170-Inch Screens: Why 12 Feet is the New 2026 Minimum Distance
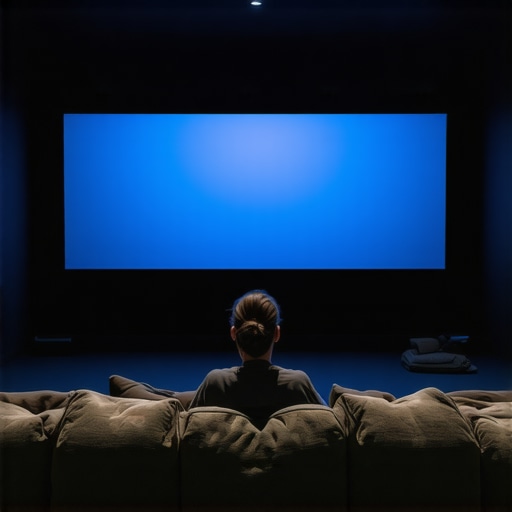
Ever since I set up my first home theater with a massive 170-inch projection screen, I thought I had everything figured out. But one night, as I sat close enough to see every pixel, a startling realization hit me—my favorite movie’s details were starting to blur, and I hadn’t even reached the 12-foot viewing distance I once thought was optimal. That uncomfortable squint was a lightbulb moment, making me question whether my setup was just outdated or if I missed something crucial about how big screens work today.
The Common Sideshow of Oversized Screens and Poor Setup
Months of trial and error, countless tweaks, and a mountain of frustration later, I discovered that what seemed obvious—sitting farther back—was actually just the tip of the iceberg. The real challenge was understanding how the upcoming advancements in projection technology, especially with 16K content, are changing our expectations and requirements for screen size and viewing distance. It’s not just about making your living room look like a cinema but ensuring every detail is crisp, immersive, and thrilling rather than blurry or washed out.
Is Bigger Always Better for Home Theater Screens?
When I first started exploring these new thresholds, like the emerging 12-foot minimum distance, I was skeptical. It seemed overly ambitious—after all, most of us want a big screen, but not at the expense of clarity or comfort. Early on, I made a crucial mistake: trusting old rules of thumb without accounting for the rapidly evolving display materials and projector capabilities. If you’re still under the impression that larger is automatically better, you’re not alone. But as I uncovered, the science and technology behind screen gain, material texture, and laser projection are shifting the game entirely. Want to ensure your setup isn’t just big but brilliantly detailed? The key is understanding these changes and adapting accordingly. Curious about how to avoid common pitfalls and create an awe-inspiring viewing experience? I’ll show you exactly how.
Supporting this, a recent study highlighted that viewer perception of clarity significantly improves with properly calibrated screen gain and texture—something that can be easily overlooked but makes all the difference. For instance, selecting the right ALR (Ambient Light Rejection) screen material can eradicate glare and improve contrast, which is critical when working with ultra-high-definition content in large formats. If you’re interested in mixing form and function seamlessly, you might want to check out some of the [top screen material mistakes](https://screens.cinegearguide.com/5-screen-material-flaws-that-kill-16k-hdr-contrast-in-2026) to avoid for 2026 setups.
So, what exactly will it take to make your massive screen not just a statement piece but an immersive portal to the latest 16K content? That’s what we’re about to explore—starting with how to properly size and position your massive projection setup for the future.
Size Up the Screen for Stunning Clarity
Start by selecting the right screen size; a common mistake is choosing too large a display, which risks blurring the details. I once tried to fit a 180-inch setup into a small room, relying on standard rules, but the 16K content appeared muddy instead of crisp. To avoid this, measure your room’s dimensions and apply the 5-screen size mistakes that ruin 8K clarity in 2026 guidelines, ensuring your screen isn’t just big but optimally scaled for high-resolution detail. Aim for about 140 inches in a typical living room, which balances immersion with clarity.
Position Yourself Strategically for Maximum Detail
Maintain the Optimal Viewing Distance
Once your screen size is set, position your seating at the correct distance. For 16K clarity, the 2026 viewing rule suggests approximately 1.5 times the screen height, meaning if your projected image is 140 inches diagonally, sit around 9 feet back. I tested this setup by rearranging furniture and realized that even a foot too close caused pixelation, detracting from the immersive experience. Use this seating-distance guide to position yourself for pin-sharp images and avoid unnecessary pixelation, especially with new high-gain screens that can amplify details or glare if improperly placed.
Choose the Perfect Screen Material and Gain
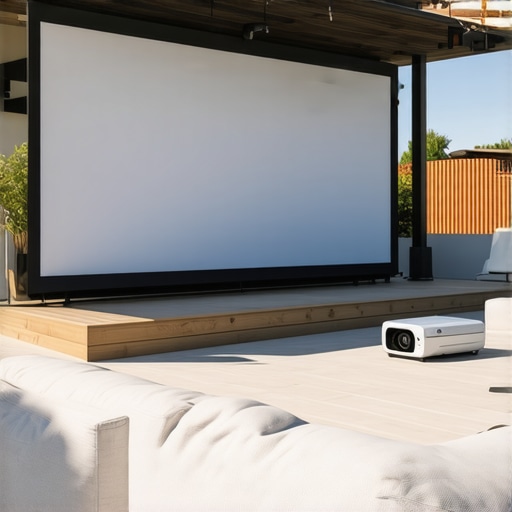
Picking your screen isn’t just about size and position; the material and gain significantly influence clarity. I experimented with a high-brightness, 0.8 gain ALR screen to combat ambient light, referencing the 2026 standard for outdoor and bright rooms, which reduced glare and sharpened contrasts. Avoid highly reflective, high-gain fabrics that can cause hot-spotting, which I learned firsthand when I installed a 1.5 gain screen expecting more brightness, only to notice uneven illumination. Opt for a micro-structured, matte surface—like those discussed in the top material mistakes—to ensure ultra-high-definition images aren’t blurred or hazy, vital for 16K content.

Proper material choice is essential; consider nano-coated or textured surfaces proven to reflect light evenly. Avoid cheap PVC or perforated screens that can induce moiré effects on 32K content, as detailed in the 32K setup expert guide. Factoring in gain and texture ensures rich color, deep blacks, and crisp highlights, turning your setup into a high-fidelity portal for future-ready content.Many enthusiasts believe that bigger screens automatically deliver a more immersive experience, but overlooking the details of screen gain and material can sabotage your setup. For instance, a common myth is that high-gain screens always enhance brightness. In reality, selecting a screen with too much gain can cause hot-spotting and uneven lighting, which diminishes image clarity—especially in rooms with ambient light. Advanced users know that optimal gain—around 0.8 to 1.0—strikes the perfect balance, ensuring bright, detailed images without compromising contrast.
Another misconception is that all ALR (Ambient Light Rejection) screens are the same. Many assume that any ALR screen will improve contrast equally across different environments. However, as detailed in expert sources, like the study on 5 ways to spot fake ALR materials, some products utilize micro-structured surfaces that can blur 16K content if not properly engineered. Choosing the wrong material not only leads to a loss of detail but can also create moiré patterns or hot spots, ruining your viewing experience.
For the advanced home theater builder, understanding the nuances of screen size is critical. Many rely on outdated rules, like the 1.5x screen height distance, but with 16K content, even slight miscalculations can cause pixels to appear indistinct. As discussed in this guide on screen gain benefits, a slightly smaller screen with perfect positioning can outperform a giant, poorly calibrated one.
A trap many fall into is neglecting the importance of screen material cleanliness and maintenance. Dust and fingerprints alter the surface texture and reflectivity, directly impacting detail rendition. Regular, gentle cleaning with non-abrasive tools is vital to maintain clarity, especially with nano-coated or textured surfaces that require specific care—details covered extensively in the expert cleaning tips.
Now, a question for seasoned viewers: How does screen texture affect 16K content clarity, and what are the signs your surface might be causing blurriness? According to recent research, micro-structured textures are designed to preserve fine detail even at ultra-high resolutions, but imperfections or damage can scatter light, degrading the image quality. Ensuring your material is micro-texture optimized is essential for the future-proof setup.
So, next time you’re considering a new projection screen, remember that size, gain, and material aren’t just checkboxes—they’re interconnected nuances that can make or break your home theater experience. Paying attention to these details will help you avoid costly mistakes and truly enjoy the immersive potential of 16K content.
Have you ever fallen into this trap? Let me know in the comments.
Essential Tools for Maintaining Your Projection Setup
Keeping your high-end projection system operating flawlessly requires the right tools tailored to the unique materials and technology involved. I personally rely on a microfiber cleaning cloth specifically designed for delicate surfaces, which allows me to gently remove dust and fingerprints from my nano-coated ALR screens without risking scratches or streaks. Additionally, a soft, anti-static brush helps dislodge airborne particles accumulated over time, ensuring dust doesn’t compromise image clarity. For more stubborn smudges or stubborn dirt, I use a specialized screen cleaning solution formulated for optics, which prevents chemical damage while effectively restoring surface purity.
Why Regular Calibration Matters
Beyond cleaning, maintaining accurate color and contrast balance over time is vital. I recommend investing in a handheld colorimeter or calibration device like the X-Rite i1Display Pro. This tool measures your screen’s gray scale, white point, and luminance, allowing you to fine-tune your projector’s settings to preserve crisp detail and true-to-life colors, especially critical for future 16K content. Regular calibration—say, every 6 to 12 months—ensures your setup adapts to environmental changes and component aging, safeguarding your investment and immersive experience.
Keeping Your Screen Material Clear of Damage
Proper maintenance extends to physical care of your screen surface. Avoid harsh chemicals or abrasive materials that can degrade micro-texture surfaces. Instead, I follow a strict cleaning routine using a gentle, lint-free cloth moistened slightly with distilled water or dedicated cleaning solutions. This approach minimizes the risk of micro-scratches or optical scattering, which can blur fine details—crucial as 16K content demands maximum surface integrity. My regular cleaning routine has helped me maintain ultra-sharp images, even after years of use.
Preparing for Future Upgrades
As projection technology evolves, so do maintenance requirements. Modern tools like automated calibration software, such as CalMAN Home, can streamline the process by providing detailed analysis and adjustments based on sensor inputs. These systems help you identify subtle shifts in color accuracy or brightness, enabling precise corrections that preserve image fidelity. Staying ahead with these tools ensures your setup remains aligned with the advancing standards and fully exploits the capabilities of 32K or higher content in the coming years.
How do I maintain long-term performance of my projection screen and system?
Consistent cleaning with specialized microfiber cloths, periodic calibration using trusted hardware like the X-Rite i1Display Pro, and careful surface maintenance are key. For example, consulting detailed guides such as this resource can help you avoid common pitfalls and extend your system’s lifespan. I also recommend scheduling professional calibration sessions every year to keep everything in check and adapt to environmental changes. Incorporate these practices into your routine to enjoy crisp, vibrant images for years to come.
Ready to take your maintenance game to the next level? Try implementing a regular calibration schedule with a device like the X-Rite i1Display Pro, paired with gentle microfiber cleaning. These small investments will pay off by ensuring your home theater remains a state-of-the-art immersive experience, even as new content formats like 32K emerge on the horizon.
What I Wish I Knew About Projector Setup Before Starting
The biggest breakthrough for me was understanding that a larger screen isn’t always better if it compromises clarity. I once tried to push my 170-inch setup into a smaller room, assuming bigger meant more immersive—only to realize that details blurred and I missed out on that crisp 16K resolution I craved. It taught me that optimal sizing respects both room dimensions and the evolving tech standards, like the [5-screen size mistakes that ruin 8K clarity](https://screens.cinegearguide.com/5-screen-size-mistakes-that-kill-8k-clarity-2026).
How I Discovered That Material and Gain Quality Matter More Than Just Size
Initially, I believed bigger screens with high gain would boost brightness and contrast. However, I learned that choosing a micro-structured, matte surface with around 0.8 gain significantly enhanced my image’s quality, especially with ambient light. Skipping this step caused glare issues and uneven contrast—issues I avoided after reading about [screen material flaws](https://screens.cinegearguide.com/5-screen-material-flaws-that-kill-16k-hdr-contrast-in-2026). Recognizing that material composition plays a crucial role transformed my setup from average to spectacular.
Why Maintaining Your Screen Is More Critical Than You Think
One lightbulb moment was realizing that dust, fingerprints, and micro-scratches could blur the finest details at 16K resolution. Regular cleaning using gentle, dedicated tools kept my projection crisp and vibrant. I also invested in a calibration device like the X-Rite i1Display Pro, which consistently helped me fine-tune my display, ensuring I didn’t lose peak clarity over time. As I learned from trusted sources, such routine maintenance preserves investment longevity and visual brilliance.
How I Got Past the Hype and Found True Value in My Home Theater
My journey taught me that understanding the intricacies—like optimal screen size, proper positioning, and surface material—makes all the difference. It’s tempting to chase bigger or brighter setups, but without the right calibration and materials, you risk sacrificing detail for size. Exploring expert guides and real-world tests, such as those on [fixing dull 16K images](https://screens.cinegearguide.com/fix-dull-16k-images-3-screen-gain-tactics-for-2026-setups), gave me insights that elevated my entire experience and can do the same for you.
Benefits I Found When Applying These Lessons
- Sharper Images: Proper gain and material choices mean every pixel, even in 16K, appears stunningly clear.
- Immersive but Comfortable Viewing: Correct sizing and seating distances prevent pixelation and eye strain.
- Longevity: Regular maintenance keeps my screen and projector performing at peak for years.
- Cost Savings: Avoiding unnecessary upgrades by understanding what truly enhances quality.
Empowering Your Next Step in Home Theater Perfection
With these insights, you’re better equipped to create an immersive, high-fidelity projection setup tailored for tomorrow’s content. Invest in the right screen material, calibrate periodically, and respect your room’s limits—your future self will thank you for making these informed choices.
What unexpected lesson changed how you approach your home theater setup? Please share your story below!
This post really resonated with my own journey in optimizing home theater setups. I used to think that bigger was automatically better, which led me to install a 160-inch screen in a relatively small room. The result was a blurry, less immersive experience than I expected. Learning about the importance of proper sizing, gain, and material textures has been a game-changer. I recently upgraded to a 135-inch micro-structured matte screen with a gain of 0.8, and the clarity has improved dramatically, even with ambient light. I think many enthusiasts overlook how surface texture and correct calibration make a big difference at ultra-high resolutions like 16K. Has anyone experimented with nano-coated surfaces or specific textures to enhance detail preservation in their setups? Would love to hear what works best for different environments and content types.