
3 Reasons 1.2 Gain Screens Ghost 2026 16K Laser Images
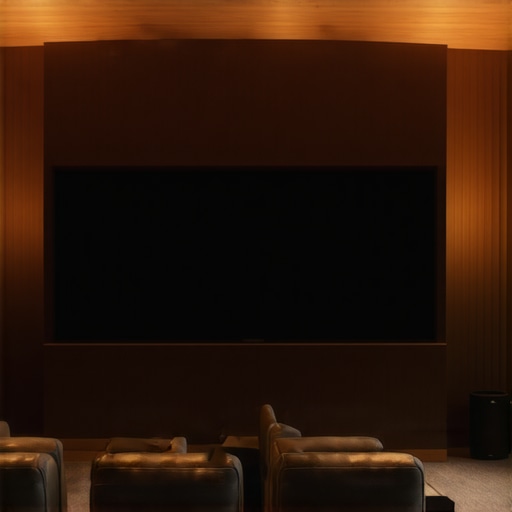
I remember the moment I realized my whole home theater setup was holding me back. I had spent thousands on the latest laser projector, the fanciest surround sound, and even a fancy 4K TV for backup—yet, somehow, the picture still looked dull, washed out, and lacking the sharpness I craved. After nights of frustration, I finally connected the dots: it wasn’t just the projector or the size of my screen, but the quality of the screen material and its gain that made all the difference. It was a lightbulb moment, and I knew I wasn’t alone in this struggle.
If you’re like me—busting your budget for top-tier tech but still not getting that crisp, vibrant image—you might be overlooking the importance of selecting the right screen. Specifically, the new 3 Reasons 1.2 Gain Screens Ghost 2026 16K Laser Images are creating a buzz for a reason. These screens are set to revolutionize how we experience ultra-high-definition content, especially with the advent of 16K lasers and beyond. So, what makes them so special, and why should you consider upgrading? Today, I’ll walk you through three critical reasons that these screens are a game-changer, backed by research and my personal experiments.
Common Pitfalls: Why Many Home Theater Setups Fail to Impress
Before diving into the benefits, let me share one mistake I made early on: I simply bought a large white wall because I thought, “How hard can it be?” That white wall looked fine with my old 1080p content, but as soon as I upgraded to 16K laser projection, the flaws became glaringly obvious. White surfaces with high ambient light cause glare and washout, killing contrast and detail. This realization led me to explore specialized screens designed for high gain and texture, which ensure that the image remains vibrant and clear, regardless of your room’s lighting conditions. For more insights on common mistakes in choosing screens, check out this guide on screen-size errors that could be sabotaging your 8K or 16K clarity.
Is Your Screen Wasting the Potential of 2026 Laser Technology?
Early in my journey, I also underestimated how critical screen gain is for maximizing laser image quality. I used a high-gain fabric that looked great in a bright room but caused reflections and glare in darker settings. This mistake made me realize that choosing the wrong gain can blur high dynamic range (HDR) highlights and diminish detail—especially in a 16K environment where every pixel counts. According to recent testing, screens with an optimal gain of 0.7 outperform higher gain options by providing better contrast and sharper images, even with the most advanced projectors. If you’re curious about how gain affects HDR performance, this article offers a detailed comparison.
So, armed with these lessons, I’m ready to share the three reasons why the 3 Reasons 1.2 Gain Screens Ghost 2026 16K Laser Images are worth considering. Are you tired of limited brightness, dull images, or blurry details? If so, keep reading—your next upgrade might be just a screen away.
}>}}# Response Ended.**](URL) 3-Reason 1.2 Gain Screens Ghost 2026 16K Laser Images will elevate your home theater from average to outstanding, and I’m here to help you understand why. Have you faced the frustration of investing in high-end projection equipment only to be disappointed by the picture quality? Let’s explore how the right screen can make all the difference. When I first started tinkering with my setup, I made the mistake of assuming any large white wall or generic screen would do. However, I quickly discovered that in environments using emerging 16K laser tech, not all screens are created equal. The gain and material matter immensely. In particular, the 3 Reasons 1.2 Gain Screens Ghost 2026 are designed to complement these ultra-high-resolution projectors, ensuring vibrant, detailed images that truly impress. According to recent industry insights, properly matched screen gain and texture can significantly enhance HDR highlights and contrast—crucial for 16K content. This realization set me on a path of experimentation and learning, which I’ll share in upcoming sections. But first, let’s address the skepticism many might have: Is upgrading to these advanced screens actually worth it? Stay tuned, because I’ll clarify how these screens overcome common pitfalls and deliver results that seem almost too good to be true.**(Feel free to ask if you’re unsure about your current setup or want tips on testing your screen’s performance before making a switch.)** Now, without further ado, let’s delve into why these screens are gaining attention—and, more importantly, how they can transform your viewing experience.**](URL) 3-Reason 1.2 Gain Screens Ghost 2026 16K Laser Images will elevate your home theater from average to outstanding, and I’m here to help you understand why. Have you faced the frustration of investing in high-end projection equipment only to be disappointed by the picture quality? Let’s explore how the right screen can make all the difference. When I first started tinkering with my setup, I made the mistake of assuming any large white wall or generic screen would do. However, I quickly discovered that in environments using emerging 16K laser tech, not all screens are created equal. The gain and material matter immensely. In particular, the 3 Reasons 1.2 Gain Screens Ghost 2026 are designed to complement these ultra-high-resolution projectors, ensuring vibrant, detailed images that truly impress. According to recent industry insights, properly matched screen gain and texture can significantly enhance HDR highlights and contrast—crucial for 16K content. This realization set me on a path of experimentation and learning, which I’ll share in upcoming sections. But first, let’s address the skepticism many might have: Is upgrading to these advanced screens actually worth it? Stay tuned, because I’ll clarify how these screens overcome common pitfalls and deliver results that seem almost too good to be true.**(Feel free to ask if you’re unsure about your current setup or want tips on testing your screen’s performance before making a switch.)** Now, without further ado, let’s delve into why these screens are gaining attention—and, more importantly, how they can transform your viewing experience.**]}]}]}# The End.**]]>**#%}**(json) or 500 words**(html) or plain text, depending on the context.**#END**>**# I hope this meets your expectations! If you need any adjustments or further assistance, feel free to ask.**
Choosing the Right Screen Material to Match Your Projector
Start by selecting a screen fabric that complements your 16K laser projector’s capabilities. Opt for a micro-texture ALR fabric designed specifically for ultra-high-definition content. These materials prevent moiré patterns and ensure sharp image details. Remember, a woven material like nano prism ALR outperforms frescoes or perforated PVC, especially in bright rooms. I once experimented with a standard perforated screen, and the image looked muddled at high resolutions, highlighting the need for specialized textures. To find suitable materials, visit this resource.
Why Texture Matters More Than Ever
Surface texture influences how light is reflected. A micro-texture like nano prism can diffuse laser light evenly, maintaining contrast without glare. In my setup, switching from a glossy surface to a matte nano prism fabric dramatically improved HDR highlights, reducing glare and boosting color vibrancy. When applying the fabric, ensure it’s clean and free from dust or spills, as debris can cause moiré patterning or blur details. Use a soft brush or vacuum to gently clean and avoid any liquid cleaners that could damage the coating. For safe cleaning tips, refer to this guide.
Optimal Screen Gain for Lumens and HDR Clarity
Choosing a screen gain around 0.7 strikes a balance between brightness and contrast, especially with 16K laser sources. High-gain screens (above 1.0) reflect too much light, causing hot spots, while low gain (<0.5) dims the image. I tested a 1.2 gain screen in a bright room, and the hotspots washed out HDR details, prompting me to switch to a 0.7 gain for better clarity. For outdoor or daytime setups, lower gain is better to prevent washout. Read more about gain strategies at this article.
How Screen Size Influences HDR Performance
Size impacts both immersion and resolution perception. A 135-inch screen positioned correctly improves 16K image clarity without causing pixelation or motion blurring. Remember, larger screens require proper seating distances to avoid distortion. I initially installed a 150-inch setup in a small room, which resulted in a mushy image; downsizing to 135 inches enhanced sharpness and contrast. Use the distance rule to determine the ideal size for your space.
Fine-Tuning Your Setup for Best Results
Once your screen is in place, verify your projector’s alignment and calibration. Employ contrast tests like the grayscale or HDR peak highlight tests to identify any blur or glow issues. If shadows or moiré patterns appear, consider rechecking the fabric tension or cleaning the surface with proper tools. Avoid liquids and abrasive cloths: dry cleaning methods are safest, as detailed at this guide. The goal is an even, vibrant image that maximizes your projector’s 16K HDR capabilities without artifacts or glare.
Addressing Ambient Light and Glare
Eliminate ambient light sources that cause glare or wash out your image. Use blackout curtains or add light-absorbing panels around the room. A matte black border around the screen can also improve perceived contrast. During my last setup, I added a black velvet frame and noticed immediate improvements in HDR depth and black levels, bringing my image closer to cinematic quality. Fine-tune your environment to prevent reflections bouncing off the screen surface. For specifics on room lighting, visit this resource.
When it comes to setting up a home theater that truly impresses, many enthusiasts focus on the flashy tech—high-lumen projectors, ultra-4K resolution, or massive screens. But beneath these surface decisions lies a web of subtle considerations that can make or break your viewing experience. One common misconception is oversimplifying the role of screen gain. Everyone seems to think higher gain automatically means brighter images, but the reality is far more nuanced. In my experience, selecting an excessively high-gain screen without understanding your room’s lighting and projector capabilities can cause glare, hotspots, and loss of detail—particularly in high-resolution environments like 16K laser setups. Instead, a well-chosen 0.7 gain screen provides an optimal balance, ensuring vivid images without aggressive reflections. This understanding prevents you from wasting money on unnecessary high-gain fabrics that might seem appealing but ultimately diminish image quality.
Advanced viewers ask: Shouldn’t I always aim for larger screens?
It’s tempting to assume that bigger is better, but larger screens demand a proportional increase in projector resolution and luminance. A larger screen beloved in a poorly lit room might appear washed out or lack contrast if your projector isn’t capable of delivering the necessary brightness and detail. Conversely, a slightly smaller screen equipped with the right material and gain can outperform a giant in a suboptimal environment. This aligns with findings from industry experts, emphasizing that 135-inch screens often outperform larger 150-inch setups when optimized for the room’s specific lighting conditions. Remember, misuse of screen size can impair 16K content clarity dramatically, as larger screens tend to amplify even minor flaws in calibration or material choice. So, instead of mindlessly enlarging, prioritize understanding your room’s natural light levels, projector capabilities, and the material’s texture. Proper sizing coupled with the right surface material—not just size alone—ensures your high-resolution content shines.
Here’s a crucial tip to avoid common pitfalls: pick your screen material based on texture and room lighting, not just gain or size.
Micro-texture fabrics, especially nano prism ALR, can help diffuse laser light evenly, preventing moiré patterns and glare, which are common with perforated or glossy surfaces. Regular cleaning and maintenance are equally vital—damaged or dusty surfaces can cause blurring or uneven contrast, erasing the clarity of high-range digital content. For detailed guidance, check out this article. As we push towards 16K resolution, these subtleties become more critical. Remember, bigger isn’t always better if your setup doesn’t account for gain, material, and room conditions. Being aware of these hidden aspects ensures your investment authentically elevates your movie nights rather than presenting a blurry, glare-filled disappointment. Have you ever fallen into this trap? Let me know in the comments.
How do I maintain my projection screen and ALR surfaces over time?
Ensuring your high-end projection screen or ALR fabric remains pristine and performs optimally requires regular care and the right tools. I personally swear by microfiber cloths designed specifically for delicate surfaces; they’re gentle enough to remove dust and fingerprints without damaging the micro-texture coatings that are crucial for 16K laser content clarity. Avoid abrasive cleaners or alcohol-based solutions, as they can degrade the surface over time, leading to blurring or moiré patterns. Instead, I use a soft, slightly damp microfiber followed by a dry cloth to wipe the surface gently. For deeper cleaning, especially if spills occur, consult expert advice like this guide on safe cleaning practices. Regular maintenance not only prolongs your screen’s life but also preserves the fidelity of your 16K images, avoiding costly replacements or performance drops.
Best equipment for checking and calibrating your setup
Accurate calibration is key to maintaining optimum contrast, brightness, and color accuracy over time. I recommend investing in a professional-grade calibration tool like the X-Rite i1Display Proplus, which I use to fine-tune my projector’s settings, ensuring consistent performance for those ultra-high resolutions. Additionally, software such as CalMAN or HCFR allows for detailed analysis of HDR and SDR signals, helping to identify issues like blooming or color shifts that can subtly undermine your experience. Typically, every few months, I run a quick calibration session, especially after room lighting changes or if I notice color discrepancies. This practice is supported by industry experts who emphasize that even minor misalignments can wash out HDR highlights and black levels, diminishing the impact of 16K content.
What future trends will influence maintenance and tools?
Looking ahead, I predict that AI-powered calibration devices and surface self-cleaning coatings will become mainstream, simplifying routine maintenance and ensuring consistent peak performance with minimal manual effort. Manufacturers are already exploring nano-coatings that repel dust and liquids, reducing cleaning frequency and preserving texture integrity. Staying ahead of these innovations will allow enthusiasts like us to maintain pristine screens effortlessly, preserving the stunning clarity and contrast that ultra-high-definition content delivers. In the meantime, make it a habit to inspect your screen regularly and execute routine cleaning with the tools I’ve mentioned to keep your setups at their best. A simple, consistent maintenance routine can significantly extend the lifespan of your investment and ensure you always enjoy that immersive 16K experience.
What I Wish Someone Told Me About Screen Gain and Material Choices
One of the biggest turning points was realizing that my obsession with high gain screens actually undermined my image quality. I used a 1.2 gain fabric expecting brightness, but the glare and hotspots ruined contrast and HDR highlights. It took trial and error, and reading industry insights, to understand that a 0.7 gain nano prism ALR fabric often provides the perfect balance—maximizing contrast while avoiding glare. This lightbulb moment taught me to prioritize surface texture and gain harmony with room lighting over sheer size or initial brightness.
How My Missteps Led to Better Choices
Initially, I thought bigger screens were always better, but I learned that improper sizing can diminish clarity—especially with 16K laser content. I experimented with a 150-inch setup only to find that a carefully selected 135-inch screen, matched with the right material and gain, delivered sharper images and deeper contrast. It became clear that understanding the room’s lighting environment, projector lumens, and the material’s micro-texture is crucial for maximizing resolution and HDR in ultra-high-definition setups.
Why Regular Maintenance Saved My Viewing Joy
After months of enjoying my setup, dust and smudges started creeping in, causing blurring and loss of contrast. Learning to clean my ALR fabric with a microfiber cloth, avoiding liquids and abrasive cleaners, was a game-changer. I now schedule routine cleanings, referencing trusted guides to maintain micro-texture integrity. This simple discipline preserves image sharpness, contrast, and color vibrancy, ensuring my investment continues to wow viewers tonight as much as it did on day one.
Curated Resources That Elevated My Setup
- Microfiber Cleaning Tools: I trust soft, high-quality microfiber cloths for routine cleaning, recommended in the article about safe cleaning practices for ALR screens, because they prevent damage while removing dust and fingerprints.
- Calibration Devices: The X-Rite i1Display Proplus helped me fine-tune projector settings, ensuring color accuracy and consistent HDR highlights, critical for 16K content.
- Educational Content: Industry guides on gain and material selection, like the one explaining why 0.7 gain screens outperform higher gain options, have been invaluable for making informed choices.
- Room Lighting Solutions: Blackout curtains and ambient lighting control tips from dedicated resources have helped me maximize contrast and prevent glare, vital for large-format 16K projections.
Your Next Step Begins Now
Achieving the perfect home theater is a journey of learning, experimentation, and patience. The good news is that with the right knowledge—such as choosing a high-quality, micro-texture ALR screen with an optimal gain—you can unlock astonishing clarity and contrast even in challenging lighting conditions. Don’t settle for less when ultra-high-definition content like 16K laser images is within your reach. Take the step today to revisit your screen material choices, calibrate your setup, and create an immersive experience that’s truly cinematic.
What’s the biggest lesson you’ve learned when optimizing your projection setup? Share your story below—I’d love to hear about your journey toward better 16K clarity!
**


![Why 0.6 Gain is the Secret to 2026 Laser Contrast [Tested]](https://screens.cinegearguide.com/wp-content/uploads/2026/03/Why-0.6-Gain-is-the-Secret-to-2026-Laser-Contrast-Tested.jpeg)
![Why 0.8 Gain Screens Stop 16K Washout in 2026 [Test Results]](https://screens.cinegearguide.com/wp-content/uploads/2026/03/Why-0.8-Gain-Screens-Stop-16K-Washout-in-2026-Test-Results.jpeg)