4 Micro-Fiber Mistakes Ruining Your 2026 ALR Screen Material
I remember the moment clearly—a bright Saturday afternoon, my living room filled with excitement because I finally ordered that ultra-premium ALR screen for my upcoming 2026 home theater upgrade. But as I unwrapped it, a sinking feeling hit me. The surface looked dull, and I noticed tiny fibers sticking out, making every scene look less crisp. That lightbulb moment made me realize I had fallen into the trap of some sneaky micro-fiber mistakes that could ruin my entire setup.
Why Tiny Mistakes with Micro-Fiber Can Sabotage Your ALR Screen
The truth is, micro-fiber mishandling is often overlooked but can have a significant impact on picture quality. These small fibers—sometimes barely visible—can cause blur, reduce contrast, and diminish the high-definition clarity you’re chasing with your 2026 projection technology. Early on, I made the mistake of blindly cleaning my screen with regular cloths, thinking I was doing the right thing. Turns out, I was introducing tiny fibers from improperly chosen materials that settled into the texture, creating unwanted surface imperfections. Trust me, these micro-mistakes are more common than you think and can be invisible to the naked eye but devastating to your viewing experience.
In this post, I’ll guide you through the most common micro-fiber mistakes and show you how to avoid them, ensuring your ALR screen material performs at its best.
Could Micro-Fiber Trap You into a Slower Upgrade?
One of the biggest fears I had was investing in an expensive ALR screen only to find it blurry or uneven—especially with 16K content on the horizon. I worried that a simple cleaning slip-up could put my setup behind the curve. Honestly, I learned the hard way that poor micro-fiber management isn’t just about dirt; it’s about surface integrity and maintaining that pristine look. If you’re concerned about maintaining optimal picture quality, it’s worth understanding the correct cleaning habits and materials. For trusted tips, you can check out [this guide on cleaning ALR screens safely](https://screens.cinegearguide.com/3-fatal-mistakes-when-cleaning-your-alr-screen-material-in-2026).
Now that I’ve spilled my early mistakes, let’s get to the heart of the micro-fiber pitfalls that could be sabotaging your 2026 ALR screen material—and how to set everything right.
Choose the Right Cleaning Tools Immediately
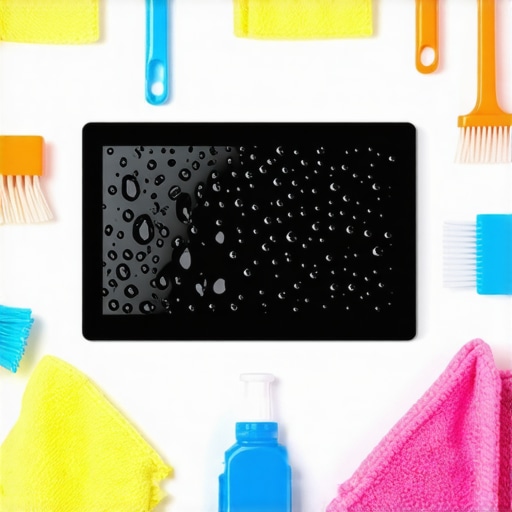
Start by selecting a microfiber cloth specifically designed for delicate surfaces. Avoid generic cleaning cloths, which often shed micro-fibers onto your screen. I recall the chaos when I used a standard fabric; tiny fibers stuck to my ALR screen, causing noticeable blurring. Opt for high-quality, lint-free microfiber materials. When I replaced my cloth, the surface cleaned smoothly without introducing new fibers, dramatically enhancing clarity. For precise recommendations, check out this guide on optimal cleaning materials.
Implement a Proper Cleaning Routine
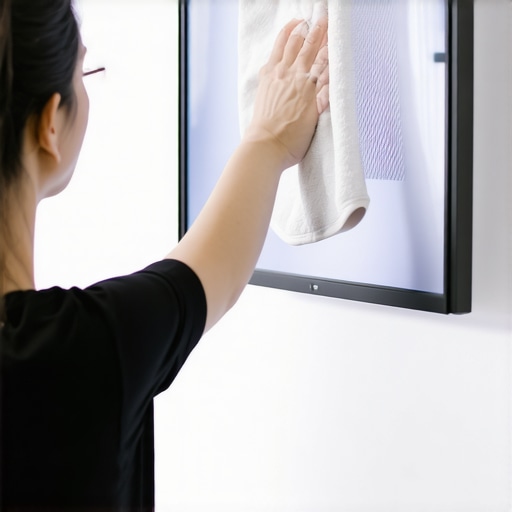
Always turn off your projector and allow the screen to cool down before cleaning. Use gentle, circular motions—not back-and-forth scrubbing—mirroring the way you might polish a fine piece of glass. I learned this the hard way, ending up with micro-scratches when I pressed too hard. Consistency matters; weekly cleanings prevent dust buildup and fibers from settling. Avoid harsh chemicals like alcohol or ammonia. Instead, lightly dampen your microfiber cloth with distilled water or specialized screen cleaner. Remember, rubbing in one spot can create fiber agitation, so keep your strokes even. To avoid surface damage, follow these cleaning best practices.
Manage Micro-Fibers During Installation
Before applying your screen, lay out the material in a dust-free environment. Use a compressed air canister to gently blow away any loose fibers or debris. Take my experience: I once installed a new ALR screen in a busy room, rushing the setup. Micro-fibers from packaging adhered to the surface, resulting in surface unevenness. This degraded contrast and sharpness. To prevent that, wear lint-free gloves and handle the material carefully, minimizing contact points. When trimming the edges, do so inside a sealed plastic bag to catch any loose fibers. This proactive measure keeps the surface pristine. For detailed techniques, see dry-cleaning solutions for delicate screens.
Regularly Inspect and Correct Surface Imperfections
Micro-fibers can accumulate over time, especially in high-traffic rooms. Use a bright light to scan your screen’s surface periodically. In one instance, I noticed tiny fibers clustered in the corners, which blurred my projected image. Carefully use a soft, static brush or a slightly damp microfiber cloth to lift these fibers without causing surface damage. Avoid rubbing aggressively, which can embed fibers deeper or scratch the material. Consistent inspection helps catch issues early, preventing micro-blemishes from escalating. For more about surface integrity and micro-texture maintenance, stay proactive.
When it comes to optimizing your home theater, many enthusiasts focus on the obvious choices—size, material, and gain. However, beneath the surface lie common misconceptions and overlooked nuances that can make or break your viewing experience. Let’s dig deeper into these hidden truths that even seasoned DIYers often miss.
Why Bigger Isn’t Always Better: Rethinking Screen Size
While the popular belief is that larger screens provide a more immersive experience, oversizing without considering room dimensions and viewing distance can lead to image distortion and eye strain. For example, a screen that’s too big for your room’s layout can cause uncomfortable viewing angles, reducing perceived contrast and clarity. The 2026 viewing distance rule emphasizes matching your screen size to your room’s dimensions—generally, 1.5 to 2.5 times the diagonal measurement—to prevent these issues. Overestimating your needs may seem appealing, but it often results in diminished image quality rather than immersion. Additionally, excessively large screens can exacerbate micro-texture flaws, leading to blurriness during 16K content playback. For detailed guidance, explore this comprehensive [screen size and gain calculation](https://screens.cinegearguide.com/5-screen-size-mistakes-that-ruin-8k-clarity-2026).
Have you ever purchased a screen that didn’t quite fit your room? Share your experience below!
The Hidden Power of Material Layers and Texture
Many believe that once you’ve picked a high-quality material, the job’s done. In reality, the number of layers and their composition significantly influence light absorption, contrast, and durability. For instance, single-layer perforated screens often fail in sunlit environments because they lack sufficient light-blocking capabilities. In contrast, multi-layer ALR screens with dedicated black backing and micro-texture layers offer superior contrast and image sharpness during daylight viewing—something not widely understood. Using a screen with inadequate layering can cause light bleed or surface blur, especially when paired with high-lumen projectors. The [3 ALR material layers you need](https://screens.cinegearguide.com/3-alr-material-layers-you-need-for-sunlit-rooms-in-2026) are essential reading for those who want clarity, contrast, and longevity.
Beware of the trap where consumers assume all materials are equal—this misconception can lead to costly upgrades later. It’s vital to understand how layered textures impact performance, especially with 16K HDR content. Do you know the layered structure of your current screen? Let me know in the comments!
Cracking the Gain Myth: Why 1.0 Isn’t Just Enough
Gain, often misinterpreted as brightness alone, actually balances reflectivity and contrast. The widespread myth is that higher gain always results in better images. However, in 2026, most high-gain screens—above 1.3—tend to cause hot spotting and muddy blacks, especially with laser projectors. Recent studies indicate that a gain of around 1.0 offers the optimal balance between luminance and contrast, avoiding the pitfalls of excessive reflectivity. The key is understanding that gain works in tandem with room lighting and projector lumen output. For instance, the [screen gain reality check](https://screens.cinegearguide.com/screen-gain-reality-check-why-1-0-is-enough-for-2026-projectors) reveals that sticking to a gain of 1.0 often simplifies setup and ensures uniform brightness across the entire surface. Don’t fall for the misconception that higher gain equals better quality—sometimes, less is more. Have you been tempted by high-gain fabrics? Consider whether they truly serve your environment. Comment below!Maintaining your high-quality projection setup requires more than just initial installation; it involves using the right tools, following precise routines, and staying ahead of potential issues. I personally rely on a few specialized equipment and methods that ensure my screen stays pristine and responsive to the demands of 2026’s ultra-High-Definition content.
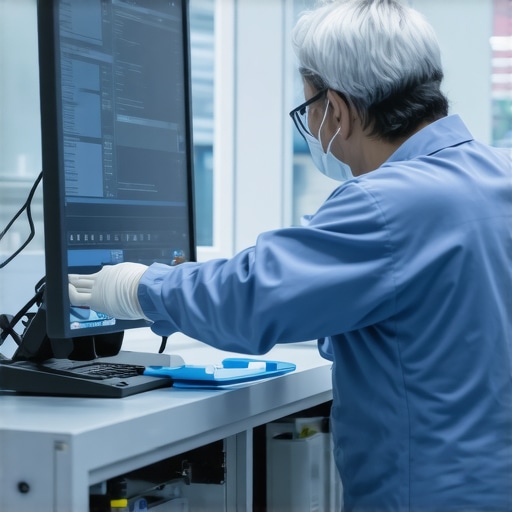
First, I use a non-contact digital luminance meter to regularly check the uniformity and brightness of my ALR screen. Unlike visual inspections, this device provides precise data, allowing me to identify subtle dull spots or uneven gain that might signal contamination or surface degradation. I calibrate my projector accordingly, referencing my current readings to maintain optimal contrast and clarity.
Secondly, I employ a static brush designed for delicate surfaces to gently remove dust and micro-fibers from the micro-texture layer of my screen. This is especially crucial for layered ALR screens, where dust can settle into micro-grooves, causing light scattering and reducing contrast. Regularly cleaning with these tools, combined with a microfiber cloth dampened with distilled water, keeps the surface free from micro-blemishes that could ruin 16K HDR visuals.
Additionally, I incorporate software-based environmental controls. Using a smart air purifier with a HEPA filter reduces airborne fibers and dust particles in the room. I set it on a timer to run during off-hours, ensuring the environment remains micro-fiber friendly. The importance of controlling ambient particulates cannot be overstated, as they are leading contributors to surface contamination.
As we look ahead, the trend is moving toward more sensitive, layered, micro-texture screens capable of handling 32K resolutions. These innovations demand even more meticulous maintenance routines and specialized tools. For example, micro-texture coatings that are nano-etched require gentle cleaning protocols to preserve their optical properties, as detailed in the latest research on nano-coated ALR surfaces.
How do I keep my projection surface working perfectly over time? Routine calibration using precise luminance measurement, gentle cleaning with static brushes, and controlling room environment are my secret weapons. I encourage you to try integrating a digital luminance meter into your maintenance routine—it’s a game-changer for detecting subtle surface changes before they impact your image quality. For an in-depth look, see this article on micro-texture maintenance techniques.
The Lessons That Took Me Years to Learn About ALR Screens
One thing I discovered through trial and error is that even the tiniest microfiber mishandling can severely impact your home theater quality. I once believed that regular dusting was enough, but I overlooked how improper cleaning tools can introduce micro-fibers that blur your picture and diminish contrast. The biggest lightbulb moment was realizing that choosing the right microfiber cloth and adopting gentle cleaning routines can prevent surface imperfections and preserve the micro-texture layers essential for crisp 16K visuals. Additionally, I learned that careful handling during installation—like using compressed air and lint-free gloves—keeps the surface pristine, preventing micro-fiber contamination that clouds the image. These lessons have taught me that micro-fiber management isn’t just maintenance—it’s an art that directly influences your viewing experience and future upgrade plans.

![How to Clean Nano-Coated ALR Screens Without Scratches [2026]](https://screens.cinegearguide.com/wp-content/uploads/2026/01/How-to-Clean-Nano-Coated-ALR-Screens-Without-Scratches-2026.jpeg)