ALR Screen Technology Guide: Best Materials & Gain for Bright Rooms
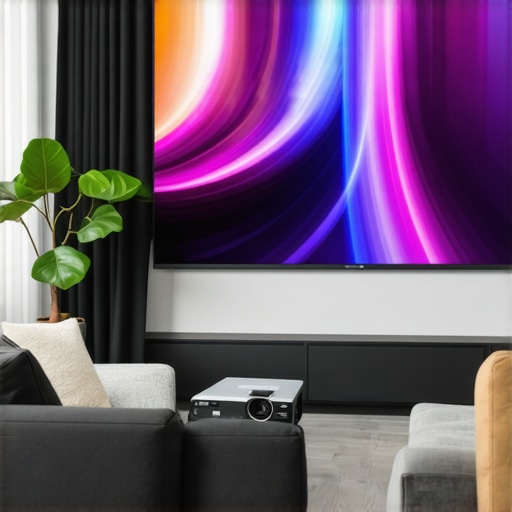
Ever been in a room where the sunlight streams in just enough to ruin your movie night? I remember the first time I set up a projector in my living room, expecting theater-quality images. Instead, I got a washed-out, dim picture that made me question if I needed a new screen or just a better attitude. It was a lightbulb moment—bright rooms demand more than just a good projector. They need the right screen technology, especially when it comes to ALR (Ambient Light Rejection) screens and selecting the perfect gain. Today, I want to share what I’ve learned from my own trials and errors, helping you avoid the pitfalls I fell into. Whether you’re upgrading your setup or starting fresh, understanding how screen material and gain work together can make or break your viewing experience.
Why Bright Rooms Are a Challenge for Projectors
Bright rooms are the bane of every projector enthusiast. No matter how powerful your projector is, ambient light can wash out the image, leaving you with a dull, unsharp picture. I used to think that a high-lumen projector was the answer—until I realized that the screen itself plays a crucial role. The wrong material or gain can make a significant difference in how vibrant and clear your image appears. This is especially true in rooms with lots of windows or overhead lighting. Investing in an ALR screen with the right gain can transform your viewing experience from frustrating to fantastic. I’ll guide you through the best options and what to avoid, based on both industry insights and my personal adventures in home theater setup.
Is Screen Gain the Secret to Bright Room Clarity?
Initially, I thought that more lumens meant better images in bright rooms. Turns out, it’s more complicated. Gain measures how much light the screen reflects back to your eyes, affecting brightness and contrast. A higher gain isn’t always better—it can cause hotspots or uneven images if not chosen carefully. Early on, I made the mistake of selecting a screen with too high a gain for my space, which led to glare and a weirdly uneven picture. Learning about the nuances of gain and how different materials handle ambient light was a game-changer. If you want to get a handle on this, check out this comprehensive guide to ALR screen options and gain for bright rooms. Knowing what to look for can save you from my rookie mistakes.
Now, let’s dive into how to choose the best materials and gain settings for your specific room, so your projector can shine no matter the lighting conditions. Ready to turn that washed-out mess into a crisp, vibrant display? Let’s go!
Assess Your Room’s Lighting Conditions
Start by evaluating your room’s ambient light sources. Are there large windows, overhead lights, or reflective surfaces? This will determine the type of ALR (Ambient Light Rejection) screen you need. For rooms with significant light, opt for a high-gain ALR screen that reflects more light back to you, enhancing brightness and contrast.
Select the Appropriate Screen Size
Size matters. A screen that’s too large can diminish brightness, while a too-small screen might not fill your viewing area. Use this guide on choosing the right screen size to find your optimal dimensions. Measure your space carefully and consider the viewing distance to ensure immersive yet comfortable viewing.
Identify the Ideal Material and Gain for Bright Rooms
Material and gain are intertwined. For bright environments, focus on high-gain materials that boost reflection without causing hotspots or glare. Typically, gain values between 1.8 and 3.0 work well. To understand the nuances, check out this ultimate guide to ALR screen options and gain. Remember, higher gain can increase brightness but may also cause uneven illumination if not chosen carefully.
Match Gain with Room Lighting
In my experience, a gain of around 2.2 provided a good balance in my bright living room. I tested a few materials, starting with a matte fabric with gain 1.0, which looked washed out. Upgrading to a screen with gain 2.5 brought the colors alive without glare. It’s a matter of trial and error—test different gains and observe how the image responds in your specific lighting setup.
Choose the Right Material for Brightness and Clarity
Materials like ALR screens with optical coatings or specialized fabrics are designed to reject ambient light and reflect projected images efficiently. For instance, the top ALR materials for bright rooms include optical films that enhance contrast and color vibrancy. When selecting, prioritize materials that specify their suitability for high ambient light conditions.
Install with Precision and Test
Proper installation is key. Mount the screen perfectly flat and at the correct height for optimal viewing angles. Once installed, perform a series of tests with your projector at typical brightness levels. Observe for hotspots, glare, or uneven lighting. Adjust the angle or gain if necessary. Remember, small tweaks can significantly improve image quality.
Optimize Your Setup Over Time
After initial setup, continue fine-tuning. Adjust projector settings like brightness and contrast, and consider blackout curtains or additional light control if possible. Regularly revisit your screen choice as your room’s lighting or your content preferences change.
By following these concrete steps—evaluating your lighting, selecting the right size, choosing an appropriate gain and material, and installing precisely—you’ll maximize your projector’s performance and enjoy vibrant images even in bright rooms. Don’t forget, continuous adjustment and testing are essential to perfect your home theater experience.
Many enthusiasts believe that simply opting for the highest gain screen will solve all their brightness issues, but this is a misconception that can lead to more problems than it solves. The reality is that most people overlook the nuanced interplay between screen material, gain, and room lighting conditions, often resulting in suboptimal image quality. Let’s dig deeper into what many get wrong and how to avoid these traps.
Why Higher Gain Isn’t Always Better
It’s a common myth that a gain of 3.0 or higher will always deliver brighter images, especially in bright rooms. However, high-gain screens tend to create hotspots and uneven illumination, which can be distracting and ruin the viewing experience. Instead, most experts recommend a balanced approach—typically gain values between 1.8 and 2.5—for bright environments. Materials like optical coatings or specialized fabrics are designed to reject ambient light while maintaining even reflection. For more insights, check out this ultimate guide to ALR screen options and gain.
The Myth of Size and Brightness
Another common mistake is choosing a screen size based solely on room dimensions without considering how size impacts brightness and contrast. Larger screens reduce perceived brightness because the same amount of light is spread over a bigger area. An overly large screen in a bright room can wash out the image, making it look dull and washed out. Use this size guide to find the sweet spot for your space, balancing size with brightness and clarity.
Are All Screen Materials Equal for Bright Rooms?
No, they’re not. Many users assume that matte fabrics or regular screens will suffice in bright rooms, but specialized ALR (Ambient Light Rejection) screens designed for high ambient light are far superior. These materials often incorporate optical films that reflect projected light directly back to your eyes while diffusing ambient light, preserving contrast and color vibrancy. For advanced material selection, explore this top ALR materials for bright rooms.
Moreover, the choice of material should be guided by your specific lighting conditions. In a room with constant, direct ambient light, a more reflective, high-gain material with precise optical coatings will serve you better. Conversely, in rooms with controlled lighting, a lower gain might provide a more natural and balanced image.
Have You Fallen Into This Trap?
Getting caught up in the hype of ultra-high gain screens or oversizing your display is a common mistake. Instead, focus on understanding your room’s unique lighting conditions and match your screen choice accordingly. Fine-tuning your setup with expert-recommended gains and materials can dramatically improve your viewing experience. If you’ve experienced frustrations with washed-out images or hotspots, it’s time to re-evaluate your choices. Remember, a well-balanced setup tailored to your environment beats the allure of high gain every time.
Need more help? Explore our comprehensive ultimate guide to ALR screens for expert tips on selecting the perfect screen for your bright room. Don’t hesitate to ask questions or share your experiences in the comments!
Investing in a high-quality projection screen or ALR (Ambient Light Rejection) screen is only part of the journey. To ensure your setup continues to deliver stunning images over the years, proper maintenance and the right tools are essential. In this article, I’ll share my personal tips and recommended equipment to keep your screen in top shape and maximize its lifespan.
How do I maintain my projection screen over time?
The first step is regular cleaning. Dust, fingerprints, and smudges can diminish image quality, especially on delicate optical coatings of ALR screens. I recommend using a soft, lint-free microfiber cloth and a gentle cleaning solution like distilled water mixed with a few drops of isopropyl alcohol. Avoid harsh chemicals or abrasive materials that can damage the surface. For fabric-based screens, a gentle vacuum with a brush attachment can help remove embedded dust without causing wear.
Another crucial aspect is avoiding prolonged exposure to direct sunlight or extreme humidity, which can degrade certain screen materials. When not in use, consider covering the screen with a dedicated protective cover or storing it in a climate-controlled environment. This prevents warping, discoloration, or degradation of optical coatings, ensuring consistent performance.
Tools I recommend for the best results
Personally, I rely on a few key tools to maintain my projection setup. First, a high-quality microfiber cloth, such as the MagicFiber Microfiber Cleaning Cloth, ensures gentle cleaning without scratching the surface. Second, a spray bottle with distilled water mixed with a tiny amount of isopropyl alcohol provides a safe cleaning solution that evaporates quickly and leaves no residue.
For more thorough maintenance, I use a portable, handheld vacuum with a soft brush attachment, like the Dyson V7 Trigger. It’s perfect for removing dust from fabric screens or the edges of rigid screens without risking damage. Additionally, using a laser pointer or small flashlight helps inspect the surface periodically for dust or imperfections that might affect image quality.
What about long-term results and scaling your system?
As your home theater evolves, so should your setup. Upgrading to larger screens or switching to different materials requires recalibration. Regularly testing your projector with test patterns, like those from this comprehensive guide, helps identify issues early. Also, consider investing in a colorimeter or calibration tool such as the X-Rite i1Display Pro. These devices allow precise calibration of your projector and screen, maintaining optimal contrast, color accuracy, and brightness over time.
Future trends and staying ahead
Looking forward, I believe the integration of smart, self-cleaning coatings and adaptive materials will revolutionize projection screens. These innovations will reduce maintenance needs and extend lifespan significantly. Until then, diligent cleaning, proper storage, and regular calibration remain your best tools for long-term satisfaction.
Try incorporating a routine cleaning schedule with the recommended tools, and you’ll notice a consistent quality boost in your viewing experience. Remember, a well-maintained screen is the foundation for breathtaking images that stand the test of time.
The Hardest Lesson I Learned About Projection Setup
One of my biggest lightbulb moments was realizing that high-gain screens are not a one-size-fits-all solution for bright rooms. I once bought a screen with gain 3.0, expecting it to deliver incredible brightness, but instead, I faced hotspots and glare that ruined my viewing experience. The real lesson? Balance and understanding your room’s specific lighting conditions trump raw gain numbers every time.
Why I Stopped Chasing the Highest Gains
Initially, I believed that the higher the gain, the better the picture in bright environments. That misconception led me to choose overly reflective screens, which caused uneven illumination and distracting hotspots. After experimenting with materials around gain 2.2, I discovered that most high-quality ALR screens designed for bright rooms offer a sweet spot—reflecting enough light for vibrant images without sacrificing evenness. For insights on the best materials, check out this top ALR materials for bright rooms.
The Myth of Size and Brightness
One of my biggest pitfalls was selecting a projector screen size without considering how it impacts perceived brightness. Bigger screens distribute the same light over a larger area, making images look dull. I learned to use a size guide that balances immersive viewing with optimal brightness. Remember, in bright rooms, a slightly smaller, well-chosen size can dramatically improve contrast and clarity.
How Material Choice Transformed My Viewing
Switching from matte fabrics to specialized ALR screens with optical coatings made a world of difference. These materials are engineered to reject ambient light while boosting contrast and color vibrancy. I now prioritize materials that specify their suitability for high ambient light conditions. For a comprehensive list, see this ultimate guide to ALR screen options.
My Secret Weapon: Precise Installation and Testing
Even the best screen can underperform if not installed properly. I learned to mount my screen perfectly flat and at the right height, then perform regular tests using patterns from this guide. Small adjustments in angle and gain can make a noticeable difference, turning a dull image into a vibrant spectacle.
Continual Fine-Tuning Keeps My Setup Sharp
Over time, I keep refining my setup—adjusting projector settings, adding blackout curtains, and recalibrating as needed. Using tools like the X-Rite i1Display Pro helps maintain color accuracy and brightness consistency. Regular upkeep and calibration are vital for sustaining stunning images, especially in changing lighting conditions.