Ultimate Guide to ALR Screen Materials & Gain for Bright Rooms
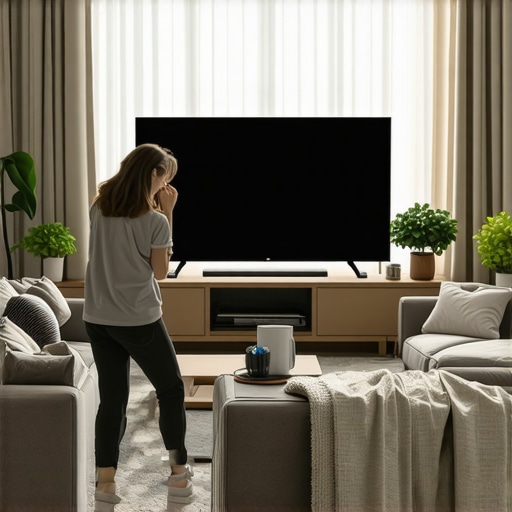
Ever had that moment during a movie night when you realize your shiny, new projector just isn’t cutting it because of the blinding glare from your windows? I remember the frustration well. I was so excited to set up my home theater, but the bright sunlight and reflective walls made the picture look washed out and dull. It felt like a lost cause—until I discovered the secret weapon: ALR screens with the right materials and gain. That lightbulb moment changed everything for me, and I bet it can do the same for you.
Why Bright Rooms Are the Biggest Challenge for Projectors
Bright rooms are notorious for ruining projection clarity. No matter how high-end your projector is, ambient light washes out the image, leaving you squinting at a pale, lackluster display. This is especially true in rooms with large windows or open layouts. I learned this the hard way, making the mistake early on of choosing a standard screen without considering my room’s lighting conditions. That was a rookie error that I later corrected by diving into the world of ALR (Ambient Light Rejection) screens, which are designed specifically to combat this problem. If you’ve faced the same, you’re not alone. The good news? There’s a wealth of options that can turn your bright room into a vibrant home theater.
In this guide, I’ll walk you through the key factors—like screen materials and gain—that make a difference. Understanding these can help you avoid the disappointment of a dull picture, especially if you’re dealing with a lot of sunlight. I’ll also share insights from industry experts and real-world tips that will make your setup shine, even in the brightest spaces.
Is Screen Gain Really That Critical for Bright Rooms?
Absolutely. Screen gain is like the volume knob for your projector’s brightness. A higher gain reflects more light back to your eyes, making the image brighter and more visible in illuminated conditions. But here’s where many beginners stumble—thinking all gains are equal or that simply cranking up the gain is the answer. In reality, choosing the right gain is a balancing act. Too high, and you risk a hot-spotting effect where the center looks super bright but the edges fade; too low, and you might as well be watching on a regular screen. I once picked a screen with too high a gain without considering my room’s lighting, and the result was a glaring, uneven picture. That mistake taught me the importance of understanding how gain works in conjunction with your environment. If you want to learn more about the best materials and gain for bright rooms, check out this detailed guide on ALR screen options.
So, are you tired of squinting at your projector screen during daylight hours? Do you wish your bright room could deliver crisp, vivid images without investing in blackout curtains? If yes, then you’re in the right place. Together, we’ll explore how to pick the perfect screen material and gain to turn your space into a cinematic paradise, even with all that ambient light.
Pick the Right Screen Material to Maximize Brightness
The first step is selecting a screen material that enhances reflectivity without sacrificing clarity. For bright rooms, opt for specialized ALR (Ambient Light Rejection) screens that are designed to combat ambient light interference. These screens contain microstructures that direct light from the projector straight to your eyes while diffusing ambient light, maintaining vivid images even in sunlight. I once replaced my standard screen with a high-gain ALR model, and the difference was night and day—sudden clarity in daylight made movie nights much more enjoyable. To understand what material suits your environment, check out this guide on ALR screen options.
Calculate Gain to Enhance Brightness
Gain measures how well your screen reflects light. Think of it as the volume knob for brightness—higher gain means more light bounces back, making images appear brighter. However, too high a gain can cause hot-spotting, where the center looks excessively bright while edges fade. I experimented with a 2.5 gain screen, which initially seemed perfect, but I noticed uneven brightness, especially during fast-moving scenes. I eventually settled on a moderate gain of around 1.8, which balanced brightness and uniformity. To choose the right gain, consider your room’s ambient light levels and projector lumen output. For detailed insights, review this in-depth guide on gain.
Size Matters: Find Your Optimal Screen Dimensions
Screen size directly impacts the viewing experience and must be proportionate to your room’s dimensions. A screen that’s too large can make your space feel cramped, while one that’s too small might not deliver that cinematic immersion you crave. I measured my room and calculated optimal viewing distances, then used this sizing guide to pick a 100-inch diagonal screen, which fit perfectly. Remember, larger screens require higher gain materials and proper mounting to avoid distortion. Use a tape measure and room layout to determine what fits best—don’t just guess!
Match Screen Gain with Room Lighting for Consistent Brightness
In bright rooms, combining the right gain with room lighting control is key. If your space has large windows, consider blackout curtains alongside a high-gain ALR screen. I used to rely solely on curtains, but they weren’t enough; adding a screen with a gain of 2.0 created a bright, vibrant picture during daytime. Conversely, if your room has controlled lighting, a moderate gain of 1.8 might suffice, saving you from potential hot-spotting. For tailored advice, explore this comprehensive guide.
Secure Installation to Maintain Picture Quality
Once you’ve chosen your screen, proper mounting is crucial. Ensure the screen is flat and at eye level, avoiding wrinkles or distortions that can impair image quality. I used a sturdy wall mount, double-checked alignment, and ran a test with my projector to verify uniform brightness. A misaligned screen or uneven surface can cause uneven reflections, reducing clarity. Use a level and measure carefully—this small effort pays off in crisp, consistent visuals. For detailed mounting tips, see this setup guide.
While many enthusiasts focus on choosing the perfect projector or screen size, there’s a subtle trap that often goes unnoticed: oversimplifying the importance of screen material, gain, and size. Let’s dig deeper into what most people get wrong about projection screens and ALR technology, and how understanding these nuances can elevate your home theater setup.
Believing All High-Gain Screens Are Created Equal
It’s a common misconception that higher gain automatically means better brightness in bright rooms. In reality, excessive gain can lead to hot-spotting, where the center of the screen appears overly bright, diminishing overall image quality. I once chose a 2.5 gain screen, thinking it would maximize brightness, but experienced uneven illumination during fast scenes. Industry experts warn that gains above 2.0 often compromise uniformity, especially if the screen isn’t perfectly installed. To master the balance, consider your room’s ambient light and projector lumen output, and explore this detailed guide on gain.
Myth of the One-Size-Fits-All ALR Screen
Many assume that any ALR (Ambient Light Rejection) screen will work equally well in bright rooms. But, in my experience, the microstructure technology varies significantly among brands, affecting color accuracy and contrast. For instance, some materials reject ambient light better but produce a duller picture, while others preserve color vibrancy. To avoid this trap, check out this comprehensive review of ALR screen options and select based on your specific lighting conditions.
Ignoring Screen Size’s Impact on Perceived Brightness
Many underestimate how screen size influences the perception of brightness and clarity. A larger screen isn’t always better in a small room—it can cause excessive eye strain and reduce contrast. Conversely, a screen that’s too small might not provide the immersive experience you want. I learned this the hard way by choosing a 120-inch screen for my 12×15 ft room, which was overwhelming. Use tools like this sizing guide to find the optimal balance, considering both room dimensions and projector capabilities.
Are You Overlooking the Power of Proper Installation?
Even the best screen material and gain won’t perform well if not installed correctly. Misalignment, wrinkles, or improper mounting can cause uneven reflections and distortions. I once ignored this, resulting in a warped image, which was frustrating. A careful, level installation paired with correct height and tension makes a noticeable difference. For detailed mounting tips, see this installation guide. Remember, precision in setup is as crucial as choosing the right screen.
Have you ever fallen into this trap of oversimplification? Let me know in the comments. Mastering these hidden nuances can dramatically improve your viewing experience, turning your bright room into a true cinematic environment.
Once you’ve invested in a high-quality projection screen or ALR (Ambient Light Rejection) screen, the next crucial step is ensuring it stays in peak condition over time. Proper maintenance not only preserves the brightness and color accuracy but also extends the lifespan of your setup, saving you money and frustration down the line.
How do I keep my screen working flawlessly for years?
Start by regularly cleaning your screen with a soft, lint-free cloth. Avoid harsh chemicals or abrasive materials that can damage delicate microstructures or coatings. For stubborn smudges or dust, a gentle wipe with a slightly damp cloth is usually sufficient. Personally, I use a microfiber cloth lightly dampened with distilled water, which prevents streaks and avoids residue buildup. For ALR screens with specialized surfaces, always consult the manufacturer’s cleaning instructions to avoid voiding warranties or damaging the material. Using a vacuum with a brush attachment can help remove dust from the edges or mounting brackets, preventing buildup that could cause warping over time.
To keep your projector performing optimally, routine calibration is key. Use software like CalMAN or DisplayCAL to regularly check color accuracy and brightness levels. These tools help you adjust your projector’s settings to maintain consistent image quality, especially if you notice fading or color shifts. I personally run a calibration every few months, which has noticeably improved my viewing experience and preserved my screen’s brightness.
Tools I recommend for long-term upkeep
Invest in a high-quality lens cleaner and microfiber cloth for screen maintenance. For calibration, a colorimeter such as the X-Rite i1Display Pro provides precise color measurements, making fine-tuning easier and more accurate. Additionally, a dust blower or compressed air can keep your projector’s lens and vents clean, ensuring maximum lumen output and preventing overheating.
Considering environmental factors is also vital. Keep your home theater room at stable humidity and temperature levels to prevent warping or mold. Using blackout curtains not only improves picture quality but also reduces dust and pollutants that can settle on your equipment over time.
Future trends in screen durability and ease of maintenance
Looking ahead, new materials and coatings are being developed to make screens more resistant to scratches, fingerprints, and environmental damage. Innovations like self-healing coatings and anti-static surfaces are already on the horizon, promising even easier maintenance and longer-lasting performance. As technology advances, I predict that screens will become more intelligent, with embedded sensors that alert you when cleaning or calibration is needed. This automation will simplify upkeep and ensure your setup remains perfect without constant manual intervention.
In the meantime, I highly recommend adopting a routine maintenance schedule using the tools and tips mentioned here. Regular cleaning, calibration, and environmental control are your best allies in preserving the brilliance of your projection setup. Try incorporating a monthly check-up with a colorimeter and a gentle cleaning routine—these small steps will keep your home theater looking and performing like new for years to come.
The Hardest Lesson I Learned About projection screen,alr screen,screen material,screen gain,screen size
Early in my home theater journey, I believed that higher gain screens would automatically solve my daylight visibility issues. It wasn’t until I experienced uneven hot-spotting that I realized too much gain could ruin the picture quality. This taught me the importance of balancing gain with room lighting and projector specifications, and I now know that moderation and understanding your environment are key to choosing the right screen.
3 Myths About projection screen,alr screen,screen material,screen gain,screen size That Held Me Back
One major myth was that all ALR screens are created equal; in reality, different microstructures reject ambient light with varying effects on contrast and color vibrancy. Another misconception was that bigger screens always mean better immersion, but in smaller rooms, a large screen can cause discomfort and reduce perceived brightness. Lastly, I used to think that higher gain always meant brighter images, but I learned that excessive gain can lead to uneven brightness and hot-spotting, especially if not properly installed.
What Experts Won’t Tell You About projection screen,alr screen,screen material,screen gain,screen size
Most industry pros emphasize the importance of matching screen gain with your projector’s lumen output and room lighting, but they often overlook the subtle effects of microstructure quality on color accuracy. Also, the real secret is that proper installation, including exact mounting and tensioning, can make or break your setup’s brightness uniformity—something many overlook until after costly mistakes.
My Essential Toolkit for Bright Room Projection
For ongoing maintenance, I rely on a microfiber cloth and a gentle cleaner recommended by manufacturers to keep my screen pristine. A colorimeter like the X-Rite i1Display Pro helps me calibrate my projector regularly, ensuring consistent brightness and color fidelity. Additionally, a dust blower keeps my projector lens clean, maximizing lumen output and preventing image dimming over time. These tools have been invaluable in maintaining my home theater’s brilliance.
Your Turn to Try and Shine
Now that you’ve learned the nuances of screen gain, materials, and installation, it’s your chance to transform your bright room into a cinematic haven. Don’t wait for the perfect setup—start experimenting with different gains and materials to discover what works best in your space. Remember, patience and attention to detail will reward you with stunning visuals that rival commercial cinemas.
What’s the biggest challenge you face when optimizing your projection setup in a bright room? Share your experiences below—I’d love to hear your story and help you find the perfect solution!
,