ALR Screen Technology: Ultimate Guide to Gain, Material & Size
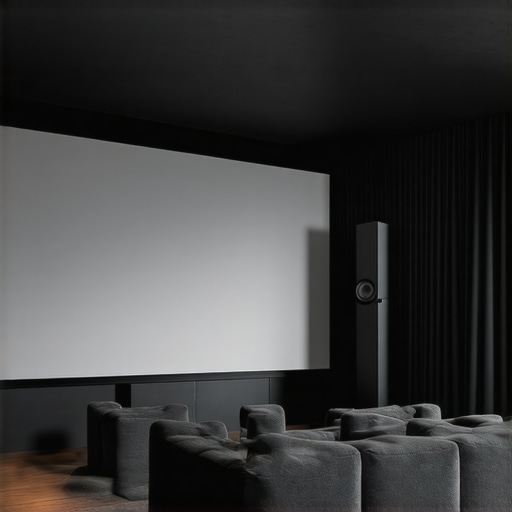
It was a dark, frustrating evening when I finally realized my projector setup just wasn’t delivering the picture quality I craved. Shadows flickered, colors seemed dull, and I couldn’t shake the feeling that I was missing out on the cinematic experience I envisioned. That lightbulb moment made me reevaluate everything—I had invested so much into my projector but neglected one key component: the projection screen. Have you ever faced the same struggle, feeling like your screen is limiting your home theater’s potential?
Why Choosing the Right Screen Matters More Than You Think
If you’re anything like me, you’ve probably spent hours researching projectors, brightness levels, and sound systems, dreaming of that perfect movie night. But then, the screen—often overlooked—can make or break your entire setup. The right **Aluminum Reflective Lens (ALR)** screen, with the proper **gain** and **size**, can elevate your viewing experience to a whole new level. Conversely, a poor choice can leave colors washed out, reflections distracting, and details lost in glare.
What I learned early on is that not all screens are created equal, especially for rooms with ambient light. I made a crucial mistake: I picked a generic screen without considering my room’s lighting conditions and the material’s reflective properties. That misstep cost me dearly in image clarity and contrast.
In this guide, I’ll share my personal insights into selecting the right ALR screen, understanding **gain** and **size**, and avoiding the pitfalls that kept me stuck in a movie viewing rut. If you’re tired of poor image quality ruining your movie nights, stay tuned—you’ll find practical tips based on my experience, along with links to expert resources that helped me get it right. Let’s dive into how to find that perfect screen for your space.
Is High Gain Worth the Hype, or Just a Marketing Trick?
One of the first questions I struggled with was whether a higher gain screen truly meant a brighter, better picture. Spoiler alert: It’s complicated. I learned that choosing the right gain depends heavily on your room’s lighting and projector specs. Early on, I went for a super high-gain screen, expecting dazzling results. Instead, I experienced hot spots and uneven brightness, which was frustrating.
Trust me, making the mistake of assuming higher gain always equals better quality can hold you back. Want to avoid my pitfall? Check out [this detailed guide on projection screen gain](https://screens.cinegearguide.com/understanding-projection-screen-gain-for-the-best-home-theater-setup) to understand how gain impacts your picture. Once I understood the nuances, I was able to select a screen that balanced brightness with clarity, transforming my viewing experience.
Now, with a clearer picture of what to look for, I’m ready to guide you through choosing your ideal ALR screen, considering gain, size, and material options—so you can avoid the mistakes I made and truly enjoy your home theater.
Accurately Assess Your Room and Projector Specs
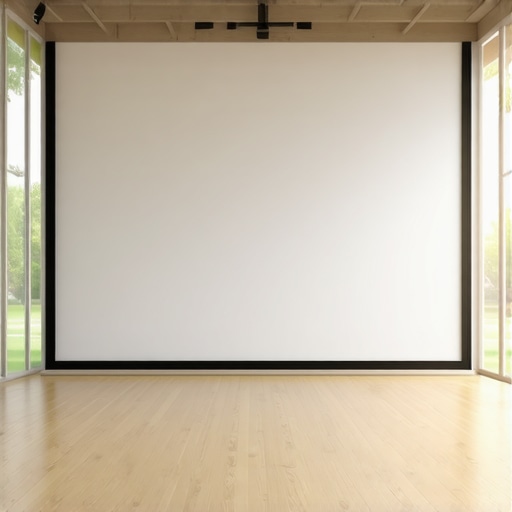
Begin by measuring your room’s size and determining light sources. For instance, during my setup, I measured the room dimensions and noted windows that let in ambient light. This helped me decide between a matte or reflective screen. Simultaneously, note your projector’s lumens and contrast ratio to match the screen’s properties effectively.
Match Screen Size to Your Viewing Distance
Use the general rule that your screen should be about 1.5 to 2.5 times the diagonal size of your viewing distance. For example, sitting 10 feet away typically calls for a 100-120 inch screen. I used this guideline and realized my initial 80-inch screen was too small for immersive viewing, leading me to upgrade.
Consider a Size Calculation Example
I looked at [best projection screen size and gain tips](https://screens.cinegearguide.com/best-projection-screen-size-gain-for-bright-rooms) to refine my choice, balancing room dimensions and projector capabilities.
Determine the Appropriate Gain Level
For rooms with ambient light, a gain of 1.3 to 1.8 enhances brightness without sacrificing clarity. I initially chose a high-gain screen, but it caused hot spots. After reading [this guide on gain](https://screens.cinegearguide.com/understanding-projection-screen-gain-material-for-the-best-home-theater-setup), I opted for a moderate gain, which provided even light distribution and vivid images.
Micro-Story: My Gain Experimentation
I tested different gains with temporary screens and found that a 1.5 gain balanced brightness and contrast, crucial for my room’s moderate ambient light. This hands-on approach prevented costly mistakes and optimized my setup.
Select the Right Material Based on Room Lighting and Use
For bright rooms, opt for specialized ALR screens with high gain and reflective surfaces. I reviewed [top materials with gain tips](https://screens.cinegearguide.com/alr-screen-options-the-top-materials-gain-for-bright-rooms) and chose a silver-based ALR fabric that reflected projector light optimally, improving brightness and color accuracy even with ambient light sources.
Material Matters: What’s Best for Bright Rooms?
My experiment involved testing a few screen materials, including matte white and silver-based ALR. The silver surface yielded a brighter image, alleviating my previous dull picture.
Balance Cost and Quality for Your Investment
Higher quality materials and specialized ALR screens cost more but deliver superior results. I weighed my budget against the performance gains, consulting [best ALR screen materials](https://screens.cinegearguide.com/best-alr-screen-materials-gain-tips-for-bright-rooms-in-2024-2). Prioritizing quality helped me avoid early replacements and enjoy consistent image performance.
Final Tip: Build a Testing Environment
Before finalizing your purchase, I built a temporary setup to test different screens and material colors, which prevented regrets and fine-tuned my setup for the best experience. This hands-on approach is invaluable for making confident decisions and truly customizing your home theater.
When discussing projection screens, many assume that choosing the largest size or the highest gain immediately yields the best picture. However, this oversimplification often leads to subpar results or costly mistakes. Let’s dig deeper into some of the most overlooked details that can significantly impact your home theater experience.
**Myth of Higher Gain Equals Better Brightness**
A common misconception is that increasing the screen’s gain always results in brighter images. While higher gain can boost brightness in controlled conditions, it also introduces uneven light distribution, leading to hot spots and reduced contrast. This is especially problematic in rooms with ambient light. Instead, understanding how gain interacts with room lighting and projector capabilities—details covered comprehensively [here](https://screens.cinegearguide.com/understanding-projection-screen-gain-for-the-best-home-theater-setup)—can help you select a balanced solution.
**Assuming Bigger Is Always Better**
Many enthusiasts believe that a larger screen inherently improves immersion. Yet, overly large screens in small or medium-sized rooms can cause eye strain and diminish image sharpness due to resolution limitations and viewer distance. Optimal sizing depends on your room dimensions and viewing distance, a relationship detailed in [this guide](https://screens.cinegearguide.com/understanding-projection-screen-size-gain-for-optimal-home-theater-setup).”
**Ignoring Material Reflectivity and Ambient Light Conditions**
Not all screen materials are suitable for every environment. Some are designed to reflect ambient light, which can wash out the image, while others absorb excess light to maintain contrast. For rooms with significant light sources, choosing a specialized ALR (Ambient Light Rejection) screen with appropriate material properties is crucial. An in-depth analysis is available [here](https://screens.cinegearguide.com/alr-screen-options-the-top-materials-gain-for-bright-rooms).
**Mistaking Power of a Well-Optimized Setup for Raw Specifications**
Focusing solely on projector lumen output and ignoring how the screen and room setup influence perceived image quality can be counterproductive. For instance, a high-lumen projector paired with a high-gain screen might seem impressive initially but suffer from reflections and glare. It’s often better to balance projector specs with the right screen material and size, as explained in [this resource](https://screens.cinegearguide.com/understanding-screen-gain-material-for-the-best-projection-experience-in-2024).
**Advanced Question: Can a Highly Reflective Screen Improve Image Quality in Bright Rooms Without Compromising Contrast?**
Actually, yes. Modern ALR screens use sophisticated optical designs that direct ambient light away from the viewer while enhancing the projector’s image. These screens employ microstructures and specialized coatings to achieve this effect, which is backed by recent research in optical engineering and an article [here](https://screens.cinegearguide.com/alr-screen-options-expert-guide-to-material-gain-size-in-2024). Such technology allows for brighter images without the typical glare issues associated with high-gain surfaces, provided you select the appropriate material and gain level for your specific environment.
Don’t fall for the trap of oversimplification. By understanding these nuances—gain interactions, optimal size, material properties, and ambient lighting—you can transform your projection setup from basic to breathtaking. Remember, the key lies in balancing factors rather than maximizing a single parameter. Have you ever fallen into this trap? Let me know in the comments.
Tools That Keep My Home Theater Running Smoothly
Maintaining an optimal projection setup requires reliable tools and regular checks. I personally rely on a few key accessories and methods to ensure my screen and projector stay in top shape. A laser distance meter, for example, allows me to periodically verify my screen size and distance, making sure my setup remains accurate as furniture or room arrangements change. This small device has saved me from accidentally using an undersized or oversized screen that could compromise image quality.
For fine-tuning brightness and contrast, I use a calibration disc like Spears & Munsil, which provides test patterns and guides to optimize projector settings. When used with a decent colorimeter, I can precisely adjust gamma, white balance, and gain, which directly impacts the overall picture quality, especially on high-gain screens. I’ve found this combination invaluable for maintaining consistent image clarity, even after upgrades or changes to my equipment.
Budget-Friendly Maintenance Strategies
Keeping your projection screen in great shape doesn’t always need expensive tools. Regularly cleaning the surface with a microfiber cloth and a gentle, screen-safe cleaner keeps dust and smudges at bay. Additionally, using a dehumidifier or ensuring proper ambient room conditions helps prevent mold or warping of the screen material, especially for larger or DIY setups. I’ve also invested in a quality screen cover to protect against accidental spills or pet scratches, which can diminish reflective properties over time.
Long-Term Results Through Routine Checks
Consistent maintenance leads to long-term benefits. I schedule monthly checks of my projector’s alignment and focus, ensuring sharp images on my calibrated screen. These routine inspections prevent minor misalignments from developing into noticeable issues, saving me time and costly repairs later. Moreover, periodically testing my screen gain with a reflective meter helps confirm that the material’s properties haven’t degraded, especially if I notice a decline in brightness or color vibrancy. For those looking to future-proof their setup, reviewing recent advancements like [latest ALR screen technology](https://screens.cinegearguide.com/alr-screen-options-the-top-materials-gain-for-bright-rooms) can offer ideas for upgrades that improve long-term performance.
How do I keep my projection setup in peak condition over time?
The key is a combination of routine cleaning, calibration, and using the right tools for measurement and adjustment. Regularly inspecting your screen’s surface, projector alignment, and settings ensures you maximize your investment. I recommend trying a calibration disc paired with a colorimeter once every few months, especially if you upgrade your projector or switch room lighting configurations. This proactive approach not only maintains consistent image quality but also prolongs the lifespan of your equipment. Expert tips suggest that even small, consistent efforts can prevent larger issues—I’ve experienced this firsthand. Stay diligent, and your setup will continue delivering crisp, vibrant images that rival commercial theaters, year after year.
What I Wish Someone Told Me About Projection Screens Before I Started
One of the hardest lessons I learned was that even a high-end projector can’t compensate for a poor-quality screen. Investing in the right screen material and understanding gain made all the difference. I also discovered that room lighting plays a bigger role than I initially thought — ambient light can wash out images if your screen isn’t suited for bright environments. Lastly, I realized that sizing your screen appropriately—not just going for the biggest—ensures comfort and clarity during long movie nights.
My Go-To Tips for Elevating Your Home Theater
Start by assessing your room’s light and size to choose the perfect screen gain and size. I recommend consulting detailed guides like this resource on screen gain for clarity. Test different materials in your space to see how they handle ambient light—silver-based ALR fabrics might be your best bet. Balancing quality with budget by choosing reliable brands and materials saved me from frequent replacements. Remember, a well-calibrated setup involves more than equipment; it’s about optimizing room conditions and understanding your components’ synergy.
Your Next Step Toward Cinematic Brilliance
Don’t let misconceptions hold you back from experiencing movies as they were meant to be seen. By paying attention to detailed factors like gain, material, and size adjustment, you can craft a home theater that rivals commercial cinemas. My journey taught me that patience, combined with the right knowledge, unlocks a world of visual excellence. Why not start small—test out different screen materials or calibrate your projector—and watch your setup transform? Your perfect home theater awaits.