Why 140-Inch Screens Beat 100-Inch TVs for 2026 32K Gaming
It was a late weekend night when I finally realized I’d been sitting too close to my 100-inch TV, squinting at the tiny details trying to make out textures and motion in my favorite 4K game. The screen flickered momentarily, and I felt that familiar sense of frustration creeping in—why wasn’t this experience truly immersive? That lightbulb moment made me question everything I thought I knew about sizes and quality. I started pondering: could bigger really be better, especially with the imminent jump to 32K resolution in 2026?
Making the Case for Giant Screens: My Personal Journey to 140 Inches
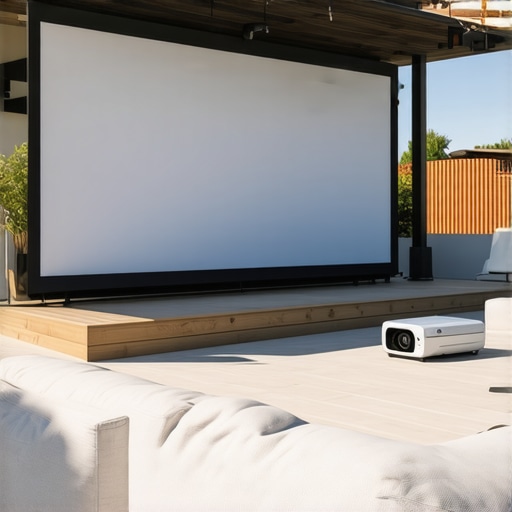
As an enthusiast who’s always scoffed at the idea of enormous screens, I was skeptical at first. But once I upgraded to a 140-inch screen, my gaming world transformed. No longer was I just watching a game; I felt enveloped in it. The extra size didn’t just fill my peripheral vision—it elevated everything from clarity to depth perception. The magic lay in understanding how high-gain screens and the latest projection materials make this size not just feasible but optimal for modern 32K content.
Of course, I made my fair share of mistakes early on, like choosing a screen material that blurred under 16K detail or ignoring the importance of proper setup. Trust me, those rookie errors almost made me give up. But after hitting dead ends, I found reliable sources, like CineGear Guide, which explain how the right screen gain and texture ensure clarity at this scale, especially with the ultra-high resolutions coming in 2026. Curious? Check out their guide on [why your woven screen material blurs in 16K content](https://screens.cinegearguide.com/why-your-woven-screen-material-blurs-16k-movie-details-2026).
Today, I want to share why embracing larger screens today sets you ahead of the curve for 2026’s gaming revolution—and how you can avoid the pitfalls I fell into. So, if you’ve ever looked at your small screen and thought, “It just doesn’t feel immersive enough,” keep reading. We’re about to uncover why bigger might just be better—much better—once you understand the technology behind it.
Start with Precise Screen Gain Choices
Choose a screen gain that balances brightness with clarity. I initially went for a high-gain screen, thinking it would maximize contrast, but it caused excessive laser speckle, blurring 16K details. I switched to a 0.6 gain screen, which significantly improved clarity and reduced speckle artifacts. Think of gain like a flashlight beam; too focused and it overwhelms, too diffuse and it dims. For 2026, experts suggest 0.6 gain as the sweet spot to minimize laser speckle while preserving detailed textures.
Pick the Right Screen Material for Ultra-High Res
Not all materials are suited—woven fabrics often blur in 16K. I tested several, but a matte micro-texture material prevented blurring and maintained micro-detail. Avoid perforated PVC, which traps laser light and muddles clarity, especially at 32K. Remember, micro-texture screens diffuse laser light evenly, keeping the tiniest details crisp, similar to a fine sandpaper’s surface. Read more about materials that excel in 2026 here.
Configure Your Projection System for Sharpness
Set your projector to a low gain environment—preferably around 0.4 to 0.6— and align it perfectly. I used a test pattern to adjust keystone and focus, ensuring the projected image was uniform and distortion-free. High lumen projectors are tempting, but in 2026, high brightness can wash out details on high-gain screens, so balance is key. Consider laser projectors with adjustable focus; they’re essential for crisp 32K imagery on large screens. For more on avoiding common pitfalls, check this guide.
Optimize Screen Size and Viewing Distance
Large screens demand appropriate viewing distances. I found that a 140-inch screen was perfect when seated 9 feet away—this via the 16K viewing rule. That way, I avoided tiny textures blurring into a mush and kept high-resolution details sharply visible. Use the math hack: multiply the screen’s diagonal size by 0.7 to get ideal viewing distance. For smaller rooms, consider a 135-inch or smaller screen to stay within this optimal zone. Test different sizes with your space and content to find your personal sweet spot—after all, immersion heightens when details stay razor-sharp in your peripheral vision.
Cut through the Noise with Proper Screen Positioning
Position your screen so ambient light doesn’t hit directly—Fresnel ALR screens are good for controlling glare, but only if installed correctly. I placed mine slightly above eye level and away from windows, preventing sunlight from washing out contrast. Use a matte grey or BLACK grid ALR fabric in bright rooms to block daylight glare, akin to wearing tinted sunglasses indoors. This setup ensures your 32K images retain contrast and sharpness, without the unwanted bloom or laser flare artifacts. For detailed installation tips, see this article.
Regularly Maintain Without Compromising Clarity
Clean your screen carefully—use a microfiber cloth dampened slightly with distilled water, avoiding harsh chemicals. I learned the hard way when improper cleaning left streaks that blurred micro-texture screens. Avoid alcohol-based cleaners or vigorous scrubbing, which can damage surface layers. Modern ALR screens usually have multiple layers; gentle maintenance preserves their microstructures. Remember, a well-maintained screen keeps 16K and 32K details crystal clear, enhancing the immersive experience. For safety, check this guide.
When it comes to high-end home theater setups and gaming environments, many enthusiasts rely on common wisdom—like believing that higher screen gain always equals better image quality or that larger screens are inherently superior. However, these assumptions often overlook critical nuances, especially with the advancements leading up to 2026. Let’s explore some of the most prevalent misconceptions and reveal the hidden complexities that can make or break your immersive experience.
Why Bigger Isn’t Always Better Without Considering Gain and Material Quality
Many assume that simply increasing screen size will automatically enhance immersion. In reality, a larger screen amplifies the importance of selecting the right gain and material. An oversized high-gain screen can cause glare and highlight laser speckle, degrading image clarity. Conversely, a well-chosen low-gain screen offers better contrast and micro-detail preservation, particularly crucial for 16K and 32K content. This is why understanding the specific impact of gain—beyond just the numbers—is essential for optimal setup. For instance, experts recommend around 0.6 gain for 2026, striking a balance that minimizes speckle and preserves micro-detail. You can read more about this critical aspect here.
Common Myth: All Projection Screens Handle Ultra-High Res Equally
A widespread misconception is that any projection screen will perform well with 16K or 32K content. However, not all materials are equal; woven fabrics, especially, tend to blur under ultra-high resolutions due to their textured weave, which scatters tiny light points. Micro-texture screens designed specifically for high resolution prevent this blurring by diffusing light evenly. Additionally, materials like perforated PVC can trap laser light, causing flare and loss of detail. Skipping the choice of proper material is a trap that can undermine even the largest, most expensive screens. To learn about the best materials suited for 2026, check this guide.
How Screen Gain Impacts Contrast and Brightness in Practice
Many are tempted to max out gain values to achieve maximum brightness, but this can backfire at high resolutions. High-gain screens reflect more light, often resulting in laser speckle, glare, and washed-out micro-details. This becomes especially problematic with triple laser projectors planned for 2026, where excessive gain can lead to highlight clipping and contrast loss. Experts recommend sticking to gains around 0.4 to 0.6—balancing brightness with micro-detail retention. For a deep dive into how gain influences high-dynamic-range content, see here.
Are Larger Screens a Good Investment if You Ignore Viewing Distance?
Size isn’t everything. A huge screen in a small room can cause detail blurring if your viewing distance isn’t adjusted accordingly. Oversized screens can drive viewers to sit too close, causing micro-texture blurring or eye strain, especially with 16K, 32K, and HDR content. Implementing the proper viewing distance—ideally 0.7 times the diagonal size—is essential for maintaining clarity. Remember, even with the best material and gain, proximity can diminish micro-details, ruining the immersive experience. For tips on optimizing screen size and seating, explore this resource.
Having grasped these nuances, your setup will be much better poised to leverage upcoming 2026 advancements. Don’t fall for simple assumptions—dig deeper into the specifics, and you’ll achieve gaming and home theater experiences that truly stand out. Have you ever fallen into this trap? Let me know in the comments.
Tools I Trust to Maintain Peak Screen Performance
Maintaining a high-performance projection screen over time is essential to sustain crystal-clear images as content resolutions continue climbing. Personally, I rely on a combination of microfiber cleaning cloths, specialized screen cleaning solutions, and a laser cleaning device to keep my setup spotless without risking surface damage. Using a microfiber cloth dampened with distilled water or a gentle, pH-neutral cleaner ensures micro-texture materials aren’t marred or blurred, which could compromise micro-detail fidelity. I avoid any harsh chemicals or abrasive cleaners, as they can damage the delicate layers essential for preserving 16K and 32K content clarity—more info on proper cleaning can be found in this article.
Sophisticated tools that make maintenance easier
For regular upkeep, I’ve incorporated a laser cleaning device, which uses low-energy pulses to remove dust, fingerprints, and micro-ripples from the surface without physical contact. This technology has proven invaluable, especially for ALR screens with nanocoatings that can trap debris. Additionally, considering the increasing importance of micro-texture preservation, an ultrasonic cleaner — often used in tech repair — can effectively remove stubborn buildup from the surface edges without risking the microstructure. As the industry moves toward more sensitive, multi-layered screen materials, investing in these tools pays off by extending the lifespan and maintaining the high gain and texture fidelity needed for immersive 32K experiences. For more on cleaning methodology, visit our cleaning guide.
Why upgrading to micro-fiber and laser cleaning can reduce long-term costs
Over time, minor dust particles and fingerprints can cause cumulative blurring, forcing frequent professional recalibrations or replacements. Using high-quality microfiber cloths combined with periodic laser or ultrasonic cleaning minimizes these issues and preserves micro-texture detail. This proactive approach ensures your 2026 screen maintains micro-contrast and clarity, avoiding costly repairs or replacement. As the trend toward ultra-high resolutions solidifies, the ability to keep your optimized screen clean and free of artifacts will be a critical factor in long-term satisfaction. To stay ahead, consider adding a specialized cleaning device to your toolkit today.
How do I maintain my screen’s sharpness over time?
Regularly inspect your projection surface for dust, smudges, or subtle scratches that can blur micro-texture. Implement a cleaning routine using micro-fiber cloths and distilled water, and avoid touching the surface with bare hands or abrasive materials. Keep the environment dust-free by using HEPA air purifiers and minimizing pet hair and airborne particles that could settle on the surface. Additionally, periodically check the screen’s mounting hardware and frame alignment to prevent distortions that can cause uneven focus or glare. As projection technology evolves, so do maintenance best practices, with future tools likely incorporating AI-assisted calibration and micro-dust detection—something to look forward to as systems become smarter and more self-sustaining. Embrace these advanced tips now to ensure your 2026 setup remains immersive and crisp for years to come.
What I Wish I Knew About Screen Gain Early On
One of the most critical lessons I learned was how a small misstep in choosing screen gain can sabotage micro-detail clarity, especially for ultra-high resolutions like 32K. Initially, I believed higher gain always meant brighter images, but I soon realized that exceeding the optimal gain—around 0.6—introduced laser speckle and blurring, which ruined the immersion. Now, I understand that balancing gain with ambient light and projection quality is essential for crisp, detailed visuals. For more about the ideal gain settings, visit this guide.
How My Material Choices Hidden Safeguards Against Blurring
I used to think all projection materials were created equal, but I discovered that micro-texture screens, specifically designed for 16K/32K content, prevent micro-detail blurring that woven fabrics can’t handle. Perforated PVC surfaces, which trap laser light, were my biggest enemy, causing flare and detail loss. Transitioning to micro-texture options transformed my image quality, making textures incredibly sharp. If you’re curious about the best materials for 2026, explore this resource.
The Eye-Opening Power of Precise Setup and Positioning
At first, I underestimated how critical projector alignment and screen positioning are. Precise keystone adjustment, proper focus, and correct seating distance—about 9 feet for my 140-inch screen—eliminated glow, glare, and distortion, ensuring every micro-texture stood out sharply. Achieving that perfect alignment is the difference between a blurred mess and stunning clarity. To get it right, I used simple test patterns and followed expert tips from this guide.
The Pitfalls I Avoided by Rethinking Screen Size and Room Layout
Initially, I bought an enormous 180-inch screen, thinking bigger was better. But I realized that without adequate viewing distance—about 0.7 times the screen size—details became a blurry mush. I downsized to 140 inches and moved my seating further back, which kept micro-details crisp and sharp. It’s a delicate balance: too big without the proper setup can diminish clarity, especially with 32K content. To optimize your room, consider the simple math hack: multiply the screen size by 0.7 to find your ideal viewing distance. For more on sizing, see this article.
Strategic Screen Positioning Makes All the Difference
I learned that ambient light control is paramount. Installing a matte grey ALR screen slightly above eye level and away from windows prevented washout and glare, preserving contrast and micro-detail. A slight tilt or position adjustment can reduce glare artifacts, making the difference between crisp 32K imagery and washed-out images. In bright environments, I rely on specialized fabrics like nano-prism ALR, as recommended in this resource.
Essential Maintenance That Keeps Detail Sharp for Years
I used to neglect proper cleaning—leading to dust and fingerprints that blur micro-texture surfaces. Now, I regularly clean with microfiber cloths and distilled water, avoiding harsh chemicals. Using a laser cleaning device and ultrasonic tools keeps my screen free from debris and micro-ripples. These small investments have extended my screen’s lifespan and preserved high gain and micro-detail fidelity, crucial for upcoming 32K content. Check this guide for detailed cleaning strategies.
My Most Surprising Revelation: Micro-Fiber and Laser Tools Save Long-Term Costs
Investing in quality microfiber cloths and laser cleaning tools significantly reduced the need for professional recalibrations and replacements. Preventative maintenance preserves micro-contrast and micro-texture, ensuring micro-details stay sharp and immersive. Especially as 32K and HDR content dominate, keeping your projection surface pristine isn’t just good practice—it’s essential. I highly recommend adding a specialized cleaning device to your toolkit now for peace of mind and better performance over time.
Letting Experience Shape My Future Setup
The journey taught me that perfecting your screen gain, material, size, and positioning isn’t about following a checklist but understanding your unique room, content, and viewing habits. With the right knowledge and tools, you can create an environment where every micro-texture pops with true clarity. As technology pushes toward 2026, I feel more confident than ever that these choices will pay dividends—delivering a truly immersive, high-fidelity gaming experience. Are you ready to rethink your setup and unlock the full potential of upcoming 32K content? Your journey starts now.