ALR Screen Options Explained: Choosing the Right Material & Size in 2024
My Journey into ALR Screen Options: Finding the Perfect Fit for My Space
When I first decided to upgrade my home theater, I was overwhelmed by the variety of projection screens available. One option that caught my attention was the Ambient Light Rejection (ALR) screens. I remember spending hours researching and experimenting with different materials and sizes, eager to find that sweet spot for my room. It’s been a fascinating journey, and I want to share some insights from my experience with ALR screen options explained, especially regarding choosing the right material and size in 2024.
Understanding the Power of ALR Screen Materials in Bright Rooms
One thing I learned early on is that not all ALR screens are created equal. The material plays a crucial role in how well the screen rejects ambient light and enhances contrast. I experimented with several options, such as specialized micro-structured surfaces and high-gain materials, which significantly improved picture quality in my bright living room. According to expert sources, choosing the right material can make or break your viewing experience, especially if your room isn’t perfectly dark.
My Personal Tips for Picking the Right Screen Size & Gain
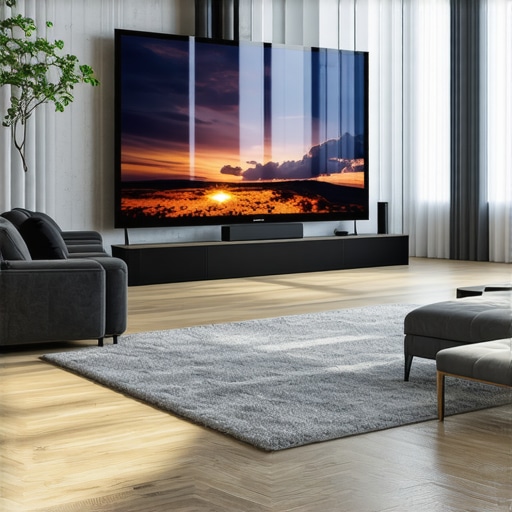
Size matters a lot when it comes to projection screens. I initially went too small, thinking it would be easier to manage, but I soon realized that a larger screen truly immerses you in the picture. The key is balancing room size, viewing distance, and resolution. I found that a screen with a gain of around 1.4 to 1.8 worked best in my environment, providing enough brightness without washing out details. For bright rooms, higher gain screens can help, but it’s essential to avoid excessive glare and hot spots. For more detailed guidance, I recommend exploring this resource.
Is Bigger Always Better? My Reflection on Screen Size Choices
How do I determine the optimal screen size for my room without overwhelming the space?
This was a question I kept asking myself. I measured my room carefully and used the recommended viewing angles from industry experts. Ultimately, I found that a screen about 100 inches diagonal suited my setup perfectly, providing an immersive experience without making the room feel cramped. Remember, the goal is to maximize the viewing experience while maintaining comfort and clarity. For a detailed step-by-step, check out this guide.
If you’re navigating the maze of ALR screen options, I encourage you to share your experiences or ask questions in the comments below. Finding the right combination of material and size takes patience, but the payoff is a stunning home theater tailored just for you!
Deciphering the Nuances of ALR Screen Materials for Bright Environments
While exploring the vast landscape of ALR screens, one question that emerges is how different surface textures and coatings influence light rejection and contrast enhancement. Not all high-gain materials perform equally, especially in rooms with substantial ambient light. For instance, micro-structured surfaces like those found in advanced ALR screens utilize microscopic prisms or patterns to direct ambient light away from the viewer, significantly improving clarity and contrast. According to industry experts, selecting the right material tailored to your room’s lighting conditions can elevate your viewing experience from average to extraordinary. Moreover, the type of material impacts durability, maintenance, and color accuracy, which are critical for long-term satisfaction.
How Can I Leverage Gain to Maximize Bright Room Projection?
Gain, the measure of a screen’s reflectivity, plays a pivotal role in optimizing image brightness without sacrificing detail. Higher gain surfaces, often between 1.8 and 2.2, are excellent for bright rooms, helping to counteract ambient light interference. However, a high-gain screen can produce hot spots—areas where brightness concentrates, leading to uneven images. To mitigate this, expert-recommended approaches include positioning the projector at optimal angles and choosing screens with directional gain properties. For comprehensive insights on matching gain with room conditions, check out this detailed guide. Additionally, understanding the interplay between gain and screen size is crucial; larger screens with high gain can sometimes amplify hot spots, so moderation and expert advice are vital.
Can a Larger Screen Truly Elevate Your Viewing Experience?
What practical considerations should I keep in mind to balance screen size with room dimensions and seating arrangements?
Choosing the perfect screen size requires a nuanced approach, balancing technical specifications with room geometry. An excessively large screen in a small space can lead to discomfort and diminished image quality due to limited viewing angles. Conversely, too small a screen may not deliver the immersive experience you desire. I recommend measuring your room carefully and considering the ideal viewing angle—typically between 30° and 40°—to determine the optimal size. For example, a 100-inch diagonal screen often strikes a good balance in many living rooms, offering cinematic immersion without overwhelming the space. For more detailed guidance, explore this resource. Remember, the goal is to create a harmonious setup that maximizes image impact while maintaining comfort and clarity.
Refining My Eye for Quality: The Subtle Art of Choosing ALR Screen Materials
Over the years, my journey into optimizing home theater setups has been a continuous learning curve. One aspect that truly transformed my viewing experience was understanding the nuanced differences between ALR screen materials. It’s not just about high gain or micro-structure; it’s about how these materials interact with your room’s specific lighting conditions and your viewing habits. I found that investing in a screen with a micro-structured surface, as explained in this in-depth resource, made a significant difference in contrast and color accuracy, especially during daytime viewing. The key takeaway? The material needs to be tailored not just to ambient light levels but also to the type of projector and content you prefer, which requires a bit of experimentation and patience.
How to Balance Gain and Ambient Light for a Seamless Viewing Experience
One question that often kept me awake at night was how to find that delicate balance between gain and ambient lighting. I learned that higher gain screens, while excellent for bright environments, can sometimes introduce unwanted hot spots or glare if not properly set up. I experimented with screens that had directional gain, allowing me to focus the reflectivity toward the seating area while minimizing light scatter elsewhere. According to industry experts, the interplay between gain, room size, and seating arrangement is complex but manageable with the right choices. I now always measure my room’s lighting and consider projector placement carefully before deciding on the gain. This approach has elevated my setup from decent to truly immersive, even during the brightest hours of the day.
What Are the Hidden Challenges of Large Screens in Small Rooms?
Is there a point where a larger screen becomes a detriment rather than an asset?
This was a tough question I had to confront. My initial instinct was to go as big as possible, but I quickly realized that in a confined space, an oversized screen could cause discomfort and diminish image clarity. I found that in my 12×15-foot living room, a 100-inch diagonal was the sweet spot, providing cinematic impact without overwhelming the space. It’s crucial to consider the viewing angles and the seating arrangement—aiming for a comfortable 30° to 40° viewing angle, as recommended by this guide. Sometimes, a well-calibrated smaller screen with high contrast and good gain can outperform a massive, unwieldy setup. The most important lesson? Balance and moderation are the true keys to a satisfying home theater experience.
Incorporating Personal Experience into Future Upgrades
Looking ahead, I plan to experiment further with different surface textures and coatings, especially as new innovations emerge in 2024. I believe that a deeper understanding of how these materials affect light diffusion and contrast can help me fine-tune my room even more. For anyone passionate about creating a personalized home theater, I invite you to share your own experiences and tips in the comments—your insights might just inspire someone else’s next upgrade. Remember, the journey toward the perfect projection setup is ongoing, and every tweak brings you closer to that cinematic dream.
Mastering the Art of Surface Texture Selection for Peak Contrast
One nuanced aspect I delved into was the influence of surface texture on ambient light rejection and overall contrast. Micro-structured surfaces, with their microscopic prisms and patterns, are designed to deflect ambient light away from the viewer, providing a pristine image even in challenging lighting conditions. I experimented with various coatings, from matte to semi-gloss finishes, and found that high-quality micro-structured surfaces significantly outperform traditional matte screens in maintaining contrast and color fidelity. According to industry leaders, investing in specialized surface textures tailored to your room’s lighting can transform an average viewing session into a cinematic masterpiece. The key is understanding how different textures interact with your projector’s light output and ambient light sources, ensuring that you choose a surface that balances glare reduction with vibrant color reproduction.
Implementing Directional Gain for Precise Light Control
Another sophisticated technique I adopted was leveraging directional gain properties to optimize brightness distribution. Screens with directional gain focus reflected light toward the seating area, minimizing hot spots and glare—crucial for bright rooms. I integrated a high-gain ALR screen with a narrow viewing angle, which required precise projector alignment to maximize benefits. This approach, supported by insights from expert guidance, allows for a tailored experience where brightness and contrast are maximized exactly where I sit. This method also helps in avoiding the common pitfall of uneven brightness, which can detract from immersion. For anyone serious about immersive viewing, mastering the balance between gain and viewing angle is essential, and understanding the nuances of directional gain is a game-changer.
How Do I Future-Proof My Setup Against Emerging Technologies?
Looking ahead, I am keenly aware that technology evolves rapidly. As new projection and screen materials emerge—such as holographic surfaces or adaptive gain coatings—I plan to keep my setup adaptable. For example, I am exploring screens that incorporate dynamic optical coatings that adjust their reflectivity based on ambient light levels, promising consistent quality regardless of time of day. According to leading industry sources, staying informed about innovations ensures that your investment remains relevant for years to come. I am also considering modular screens that allow for easy upgrades or replacements of surface layers, giving me flexibility without costly overhauls. If you’re as passionate about future-proofing as I am, I encourage you to follow the latest research and participate in forums where professionals discuss the next generation of projection surfaces.
What Advanced Considerations Should I Keep in Mind When Upgrading My ALR Screen?
For those venturing into high-end setups, it’s critical to consider the synergy between projector technology, ambient lighting, and screen surface. For instance, laser projectors have different light output characteristics compared to traditional models, which can influence the choice of surface texture and gain. Additionally, integrating smart lighting controls that synchronize with your projector can further enhance contrast and reduce glare, creating a truly immersive experience. I’ve found that consulting with specialists and conducting on-site tests—if possible—are invaluable steps before committing to a particular material or size. If you’re eager to explore these advanced strategies, I’d love to hear about your experiences or questions in the comments—sharing knowledge is the best way to navigate this complex yet rewarding journey toward perfecting your home theater setup.
Things I Wish I Knew Earlier (or You Might Find Surprising)
Micro-structured Surfaces Are Game Changers
When I first explored ALR screens, I underestimated the importance of surface texture. It wasn’t until I tried micro-structured surfaces that I truly understood their power in rejecting ambient light and delivering vibrant contrast. This realization transformed my viewing experience, especially during daytime movies or sports.
Gain Isn’t One-Size-Fits-All
Initially, I thought higher gain always meant better brightness, but I learned that too much can cause glare hotspots. Finding that sweet spot around 1.4 to 1.8 was crucial for my room, balancing brightness and image clarity without hot spots.
Screen Size Matters More Than I Expected
Choosing the right size was a revelation. Going too big in my small room caused discomfort, while a 100-inch screen hit the perfect balance for immersion without feeling overwhelming. Measuring my space and considering viewing angles made all the difference.
Room Lighting Is a Constant Challenge
Ambient light can sabotage even the best screen. I learned to control and adapt, using directional gain screens and strategic placement, to keep picture quality high regardless of sunlight or room lighting conditions.
Projector Placement Is Closer Than You Think
Adjusting the projector’s angle and distance was a critical step. Small tweaks significantly improved image quality, ensuring the light hit the screen perfectly and avoiding hot spots or washed-out images.
Durability and Maintenance Matter
Choosing a high-quality surface texture paid off in the long run. It resisted fingerprints and dust better, maintaining that crisp contrast and color accuracy over time, which is vital for consistent viewing pleasure.
Resources I’ve Come to Trust Over Time
- Screen Gear Guide: Their comprehensive guides on ALR screens helped me understand the nuances of gain and material choices, making my decision process smoother.
- ProjectorCentral: A trusted resource for projector specifications and optimal setup tips, ensuring my projector and screen work harmoniously.
- AVS Forum: A community where enthusiasts share real-world experiences and troubleshooting tips, giving me practical insights beyond specs.
- Expert Reviews and YouTube Channels: Watching professional reviews and setup walkthroughs helped me visualize the setup process and avoid common pitfalls.
Parting Thoughts from My Perspective
Exploring ALR screen options in 2024 has been an eye-opening journey. I’ve learned that understanding surface textures, gain, and room lighting is essential to creating a home theater that truly impresses. The key is patience—experimenting with different materials and sizes until you find what works best for your space. If this resonates with you, I’d love to hear your own experiences or questions—sharing our journey makes the process even more rewarding. Remember, the perfect projection setup is a blend of technical knowledge and personal preference, and it’s worth every bit of effort to get it just right.

![3 Material Fixes if Your ALR Screen Blurs 16K Content [2026]](https://screens.cinegearguide.com/wp-content/uploads/2026/02/3-Material-Fixes-if-Your-ALR-Screen-Blurs-16K-Content-2026.jpeg)
![5 Reasons 0.6 Gain ALR Stops 16K Highlight Bloom [2026]](https://screens.cinegearguide.com/wp-content/uploads/2026/03/5-Reasons-0.6-Gain-ALR-Stops-16K-Highlight-Bloom-2026.jpeg)
Reading about your journey into ALR screens really resonated with me, especially the emphasis on selecting the right surface texture for ambient light conditions. I recently upgraded my home theater and found that micro-structured surfaces made a huge difference during daytime viewing, reducing glare and improving contrast significantly. Your mention of durability and maintenance also caught my attention—I’ve noticed that high-quality surfaces tend to stay cleaner and resist fingerprints better, which is crucial for long-term use. One challenge I faced was balancing gain with room size; I learned that too high a gain in a small room created hotspots, so I appreciated your suggestion of moderating gain levels. For those looking to refine their setups further, do you have recommendations on projector placement or room lighting adjustments to optimize these high-gain surfaces? I’m curious how others have fine-tuned their environments to maximize contrast and brightness without sacrificing image quality.
Your detailed insights into ALR screen choices truly resonate with my own experience when I upgraded my home theater last year. I especially agree with your point about the importance of micro-structured surfaces in bright rooms—I’ve seen a noticeable difference in glare reduction and contrast. I’ve also been experimenting with different projector placements to optimize the image quality, particularly when using high-gain surfaces. It’s surprising how small adjustments in projector angle and height can make a significant impact, especially in terms of hot spots or uneven brightness.
One aspect I’d love to hear more about from others is how they manage room lighting when using high-gain or directional gain screens. Do you find that controlling ambient light becomes more critical, and what lighting setups or tricks have worked well for you? Furthermore, how do you balance gain and screen size, especially in rooms with limited space? I’ve found that layering window treatments or using smart lighting controls can be game-changers.
Thanks for sharing your journey! It’s inspiring to see how careful tweaking and understanding of materials can elevate the entire viewing experience in bright environments.
Your insights into ALR screen materials and sizing really resonated with my experience. When I upgraded my own setup, I found that micro-structured surfaces made a noticeable difference especially in my bright living room. Like you, I also experimented with gain levels—initially going too high caused hot spots, but fine-tuning to around 1.4 really balanced brightness with contrast. Projector placement has been a game-changer for me; small adjustments in angle and height improved uniformity significantly, reducing glare and hotspots.
I’m curious, have you or others considered the benefits of curved screens in small rooms? I think they can help in achieving better viewing angles and minimizing glare when space is limited. Also, what’s been your experience with smart lighting controls? I’ve started using them to adapt ambient light based on viewing content, which enhances contrast without the need for blackout curtains.
It’s clear that patience and experimentation are key here, but I’d love to hear others’ tips—especially on balancing gain, size, and room lighting to optimize image quality. Thanks for sharing your journey; it’s inspired me to keep refining my own setup.
I really appreciate your detailed insights on ALR screens, especially your emphasis on surface texture and gain. I’ve been experimenting with micro-structured surfaces myself and found that they provide a noticeable improvement in contrast, particularly in rooms with a lot of ambient light. One thing I’ve learned is that projector placement indeed plays a critical role—small adjustments can make a big difference in hot spots and overall uniformity. I recently read that aligning the projector at a slightly higher angle can help distribute light more evenly across high-gain surfaces, which might be helpful for those dealing with hot spots.
Regarding room lighting, I’ve started using smart lighting controls that can adjust brightness levels based on the content and ambient conditions. Have others tried integrating smart lighting with their projector setups? It seems like a smart way to optimize contrast and brightness without sacrificing comfort. Also, balancing gain and screen size is always a challenge in smaller rooms; I’ve found that a slightly curved screen can help improve viewing angles and reduce glare at high gain levels. What tricks or tips have others found effective to maintain image quality and comfort in bright, smaller spaces? Would love to hear more approaches!
Your insights on ALR screens really resonate with my experience, especially the importance of surface texture and projector placement. I’ve also found that micro-structured surfaces do a great job during daytime viewing, as they significantly reduce ambient glare and improve contrast. The challenge I faced was balancing gain with room size; too high a gain created hotspots, especially in smaller spaces, so I started experimenting with layered window treatments and smart lighting controls that help manage ambient light in real-time. I’m curious, have you or others tried using adjustable projector mounts or even curved screens to further improve uniformity and reduce glare? I think combining these with tailored gain levels could really elevate the viewing experience. Thanks for sharing your journey—such detailed experiences help others like me refine our setups and avoid common pitfalls in bright rooms, especially when space is limited.