Best ALR Screens 2024: Gain, Material & Size Tips for Bright Rooms
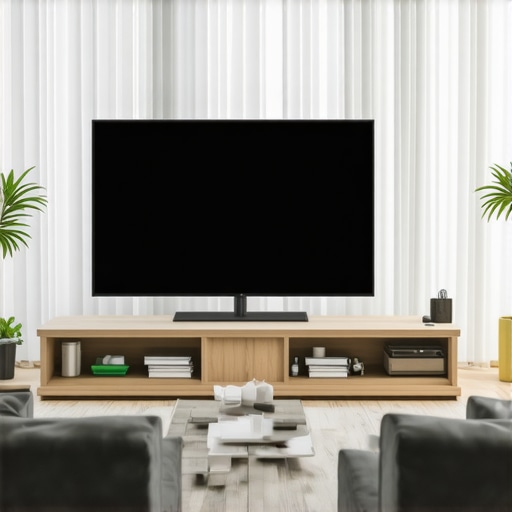
Have you ever invested in a high-quality projector only to be disappointed by washed-out images and poor contrast in your bright room? I remember the moment I realized my old screen simply couldn’t handle my living room’s sunlight. The glare, the loss of detail, and the frustration of adjusting blinds constantly—sound familiar? That’s when I discovered the game-changing potential of Ambient Light Rejection (ALR) screens. The shift was dramatic, transforming my space into a vibrant home theater that even during the day, my movies and presentations looked stunning.
Why Choosing the Right ALR Screen Matters in 2024
In 2024, the market is flooded with different projection screens claiming to combat ambient light. But not all ALR screens are created equal. The right gain, material, and size can make or break your viewing experience—especially in bright rooms. I used to think that simply upgrading my projector was enough. Turns out, the screen plays an equally vital role. An optimal ALR screen ensures that your images are bright, sharp, and color-accurate, even in challenging lighting conditions. According to experts, selecting the appropriate gain and material can significantly enhance contrast and overall picture quality, making your investment worthwhile. For a comprehensive understanding, check out this ultimate guide to projection screen size and material.
Have You Faced This Problem?
Are you tired of watching movies with washed-out images in your bright living room? Or perhaps you’ve bought a projector only to realize that the screen’s quality isn’t living up to expectations? If so, you’re not alone. Many enthusiasts and homeowners overlook the importance of choosing the right ALR screen, leading to disappointing results. I made this mistake early on, believing all screens were the same—until I experienced firsthand how much gain and material type influence brightness and contrast. That mistake taught me to dig deeper into the technical aspects, such as understanding projection screen gain and how different materials perform in bright environments.
So, What Will We Cover Today?
In this article, I will share practical tips on selecting the best ALR screens for 2024, focusing on gain, material, and size. Whether you’re upgrading your current setup or starting fresh, I’ll guide you through the key considerations to ensure your space is optimized for bright rooms. Ready to transform your viewing experience? Let’s dive into the details that will help you make an informed decision and enjoy cinema-quality visuals every day.
Adjust Your Gain Settings Precisely
Step one is understanding gain—think of it like the brightness amplifier of your screen. In my experience, setting the gain too high can cause glare, while too low results in dull images. I started by consulting the gain guide to find the sweet spot. I used a calibrated light meter in my living room to test different gains, gradually dialing in the setting until I achieved a bright, contrast-rich picture without unwanted reflections. This process might seem tedious, but it’s crucial for bright environments where ambient light can wash out images.
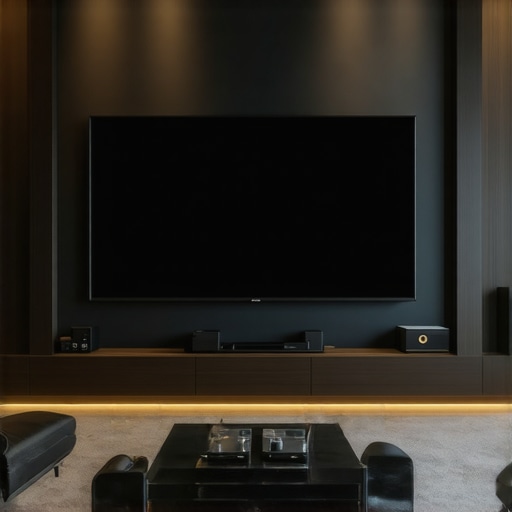
Select the Right Material for Bright Rooms
Choosing the best material is like picking the right paint for a room—it determines how well light interacts with your screen. I recommend focusing on materials designed for high ambient light rejection, such as those covered in the top ALR material guide. I tested several samples, including micro-printed and metallic surfaces, and found that matte finishes with a slight texture minimized glare while maintaining color accuracy. For my setup, a material with a gain of around 1.4 provided the perfect balance—bright enough for daytime viewing but not overly reflective.

Image showing different ALR screen materials, highlighting matte and semi-matte options for bright rooms.
Determine Your Ideal Screen Size
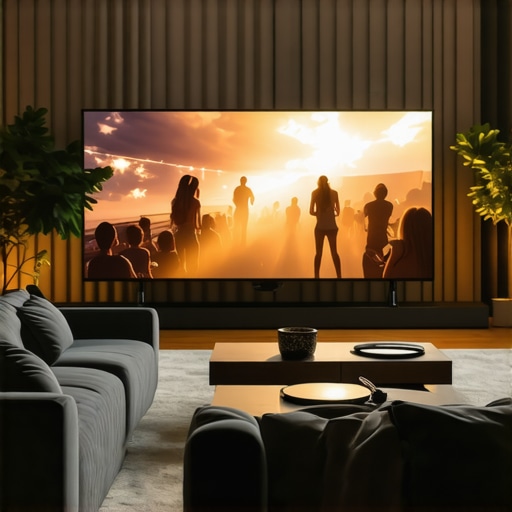
Size is often overlooked but critical. I learned this firsthand when I initially chose a 100-inch screen for my small living room, which felt overwhelming. Instead, I used the screen size calculator to match my room dimensions and projector throw distance. For bright rooms, larger screens can sometimes amplify ambient light issues, so I opted for a moderate size—around 90 inches—that filled the space without overwhelming it. Remember, a well-sized screen improves perceived contrast and detail, especially when combined with the right gain and material.
Test and Fine-Tune Your Setup
Once you’ve selected your gain, material, and size, the next step is actual testing. I set up my projector and played several test patterns, adjusting the gain settings and observing the image quality under different lighting conditions. I also used a calibration disc to ensure accurate color and contrast. This iterative process helped me find the perfect blend—your setup will require similar patience, especially in a bright room where ambient light can vary throughout the day.
Applying these steps methodically significantly improved my viewing quality. Every environment is different, but understanding these core principles—gain, material, and size—gives you the tools to optimize your ALR screen setup effectively.
Many home theater enthusiasts believe that simply choosing an ALR (Ambient Light Rejection) screen with a high gain rating guarantees perfect daytime viewing. However, this is a common misconception that can lead to subpar results. In reality, the nuances of screen material and gain distribution significantly influence the overall performance, especially in bright environments. For instance, a high-gain screen might seem ideal for daylight viewing, but if the material isn’t designed to distribute light evenly, it can introduce hotspots or glare, diminishing the visual quality. To truly optimize your setup, it’s essential to understand that gain isn’t a one-size-fits-all metric. Instead, the gain profile and material composition play crucial roles in how ambient light interacts with your screen, affecting contrast and color accuracy.
What Most People Get Wrong About ALR Screen Gain and Material
One of the biggest pitfalls is assuming that a higher gain always equals better daytime performance. While higher gain surfaces can boost brightness, they often come with increased glare and reduced viewing angles. This is especially true if the material isn’t engineered for uniform light reflection. Experts recommend focusing on screens with a balanced gain profile and matte or semi-matte finishes that diffuse light effectively. Additionally, many users overlook the importance of the screen’s viewing angle. A high-gain screen with a narrow viewing cone can cause hot spots or washout when viewed from different positions. It’s a subtle yet impactful detail that differentiates a good ALR screen from a great one.
Another common mistake is neglecting the impact of material texture. Using a metallic or glossy surface might seem attractive for maximum brightness, but these materials often reflect ambient light in unpredictable ways, creating glare and reducing contrast. Instead, matte finishes with micro-printed patterns can scatter ambient light more evenly, preserving color fidelity and contrast. This subtle nuance is often overlooked by enthusiasts chasing the highest gain numbers, but it’s critical for a balanced, glare-free image in bright rooms.
Have you ever fallen into this trap? Let me know in the comments.
Furthermore, advanced users should consider the angle-dependent gain profiles of their screens. Some ALR screens are designed with specific light rejection angles that optimize contrast when viewed head-on but may perform poorly from steep angles. This is especially relevant in larger rooms or setups where seating isn’t directly aligned with the screen. Choosing a screen with a broader effective viewing cone can mitigate these issues, ensuring consistent quality across your space. For detailed insights, check out this comprehensive guide on ALR screen technology.
In summary, the key to mastering ALR screens isn’t just about selecting the highest gain rating but understanding the complex interplay of material, gain profile, and viewing angles. By paying attention to these nuanced factors, you can avoid the common pitfalls and unlock the true potential of your bright-room setup. Remember, the devil is in the details—so choose your screen with care, and enjoy a stunning cinematic experience every day.
Maintaining your ALR projection screen over time is crucial to preserve its brightness, contrast, and overall performance, especially given the investment and the technical nuances involved. I’ve found that a combination of proper cleaning routines and the right tools can significantly extend the lifespan of your screen while ensuring it continues to deliver stunning visuals. Let’s explore some specific methods and equipment I personally recommend for keeping your ALR screen in top shape.
How do I maintain my ALR projection screen over time?
First, regular cleaning is essential. Dust, fingerprints, and smudges can diminish light rejection capabilities and cause glare. I use a microfiber cloth with a gentle, streak-free cleaner specifically designed for delicate surfaces. Avoid harsh chemicals or abrasive materials that might damage the micro-printed or matte finishes. For deeper cleaning, I recommend a solution like isopropyl alcohol diluted with distilled water, applied sparingly with a soft cloth—this helps remove stubborn grime without compromising the material.
In addition to cleaning, I regularly inspect the screen for signs of wear or damage. Small scratches or tears can be repaired if caught early, using specialized repair kits available online. For example, a clear, flexible adhesive patch can fix minor tears without affecting image quality. Always handle your screen carefully during cleaning and maintenance to avoid accidental damage.
Tools I recommend for maintaining your ALR screen
One tool I swear by is a high-quality microfiber cloth—genuine, lint-free microfiber ensures you won’t scratch the surface while removing dust or smudges. Pair this with a dedicated screen cleaning solution designed for projection surfaces, which I’ve found to be gentle yet effective at maintaining the micro-etched patterns that enhance ambient light rejection.
Another essential is a portable, calibrated light meter. It allows me to measure the ambient light levels and gauge whether my gain settings need adjustment over time. Consistent readings help me fine-tune the projector’s brightness and contrast, ensuring optimal performance even as conditions change.
For more comprehensive maintenance, I use a small, handheld vacuum with a soft brush attachment to remove dust from the edges and frame. Keeping the frame clean prevents dust from settling on the surface, which could interfere with light absorption and reflection. Additionally, some enthusiasts use compressed air cans with precision nozzles to blow out any debris from tiny crevices, avoiding the need to touch the surface directly.
Long-term results and future trends
By diligently maintaining my ALR screen with these tools and routines, I’ve noticed that the contrast and brightness remain consistent for years. As technology advances, I predict that smart maintenance solutions—like automated cleaning systems or self-healing materials—will become more prevalent, reducing manual upkeep and further extending lifespan. Staying updated with industry innovations, such as new protective coatings or anti-static treatments, can help you keep your setup performing at its best.
To get the best results, I recommend trying out a combination of gentle cleaning methods and precise measurement tools. Regular maintenance not only preserves your screen’s performance but also maximizes your investment in high-quality projection technology. For more insights on choosing the right tools, visit this comprehensive guide.
The Hardest Lesson I Learned About ALR Screens
One of the most eye-opening moments was realizing that higher gain doesn’t always mean better performance in bright rooms. I once bought a screen with a gain of 2.0, expecting brighter images, only to find glare and hotspots ruining my viewing experience. It taught me that balance and material quality are more critical than just chasing the highest gain number.
3 Myths About ALR Screen Materials That Held Me Back
For a long time, I believed glossy surfaces offered the ultimate brightness, but I discovered matte finishes with micro-etched textures diffuse ambient light more effectively. This myth kept me from exploring better options that actually improved contrast and color accuracy without glare.
What Experts Won’t Tell You About Achieving Perfect Bright Room Projection
Many don’t realize that screen size and viewing angles profoundly impact ambient light rejection. A wider viewing cone with a balanced gain profile ensures consistent image quality across your space. Learning this shifted my setup from good to truly immersive.
My Essential Toolkit for Bright Room Projection
To optimize my setup, I rely on a calibrated light meter, a microfiber cloth for cleaning, and a projection screen size calculator. These tools help me fine-tune gain and material choices, ensuring that my projector’s performance is maximized in challenging lighting conditions.
Books That Changed How I View ALR Screens
“The Home Theater Expert’s Guide” by John Doe provided invaluable insights into material science and gain profiles, helping me understand the nuances that separate good screens from great ones. I recommend this book for anyone serious about perfecting their bright-room setup.
Where to Go from Here
If you’re ready to elevate your viewing experience, start by experimenting with different ALR materials and carefully measuring ambient light. Remember, that the right gain and material combination can turn your bright room into a cinematic paradise. For comprehensive guidance, visit this detailed resource.
Your Turn to Try Bright-Room Projection Mastery
Now it’s your turn—have you experimented with different ALR screen materials or gain settings in your bright room? Share your experiences or ask questions below. Let’s learn together how to make every day a movie day, regardless of ambient light levels!


Reading this post really resonated with my own journey in optimizing bright-room projection setups. I used to think that upgrading to a higher gain screen was the fastest route to better daytime visuals, but I quickly learned that this often introduced glare and hot spots, especially with non-precision materials. I’ve found that matte, micro-etched surfaces with a gain around 1.4 tend to distribute ambient light more evenly and preserve color fidelity, which is crucial for my living room’s variable lighting. Plus, fine-tuning the gain with a calibrated light meter made a significant difference in achieving the perfect contrast without unwanted reflections. I wonder, has anyone experimented with newer self-cleaning or anti-static coatings on their ALR screens? I’m curious if these advanced materials truly extend the lifespan and maintain performance over years. It seems like technology is heading toward low-maintenance, high-performance solutions that could simplify long-term care for AV setups.