Stop Chasing Gain: Why 1.0 is the 2026 HDR Sweet Spot
It was late last night when I finally realized I’d been battling my projection screen for years without truly understanding what was going wrong. I’d spent so much time chasing higher gain values, convinced that bigger numbers meant better brightness and contrast. And yet, every new screen upgrade seemed to introduce more problems—glare, muddled images, or color washout. That moment of clarity hit me hard: I was actually making things worse by obsessing over gain.
The Hidden Trap of High-Gain Screens
I remember the first time I got lured into the hype—thinking that a screen with a gain of 2.0 or higher would double my brightness, making dark rooms brighter and movies more vivid. But the truth is more complicated. In fact, surpassing a gain of 1.0 often leads to diminishing returns, especially as the technology advances. Higher gain screens tend to focus light into narrower viewing angles, which means only viewers directly in front get the full effect. Anyone sitting just a few degrees off-center is left with a washed-out picture or reflections bouncing back at them.
Early on, I made the classic mistake of thinking that bigger numbers automatically equated to better performance. I bought into the idea that higher gain meant brighter images, but I overlooked the impact on contrast, color accuracy, and even the long-term health of my projector bulb. It wasn’t until I stumbled upon https://screens.cinegearguide.com/why-0-9-gain-screens-beat-high-gain-fabrics-for-2026-hdr that I realized there’s a sweet spot—a point where gain just hits the mark for ideal brightness without sacrificing picture quality.
What this taught me is that the obsession with gain numbers is often a distraction from more meaningful metrics. Instead of chasing higher gain, we should focus on understanding how a screen’s gain interacts with our room’s lighting, projector lumen output, and seating arrangement. As displays and projectors become more advanced, especially with the coming of 16K content, the importance of nuanced screen choices becomes even more critical.
Are you tired of fighting glare or losing picture clarity in your setup? Trust me, I’ve been there. The good news is, the answer isn’t always pushing for the highest gain, but rather finding that perfect balance—something I’ll help you uncover step by step.
Will Lower Gains Still Deliver the Brightness I Need?
Early in my journey, I mistakenly believed that lower gain meant duller images. I thought I had to settle for high gain screens to keep things bright enough for daytime viewing or well-lit rooms. But that was a mistake rooted in outdated thinking. Today, with advancements in projection technology and screen coatings, screens with a gain of around 1.0 are perfectly capable of delivering stunning brightness and contrast, even in challenging environments. For a comprehensive overview on how to optimize your setup, I recommend checking out https://screens.cinegearguide.com/ultimate-guide-to-projection-screen-material-gain-for-bright-rooms-in-2024. The key is balancing gain with your projector’s lumen output and room conditions.
So, if you’ve ever felt frustrated after upgrading your screen only to see worsening picture quality, know you’re not alone. And more importantly, you’re not stuck with high gain screens that hurt more than they help. In the next sections, I’ll share the practical insights that helped me stop chasing gain and start enjoying stunning images that truly pop.
Let’s get started—your perfect projection setup is closer than you think.
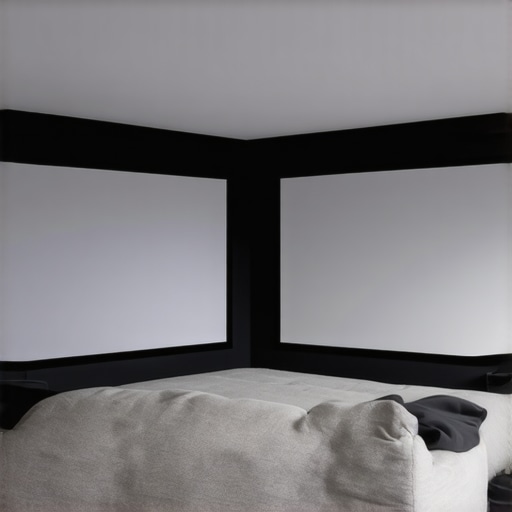
Select the Right Screen Material for Your Room
Start by choosing a screen material that matches your room’s lighting and projector capabilities. For bright rooms, materials with moderate gain, around 0.9 to 1.1, are ideal to prevent glare and washout. Avoid high-gain fabrics, which concentrate light and can cause reflections or hot spots. I once tested a high-gain screen in my well-lit living room, only to find the image overly bright and uneven; switching to a 1.0 gain fabric restored clarity and even illumination. To understand more about how gain influences image quality, visit this guide.
Balance Screen Size with Your Room Dimensions
Next, pick a size that fits your space and viewing distance. A common mistake is choosing a giant screen that exceeds optimal viewing angles, causing discomfort and pixelation. Use the 8K viewing distance rule to determine the ideal size: sit approximately 1.5 times the screen height away. I once attempted a 150-inch screen in a small room, which made seating uncomfortable and reduced image sharpness. Applying this rule kept my setup comfortable and ensured crisp visuals. For precise calculations, check this calculator.
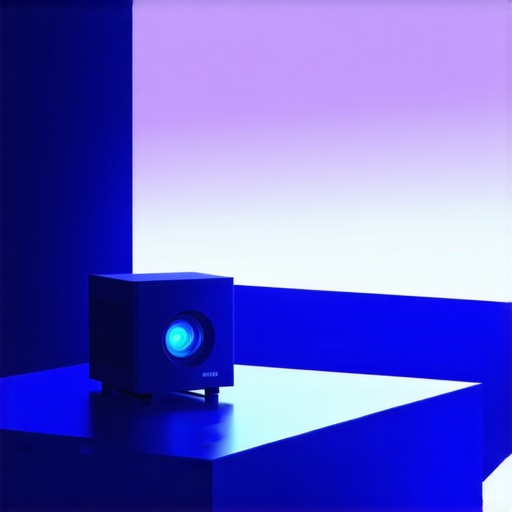
Optimize the Screen’s Gain for Your Projector
Matching your screen’s gain with your projector’s lumen output is crucial. A lower gain (around 0.8-1.0) disperses light uniformly, reducing hot spots and reflections, especially important in ambient light or daylight viewing. I experimented with a 0.8 gain ALR screen, which dramatically improved contrast with my laser projector. This setup avoided the pitfalls of high-gain screens that focus light too narrowly, leading to glare. To dive deeper into gain choices and how they impact different projector types, see this resource.
Shape Your Room’s Light Environment
Controlling ambient light enhances your image quality more than increasing gain. Use blackout curtains, dimmable lights, and reflective surfaces to minimize interference. I once had glare issues during daytime, despite using a high-gain screen; adding remote-controlled window shades fixed the problem entirely. Think of your room lighting like a dimmer switch—managing it allows your projection to shine at its best. For detailed lighting strategies, visit this guide.
Test before You Finalize
Before committing, perform contrast and ambient light tests. Use a simple test pattern and observe how the image holds up under different lighting. I found that tweaking angles and lighting in my setup made a noticeable difference, especially with delicate color gradations. A hands-on test ensures your choices align with your environment. For expert testing methods, see this article.
.Many enthusiasts focus on getting the highest gain screens or the most reflective materials, but this can be a costly misconception. The common belief that a higher gain always means a brighter, better image is oversimplified and sometimes downright wrong. In reality, this approach often leads to issues like glare, hot spots, and color washout, especially in rooms with ambient light or imperfect projector alignment. Instead, understanding the nuanced interaction between gain, material, and room conditions can elevate your setup dramatically.
One frequent myth is that high-gain screens are ideal for every environment. While they do boost brightness, they do so by focusing light narrowly, which reduces viewing angles and can create uneven images. This is an advanced mistake — relying solely on gain figures without considering room size and seating arrangement. According to experts, a gain of around 0.9 to 1.1 offers a balanced trade-off, providing sufficient luminance without sacrificing contrast and uniformity. For a deeper dive into how gain interacts with projector brightness, check out https://screens.cinegearguide.com/understanding-screen-gain-material-for-the-ultimate-projection-setup-2.
Another often overlooked factor is the choice of screen material. Many jump to high-reflectivity fabrics, thinking they maximize brightness in their spaces. However, materials with too high a gain can reflect light unevenly, causing hot spots and reducing image quality. A common trap is selecting a fabric based on specs alone without testing in your environment. Modern materials, especially those with micro-texture coatings, help diffuse light uniformly, enhancing color accuracy and contrast even at moderate gains. For the most suitable options tailored to your room’s lighting conditions, visiting https://screens.cinegearguide.com/why-0-9-gain-screens-beat-high-gain-fabrics-for-2026-hdr offers valuable insights.
Screen size is another critical aspect where assumptions can lead you astray. Many believe bigger is always better; however, an oversized screen can push pixel density below optimum levels, causing softness or blurriness, especially with 4K and 8K content. Advanced users know to apply the “8K viewing distance rule,” which suggests seating should be approximately 1.5 times the screen height—this ensures sharp visuals and comfortable viewing angles. For precise guidance, https://screens.cinegearguide.com/3-screen-gain-fixes-for-low-lumen-projectors-2026 helps clarify how size impacts overall image clarity.
Finally, the allure of high-gain or specialized materials often overshadows the importance of room lighting conditions. Ambient light can drown out gains, wash out colors, and diminish contrast, no matter how advanced the screen. Investing in light control or choosing screens with consistent diffuse reflection properties can transform your viewing experience. Consider the benefit of a matte or low-gain screen coated with optical diffusers—these strategies mitigate the impact of stray light. Detailed advice on aligning room lighting with your screen choice can be found here: https://screens.cinegearguide.com/3-contrast-tests-to-run-before-buying-an-alr-screen-in-2026.
In conclusion, don’t fall into the trap of fixating solely on gain numbers or materials. Instead, focus on a holistic approach: matching gain to your projector’s lumen output, room lighting, and seated distance. This nuanced understanding can prevent costly mistakes and lead to truly immersive image quality. Have you ever fallen into this trap? Let me know in the comments.Keeping your projection system in top shape requires the right tools and disciplined habits. One essential area is calibration. I personally rely on the X-Rite i1Display Pro colorimeter because it provides accurate readings and easy calibration for projectors and screens, ensuring consistent color and brightness over time. Regular calibration using this device prevents color drift and uneven illumination, especially important when experimenting with different screen materials or gain settings. To streamline the process, I use CalMAN software, which integrates seamlessly with colorimeters and offers advanced calibration profiles tailored for various screen types, including ALR and high-gain fabrics. Over time, these calibrations preserve image fidelity and prevent issues like washed-out colors or contrast loss. Looking ahead, as 16K content becomes more prevalent, I anticipate calibration tools will evolve to accommodate higher resolutions and wider color gamuts, making ongoing maintenance even more critical.
How do I maintain my setup to stay optimal over the years?
Implement routine inspections—clean your screen with a microfiber cloth to remove dust and fingerprints that can diminish image quality. I recommend using a gentle screen cleaner like the Cosmic Shield lens cleaner, which is designed for delicate surfaces without scratching. Dust buildup on the projector’s lens or screen surface is a common culprit for image degradation. Moreover, secure the projector’s lamp hours and replace bulbs proactively to avoid sudden brightness drops. Many projectors have apps that remind you when lamp maintenance is due, simplifying this process. For room lighting, investing in dimmable LED fixtures with color temperature controls allows you to adjust ambient light to match your screen’s gain and material, helping maintain contrast and color accuracy. I personally use the Philips Hue system, which integrates with smart home setups and enables easy adjustments without disrupting viewing sessions. In terms of long-term results, regularly updating firmware and calibration profiles ensures your system adapts to environmental changes. Looking forward, I believe AI-driven calibration and maintenance tools will offer predictive diagnostics, notifying you of potential issues before they impact picture quality—making setup sustainability more automatic and reliable. To keep your system performing like new, set a quarterly calendar reminder to check and calibrate using your tools and tweak lighting settings as needed. I encourage you to try integrating a calibration device like the i1Display Pro and scheduling routine checks—it’s a small investment that pays dividends by maintaining peak performance and avoiding costly repairs down the line. Incorporating these practices now prepares your setup for the future’s higher resolutions and more demanding content, keeping your home theater experience consistently stunning.
What I Wish I Knew Before Diving Into High-Gain Screens
One of my biggest lessons was realizing that higher gain isn’t always better. I used to chase after the highest gain numbers, believing they would give me the brightest images. But I found out that focusing solely on gain often led to glare and uneven images, especially for viewers sitting off-center. Choosing lower or moderate gain screens, like those around 0.9 to 1.1, actually improved my viewing experience significantly. This insight transformed how I approach screen selection, emphasizing balance over numbers.
Another crucial lesson was understanding how room lighting impacts gain effectiveness. I used to think I needed a super-bright, high-gain screen for my well-lit living room, but I was wrong. Modern screen materials with moderate gain handle ambient light much better, giving me vibrant images without unwanted reflections. The key is matching your screen’s gain with your room’s lighting conditions and your projector’s capabilities, which I learned by reading guides like this resource.
My Humbling Experience with Screen Size and Material Choices
Picking the right screen size can be tricky. I once installed a massive 150-inch screen in a small room, thinking bigger was better. The reality was a blurry, uncomfortable viewing experience. After recalculating seating distance using the 8K rule, I opted for a 120-inch screen, which delivered crisp images and comfortable viewing angles. Pairing this with a screen material that suits my room’s lighting—like a matte grey with around 0.8 gain—made a world of difference. You can explore more about optimal screen gain and size at this guide.
Why Room Lighting Can Make or Break Your Projection Experience
I learned that controlling ambient light is often more important than obsessing over gain. During daytime, I faced glare and washed-out images, even with the best screen material. Installing blackout curtains and using dimmable LEDs transformed my viewing, making contrast and color pop regardless of gain value. Think of your room’s lighting as the secret ingredient—manage it well, and your projection quality soars. Techniques like diffusing ambient light and using reflective surfaces have helped me, and you can read about the best strategies at this article.
Keep Testing and Tuning for the Best Results
Before finalizing any screen setup, I always perform contrast and brightness tests with test patterns. This hands-on approach revealed issues like hot spots and glare that specs alone couldn’t show. Regular calibration using tools like the colorimeter keeps my system sharp and colors true, especially as I experiment with different materials and gain levels. Engaging in this process ensures my viewing experience remains optimal over time, even as content and technology evolve.
Ultimately, my biggest takeaway is that effective projection setup isn’t about chasing the highest gain or the most expensive material. It’s about understanding how all these elements—gain, material, room lighting, and size—work together. When I started viewing my projector and screen as a system rather than isolated parts, my enjoyment skyrocketed. I encourage you to treat your setup with patience and curiosity, and you’ll discover the perfect balance that turns your home into a cinematic haven.