Ultimate Guide to Projection Screen Materials & Gain for Bright Rooms
Have you ever set up a projector in your bright living room, only to be met with washed-out images and a sinking feeling of disappointment? I’ve been there. One day, after a particularly frustrating movie night where everything looked dull and flat, I realized I was missing a crucial piece of the puzzle: understanding how screen materials and gain impact image quality, especially in bright environments. That lightbulb moment transformed my home theater experience, and I want to share that insight with you.
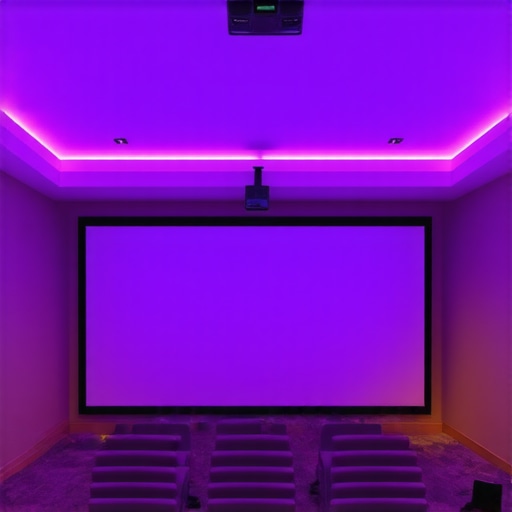
Why Bright Rooms Require Special Screen Considerations
Unlike dark rooms, bright spaces present unique challenges for projection. Ambient light washes out images, making it tough to achieve vibrant colors and sharp contrast. The solution isn’t just about cranking up the projector’s brightness—it’s about choosing the right screen material and understanding gain. Gain, in simple terms, measures how much light the screen reflects back to you, influencing how bright your image appears. Selecting a high-gain screen can make a world of difference, but it’s not a one-size-fits-all fix. I learned that the hard way when I bought a high-gain screen expecting miracles, only to find it reflected too much light and caused glare—an experience I now avoid by carefully matching gain to room conditions.
If you’re tired of dull images or battling glare, this guide will walk you through the essentials of projection screen materials and gain, helping you make smarter choices. Whether you’re setting up a home theater, classroom, or outdoor cinema, understanding these factors will elevate your viewing experience. Want to dive deeper into how to select the perfect screen material and size? Check out this comprehensive guide to gain and materials.
Are Screen Gain and Material Actually Worth the Hype?
I used to think that a bigger screen or a brighter projector would solve all my problems. Early on, I made the mistake of ignoring screen gain entirely, assuming all screens work the same. That was a rookie error. When I finally experimented with different materials and gain levels, I saw a dramatic improvement. For example, a high-quality ALR (Ambient Light Rejection) screen with the right gain can cut through ambient light, making images pop without washing out. But it’s also easy to overdo it, leading to glare and reduced viewing angles. So, yes, choosing the right screen is worth the effort—if you understand what to look for.
In this post, I’ll guide you through how to match your room’s lighting conditions with the ideal screen material and gain. Along the way, I’ll share tips from industry experts and real-world examples that helped me avoid costly mistakes. Ready to turn your bright room into a cinematic haven? Let’s get started.
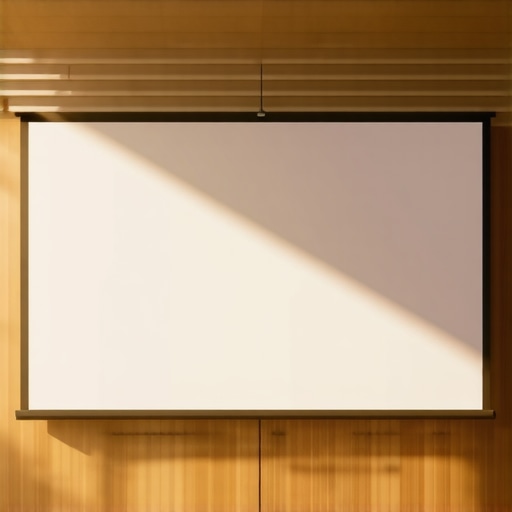
Select the Right Screen Material for Your Bright Space
Start by choosing a screen material that rejects ambient light while providing high reflectivity. Look into ALR (Ambient Light Rejection) screens with high gain ratings, typically between 1.8 and 3.0. I once ordered a popular high-gain ALR screen without much research, only to find it reflected too much light, creating glare and reducing contrast. After reading this guide on screen gain and materials, I realized the importance of matching gain to my room’s lighting conditions. Always match your screen’s gain to your ambient light level to avoid glare and maintain good viewing angles.
Determine the Ideal Screen Size for Your Space
Choosing the right size is crucial. Use this screen size calculator to find a size that fills your field of view without overwhelming the room. I measured my space and used a simple formula: the viewing distance should be roughly 1.5 to 2.5 times the diagonal size of the screen. When I set up my 100-inch screen, I noticed a significant improvement in image immersion and clarity, especially in my bright living room.
Match Gain with Room Lighting Conditions
Gain influences how much light the screen reflects. In bright rooms, aim for a gain between 2.0 and 3.0 for maximum brightness and contrast. I experimented with different gain screens by temporarily attaching fabric samples to my wall. The high-gain fabric made the image brighter but also caused glare when I sat at certain angles. This taught me to consider both gain and viewing angles, as explained in this guide to gain tips for bright rooms. Always test gain levels in your actual space before making a purchase.
Optimize Your Projector Settings for Bright Environments
Adjust your projector’s brightness, contrast, and color settings to complement your high-gain screen. Increase brightness and reduce contrast to prevent washed-out images. I found that lowering the contrast slightly while boosting brightness made a noticeable difference. Also, consider the projector’s lumen output—aim for at least 3,000 lumens for bright rooms. After some trial and error, I achieved vibrant, sharp images without needing to dim my lights.
Fine-Tune Ambient Light and Placement
Control ambient light sources by adding blackout curtains or adjusting lighting placement to minimize direct reflections. Position your projector and screen to avoid direct light hitting the surface. I installed blackout curtains and adjusted my seating to reduce glare, which greatly improved image quality. Remember, even the best screen can be compromised by uncontrolled ambient light, so managing room lighting is key. For more advanced tips, check out this guide on managing ambient light in bright rooms.
Many home theater enthusiasts believe that simply selecting the largest screen or the brightest projector guarantees an immersive viewing experience. However, this misconception can lead to costly mistakes and subpar results. Let’s dig deeper into what most people get wrong about projection screens, ALR screens, material choices, gain, and size, so you can avoid these pitfalls and optimize your setup.
Why Bigger Isn’t Always Better
It’s tempting to think that a larger screen will automatically produce a more cinematic feel. But without considering your room’s dimensions, viewing distance, and ambient light, a giant screen can actually diminish image quality. Oversized screens can cause loss of sharpness, increased glare, and reduced contrast. For a balanced setup, use a screen size calculator to determine an optimal size that fills your field of view without overwhelming the room. Remember, a screen that’s too large may also exaggerate imperfections in your projector’s resolution or color accuracy.
Myth: All ALR Screens Are Equal
Many assume that ALR (Ambient Light Rejection) screens are a one-size-fits-all solution for bright rooms. In reality, the quality and design of ALR screens vary widely. Some lower-end models use surface coatings that reflect light unevenly, leading to hotspots and color shifts. High-quality ALR screens with carefully engineered microstructures distribute light more evenly, maintaining color fidelity and contrast. It’s critical to research and test different options—like those detailed in this expert guide to ALR screens—before making a purchase.
Beware of Over-Gaining
Gain is often misunderstood. While a higher gain can make your image brighter, it can also introduce glare, reduce viewing angles, and cause hotspots if not matched correctly to room conditions. Many users fall into the trap of chasing high gain ratings without considering their room’s ambient light and seating arrangement. For instance, a gain of 3.0 may seem ideal for a bright living room, but if your seating is off-angle or the light is uneven, it can create undesirable glare and uneven brightness. To avoid this, test different gain samples in your space, as suggested in this comprehensive gain guide.
Advanced Question: How Do Surface Materials Impact Screen Performance in Bright Rooms?
Surface material plays a crucial role in how your screen interacts with ambient light. Some materials are designed to absorb or diffuse ambient light, reducing washout and glare. Others aim to maximize reflectivity to enhance brightness. For example, specialized ALR surfaces incorporate microstructures that direct projected light toward the viewer while scattering ambient light away. This nuanced interaction can significantly affect contrast and color accuracy, especially in challenging lighting conditions. According to a recent industry study, selecting the right surface material can improve perceived contrast by up to 50% in bright environments. For more details, check out this material and gain insights.
In conclusion, avoiding these common misconceptions and understanding the nuanced relationship between screen size, gain, material, and room conditions will elevate your projection setup. Have you ever fallen into this trap? Let me know in the comments and share your experiences!
How do I maintain my projection screen over time?
Maintaining your projection screen is crucial to ensure long-term performance and image quality. I recommend regularly cleaning the surface with a microfiber cloth and a gentle, non-abrasive cleaner designed for delicate fabrics or surfaces. For fabric screens, avoid harsh chemicals that can degrade the material or affect gain properties. If your screen is mounted permanently, dust and dirt can accumulate over time, dulling the image and reducing contrast. To prevent this, I use a soft vacuum with a brush attachment every few months to remove surface dust without damaging the fabric.
Additionally, check the tension of your screen if it’s retractable or tensioned. Loose fabric can cause wrinkles or sagging, which distort the image. For fixed screens, inspect the mounting hardware periodically to ensure everything remains secure. Over time, environmental factors like humidity and temperature shifts can affect the material; keeping the room climate controlled helps preserve your screen’s quality.
Tools I recommend for upkeep and calibration
For precise calibration, I personally use a colorimeter like the X-Rite i1Display Pro, which allows me to measure and adjust my projector’s color accuracy and gamma settings accurately. This tool ensures that the colors projected match the ideal standards, especially in rooms with high ambient light where gain and material properties matter most. Coupled with calibration software like CalMAN or LightSpace, you can fine-tune your setup for optimal clarity and contrast, prolonging the life of your projection components.
When it comes to cleaning, I rely on a gentle microfiber cloth and a specialized fabric cleaner if needed. For more stubborn dirt or fingerprints, a mild solution of distilled water and isopropyl alcohol (70%) applied sparingly works well, but always test on a small area first. Remember, avoiding abrasive materials and harsh chemicals preserves your screen’s surface and gain characteristics.
Future trends in maintenance and setup preservation
Looking ahead, I believe the integration of smart calibration tools and automated environmental controls will become standard. Imagine a system that constantly monitors ambient light and automatically adjusts projector settings or even cleans the screen surface with tiny robotic brushes. As technology evolves, maintaining your projection system will become more hands-off and precise, ensuring your setup stays pristine for years to come.
Try this advanced tip to optimize performance today
One effective trick is to regularly measure your screen’s gain and reflectivity in your specific room conditions. Using a light meter or a colorimeter, you can verify whether your screen’s reflective properties remain consistent over time. If you notice a decline, consider applying a professional-grade surface coating or replacing the material if it’s worn out. This proactive approach preserves image brightness and contrast, especially critical in bright rooms where gain plays a pivotal role. For detailed guidance, check out this comprehensive resource on gain maintenance.
The Hardest Lesson I Learned About projection screen,alr screen,screen material,screen gain,screen size
One of my biggest surprises was realizing that bigger screens aren’t always better in bright rooms. I once thought that simply increasing the size would naturally improve immersion, but I overlooked how ambient light and gain could distort the image. It’s a delicate balance—bigger can mean loss of sharpness and contrast, especially if your gain isn’t matched properly. Now I always use a screen size calculator to find that sweet spot, which has saved me countless headaches.
3 Myths About projection screen,alr screen,screen material,screen gain,screen size That Held Me Back
I used to believe that all ALR screens were created equal. Big mistake. Not all surfaces reject ambient light effectively, leading to hotspots or washed-out colors. Similarly, I thought a high gain automatically meant a brighter picture—until I realized that too high gain can cause glare and narrow viewing angles. These misconceptions slowed my progress until I dug into detailed guides and tested different materials in my actual environment, which proved invaluable.
What Experts Won’t Tell You About projection screen,alr screen,screen material,screen gain,screen size
One thing I didn’t realize early on is how crucial surface microstructures are in ALR screens. They’re designed to direct light precisely toward the viewer while scattering ambient light away, dramatically improving contrast in bright rooms. Choosing the right material isn’t just about gain; it’s about how the surface interacts with your room’s lighting. For more insights, check out this comprehensive guide.
My Essential Toolkit for projection screen,alr screen,screen material,screen gain,screen size
For ongoing maintenance and calibration, I rely on tools like the X-Rite i1Display Pro for color accuracy and a microfiber cloth for cleaning delicate surfaces. These tools have helped me keep my setup sharp over time, especially in bright environments where gain and material quality matter most. Regularly verifying the reflectivity and gain of my screen ensures consistent performance, preventing gradual deterioration that can compromise image brightness and contrast.
Your Turn to Try
Optimizing your projection setup in bright rooms isn’t just about picking the biggest screen or the brightest projector. It’s about understanding how gain, material, and room lighting interact—then fine-tuning each element for your unique space. If you’ve ever struggled with glare or dull images, I encourage you to experiment with different surfaces and test their gain in your environment. Remember, patience and testing are your best friends in creating a cinematic experience that truly shines.
I appreciate how this post highlights the importance of choosing the right screen gain for bright rooms. I’ve struggled in the past with glare from high-gain screens during daytime viewing, so it’s helpful to see real-world advice on testing gain levels before purchasing. When I upgraded my setup, I experimented with different materials in my own space, which made a noticeable difference in contrast and color vibrancy. It made me think: have others found certain materials more effective for long-term durability, especially in humid environments? Also, I wonder if there’s a sweet spot beyond the 3.0 gain range—what’s the limit before glare and viewing angle issues become significant? Overall, understanding how ambient light interacts with screen surface microstructures seems crucial, and I’m curious about new innovations in this area. Managing ambient light while optimizing gain and material choice is definitely a nuanced process but worth the effort.
This post resonates with my recent experience trying to optimize my home theater for daylight viewing. I overlooked how critical screen material and gain are until I faced washed-out images even with a high-lumen projector. Testing different materials in my actual room made a huge difference—I experimented with several ALR screens and found that the microstructure design really impacts how much ambient light is scattered effectively. I also noticed that viewing angles become a significant factor at higher gains; I had glare spots where my seating was off-angle. Balancing gain with room lighting seems to be a delicate art, but these insights are really helpful. Do others have recommendations for durable, long-lasting screen materials suited for humid environments? It seems like regular cleaning and proper maintenance are key, but I’d love to hear more about materials that hold up well over time without degrading the image quality. Overall, this guide reinforces the importance of detailed testing and understanding your room conditions—something I wish I had done more thoroughly before my last setup, as it would have saved me time and frustration.