Understanding Screen Size & Gain for Optimal Projection Setup Today
I vividly remember the first time I set up my home theater. Everything looked promising—until I turned on the projector and realized my image was either washed out or too dim to enjoy. It was frustrating, and honestly, I felt like I was chasing ghosts. The breakthrough came when I finally understood the importance of screen size and gain. Since then, my viewing experience has transformed from mediocre to stunning, and I want you to experience the same.
Why Screen Size and Gain Matter More Than You Think
Choosing the right projection screen isn’t just about fitting it into your room or matching your projector’s resolution. It’s a delicate dance of several factors—especially screen size and gain. These two elements dictate how bright, vivid, and immersive your image will be. A misstep here can lead to a dull picture, excessive glare, or even eye strain. Trust me, I’ve made the mistake early on of ignoring gain and ended up with a screen that looked great in theory but terrible in practice. It’s a common pitfall many newcomers face, but it’s one you can avoid with a little knowledge.
Understanding how gain impacts brightness and contrast, and how to choose the right size for your space, can make all the difference. For instance, a high-gain screen can help brighten an otherwise dull room, but too much gain might cause hotspots or glare. Conversely, a low-gain screen offers a softer image but may require a brighter projector or darker room. The key is finding the perfect balance tailored to your specific environment. Want a deeper dive? Check out this guide on projection screen gain.
Ever faced a projector setup that just didn’t look right?
If you’re nodding yes, don’t worry—you’re not alone. Many enthusiasts stumble at this stage because they don’t realize how critical these details are. The good news? Once you grasp the basics of screen size and gain, you’ll be able to set up your system for maximum impact, whether you’re in a bright room or a dark theater.
So, are you ready to stop guessing and start knowing exactly how to optimize your projection setup? Let’s walk through the essential principles that will elevate your home theater experience from good to breathtaking.
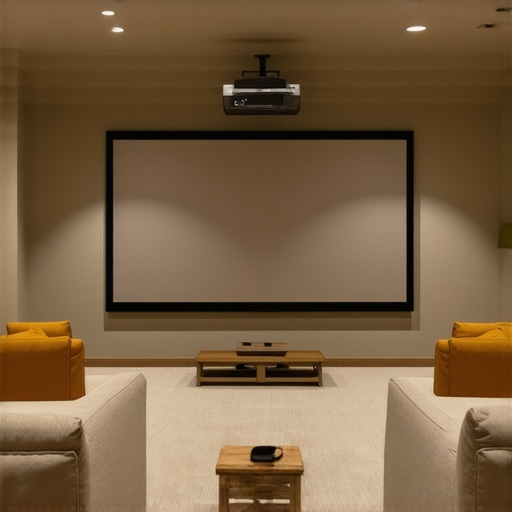
Match Your Screen Size to Your Space
The first step is to determine the ideal screen size based on your room’s dimensions and viewing distance. Think of your screen as a window into your cinematic world; it needs to be proportionate to your space. Use a simple rule: the optimal viewing distance is about 1.5 to 2.5 times the diagonal size of your screen. For example, if your sofa is 8 feet from where you’ll position the screen, aim for a screen size that allows you to sit comfortably within this range. To find the perfect fit, check out this guide on projection screen size and material selection.
Use a Tape Measure and Room Layout
Measure your available space accurately. Mark where your projector will sit and calculate the maximum and minimum screen sizes that fit comfortably without crowding or leaving too much empty space. Remember, too large a screen in a small room can cause discomfort, while too small can diminish immersion. I once set up a 120-inch screen in a cramped room, and the image was overwhelming. After resizing to 100 inches using these principles, my experience improved dramatically.
Control Brightness with Gain
Gain determines how much light the screen reflects back to your eyes. Think of it as the screen’s brightness amplifier. High-gain screens (above 1.5) boost brightness but can create hotspots—bright spots that ruin uniformity. Low-gain screens (around 1.0 or less) offer a softer, more even image but may require a brighter projector or darker room conditions.
When I upgraded to a high-gain screen for my bright living room, I noticed a significant increase in brightness without needing to upgrade my projector. However, I also encountered hotspots when sitting off-center. To prevent this, I chose a screen with a gain around 1.3, balancing brightness and uniformity. For more insights, see this article on projection screen gain.
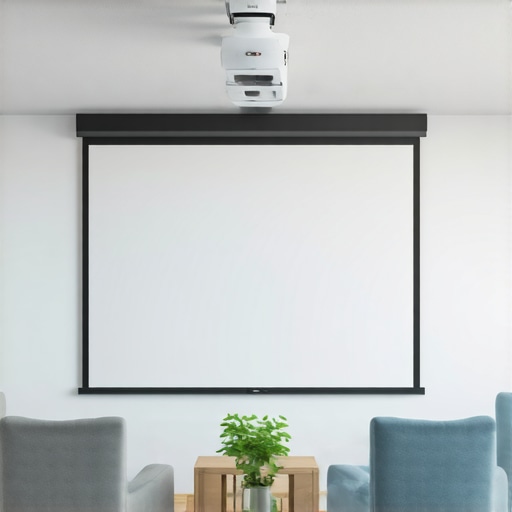
Match Gain to Room Lighting
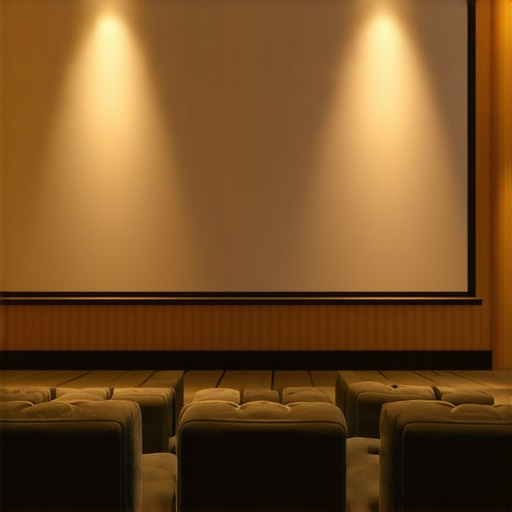
If your room has lots of ambient light, a high-gain screen can help maintain image visibility. Conversely, in a dark room, a low-gain screen preserves contrast and prevents glare. I once tried a high-gain screen in a dim basement home theater—results were stunning, with vivid images and no glare. But in my bright living room, the same high-gain screen caused glare and hotspots. Adjust based on your room’s lighting conditions for optimal results.
Test and Adjust
After selecting your size and gain, set up your projector and screen, then evaluate the image. Sit at your typical viewing distance and check for uniform brightness and contrast. Adjust projector settings, screen position, or even consider a different gain material if necessary. Remember, small tweaks can make a big difference—don’t hesitate to experiment until you find what works best for you.
When I first set up my room, I used a 100-inch screen with a gain of 1.3. I tested different projector modes and found that a slight increase in gain boosted brightness without hotspots. This iterative process is key to perfecting your setup.
Many home theater enthusiasts believe that choosing a high-gain screen will automatically solve brightness issues in bright rooms. While high gain can indeed boost brightness, relying solely on it is a mistake that can lead to uneven images and hotspots. The truth is, understanding the nuanced effects of gain and how it interacts with room lighting is essential for a truly immersive experience. For example, a high-gain screen reflecting too much light can cause glare and reduce contrast, especially if positioned improperly. Instead, I recommend exploring how different gain materials perform in various lighting conditions—check out this guide on gain materials for more insights.
Another common misconception is that bigger screens always mean better viewing. In reality, a screen that’s too large for your space can strain your eyes and diminish image quality, especially if your projector isn’t powerful enough. Many overlook the importance of matching your screen size to your room’s dimensions and viewing distance. Using a simple rule—your seating should be about 1.5 to 2.5 times the diagonal of your screen—can make a huge difference. For detailed tips, see this guide on screen size selection.
What advanced mistakes do even seasoned enthusiasts make with gain and size?
One sneaky trap is ignoring the impact of ambient light and assuming that a high-gain screen will fix all visibility issues. In fact, in rooms with significant ambient light, high gain can cause glare and hotspots that ruin the viewing experience. Conversely, in dark rooms, a low-gain screen maintains contrast and prevents glare. The key is choosing a gain level that matches your room’s lighting environment. Experts recommend considering ALR screen options designed specifically for bright rooms to get the best results. Remember, the goal isn’t just brightness—it’s uniformity and contrast.
Have you ever fallen into this trap? Let me know in the comments.
Maintaining your projection setup over time is crucial to preserving image quality and ensuring your home theater remains a source of enjoyment for years to come. From cleaning routines to choosing the right equipment, I’ve found that a few specific tools and practices make all the difference in keeping everything working smoothly.
Keep Your Screen Spotless for Optimal Clarity
Regular cleaning of your projection screen prevents dust, fingerprints, and smudges from dulling your image. I recommend using a microfiber cloth—gently wiping the surface without applying pressure. For tougher spots, a mixture of distilled water and a mild detergent works wonders. Avoid chemical cleaners that could damage the material. If you want to go the extra mile, investing in a dedicated screen cleaning kit, like the ones recommended by experts at CineGear Guide, can make maintenance easier and more effective.
How do I maintain my projection screen over time?
The key is consistency. Incorporate a gentle cleaning routine every few months and always use soft, non-abrasive tools. Keep the room free of dust and avoid touching the screen with your hands. When not in use, consider covering your screen to prevent accidental damage or dust accumulation. These small habits preserve the material’s reflective qualities and extend its lifespan, ensuring you get the most out of your investment.
Tools I Recommend for a Smooth Setup
Beyond cleaning, calibration tools are essential for long-term performance. I personally rely on a colorimeter like the X-Rite i1Display Pro. It allows me to precisely calibrate my projector’s color and brightness, ensuring consistent image quality. Proper calibration prevents color drift and maintains contrast levels, which are especially important if you upgrade your projector or change room lighting conditions.
Additionally, a good quality leveling laser—such as the Bosch GLL 55—helps in aligning your projector accurately, avoiding skewed images or keystone distortions. Accurate alignment not only improves picture quality but also reduces strain on your equipment, prolonging its life.
What equipment should I consider for ongoing maintenance?
Invest in a dust blower and microfiber cloth for routine cleaning, a calibrated colorimeter for periodic calibration, and a laser level for precise projector setup. Keeping a log of calibration dates and maintenance routines can help you track changes over time and know when to perform more in-depth adjustments or replacements.
Future Trends in Projection Maintenance
As technology advances, we can expect smarter calibration tools integrated with AI that automatically adjust color and brightness settings based on room conditions. This will make maintenance even easier and more accurate, ensuring optimal performance with minimal effort. For now, sticking to proven tools and routines is your best bet for long-term success.
Ready to give your setup a boost? Start with a gentle cleaning routine and invest in a reliable calibration device. These small steps will pay off in stunning images and lasting performance.
The Hardest Lesson I Learned About Projection Setup
One of the biggest surprises I faced was realizing that even high-end projectors can’t compensate for a poorly chosen screen material or size. I once thought upgrading my projector would solve everything, but the image remained dull and inconsistent. The lightbulb moment was understanding that screen gain and size are just as crucial as the projector itself. This taught me that a balanced setup makes all the difference, and rushing this step can lead to costly mistakes.
My Essential Toolkit for Perfect Projection
To optimize my home theater, I rely on tools like a quality colorimeter for calibration, a laser level for projector alignment, and a microfiber cloth for cleaning. These tools have helped me maintain consistent image quality over the years. Trusting these resources is essential because they prevent guesswork and ensure your setup remains perfect, no matter how often you tweak your system.
Don’t Be Afraid to Start
Remember, your home theater is a journey, not a destination. By paying close attention to screen size and gain, and understanding how they interact with your space, you can create an immersive experience that rivals commercial cinemas. Start small, experiment, and most importantly, enjoy the process of transforming your room into a cinematic haven. Your perfect projection setup is within reach—just take that first step today.