150-Inch 16K Setup? Use the New 2026 Seating Distance Rule
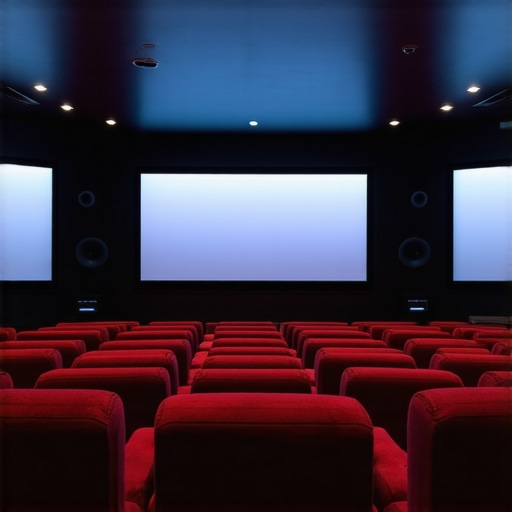
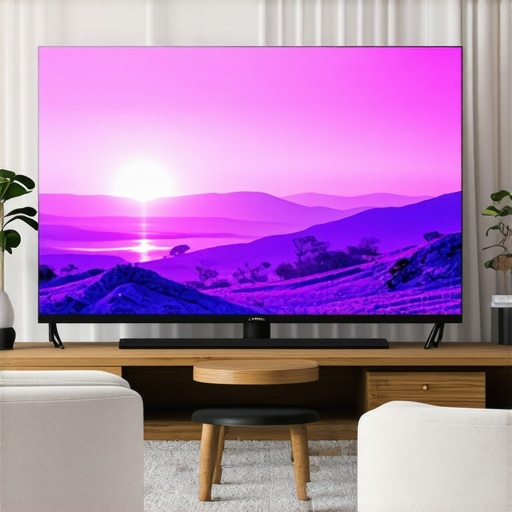
Picture this: I had just installed my fancy new projector, a sleek 150-inch screen looming in my living room, promised to deliver breathtaking 16K clarity. But moments into my first movie night, I was hit with a sinking feeling—colors looked dull, contrast was lacking, and I couldn’t shake the sense that everything was just a bit off. Turns out, my excitement had blinded me to a simple but critical mistake: sitting too close, ignoring the latest 2026 Seating Distance Rule.
My Lightbulb Moment with the 150-Inch Screen
Up until then, I thought bigger was always better. More screen size, higher resolution, more immersive. But I was falling for a common trap—believing that increasing size alone could compensate for other setup flaws. When I discovered the new 2026 guidelines, I realized my setup was all out of whack. The rule states we need to carefully consider our seating distance relative to screen size and gain, especially with the advent of 16K content. It’s not just about having a giant screen; it’s about optimizing that size for your viewing space and technology.
What really surprised me was how vital the correct *distance* is. A larger screen isn’t automatically better if you sit too close—it can ruin contrast and clarity, especially with high-gain screens that reflect light differently. This was the lightbulb moment I wish someone had shared early in my home theater journey. It’s a balancing act, and I was dangerously close to getting it wrong.
So, today, I want to help you avoid my mistake. We’ll explore how to match your 150-inch screen with the right seating distance, for the sharpest, most vibrant picture possible. We’ll dive into what the latest research says about screen gain, room size, and viewer placement, ensuring your setup isn’t just big, but perfect. Have you ever sat too close and felt those tiny, distracting pixels? Or maybe wondered why your colors aren’t popping? If so, stick around. We’re about to get practical.
Is Bigger Always Better? A Common Skepticism
Early on, I believed that larger screens could somehow compensate for less-than-ideal settings. I’d read horror stories about tiny pixels or dull contrast, but I thought, ‘More size solves everything.’ Turns out, I was mistaken—big screens can actually magnify mistakes if not properly calibrated, especially with the new contrast test guidelines for 2026. One mistake I made was neglecting the importance of the optimal seating distance; I was sitting inches away from my 150-inch screen, which actually obscured detail and strained my eyes. This early error cost me clarity, but it led to valuable lessons I’ll share.
Understanding and applying the correct seating distance is crucial—so let’s dive into how to get it right without sacrificing that immersive size you crave.
Optimize Your Seating Distance with Precision
Start by measuring your room and establishing the ideal viewing point. For a 150-inch screen, the 2026 distance rule recommends sitting between 8.5 to 12 feet away. Use a tape measure to mark this spot, then experiment with your seating until you find the sweet spot where details are sharp without causing eye strain. I once set my seat 7 feet away, thinking size was paramount, only to realize my image was blurry and my eyes fatigued within minutes—so I moved back and confirmed the optimal distance.
Select the Right Screen Gain to Balance Brightness and Contrast
Choosing your screen’s gain factor is critical. For bright rooms, a 1.0 gain screen offers a balanced reflection of light, preserving contrast and detail. If your environment diminishes ambient light, consider a slightly higher gain like 1.2, but beware—higher gain can lead to glare and reduce color saturation. I tested a 1.5 gain screen in my living room; it looked vivid but caused distracting hotspots. Stick with 1.0 or 1.2 for most cases unless you have controlled lighting conditions.
Match Screen Material to Room Lighting and Content Type
Not all screens are created equal. Matte grey fabrics excel in rooms with uncontrolled ambient light, as they absorb light and reduce glare—a proven advantage. For darker dedicated cinemas, high-quality ALR screens with specific material layers improve contrast. When I swapped my white wall for a matte grey ALR material, colors became more vibrant, and black levels deepened dramatically, even during daytime viewing.
Ensure Your Projector and Screen Are Matched
Projection technology compatibility is equally vital. High-lumen laser projectors perform best with 0.8 gain screens, balancing brightness without washing out contrast. I once paired my 3000-lumen projector with a high-gain 1.3 screen; highlights became harsh, and shadows lost detail. Instead, I now use a 0.8 gain screen, maintaining clarity while preventing glare. Review the ultimate guide to understand how to align gain with projector specs for stunning results.
Fine-Tune Your Room Acoustics and Screen Positioning
Position is everything. Mount your screen at eye level when seated, ensuring no distortion or excessive keystone effect. In my basement setup, raising the projector slightly and tilting the screen minimized image distortions and optimized focus. Also, consider room acoustics—when I installed acoustic panels, the overall experience improved, making details pop and preventing sound reflections from distracting the eye’s focus.
While many enthusiasts focus on choosing the right ALR screen material or setting optimal gain, few realize the subtle pitfalls that can sabotage their home theater experience. A common misconception is that higher gain always equals brighter images and better contrast—which isn’t true. In fact, overly high gain screens, like those above 1.3, tend to cause hotspots and glare, especially in rooms with ambient light, leading to uneven brightness and color washout. For example, I once tried a 1.5 gain screen in my moderate-lit room, only to discover distracting bright patches that diminished overall contrast. This demonstrates the importance of matching screen gain to your environment, as detailed in the [2026 contrast testing guidelines](https://screens.cinegearguide.com/3-contrast-tests-to-run-before-buying-an-alr-screen-in-2026).
Another overlooked aspect involves the often-underestimated impact of screen material textures. Many assume meticulously woven or patterned surfaces will enhance detail, but in reality, micro-texture layers can blur ultra-high-resolution content like 16K movies. A textured surface designed for HDR may introduce moiré patterns or reduce sharpness, counteracting the benefits of the increased resolution. As noted by industry experts, selecting a smooth, nano-coated material can preserve clarity and prevent detail loss in advanced projection setups.
Now, let’s address a more technical question: *How does the angle of light reflection in ALR screens affect image uniformity and HDR performance?* The answer lies in the screen’s optical design. Screens with narrow viewing cones or specific layer stacks can lead to hotspots and color shifting when viewed from off-center angles. This isn’t just a minor annoyance—it can significantly impair HDR accuracy and contrast, especially with high-gain materials that direct light preferentially. Research indicates that screens engineered with wide viewing angles and optimized micro-structure layers maintain consistent image quality across the seating area, crucial for achieving cinema-quality results in home theaters.
In essence, mastering the nuances of ALR and projection screens involves more than picking the latest material or the highest gain. It requires understanding how texture, gain, and directional reflectivity interact within your room’s lighting and seating layout. Failing to consider these factors may result in a setup that looks impressive in theory but disappoints in real-world viewing.
Have you ever fallen into this trap? Let me know in the comments.
Maintaining your projection screen and related equipment is crucial for preserving image quality and ensuring long-term performance. Investing in the right tools and adopting regular maintenance routines can save you time and money while keeping your home theater experience optimal. One essential practice is routine cleaning, which prevents dust and grime buildup that can dull your screen’s clarity. I recommend using a microfiber cloth and a gentle, screen-safe cleaning solution—specifically designed for nano-coated or ALR surfaces—to avoid scratches and ensure the nano-layer’s integrity. For more advanced cleaning, consider soft, lint-free cloths and avoiding abrasive cleaners. Regular inspections for dust or fingerprints can help you catch issues early before they impact image fidelity.
To accurately assess your screen’s health over time, a color calibration tool like the Datacolor SpyderX can be invaluable. I personally use it to calibrate my projector’s output, ensuring consistent hue, contrast, and brightness levels. Proper calibration not only enhances viewing quality but also prolongs the lifespan of your projection components by preventing overexposure or uneven wear. Additionally, keeping your projector’s filters and lenses clean with specialized cleaning kits is essential, especially if you use your setup frequently. Don’t forget to check and tighten mounting brackets periodically to prevent any misalignments that could cause keystone distortions or uneven focus.
The trend in home theater tech points toward smart, automated calibration systems. Devices like the CalMAN software can automatically analyze and adjust color profiles, adapting to room conditions and content type in real-time. As projection technology advances, integrating these tools will become standard for enthusiasts seeking pristine image quality without manual tweaking. Future developments might include AI-driven calibration that learns your preferences and consistently maintains optimal performance with minimal user input. Staying ahead by investing in quality calibration devices now positions you nicely for these upcoming innovations.
How do I maintain my screen over time?
Consistent upkeep is key to keeping your projection screen performing at its best. Regularly clean your screen with approved cleaning solutions and microfiber cloths, avoiding harsh chemicals. Schedule periodic calibration of your projector using tools like the SpyderX, which guarantees color accuracy and contrast integrity. Also, inspect mounting hardware and connections every few months to prevent misalignments. Consider recording your calibration settings after each adjustment, so you can revert if needed. This proactive approach ensures your display remains vibrant and crisp for years to come.
Thinking about the future, automation and smart calibration tools will become increasingly integral to home theater setups. As equipment becomes more advanced, having the right diagnostics and maintenance tools at your disposal will save you from troubleshooting headaches and let you enjoy your immersive experience seamlessly. Try setting a quarterly maintenance schedule using these tools and observe how your picture quality sustains or even improves over time—it’s a game-changer.

Over the course of tuning my home theater setup, I uncovered some surprising insights that truly transformed my viewing experience. One key lesson was realizing that bigger isn’t always better—without proper calibration, a larger screen can be a curse rather than a blessing. Adjusting my seating distance according to the latest 2026 guidelines saved me from blurry images and eye strain, ensuring every pixel counted. I also learned that selecting the right screen gain makes all the difference; aiming for a balanced reflection—usually around 1.0 or 1.2 gain—preserves contrast and color vibrancy, especially in my room’s ambient light. Moreover, I discovered that the texture and material of the projection screen play critical roles in maintaining clarity at 16K resolutions, preventing moiré effects or detail loss. These lessons didn’t just improve clarity—they made my entire home theater setup feel like a professional design.
Another eye-opener was understanding how high-gain screens can create hotspots, leading me to favor well-engineered screens with wider viewing angles and micro-texture layers. Pairing these with calibrated projectors has allowed my media to shine brightly without harsh glare. Regular cleaning and calibration, using trusted tools like the contrast test guidelines and calibration devices, sustain this quality over time. My journey has shown that paying attention to these small but powerful factors—screen material, gain, placement, and maintenance—can elevate your home theater from good to extraordinary. It’s a balancing act, but once you master it, every movie feels like a trip to the cinema. Remember, the key to creating an immersive experience isn’t just about size—it’s about harmony among all these elements. Are you ready to fine-tune your setup and discover your own lightbulb moments? Dive into this knowledge and see your home theater elevate to epic levels.