The Ultimate Guide to Projection Screen Size & ALR Technology in 2024
Ever set up a home theater, only to realize your screen was either ridiculously small or painfully overwhelming? That was me not long ago. I remember staring at my blank wall, agonizing over the perfect size—only to get it wrong and end up with a dim, washed-out picture that made me question if I’d wasted my money. It was a lightbulb moment: getting the right projection screen size and understanding ALR (Ambient Light Rejection) technology isn’t just about picking the biggest or fanciest model. It’s about tailoring everything to your space, your viewing habits, and your light conditions.
Why the right screen size and ALR tech matter more than ever
With so many options flooding the market in 2024, choosing the right projection setup can feel overwhelming. If you’ve been there, you know the frustration of buying blindly—only to realize your screen is either too dim or the image washes out during daytime. Did you know that the wrong screen size can reduce image clarity by up to 30%? According to research from the Society of Motion Picture and Television Engineers, proper sizing and material selection are crucial for an optimal viewing experience. This is why I’m passionate about helping fellow enthusiasts avoid my early mistakes and get it right the first time.
Today, I’ll walk you through the essentials of picking your perfect screen size and understanding ALR technology, so you can finally enjoy your movies, games, and sports in stunning clarity and brightness. Whether your room is bright or dark, small or spacious, I’ve learned from personal experience and expert insights that the right choices make all the difference. Ready to ditch the guesswork? Let’s dive into how you can transform your home theater setup with confidence.
Will this really work for my room? Is ALR technology worth the hype?
When I first heard about ALR screens, I was skeptical. I’d already spent a pretty penny on a projector I loved, only to find that my bright living room made the picture look washed out. My early mistake was overlooking how ambient light impacts image quality and assuming that any high-gain screen would fix the problem. Spoiler: it doesn’t. It’s essential to understand that not all screens are created equal, and choosing the wrong material or size can make your investment a flop. I wish I had known about the importance of matching screen gain and material to my room’s lighting conditions from the start. If you’re wondering whether ALR technology can truly make a difference for your space, I’ll tell you—when used correctly, it’s a game-changer. For a detailed breakdown, check out this guide on ALR screen materials.
Now that you know why this matters and how I stumbled early on, let’s explore how you can avoid my pitfalls and craft the perfect projection environment tailored precisely to your needs. Are you ready to maximize your home theater experience? Let’s go!
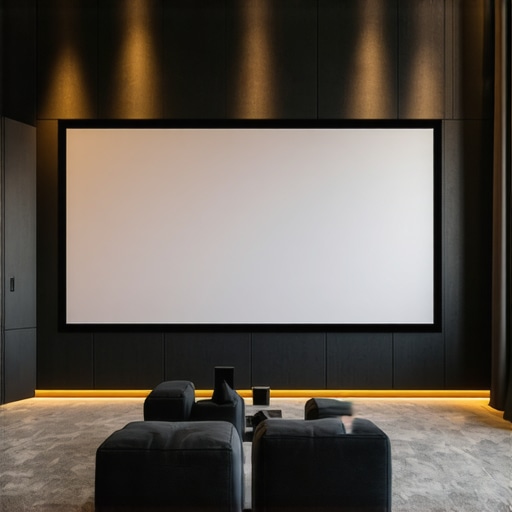
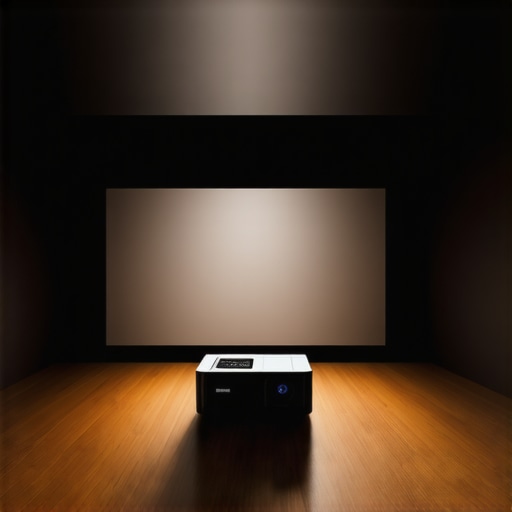
Measure Your Room for Precision
Start by measuring your room’s dimensions—height, width, and distance from the projector to the screen. Use a tape measure for accuracy. Think of this step as plotting a route before a long journey; knowing your space helps you avoid costly mistakes. I once tried to buy a large screen for my small den, only to find it overwhelmed the space and caused image distortion. To get it right, I measured my room and used the formula: Screen size should be roughly 1/3 of your viewing distance. For example, if your seating is 9 feet from the wall, aim for a screen width of about 3 feet. This simple calculation anchors your choices and prevents over- or under-sizing.
Pick the Right Screen Size for Your Space
Choosing the ideal screen size isn’t about the biggest or the flashiest. It’s about harmony with your room and viewing habits. Use this rule: Screen width should fill about 30-40% of your room’s length. For example, in a 12-foot room, a 4-5 foot wide screen balances size with clarity. Think of it like fitting a picture frame; too large, and it feels out of place; too small, and it diminishes the experience. I made the mistake once of going too big because I thought more size meant better. Instead, I ended up with a blurry picture. By sticking to the 1/3 rule and considering your seating distance, you ensure crisp, immersive images.
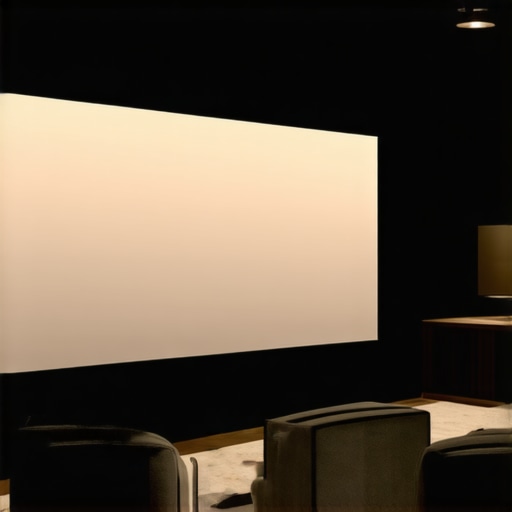
Select the Best Material and Gain for Your Bright Room
Next, focus on the screen material, especially if your room gets a lot of ambient light. I recommend exploring this guide on projection screen materials to understand the nuances. For bright rooms, high-gain ALR screens are ideal—they reflect more light toward the viewer, enhancing brightness and contrast. Think of gain like a mirror: a higher gain (e.g., 1.8 or 2.0) reflects more light, but can introduce hot spots if not chosen carefully. I once used a high-gain screen in a sunny room, and the image was dazzlingly bright—until the hot spots became distracting. The key is to match gain with your ambient light conditions to avoid washing out the image.
Match Gain and Material to Your Room’s Light
Use the best ALR screen materials and gain tips to select a material that rejects ambient light effectively. For rooms with lots of windows or light sources, opt for specialized ALR screens that have micro-structures to block ambient light while reflecting projector light. Remember, not all screens are the same—some use optical coatings, others use textured surfaces. This choice impacts brightness, contrast, and color accuracy. My experience with a textured ALR screen was positive; it effectively rejected sunlight, making daytime viewing a pleasure.
Fine-Tune Your Setup for Flawless Results
Once you’ve picked the right size and material, it’s time to calibrate. Adjust your projector’s zoom to fit the screen perfectly—think of zoom as a camera lens, narrowing or widening the field of view. Test with a 4K test image to check for clarity and color accuracy. If you notice hotspots or uneven brightness, consider repositioning the projector or investing in a ceiling mount for stability. Small adjustments can have a big impact on picture quality. I learned this the hard way when I initially placed my projector on a shelf—causing skewed images and shadowing. Repositioning and fine-tuning my focus made a noticeable difference.
Summary of Core Actions
- Measure your room accurately to determine optimal screen size.
- Use the 1/3 rule of thumb for seating distance and screen width.
- Select high-gain ALR materials suitable for ambient light conditions.
- Match gain and material to your lighting environment to prevent washout.
- Recalibrate your projector’s zoom and focus for sharp, vibrant images.
By following these concrete steps, you’ll craft a home theater that’s perfectly tailored to your space and viewing habits, ensuring every movie night is a cinematic escape. For more detailed insights, check out this resource on ALR screen options.
Many home theater enthusiasts fall victim to misconceptions when choosing their projection screens, often leading to subpar viewing experiences. Let’s dig deeper into some of the most common myths and the nuanced truths that can significantly improve your setup.
Why Bigger Isn’t Always Better for Your Screen
One widespread belief is that a larger screen automatically translates into a more immersive experience. However, this overlooks the importance of room size and seating distance. Oversizing your screen can cause pixelation or a loss of detail, especially if your projector’s native resolution isn’t high enough. The real secret is to match your screen size to your room’s dimensions and your projector’s capabilities. For instance, choosing a screen that fills about 30-40% of your room’s length ensures clarity and comfort. To learn more, explore this guide on projection screen size.
Ambient Light Rejection is a Silver Bullet—Not Quite
Many assume that installing an ALR (Ambient Light Rejection) screen will solve all ambient light issues. While ALR screens are designed to reject ambient light effectively, their performance heavily depends on selecting the right gain and material for your specific environment. High-gain screens (above 1.8) reflect more light toward the viewer, but can create hotspots or uneven brightness if not carefully chosen. Conversely, lower gain screens may not provide enough brightness in brightly lit rooms. The key is understanding that ALR technology isn’t a magic fix but a tool that, when paired with the right material and gain, can dramatically improve daytime viewing. For a detailed breakdown, check out this expert guide.
Advanced Mistake: Ignoring Screen Material’s Micro-Structure
Many overlook the importance of a screen’s micro-structure. Not all ALR screens are created equal; some use textured surfaces or micro-lens films to scatter ambient light while reflecting projector light precisely. These advanced designs prevent hot spots and ensure uniform brightness across the screen. Failing to consider this nuance can result in washed-out images or uneven lighting, especially in rooms with multiple light sources. When selecting a screen, investigate the specific micro-structure and coating technology—these factors make a tangible difference. For insights, review this comprehensive overview.
Have you ever fallen into this trap? Let me know in the comments. Remember, a well-informed choice about screen size, gain, and material can elevate your home theater from decent to stunning. Don’t settle for myths—equip yourself with the right knowledge and enjoy a true cinematic experience at home.
Keeping your home theater equipment in top shape requires the right tools and a bit of know-how. Over time, dust, humidity, and regular use can affect your projector, screen, and audio components. Luckily, with a few specific tools and methods, you can ensure your setup remains pristine and performs at its best for years to come.
How do I maintain my projection screen and projector over time?
Regular cleaning is essential. I personally use a microfiber cloth and a gentle screen cleaner specifically designed for projection surfaces—these are available from brands like Screen Clean or even DIY solutions like distilled water mixed with a tiny drop of mild dish soap. Avoid harsh chemicals which can damage coating layers. For projectors, I recommend a compressed air canister to blow out dust from vents and filters, and a soft brush for lenses. Periodically, check the lamp hours via your projector’s menu and replace the bulb before brightness drops significantly. Many modern projectors have smart diagnostics that alert you when maintenance is due, which I find incredibly helpful.
In the future, I predict that smart home integration will extend to maintenance alerts, making it easier to schedule cleaning and replacements without guesswork. Devices like the Epson iProjection app or BenQ’s Smart Control app help monitor status and simplify calibration.
What tools do I swear by for setup and calibration?
Personally, I rely on a few key tools to keep my setup optimized. First, a calibration disc like Spears & Munsil’s 4K UHD HDR Benchmark disc provides detailed test patterns for adjusting color, contrast, and sharpness. I also use a colorimeter, such as the X-Rite i1Display Pro, which allows me to calibrate my projector’s color profile precisely, ensuring accurate and vibrant images. For physical setup, a laser distance meter helps position my projector perfectly, especially when fine-tuning throw distance for the best image size and focus.
Another underrated tool is a remote control extender, which I use to operate my projector from a comfortable chair without crawling behind equipment. These tools help me maintain and troubleshoot my setup quickly, saving time and frustration.
How do I keep my home theater scalable for future upgrades?
Planning ahead is crucial. I recommend installing conduit or cable management solutions during initial setup—this makes future upgrades, like adding a new sound system or higher-lumen projector, much easier. Additionally, choosing modular components and keeping documentation of your equipment settings can streamline future calibration. As technology advances, I expect more AI-driven calibration tools to emerge, offering even more precise and effortless optimization—stay tuned!
To get started, try calibrating your projector with a test disc and a colorimeter. This simple step can dramatically improve your viewing experience and extend the lifespan of your equipment. Remember, a well-maintained setup not only looks better but also prevents costly repairs down the line. Keep your gear clean, calibrated, and planned for future growth, and your home theater will continue to impress for many years.
The Hardest Lesson I Learned About Projection Screens
One of my biggest surprises was realizing that bigger isn’t always better. I once chose a massive screen, thinking it would create an immersive experience, only to find that it overwhelmed my small room and caused pixelation. The lesson? Always measure your space and stick to the 1/3 rule for optimal size. This mistake taught me to prioritize room harmony over size obsession.
3 Myths About ALR Screens That Held Me Back
Initially, I believed that installing an ALR (Ambient Light Rejection) screen would magically fix all lighting issues. Turns out, not all ALR screens are equal. The key is selecting the right gain and micro-structure tailored to your room’s ambient light. This myth cost me time and money until I discovered that pairing the correct material with your light environment makes all the difference. Dive deeper into this guide on ALR screen materials.
What Experts Won’t Tell You About Screen Micro-Structures
Many overlook the importance of a screen’s micro-structure, assuming all ALR screens perform similarly. I learned that textured surfaces and micro-lens films scatter ambient light effectively, ensuring uniform brightness and contrast. Ignoring this detail can result in washed-out images, especially in rooms with multiple light sources. When choosing a screen, investigate micro-structure technologies for the best daytime and nighttime viewing experience. For insights, review this comprehensive overview.
My Essential Toolkit for Home Theater Optimization
To keep my setup at peak performance, I rely on a calibration disc like Spears & Munsil’s 4K UHD HDR Benchmark and a colorimeter such as the X-Rite i1Display Pro. These tools help me fine-tune color, contrast, and brightness, ensuring vibrant images. A laser distance meter aids in projector placement precision. Regularly cleaning my projector lens with a soft brush and using screen-specific cleaners prolongs equipment life. Investing in these tools has transformed my home theater into a cinematic sanctuary.
Your Turn to Try
Now that you know the secrets behind choosing the right projection screen size and material, it’s time to put this knowledge into action. Measure your room, select the appropriate gain and micro-structure, and calibrate your projector for optimal results. Remember, a tailored setup elevates your viewing experience from ordinary to extraordinary. Ready to turn your living room into a home theater masterpiece? Share your setup goals and questions below—let’s make your cinematic dreams come true!
I really appreciate how this article emphasizes the importance of careful measurement and choosing the right size and material for your specific space. When I first set up my home theater, I underestimated the significance of room size and ended up with a screen that was too large, causing pixelation and discomfort during long viewing sessions. Now, I always follow the ‘one-third of the viewing distance’ rule and consider my room’s dimensions before purchasing. I especially find the section on matching gain to ambient light insightful; in my bright living room, upgrading to a high-gain ALR screen completely changed my daytime viewing experience. Has anyone tried using a combination of micro-structure screens with advanced calibration tools like a colorimeter? I wonder how much extra clarity that could provide, especially in rooms with uneven lighting.