Projection Screen Material & Size Tips: Find Your Perfect ALR Screen Today
My Journey to the Ideal Projection Screen: A Personal Story
As someone who loves transforming my living room into a cozy home theater, I’ve gone through quite a bit of trial and error in selecting the right projection screen. I vividly remember the day I decided to upgrade my old screen, eager to experience brighter and sharper images. It was a game-changer that made me realize how crucial the right screen material and size are for an optimal viewing experience.
Understanding Projection Screen Materials: What Works Best in Bright Rooms?
One thing I quickly learned is that not all screen materials are created equal. For my setup in a room with lots of ambient light, I needed a material with high gain to reflect more light and improve brightness. I found that **ALR (Ambient Light Rejection) screens** with specialized surfaces significantly enhanced my viewing experience, even during the daytime. After researching, I discovered that materials like **micro-etched surfaces** can offer excellent contrast and brightness, making dark scenes pop without washing out in bright environments.
How Do I Choose the Right Screen Size for My Space?
Size matters more than I initially thought. I once tried to maximize my screen size without considering my room’s dimensions, which resulted in a cramped viewing area. Now, I rely on guidelines from experts, such as those at CineGear Guide, to find the perfect balance. My rule of thumb is to select a screen size that fills a good portion of my field of view without overwhelming the space. For my room, I settled on a 120-inch screen, which offers an immersive experience without feeling too large.
What Are the Key Factors to Consider When Picking ALR Screen Materials?
When I was choosing my ALR screen, I looked into gain levels, viewing angles, and surface textures. High gain screens reflect more light but can have narrower viewing angles, so I opted for a medium gain around 1.3 for a wider sweet spot. The textured surfaces, like those with a micro-etched finish, help diffuse light evenly, preventing hot spots and maintaining image clarity from different seats. For those interested, I recommend exploring options on CineGear’s detailed guide.
Why Is It So Important to Match Screen Material and Room Lighting?
This question often puzzled me at first. The key is that the right combination can drastically improve contrast and brightness, especially in rooms with ambient light. If your space isn’t fully dark, selecting a high-gain, light-rejecting material is essential. It’s worth noting that the wrong choice might lead to washed-out images or reflections that glare into your eyes. I’ve learned that understanding your room’s lighting conditions helps in choosing a screen that complements your environment perfectly.
If you’re contemplating your own setup, I encourage you to share your experiences or ask questions below. Choosing the right projection screen isn’t just a technical decision—it’s about creating a space where movies come alive and every viewing feels personal.
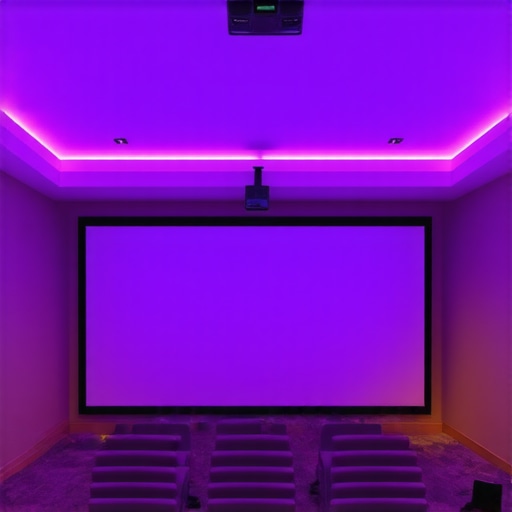
Unlocking the Secrets to Perfect Projection in Bright Rooms
One of the most overlooked aspects of home theater setup is the intricate relationship between screen material and ambient lighting. As I delved deeper into optimizing my setup, I realized that understanding how different materials interact with various lighting conditions is crucial. For instance, high-gain ALR screens with micro-etched surfaces can reflect more light, but their effectiveness depends on the room’s brightness level. This nuanced balance can significantly influence contrast and color accuracy, especially in spaces where controlling ambient light is challenging. For a comprehensive understanding, exploring the latest ALR screen innovations provides valuable insights into selecting the best materials tailored for bright environments.
How Does Room Lighting Shape Your Projection Choice?
Room lighting isn’t just a background factor; it fundamentally determines which screen material will deliver the best image quality. If your space has large windows or frequent daylight, opting for a high-gain or light-rejecting screen becomes essential. Conversely, darker rooms allow for more flexible choices, including matte surfaces with lower gain for wider viewing angles. The key is to match your environment with the appropriate material to prevent washed-out images or glare issues. For example, in bright rooms, a specialized ALR screen with a textured micro-etched surface can reject ambient light effectively, maintaining vivid contrast and color depth. For more detailed guidance, I recommend reviewing expert recommendations on screen materials.
What Are the Practical Steps to Fine-Tune Your Projection Environment?
Beyond selecting the right screen material, optimizing your room setup involves strategic adjustments. Implementing blackout curtains, controlling light sources, or using dimmable lighting can dramatically improve projection quality. Additionally, positioning your projector at the correct distance and angle ensures uniform image distribution, especially when using screens with specific gain properties. Regular calibration of brightness, contrast, and color settings further enhances the viewing experience. Remember, the goal is to create a harmonious environment where the screen and room lighting complement each other seamlessly. For detailed tips on calibrating your system, check out the comprehensive calibration guide.
If you’re passionate about perfecting your home theater, I invite you to share your challenges or success stories below. Improving your projection setup is an ongoing journey—every tweak brings you closer to cinematic perfection.
Beyond the Basics: Personal Reflections on Advanced Projection Screen Choices
Over the years, my journey into optimizing home theater setups has taken me through a maze of trial and error, especially when it comes to selecting the ideal projection screen material that can handle complex lighting conditions. I’ve come to realize that understanding the deeper nuances of screen technology—such as micro-etched surfaces or specialized light-rejecting coatings—can make a significant difference in achieving cinema-quality images in less-than-ideal environments.
Why Do Some Screen Materials Perform Better in Dynamic Lighting Conditions?
It’s fascinating how certain materials like **micro-etched ALR screens** can outperform traditional matte surfaces, especially in rooms with fluctuating ambient light. These surfaces are engineered to scatter light evenly and reject projected light from specific angles, which helps maintain contrast and color fidelity. I remember experimenting with different screens in my living room, and the results were clear: micro-etched surfaces provided a more consistent image, even during daytime viewing when sunlight peeked through the blinds. This deeper understanding came from exploring technical resources such as CineGear’s detailed analysis on how gain and surface texture influence performance.
How Can I Fine-Tune My Room Environment for Optimal Projection?
Achieving a perfect projection isn’t just about choosing the right screen; it’s also about how I manage my space. I’ve found that strategic placement of blackout curtains, careful positioning of the projector, and even the use of dimmable smart lighting can dramatically enhance image quality. It’s almost like creating a dedicated cinema environment within my home—where every element works in harmony. Regular calibration of brightness, color, and contrast settings is equally essential, and I’ve learned that these adjustments are ongoing processes, not just one-time setups. For those interested in getting more technical, I recommend exploring comprehensive calibration techniques to refine your setup further.
What Are the Most Overlooked Aspects of Screen Material and Room Lighting Integration?
One aspect I wish I had understood earlier is how critical the angle of viewing and light diffusion are in relation to screen texture. A textured surface, like micro-etched screens, diffuses ambient light more effectively, reducing hot spots and glare. This can be especially beneficial if you have multiple seating areas or a room with irregular lighting sources. Integrating knowledge from authoritative sources such as top ALR materials guide has helped me appreciate how the right combination of gain, texture, and room lighting can elevate the entire viewing experience.
Sharing your own experiences or questions about setting up a home theater can be incredibly valuable. Every space is unique, and sometimes the smallest adjustment can yield remarkable results. I invite you to comment below or explore further to discover how you can tailor your environment for cinematic perfection.
Embracing the Complexity: The Art and Science of Projection Setup
In my ongoing quest for the perfect home cinema, I’ve come to see that mastering projection isn’t solely about technology—it’s a delicate dance between science and personal preference. Balancing gain levels, surface textures, and ambient lighting requires both technical understanding and a creative touch. As I continue to experiment, I realize that each room has its own personality, and what works wonders in one space might need adjustment in another. Exploring detailed guides like these resources has empowered me to make more informed decisions, transforming my setup from basic to extraordinary.
Refining My Approach: The Intricacies of Micro-Etched Surfaces and Light Rejection Coatings
As I delved deeper into the nuances of high-end projection screens, I discovered that micro-etched surfaces and specialized light-rejection coatings could significantly elevate image quality in challenging lighting conditions. These advanced materials are engineered to scatter ambient light uniformly, maintaining contrast and color fidelity even during daytime viewing. My exploration into these technologies was inspired by detailed analyses like those found in CineGear’s comprehensive review, which underscores how micro-etching can diffuse ambient light more effectively than traditional matte surfaces. Implementing these solutions in my setup involved meticulous calibration and strategic room modifications, transforming my theater into a space where cinematic magic persists regardless of external lighting influences.
The Art of Ambient Light Management: Beyond Basic Room Treatments
While selecting the right screen material is crucial, I found that mastering ambient light management is equally vital. My journey led me to experiment with layered blackout curtains, smart dimmable lighting, and strategic furniture placement to minimize light spill and glare. These adjustments, though seemingly simple, profoundly impact the overall viewing experience. I learned that integrating these elements with a high-gain, micro-etched ALR screen creates a synergy that preserves vivid contrast and accurate colors. For those seeking to optimize their environment, I highly recommend exploring techniques outlined in this expert guide, which offers practical insights on harmonizing room lighting with premium screen materials.
How Can I Tailor My Setup for Fluctuating Ambient Light Conditions?
This question has been central to my quest for cinematic perfection. Adapting to fluctuating lighting involves a combination of dynamic room treatments and technological solutions. I integrated motorized blackout shades and installed intelligent lighting systems that adapt to the time of day, effectively controlling ambient illumination. Additionally, choosing a screen with a gain profile that matches my specific lighting conditions—such as a medium gain around 1.3—ensured optimal light reflection without sacrificing viewing angles. Regular calibration sessions, focusing on contrast and color accuracy, further refined my setup. For a deeper understanding of these adaptive strategies, I recommend reviewing this detailed explanation of gain and surface options tailored for dynamic lighting scenarios.
What Are the Hidden Benefits of Combining Advanced Screen Materials with Acoustic Treatments?
One aspect I didn’t initially consider was how acoustic treatments complement high-performance projection screens. Sound quality is often overlooked but plays a crucial role in creating an immersive experience. I experimented with diffusers and absorbers that not only improve audio clarity but also reduce reflections that can interfere with image quality. This holistic approach—pairing micro-etched ALR screens with soundproofing—has transformed my room into a true cinematic sanctuary. Exploring resources like industry insights has helped me understand the symbiotic relationship between visual and auditory excellence, allowing me to craft a truly balanced environment.
Join My Journey: Share Your Experiences and Discoveries
Navigating the complexities of high-end projection setups is both a technical challenge and a personal endeavor. I invite you to share your own insights, breakthroughs, or questions as you refine your theater space. Whether it’s experimenting with advanced materials, optimizing ambient light, or integrating acoustic enhancements, every step brings you closer to a cinematic experience that’s uniquely yours. Feel free to connect and exchange ideas—together, we can elevate our home theaters to professional standards. For more in-depth discussions and tailored advice, explore my ongoing journey and share your thoughts below.
Things I Wish I Knew Earlier (or You Might Find Surprising)
1. The Power of Surface Texture
Initially, I underestimated how much the surface texture of a projection screen impacts image quality, especially in bright rooms. Micro-etched surfaces, for example, scatter ambient light more effectively, helping to preserve contrast even when the lights are on. Discovering this was a game-changer for my setup, making me realize that surface finish isn’t just about aesthetics but plays a crucial role in performance.
2. Room Size and Screen Gain Are a Delicate Balance
I used to think bigger was always better, but I found that high-gain screens in large rooms can cause hotspots and glare. Understanding that a medium gain around 1.3 often offers the best compromise helped me refine my choice. It’s all about matching gain to your room’s size and lighting conditions—something I wish I had grasped earlier.
3. Ambient Light Rejection (ALR) Matters More Than I Thought
When my room got brighter, I believed I’d need to darken the space completely. Instead, I learned that ALR screens with specialized coatings can reject ambient light, maintaining vivid contrast and color. This realization saved me from blackout drapes and transformed my daytime viewing experience.
4. Proper Calibration Is Critical for Bright Environments
No matter how good the screen, if the projector isn’t calibrated correctly, images can look washed out or dull. Fine-tuning brightness, contrast, and color settings consistently makes a noticeable difference—something I wish I’d prioritized from the start.
5. The Room’s Lighting Setup Can Be Optimized for Better Results
Strategic placement of blackout curtains, dimmable lights, and even furniture positioning can significantly improve projection quality. These small adjustments, combined with the right screen material, create an immersive cinematic experience without extensive renovations.
6. Investing in Quality Materials Pays Off in the Long Run
While it’s tempting to go for cheaper options, I’ve learned that high-quality ALR screens with micro-etched surfaces last longer and perform better over time. The initial investment is worth the enhanced viewing experience and durability.
Resources I’ve Come to Trust Over Time
- CineGear Guide: Their detailed analyses on ALR screen technology and gain options helped me understand what to look for in a high-performance projection screen. It’s a trusted resource I recommend to anyone serious about optimizing their setup.
- ProjectorCentral: A comprehensive site with reviews and calibration tips that have improved my understanding of projector and screen compatibility.
- AVS Forum: An active community where enthusiasts share real-world experiences and solutions, offering practical advice that complements technical guides.
Parting Thoughts from My Perspective
Choosing the right projection screen for bright rooms is a nuanced process that combines understanding surface textures, gain levels, and ambient light management. From my experience, investing in a quality ALR screen with a micro-etched surface, paired with strategic room adjustments, can dramatically elevate your home theater experience. Remember, it’s not just about the technology but how you tailor your environment to match your viewing needs. If this resonated with you, I’d love to hear your thoughts or experiences—feel free to share below. Together, we can continue exploring the art and science of the perfect projection setup.

Reading through this detailed journey about selecting the perfect projection screen really resonated with my own experience. I particularly appreciated the emphasis on understanding how ambient light interacts with screen materials, especially the micro-etched ALR surfaces. In my setup, I’ve also found that room modifications, like strategic placement of blackout curtains and dimmable smart lighting, make a considerable difference. One thing I’ve noticed is that the angle of seating can influence how ambient light affects the picture, especially in larger rooms with multiple seating areas. Have others experimented with adjustable viewing angles or different seating arrangements to optimize contrast and color fidelity? I’m curious if there are any lesser-known tricks for balancing ambient light without extensive renovations, as I’d love to enhance my setup further without major changes.
This post really hits home for me, especially the part about balancing room lighting with screen choice. I’ve faced similar challenges in my living room, where sunlight can wash out even the best screens without careful planning. One approach I’ve found helpful is installing adjustable blinds for windows, which gives flexibility during daytime viewing. Also, I’ve started using a projector with a higher lumen output and a micro-etched ALR screen—combined, these make a significant difference in bright conditions. Regarding seating arrangements, I’ve experimented with reclining chairs that can be easily moved to different angles, which helps mitigate glare effects from ambient lighting in certain spots. Have others tried building partial room enclosures or using specific light placements to improve contrast? I’m curious about lesser-known tricks that don’t involve major renovations but still provide a noticeable boost to image quality in bright rooms. It’s fascinating how such small adjustments can transform the viewing experience, making it more vibrant and immersive.