Projection Screen Size Guide: Choosing the Perfect Screen for Your Space
My Journey into the World of Projection Screens
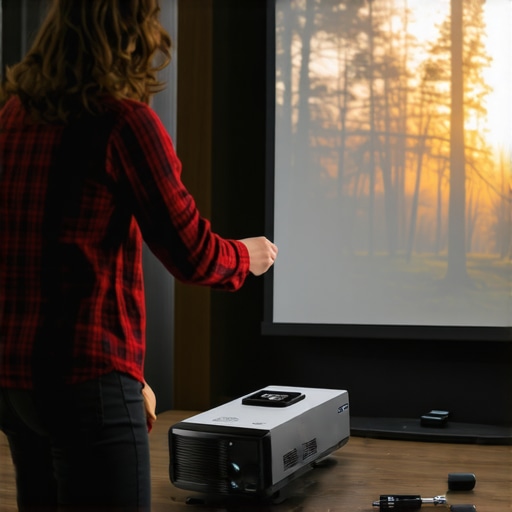
When I first decided to upgrade my home theater setup, I was overwhelmed by the myriad of options available. One of the most crucial decisions was selecting the right projection screen size. I remember spending hours researching and measuring my space to ensure I made the best choice. That personal experience sparked my interest in understanding how to match screen size with room dimensions for an optimal viewing experience.
Understanding the Basics of Projection Screen Size
Choosing the right screen size isn’t just about picking the biggest one you can find. It’s about balancing visibility, image quality, and your room’s dimensions. I learned that a screen that’s too large can overwhelm a small room, while too small a screen can diminish the cinematic feel. For practical guidance, I found the projection screen size guidelines on this helpful resource invaluable in making informed decisions.
How Do Room Size and Viewing Distance Influence Your Choice?
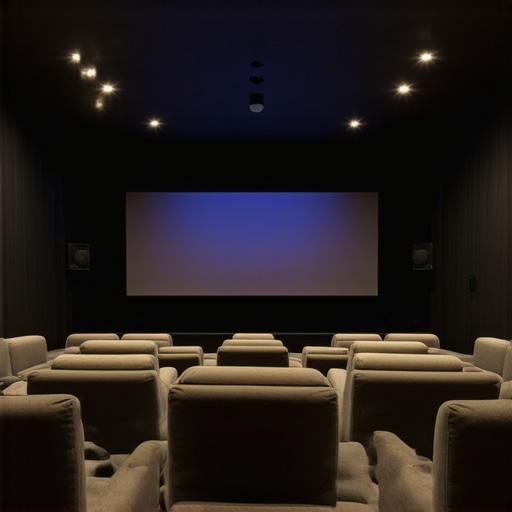
One of the most insightful lessons I discovered is how the size of your room and seating arrangements impact screen size. For instance, in a small living room, a 100-inch screen might be just right, offering immersive visuals without causing discomfort. Conversely, larger rooms can support screens up to 150 inches or more, providing a true cinematic experience. I also learned about the importance of viewing distance—the optimal distance from the screen affects how large your screen should be. The general rule I follow is that the viewing distance should be approximately 1.5 to 2.5 times the diagonal size of the screen.
Why Does Screen Material Matter in Size Selection?
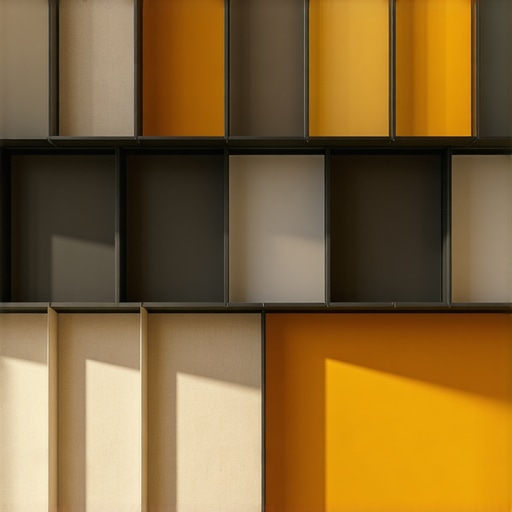
The material of the projection screen also plays a significant role. For bright rooms, I found that a high-gain material enhances brightness and contrast, making the image pop even in well-lit spaces. In darker rooms, a material with lower gain provides more accurate colors and better viewing angles. I often refer to the comprehensive guide on screen materials and gain factors to fine-tune my choices.
What Are the Practical Steps to Measure My Room for the Perfect Screen Size?
Measuring my room properly was a game-changer. I used a tape measure to determine the distance from where I planned to sit to the wall where the screen would hang. I also considered ceiling height and furniture placement. These measurements helped me decide on a screen size that fits comfortably without overpowering the space. Remember, the goal is to achieve a balance between visibility and comfort.
If you’re contemplating your projection screen setup, I encourage you to share your experiences or ask questions in the comments. It’s always helpful to learn from others’ journeys towards the perfect home theater!
Balancing Room Dynamics and Screen Dimensions for Cinematic Magic
As I delved deeper into customizing my home theater, I realized that optimal screen size is a nuanced balance between the room’s architecture, seating arrangement, and viewing habits. For example, a dedicated theater room with high ceilings and ample space offers more flexibility for larger screens, such as 150 inches or more. Conversely, multi-purpose living rooms require more careful planning to avoid overwhelming the space or compromising comfort. Adjusting the screen size to align with the room’s proportions ensures that every viewing feels immersive without sacrificing practicality.
The Art of Precise Room Measurement and Its Impact on Screen Choice
Measuring your room isn’t just about getting numbers—it’s about understanding spatial relationships. I recommend measuring the distance from your primary seating position to the wall where the screen will be hung, factoring in ceiling height, furniture placement, and natural light sources. For instance, in a room with a ceiling height of 8 feet, a 120-inch screen can create a stunning visual without making the space feel cramped. Remember, the general rule of thumb is that the optimal viewing distance should be about 1.5 to 2.5 times the diagonal size of your screen, which helps prevent eye strain and enhances image clarity.
How Does Screen Material Influence Perceived Size and Image Quality?
The material of your projection screen can significantly affect how large and vibrant your image appears. High-gain materials are excellent for bright rooms, reflecting more light and making images appear brighter and more contrasted. On the other hand, matte or low-gain screens diffuse light more evenly, reducing glare and providing more accurate colors, especially in darker environments. I often consult detailed guides like this resource on screen gain and materials to fine-tune my choices and achieve the desired visual effect in my setup.

Can You Achieve the Perfect Balance Between Screen Size and Material in Your Space?
Achieving the ideal combination requires understanding the specific demands of your room and viewing preferences. For example, if your room receives a lot of ambient light, opting for a high-gain screen material might allow for a larger display without losing brightness. Meanwhile, in a darker room, a lower-gain material will provide more natural colors and better viewing angles, even for larger screens. Experimenting with different materials and sizes—guided by expert advice and technical specifications—can help you craft a personalized cinematic experience tailored to your space.
What Additional Factors Should I Consider When Choosing My Projection Screen?
Beyond size and material, factors such as screen gain, viewing angles, and ambient light control are critical to optimize image quality. For instance, a screen with wide viewing angles ensures everyone gets a clear picture regardless of seating arrangement, while controlling ambient light with curtains or blinds improves contrast and color accuracy. Additionally, the mounting height and surface texture of the wall can influence how the image appears. Consulting comprehensive resources and expert reviews can help you navigate these complexities, ensuring your home theater setup is both functional and stunning.
If you’re keen to share your experiences or need tailored advice, I encourage you to leave a comment or explore more about the latest projection screen innovations. Your perfect home theater is within reach—just a few informed choices away!
Delving into the Nuances of Screen Material and Its Impact on Perceived Quality
As I continued refining my home theater setup, I became increasingly aware that selecting the right screen material isn’t just about brightness or contrast—it’s about understanding how different surfaces influence the overall perception of size and image quality. I remember experimenting with matte white versus high-gain screens, noticing how each altered the vibrancy and depth of colors. High-gain materials, for example, reflect more light, making images appear brighter and more contrasted, which is fantastic for well-lit rooms. However, they can introduce hot spots, where the image seems overly bright in the center. Conversely, matte surfaces diffuse light evenly, reducing glare and maintaining color accuracy, especially in darker environments. To make an informed choice, I turned to detailed guides like this authoritative resource, which helped me understand the subtle interplay between material, gain, and room lighting conditions.
How Do Advanced Room Features Influence Screen Size Decisions?
One aspect I overlooked initially was how specific room features—such as ceiling height, wall color, and natural light sources—affect screen visibility and perceived size. For instance, a room with high ceilings and large windows can dilute the impact of a large screen, making it seem less immersive. I learned that incorporating blackout curtains or adjusting the screen’s gain can compensate for ambient light, ensuring the image remains vibrant and clear. Also, the wall color plays a role; darker walls enhance contrast and perceived depth, allowing for larger screens without overwhelming the space. This realization led me to experiment with different configurations, and I found that a tailored approach, considering these unique features, yields the most satisfying cinematic experience. Sharing my journey, I invite you to reflect on your own room’s characteristics and how they might influence your ideal screen size and material choices.
What Are the More Subtle Factors That Can Make or Break Your Home Theater Visuals?
Beyond size and material, subtle elements like mounting height, viewing angles, and even the texture of the wall surface can significantly affect your viewing experience. For example, mounting the screen too high or too low can distort perspectives, reducing immersion. I discovered that the optimal height aligns with eye level when seated comfortably—typically about 4 to 5 feet from the floor for most setups. Additionally, wide viewing angles are critical if you have a group viewing, but some screens perform better at specific angles, which is worth investigating through reviews or testing. Wall textures, such as rough plaster or textured paint, can scatter light and diminish image sharpness. To mitigate this, I used smooth, flat surfaces and considered wall treatments that enhance reflectivity and clarity. These nuanced considerations, though often overlooked, profoundly influence the realism and immersive quality of your home theater. If you’re exploring these factors, I encourage you to share your insights or questions—sometimes, the smallest adjustments make the biggest difference.

Balancing These Elements for a Truly Customized Cinema
Achieving a harmonious balance among screen size, material, room features, and personal preferences is both an art and a science. For me, it meant trial and error—testing different screen materials, adjusting mounting heights, and fine-tuning room lighting. I found that taking detailed measurements and keeping notes on what worked helped develop a personalized setup that feels just right. Remember, your space is unique, and what works for one person might not suit another. Embrace the process of experimentation, guided by technical insights and your own comfort. This journey toward a truly customized cinematic experience is ongoing, and sharing your discoveries can inspire others to craft their perfect home theater. Feel free to comment with your experiences or ask for advice—your ideal setup is within reach, and every detail counts in creating a space that feels truly yours.
Refining Your Screen Choice with Room Acoustics and Light Dynamics
One often overlooked aspect of optimizing your projection setup is the intricate relationship between room acoustics and screen performance. I discovered that the acoustic properties of my space—such as sound reflections and absorption—could subtly influence the perceived image quality. For example, a room with hard surfaces like glass or tile tends to reflect more sound and light, which can cause glare and reduce contrast. Incorporating soft furnishings, acoustic panels, or even textured wall treatments improved not only sound clarity but also enhanced the visual experience by minimizing ambient light interference. I found that these modifications created a more cohesive environment where both sound and visuals synergize, elevating the immersive quality of my theater. For detailed guidance, consulting resources like this expert article helped me understand how acoustic treatments complement visual optimization.
How Can Leveraging Room Geometry and Architectural Details Elevate Your Screen Selection?
Thinking beyond basic measurements, I delved into how the unique architecture of my room could be harnessed to enhance the cinematic experience. For instance, the room’s shape—whether rectangular, square, or irregular—affects light distribution and viewing angles. I experimented with angled walls and alcoves, which helped diffuse light and reduce glare, allowing me to select larger screens without sacrificing clarity. Additionally, architectural features like soffits and crown moldings can be integrated into mounting strategies, enabling more precise positioning and better utilization of space. This approach required detailed planning and sometimes custom mounting solutions, but the payoff was a seamless integration of technology and design that amplified the sense of immersion. I recommend exploring architectural acoustics and lighting design guides to inform your customization process—these insights can be found in specialized publications like this resource.
What Are the Implications of Advanced Screen Materials with Nano-Structured Surfaces?
As my journey into high-end home theater setups progressed, I encountered cutting-edge screen materials featuring nano-structured surfaces designed to optimize light diffusion and color accuracy. These advanced surfaces can dramatically reduce hot spots and viewing angle limitations, providing a more uniform image across larger screens. I was particularly intrigued by recent innovations documented in industry studies, such as those published by Sony’s research on nano-structured screens, which demonstrate how these surfaces leverage nanotechnology to enhance perceived size and depth. Integrating such materials requires careful consideration of ambient light conditions and projection technology compatibility, but the resulting image quality is truly transformative. If you’re aiming for a state-of-the-art setup, exploring these materials might be your next frontier—I’d love to hear about your experiences or questions on this topic.
Feel free to share your insights or ask for tailored advice—navigating these advanced options can make a significant difference in creating a home theater that’s both technically superb and personally inspiring.
Things I Wish I Knew Earlier (or You Might Find Surprising)
Size Isn’t Always Better
One of the biggest surprises I discovered is that bigger isn’t necessarily better when choosing a projection screen. Initially, I thought a larger screen would always create a more immersive experience, but I realized it can overwhelm a small room or cause eye strain. Finding the right balance between size and room proportions made all the difference in my viewing comfort.
Room Lighting Trumps Brightness
While I focused heavily on projector lumens in the beginning, I learned that room lighting conditions play a more crucial role. A high-gain screen in a bright room can produce dazzling images, but in a darker space, matte or low-gain screens offer more natural and vibrant colors. Adjusting my room’s ambient light made my visuals much more enjoyable.
Material Matters More Than I Thought
Initially, I overlooked the impact of screen material, assuming all surfaces were similar. Experimenting with different materials, I found that high-gain surfaces boost brightness but can introduce hot spots, while matte finishes provide even image distribution. This subtle choice significantly influenced my viewing experience.
Room Geometry Can Be a Game-Changer
Understanding my room’s architecture helped me optimize screen placement and size. Angled walls and ceiling height affected how large my screen could comfortably be without causing distortion or glare. Tailoring the setup to my space made a noticeable difference in immersion and comfort.
Fine-Tuning with Testing and Notes
Taking the time to measure, test, and record what worked best helped me develop a setup that feels just right. Small adjustments, like mounting height or adding light control, improved image quality and viewing pleasure. Personal experimentation proved invaluable in creating my perfect home theater.
Resources I’ve Come to Trust Over Time
- CineGear Guide’s Projection Screen Size Guide: This comprehensive resource helped me understand how to match screen size with room dimensions and seating distance. It’s a must-read for beginners and enthusiasts alike.
- AVScience Forum: A community of audio-visual experts sharing real-world advice and troubleshooting tips. I’ve learned a lot from their discussions on screen materials and projector setups.
- Home Theater Review: Their in-depth reviews and guides on screens and projectors helped me make informed decisions and stay updated on the latest technology trends.
- Sony’s Nano-Structured Screen Research: Cutting-edge material innovations that push the boundaries of image quality. Exploring this gave me ideas for future upgrades.
Parting Thoughts from My Perspective
Choosing the right projection screen size and material is both an art and a science. It’s about understanding your space, experimenting with different options, and trusting your personal preferences. My biggest takeaway is that patience and research are essential—there’s no one-size-fits-all solution, but with the right knowledge, you can craft an immersive home theater tailored just for you. If this resonated with you, I’d love to hear your thoughts or experiences. Feel free to share your journey or ask questions—your perfect setup is within reach, and every detail counts in creating a space that truly feels like your own cinematic escape.

Reading through this detailed journey really resonated with me. I remember the initial overwhelm when I started exploring projection screens for my own home theater. It’s fascinating how much the room’s architecture and lighting conditions can influence the best choice of size and material. I also learned the hard way that bigger isn’t always better—sometimes a modest screen in a well-lit room with the right material can offer a far more satisfying experience than an oversized one that’s too bright or causes eye strain. I’ve found that experimenting with different mounting heights and testing various screen gains really tames the challenge of ambient light and viewing angles. Has anyone here tried nano-structured screens or advanced materials to improve uniformity and depth? I’d love to hear how those high-tech solutions have worked for others in similar room setups.
This post really resonated with my experience in setting up a home theater. I initially thought bigger screens would always be better, but after some trial and error, I realized that room size and lighting really define what’s optimal. I’ve been experimenting with different screen materials, like matte and high-gain surfaces, depending on my room’s ambient light, which made a huge difference in picture quality and comfort. One thing I’ve found particularly helpful is measuring the exact viewing distance and ensuring the screen size complements that, as you suggested. Have others here tried using nano-structured screens or other recent innovations in screen materials? I’ve read they can significantly reduce hot spots and improve color uniformity across large displays, especially in multi-purpose living spaces. Would love to hear about your experiences or any tips on integrating advanced materials into existing setups—sometimes the smallest tweaks make the biggest difference in immersiveness.
Reading about the process of matching screen size with room dimensions really struck a chord with me. When I first set up my home theater, I thought I needed the biggest screen possible to get that true cinematic experience, but I quickly realized that room size and furniture placement are just as important. I started experimenting with different sizes, and surprisingly, I found that smaller, well-calibrated screens could deliver a more immersive feel in my smaller living room. I also explored high-gain materials to compensate for ambient light issues, and it made a significant difference in brightness and contrast. Has anyone tried combining ultra-thin ambient light rejection screens with adjustable mounting heights for more tailored setups? I’d love to hear how these adjustments impacted your viewing comfort and image quality, especially in multi-use spaces.
This post really hits home for me; I remember the initial frustration I felt when trying to pick the right screen size for my dedicated theater room. I spent many evenings measuring distances and calculating what would be the most comfortable yet immersive size. What I’ve learned over time, though, is that room lighting and even wall color can dramatically influence the perceived quality and size of the projection. Lately, I’ve been reading about nano-structured screens—they promise more uniform images and less hot spotting, which sounds promising for larger setups. I wonder if anyone here has experience with these advanced materials? Do they truly deliver on their promise, especially in rooms where ambient light can’t be completely controlled? Also, how do you balance the need for a larger screen versus the potential glare or hot spots some of these materials might introduce? It’s such a nuanced art—finding that perfect harmony between size, material, and room conditions. Would love to hear your insights on implementing these newer technologies into existing setups.
This post really highlights some important aspects of selecting the right projection screen size, especially the emphasis on measuring your space accurately. I went through a similar process when setting up my home theater, and I found that experimenting with different screen sizes while considering the room’s natural lighting made a noticeable difference. I was curious, though—has anyone tried combining nano-structured screens with adjustable mounting options? I wonder if that could optimize image quality and viewing comfort, particularly in rooms with varying light conditions. Additionally, I’d love to hear if anyone has insights on the long-term durability of advanced screen materials like those with nano-structures. It seems like the future of home theaters is moving toward highly customizable and high-tech solutions, which is exciting. Do you think these innovations will become more affordable and accessible for the average enthusiast soon? Would be great to hear about personal experiences with these cutting-edge materials and setups.
I really appreciate this detailed post—it’s given me much to consider as I plan my own home theater setup. One aspect that stood out to me is the importance of room shape and natural light sources, which can subtly influence how large and vibrant your projected image appears. I recently read about nano-structured screens and their ability to minimize hot spots and improve uniformity over large surfaces. Has anyone here experimented with these advanced materials? I’m curious about how they perform in rooms with less-than-ideal lighting conditions, and whether the investment is worth it for a home enthusiast like myself. Also, I wonder if combining these high-tech screens with adjustable mounts or smart lighting could further enhance viewing experience and flexibility. What are your thoughts on integrating newer technologies into existing setups? Thanks again for this insightful guide—makes me feel more confident about making informed choices!
This in-depth post really resonated with me, especially the emphasis on measuring room dimensions accurately before choosing a screen size. I remember the frustration I faced trying to pick the right size initially—almost ended up with a screen that’s too large for my space, causing discomfort during long movies. I’ve recently been exploring advanced materials like nano-structured screens, and from what I’ve read, they offer excellent uniformity and minimize hot spots, which is a game-changer. Have others here experimented with these high-tech options? I’d love to hear how they perform in real-world setups, especially in rooms with varying ambient light. Also, integrating adjustable mounts and smart lighting seems like a promising way to customize the viewing experience further. Do you think combining these innovations could make home theaters more adaptable and future-proof? I believe, as technology advances and costs come down, these features will become more accessible for enthusiasts like us. Looking forward to hearing different experiences and tips on optimizing space and technology for the best cinematic experience.