ALR Screen Technology: Best Material, Gain & Size Insights for 2024
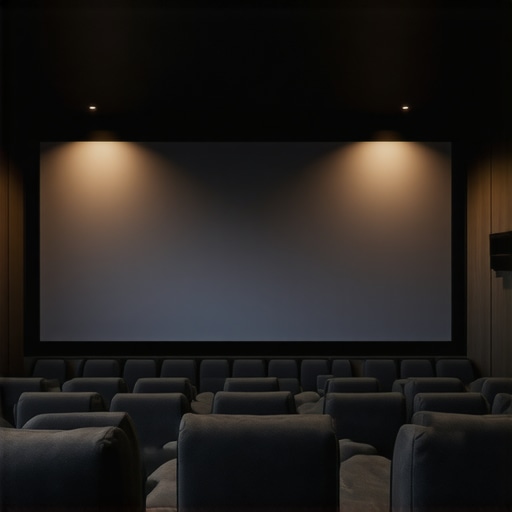
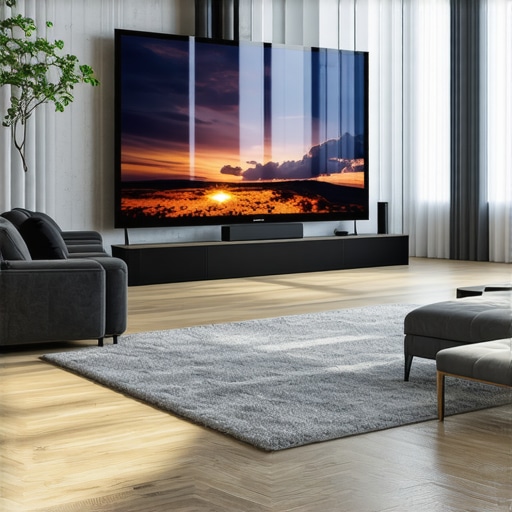
Imagine finally settling into your home theater after hours of searching, only to be met with washed-out images, ringing colors, and a nagging feeling that something’s just not right. I remember the moment I realized my massive 100-inch screen in a bright room was ruining my viewing experience—it looked terrible during the daytime, no matter how much I fiddled with the settings. That lightbulb moment hit me hard: not all screens are created equal, especially when your room isn’t perfectly dark.
Why Choosing the Right Material and Gain Makes All the Difference
If you’re like me, you love the idea of a big, immersive screen but dread the glare and washed-out images that come with bright environments. The secret isn’t just about size or resolution—it’s about selecting a high-quality ALR (Ambient Light Rejecting) screen with the right material and gain. These factors determine how well your screen can combat ambient light and deliver vibrant, sharp images.
Early on, I made the mistake of assuming that any projection screen would do the trick. I purchased a cheaply made screen without considering its gain or material. As a result, my daylight viewing sessions were frustrating—colors faded, and contrast disappeared. It wasn’t until I dug into reputable resources like [CineGearGuide](https://screens.cinegearguide.com/projection-screen-materials-gain-choosing-the-best-alr-screen-for-your-room) that I learned how crucial material choice and gain are. Gaining a deeper understanding helped me avoid this costly mistake and improve my setup dramatically.
Are you tired of struggling with your current screen setup in bright rooms? If so, you’re not alone. Many enthusiasts endure the same struggle because they overlook the importance of material quality and gain ratings. Knowing which materials and gain levels work best can transform your room from a glare-filled mess into a cinema-quality environment.
In this post, I’ll walk you through the insights and practical tips to choose the perfect ALR screen material, gain levels, and size—empowering you to enjoy a stunning viewing experience regardless of your room’s lighting conditions. Let’s dive into what makes a difference and how you can avoid the pitfalls I faced early on.
Choose the Right Screen Material to Fight Glare
Start by selecting a high-quality ALR (Ambient Light Rejecting) material designed specifically for bright environments. These materials are engineered to reflect ambient light away from the viewer while enhancing the projected image’s brightness and contrast. I once purchased a screen labeled as “bright room compatible,” but it was cheaply made, resulting in washed-out colors. After researching on this guide, I realized the importance of choosing a material with a high gain and specific light-rejecting properties. Opt for materials with a gain between 1.4 and 2.0, depending on your room’s ambient light level.
Adjust Screen Gain for Optimal Brightness
Gain determines how much light the screen reflects back toward the viewer. A higher gain means a brighter image but reduces the viewing angles. Think of gain as a flashlight lens: a narrow beam focuses light directly ahead, while a wider beam radiates outward. I experimented with different gain levels in my setup, starting with a 1.8 gain screen. During the day, I noticed my image became brighter and more vivid, thanks to the increased reflectivity. To find your ideal gain, consider the size of your room and seating arrangement. A comprehensive guide can help you determine the best gain for your space.
Select an Appropriate Screen Size for Your Space
Size impacts immersion and image quality. Larger screens fill your field of view but require more light to maintain vividness. I once tried a 120-inch screen with a gain of 1.4 in a room with lots of sunlight—it looked dull and washed out. After reading this resource, I understood that smaller screens or higher gain materials could help. Measure your room precisely: the optimal screen size usually occupies about 60-70% of your viewing wall, and your projector’s lumen output should match the screen size and gain. Don’t forget to account for the seating distance to maintain clarity and immersion.
Implement a Screen with Controlled Reflectivity
Effective ALR screens utilize specially designed light-rejecting surfaces that reflect projected light toward the audience while absorbing ambient light from other directions. I installed a screen with optical layers that confine reflected light to the viewing zone, greatly reducing glare during daytime movies. When choosing such a screen, look for materials praised for their ambient light rejection capabilities, like those detailed in this guide. Remember, the effectiveness of these surfaces depends on proper installation—an uneven or poorly aligned screen diminishes their benefits.
Test and Fine-Tune Your Setup
After setting up your chosen material, gain, and size, conduct real-world tests. Watch daytime content with room lights on to evaluate brightness and contrast. If the image is dull, consider increasing gain or enlarging the screen slightly. Conversely, if viewing angles are narrow or the image looks uneven, reduce gain or opt for a different material. I found using a calibration disc helped me adjust projector settings precisely, ensuring the projected image matched the screen’s capabilities. Remember, small adjustments can make a significant difference in delivering crisp, vibrant images in bright rooms.
When it comes to selecting the perfect projection screen, many enthusiasts fall prey to misconceptions that can sabotage their setup. One widespread myth is that bigger always means better—yet, without considering gain and material, a massive screen can create washed-out images in bright rooms. In reality, understanding the nuanced interplay between screen size and gain is crucial. For instance, a larger screen with a low gain might lose brightness and contrast, especially in ambient-light-rich environments. Conversely, opting for a smaller, high-gain screen can enhance vividness but at the expense of narrower viewing angles—an advanced mistake often overlooked by beginners.
Let’s challenge a common belief: many believe that any ALR (Ambient Light Rejecting) screen will automatically improve daytime viewing. However, the performance of ALR screens varies significantly based on the quality of the material and the specific optical design. Prematurely choosing a cheap or improperly rated ALR surface can lead to glare and color washout, negating their benefits. As highlighted in [this expert analysis](https://screens.cinegearguide.com/alr-screen-options-explained-best-material-gain-for-bright-rooms), not all ALR screens are created equal, and selecting the right material tailored to your room’s lighting conditions makes all the difference.
Another trap is the belief that increasing gain linearly boosts brightness without downsides. In fact, higher gain screens (above 2.0) tend to have very narrow viewing angles, causing uneven brightness and color shifts when viewers move just a few degrees off-center. This advanced nuance is often ignored but critically important for maintaining image quality across the seating area. In my experience, aiming for a gain between 1.4 and 2.0 provides a sweet spot—delivering brightness while preserving broad viewing angles, especially in daytime environments.
How does the optical architecture of an ALR screen influence ambient light rejection at a deeper level?
The secret lies in the microscopic optical layers integrated into top-tier ALR surfaces. These layers are engineered to direct ambient light away from the viewer and focus the projected light precisely toward the intended viewing zone, enhancing contrast. According to research from industry leaders, the angle of light rejection—often specified as the off-axis viewing angle—determines how well the screen can combat side or overhead ambient light sources. Selecting a screen with a superior optical design aligned with your room’s layout can drastically elevate your viewing experience in bright conditions.
Ultimately, the key is not just in picking a screen based on surface material or gain alone, but understanding how these elements interact in your unique environment. Overcoming the myths and paying attention to the subtleties—like optical layering, gain angles, and size calibration—can turn your home theater into a true cinematic oasis.
Have you ever fallen into this trap? Let me know in the comments. Remember, the devil is in the details, and mastering these nuances elevates your projection game to professional levels.Once you’ve carefully selected your projection screen and optimized your room conditions, maintaining your setup over time is essential to ensure consistent performance and longevity. I rely on a few specialized tools and daily habits that have proven invaluable in preserving the quality of my home theater system.
First, investing in a **laser projection tester** like the *X-Rite i1Display Pro* helps me regularly calibrate my projector’s color accuracy and brightness levels. Proper calibration ensures that the materials and gain ratings I chose continue to deliver optimal contrast and vividness, especially since projector lamps’ brightness can diminish with age. Regular calibration can be scheduled quarterly, and the device guides me through easy calibration processes, maintaining the integrity of my images.
Second, I use a **compressed air duster** to clean my projector’s vents and filters. Dust accumulation can cause overheating and decrease lamp life, which directly affects image quality. Keeping the vents clear is a simple, yet effective, maintenance step that extends equipment lifespan and guarantees sustained brightness. Remember, always turn off and unplug your projector before cleaning.
Third, **software-based color management tools** like *CalMAN* or *DisplayCAL* are instrumental in fine-tuning my setup visually. These programs allow me to create custom profiles that match my specific screen material and gain settings, compensating for any drift over time. I run this calibration whenever I notice subtle color shifts or contrast loss.
Looking ahead, I predict that home theater maintenance tools will become more integrated with AI-driven diagnostics. Such advancements could automatically detect performance drops, recommend calibration, or even adjust projector settings remotely, simplifying long-term upkeep.
### How do I keep my projection setup working flawlessly over time?
Consistent cleaning, quarterly calibration, and using reliable tools are my go-to strategies. Maintaining proper airflow with an air duster prevents overheating, while regular calibration keeps images sharp and true-to-life. Additionally, using a **laser measurement tool** like the *Bosch GLM 50 C* can help me verify that my screen size and projector positioning remain optimal—key for preserving the immersive experience.
Don’t overlook the importance of routine checks—they ensure that your investment continues to perform at its best, producing vibrant images free of color shifts and washed-out tones. If you haven’t prioritized calibration and cleaning in your maintenance routine, give these tools a try this week. It could make a significant difference in your viewing experience.
The Hardest Lesson I Learned About Screen Material and Gain Choices
One eye-opening realization was that not all ALR screens are created equal; I learned this the hard way when I bought a cheaper surface that seemed promising but delivered dull, washed-out images in my bright room. It took experimenting and a deep dive into expert guides like this one to understand how crucial quality materials and optimal gain are for daytime viewing.
When Bigger Sometimes Means Dimmer
I used to think a larger screen would automatically elevate my home theater, but I overlooked the importance of matching gain and size. My 120-inch screen with low gain struggled during the day, turning my vivid scenes into a dull slideshow. After reading this resource, I realized that selecting a balanced size and gain level tailored to ambient light conditions was vital for a consistent, stunning picture.
Color and Brightness Are More Than Just Settings
After installing my high-gain ALR screen, I discovered that calibration was key. Using tools like the calibration guides helped me fine-tune my projector, maintaining accurate colors and brightness over time. It taught me that consistent maintenance—like cleaning filters and recalibrating regularly—is essential to keep performance sharp and images vibrant in bright environments.
My Preconceived Notions Were My Biggest Barriers
One myth I had to shed was the idea that any ALR surface would improve daytime viewing. It was a costly mistake; only by choosing a high-quality material with proper optical layering and paying attention to gain ratings could I truly conquer ambient light challenges. Remember, the right surface and optical design, such as those detailed in this guide, are game-changers for sunny rooms.
Embrace the Subtleties of Light Control and Calibration
The most profound lesson was that the battle against ambient light isn’t won with size alone; optical layers and strategic gain selection are equally crucial. Installing a screen with designed light-rejection properties, as outlined in this article, can elevate your viewing experience dramatically. When coupled with regular calibration and cleaning routines, your home theater can perform flawlessly regardless of how bright it is outside.
Perfecting Your Bright Room Setup Is a Continuous Journey
Having been through the ups and downs, I can say that achieving a stunning projection in a bright room demands patience, experimentation, and knowledge. The more I learned about material quality, gain optimization, and optical design, the more my system improved. Remember, mastering these details transforms your space from a glare-prone zone into a cinematic sanctuary. Have you found your biggest challenge with bright room projection? Share below—your experiences might help others achieve their perfect setup!


Reading this post really resonated with my own experience trying to set up a home theater in a bright room. I initially underestimated how crucial selecting the right screen material and gain is, especially in spaces with lots of ambient light. I used a standard matte screen, expecting it to handle daylight, but ends up washing out the image and ruining the immersion. Since switching to a high-quality ALR screen with a gain of around 1.8, the difference has been night and day—bright colors, sharp contrast, even during daytime.
One thing I’ve found helpful is experimenting with the projector’s placement and calibration after choosing the right screen. Do others here have tips on fine-tuning projected images once the hardware is set? Also, how do you manage heat and dust inside your projectors for long-term maintenance? I use a compressed air duster regularly, but I’d love to hear more suggestions from the community. Truly appreciated this deep dive into light-rejecting surfaces—it’s helped me rethink my setup and improve my viewing experience.
This post really emphasizes how critical choosing the right ALR screen material and gain is, especially for bright environments. I totally agree that a lot of enthusiasts overlook these nuances and end up frustrated with washed-out images. I’ve had a similar experience where initially I went for a larger, cheaper screen, thinking size alone would boost the experience. Turns out, the optical properties and gain rating are what really make a difference in daylight. Switching to a high-gain ALR screen and fine-tuning projector placement made a huge difference in my setup.
I’m curious, for those who’ve upgraded to a higher gain screen, how do you manage the narrower viewing angles? Do you find yourself having to position seating differently or use specific reflective paints or lenses to widen the effective viewing zone? Also, are there particular brands or materials for ALR screens that you’ve seen perform exceptionally well in rooms with lots of ambient light? Any recommendations for balancing brightness and viewing comfort would be really helpful as I continue perfecting my system. Would love to hear more tips from the community on maintaining optimal image quality in bright rooms—thanks for such an in-depth look at the optical science behind these screens!