Screen Gain Reality Check: Why 1.0 is Enough for 2026 Projectors
I remember the frustration vividly—the day I finally realized my high-gain projection screen was doing more harm than good. My image looked washed out, colors muted, and I felt like my projector was fighting against the screen, not working with it. It was a lightbulb moment that shifted my entire approach to home theater setups. Instead of chasing after the latest and greatest specs, I discovered that sometimes, less really is more.
The Real Reason to Reconsider Screen Gain Expectations
Are we falling for the hype around high-gain screens?
Early on, I made the mistake of believing that a higher gain would automatically translate to brighter images and better picture quality, especially in bright rooms. That led me to invest in screens boasting gains of 2.0 or higher, thinking I was maximizing my projector’s potential. But I quickly noticed the downsides—hotspots, glare, and uneven brightness that distracted more than impressed. The truth is, higher gain screens can introduce problems that diminish the very quality you’re trying to enhance.
Recent studies, like those highlighted in CineGear Guide, underline that a gain of 1.0 or slightly above is often sufficient for most home theaters. They emphasize that the key is balancing gain with the room’s ambient light and projector brightness, rather than blindly chasing higher values. This realization was my turning point—less clutter, fewer compromises, better image uniformity.
Have you ever felt like your efforts to boost brightness actually left you with a worse picture? You’re not alone—and I’m here to guide you through simplifying your setup for maximum satisfaction without unnecessary gimmicks.
Choose the Right Screen Material
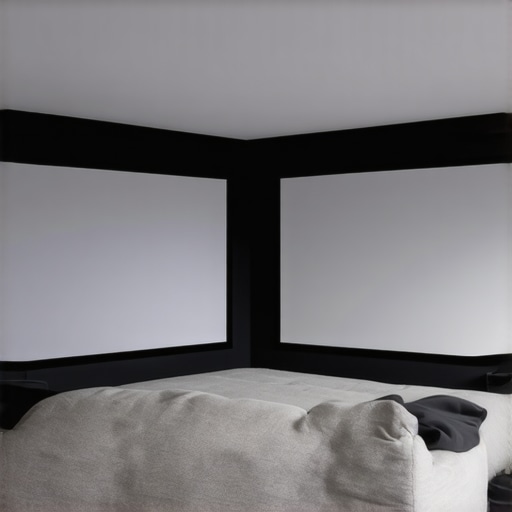
Selecting the appropriate material is crucial. Think of your screen as the paint on a canvas—it affects how colors and details appear. For bright rooms, materials like ALR (Ambient Light Rejection) screens with specialized coatings can dramatically improve contrast and brightness without the need for excessive gain. Dive into the detailed options at this guide to understand what material best suits your space.
Calculate the Ideal Screen Size
Determining the right size for your room is like choosing the perfect pair of glasses—you want clarity without distortion. Use tools like the screen size calculator to match your projector’s lumen output and ambient light conditions. Remember, a too-large screen in a small room can cause discomfort; err on the side of moderation for a balanced view.
Set the Proper Gain
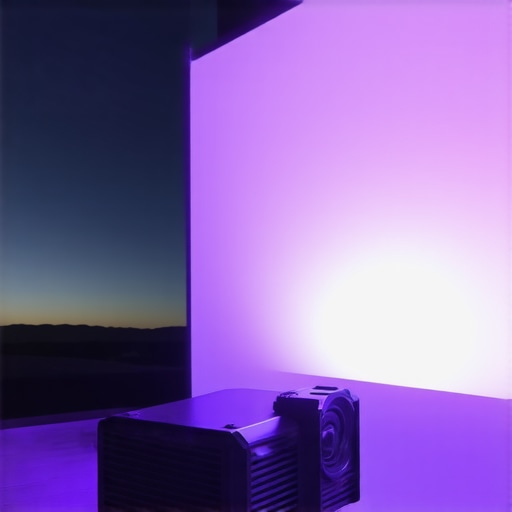
Think of gain as how much the screen amplifies the projector’s light. A gain of around 1.0 to 1.3 often provides uniform brightness, reducing hotspots that occur with high-gain (>2.0) screens. I experimented by temporarily placing different gain samples in my setup, observing hotspots with a 2.0 gain screen—making the image uneven, especially in the corners. Instead, selecting a medium gain material improved the uniformity and clarity, aligning with recommendations found at this resource.
Adjust Projection Distance and Angle
Properly positioning your projector is akin to tuning a musical instrument—precision is key. Use the projection distance guidelines to ensure your image is sharp with minimal keystone distortion. An optimal angle also prevents glare and hotspots, especially with high-gain screens.
Optimize Lighting Conditions
Controlling ambient light is essential. Like wearing sunglasses during a bright day, managing room lighting preserves contrast and color fidelity. Use blackout curtains or dimmable lights in conjunction with your chosen screen material for best results. This simple step can make a noticeable difference without changing your hardware.
Test and Fine-Tune the Setup
After installation, run test patterns—check for uniform brightness and color accuracy. Adjust the projector’s keystone and focus, and if needed, tweak the screen position slightly to eliminate hotspots. Document your observations, then iteratively refine each parameter. Remember, small adjustments can yield big improvements in picture quality.
Many home theater enthusiasts believe that high-gain screens are a surefire way to boost brightness and picture quality, but this often leads to overlooked nuances and pitfalls. For instance, a prevalent myth is that increasing gain always improves image visibility in bright rooms. In reality, pushing gain beyond 1.3 can cause hotspots and uneven brightness, which degrade the viewing experience. Recent analysis in this study emphasizes that balancing gain with room characteristics yields superior results.
Another common mistake is overestimating the importance of screen size. While larger screens seem impressive, choosing a size that overwhelms your space or strains your viewing angle diminishes immersion and causes discomfort. The optimal size is often smaller than what most assume, especially in rooms with limited distance between the screen and seating. Consulting tools like the screen size calculator can help prevent this misjudgment.
Regarding materials, many assume that premium or expensive fabrics automatically guarantee better picture quality. However, selecting the right material depends heavily on ambient light conditions. For bright rooms, specialized ALR (Ambient Light Rejection) screens with reflective coatings outperform traditional matte surfaces. Exploring this guide can shed light on choosing the best material for your specific environment.
Is a larger screen always better, or can it backfire?
This question is crucial for advanced setups. Oversized screens can cause eye strain or diminish image sharpness if your projector’s lumen output isn’t sufficient. The goal is to find a balance where the screen fits your room size, projector brightness, and seating distance. Exceeding these parameters often results in lower perceived contrast and detail loss, especially in rooms with high ambient lighting. Expert advice at this resource highlights the importance of tailored sizing rather than generic recommendations.
Additionally, many overlook the impact of screen gain on uniformity. Higher gain surfaces, particularly those above 2.0, tend to produce hotspots where the center is significantly brighter than the edges, creating a disjointed image. Instead, opting for moderate gain (around 1.0-1.3) ensures a more evenly illuminated picture, which is vital for immersive viewing.
In summary, understanding these nuances—balancing gain with room attributes, choosing appropriate size, and selecting the right material—can elevate your home theater from good to exceptional. Think of your setup as an ecosystem, where each component influences the other. For in-depth guidance, exploring resources like this comprehensive guide is invaluable. Have you ever fallen into this trap? Let me know in the comments and let’s ensure your setup reaches its full potential.
Keep Your Screen Working Perfectly: Tools and Tips for Longevity
Ensuring your projection screen remains pristine over years of use requires more than just installation; it demands regular maintenance with the right tools. I personally swear by a microfiber cloth and a gentle lens cleaner to keep the surface free from dust, fingerprints, and smudges that can impair image quality. For screens with delicate finishes or specialized materials, avoid harsh chemicals—stick to manufacturer-recommended cleaners like those discussed in this guide. Additionally, a soft-bristled brush or a low-suction vacuum with a brush attachment can gently remove dust from corners and edges without damaging the surface.
For ongoing calibration, I rely on software solutions like VideoForge’s Color Management System, which allows precise adjustment of your projector settings and ensures consistent color accuracy over time. Regularly checking projector alignment and keystone correction is equally important—misalignment can cause uneven focus and hotspots, particularly on high-gain screens. Keep a small adjustable wrench and a level nearby; these simple tools enable quick realignment and prevent long-term issues.
How do I maintain my projection setup over time?
Consistency in maintaining your screen and equipment involves routine inspections—at least once a month. Check for dust accumulation, inspect the frame and mounting hardware for stability, and verify that your ambient light conditions haven’t changed unexpectedly, which could impact your chosen screen material. Over time, environmental factors like humidity or temperature fluctuations can cause slight warps or material degradation. Using a dehumidifier in damp environments or an air purifier can help preserve your screen’s integrity, especially if you have a fabric or matte surface.
Projection screens and their components are evolving; for instance, newer ALR (Ambient Light Rejection) screens incorporate anti-static coatings that repel dust and reduce static buildup—keeping them cleaner with less frequent cleaning. Monitoring advancements in specialized materials, like those outlined at this resource, can inform your upgrade decisions for long-term performance.
Investing in a maintenance routine is a game-changer
Adopting a systematic approach—using microfiber cloths, gentle cleaners, calibration software, and environmental controls—significantly extends your screen’s lifespan and performance. I highly recommend integrating a once-a-quarter calibration check, including projector alignment and color calibration, into your routine. This proactive maintenance prevents small issues from turning into costly repairs or replacements down the line.
Looking ahead, I predict that smart, sensor-equipped screens will become standard, offering real-time diagnostics for dust, humidity, or damage, simplifying maintenance even further. Until then, a few simple, specific tools and consistent practices will ensure your home theater remains stunning for years to come.
Don’t wait for visible degradation—try setting up a monthly maintenance checklist with these tools, and see how your picture quality and screen durability improve over time!
Lessons from the Front Lines of Screen Gain Decisions
- I once believed that pushing my screen gain to the max would give me brighter images, but the reality was hotspots and uneven brightness that ruined the experience. The lightbulb moment was realizing that moderation in gain—around 1.0 to 1.3—delivers more consistent quality without sacrificing punch.
- Choosing the right material matters more than the gain rating. I learned this after experimenting with different surfaces, discovering that specialized ALR screens significantly reduce glare and enhance contrast—even in bright rooms—if I select the right one, as explained at this guide.
- The size of your screen should complement your room’s dimensions and projector capacity. My mistake was going too big, causing eye strain and loss of detail. Using tools like the screen size calculator helped me find a balanced setup that feels immersive without overwhelming.
- Understanding that higher gain isn’t always better saved me from costly upgrades. At first, I thought more gain equals more brightness, but after reading this resource, I realized that balance is key, especially in rooms with ambient light.
My Top Picks for Enhancing Your Home Theater
- Opt for ALR Screens: These specialized screens excel in bright environments and help achieve contrast without high gain. I trust this guide to understand which materials suit my needs.
- Use a Size Calculator: A tool like the screen size calculator ensures my setup fits the room and projector capabilities, minimizing discomfort.
- Choose the Right Material: Reflective coatings tailored for ambient light conditions transformed my viewing experience. As detailed at this resource, material selection is critical.
- Moderate Gain for Consistency: Going beyond 1.3 gain introduced hotspots. Sticking with moderate gain surfaces ensures even brightness, aligning with professional advice and my own experience.
Take Control and Make Your Space Shine
When it comes to optimizing a home theater, embracing the nuances of screen gain, material, and size can feel overwhelming. But remember—small adjustments, informed choices, and patience lead to spectacular results. Your setup is an ecosystem—balance everything to echo that perfect cinematic harmony. For a deep dive into each component, check out this comprehensive guide. Ever struggled to get your projection just right? Share your story below, and let’s troubleshoot together!”}#}endmarkdown]}#}This detailed journey into projection screen gains highlights the importance of moderation, material choice, and precise sizing in achieving a home theater setup that truly shines. Remember, the most advanced technology is only as good as the understanding you bring to it—use these insights to transform your space into a cinematic sanctuary. Don’t hesitate to experiment, ask questions, and share your successes or missteps—every experience brings you closer to the perfect viewing experience. Happy projecting! Have you ever struggled with optimizing your screen gain or material choices? Let me know below!**