Ultimate Guide to Projection Screen Material & Size for Optimal Setup
Ever spent hours setting up your home theater, only to be disappointed by dull, washed-out images or a screen that just doesn’t seem to work in your space? I’ve been there. I remember the frustration of buying what I thought was the perfect screen, only to realize that its material and size were completely wrong for my room’s lighting and layout. That lightbulb moment hit hard — I was wasting money and time on setups that didn’t deliver the cinematic experience I craved.
Why Choosing the Right Material and Size Matters More Than You Think
When I first started exploring home theater options, I underestimated how critical the projection screen’s material and size are. It’s not just about having a big screen or a fancy projector. The wrong material can make your image look dull, overly reflective, or washed out, especially in bright rooms. Similarly, choosing a screen that’s too small or too large can ruin your viewing experience, causing eye strain or missing details. The good news? With a little knowledge, you can avoid my early mistakes and create a setup that’s both stunning and practical.
For example, I learned that materials with high gain can boost brightness in well-lit rooms, but choosing the wrong gain can also lead to glare or uneven images. Getting the size right is equally important — too small, and you’ll miss the immersive effect; too large, and you risk distortions or difficulty with projector alignment. The key is understanding how your room’s lighting, size, and viewing distance all influence these choices. If you’re wondering how to navigate this maze, I’ve got your back. I’ll guide you through selecting the best material and size for your space, saving you from costly trial-and-error.
Have you ever bought a screen that looked great in the store but fell flat once you set it up at home? Trust me, you’re not alone. Many enthusiasts make the mistake of ignoring room specifics and settling for generic recommendations. A common slip-up I made early on was choosing a standard matte white screen without considering my room’s brightness, which made my dark images look dull and washed out. That’s why I recommend diving into specific guides on ALR screen options and understanding how gain affects brightness and contrast in different environments. Being informed can turn your setup from mediocre to magnificent.
Is Projection Screen Material & Size Really That Important?
Absolutely. Skipping this step or choosing based only on price can sabotage your entire setup. Remember, the right screen material can enhance contrast, color accuracy, and viewing angles. The wrong size can cause headaches, eye strain, or poor image quality. I learned this the hard way, but now I wish I’d known sooner. By paying attention to these details, you’ll get a clear, vibrant picture that makes every movie night feel like a trip to the cinema. Ready to discover how to pick the perfect material and size for your setup? Let’s dive in and avoid the costly mistakes I made early on.
Selecting the Right Material for Your Room
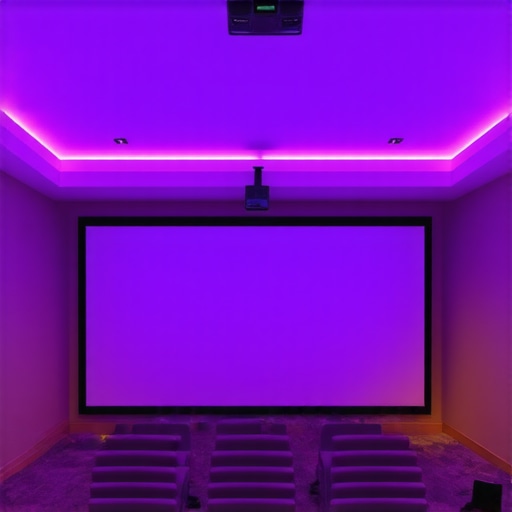
Choosing the optimal projection screen material begins with understanding your room’s lighting conditions. For bright rooms, opt for high-gain screens that reflect more light, making images vibrant and clear. Conversely, in darker rooms, low-gain or matte screens reduce glare and enhance contrast. I once installed a high-gain ALR screen in my living room without considering ambient light, which resulted in excessive glare and washed-out colors. After switching to a low-gain matte screen, my picture quality dramatically improved, proving the importance of matching material to environment. For a detailed comparison of materials, check out this ALR screen options guide.”},
Many enthusiasts believe that selecting a projection screen is straightforward — just pick the biggest size and the most affordable material, right? Wrong. In fact, this common misconception can lead to subpar viewing experiences and costly mistakes. Let’s dig deeper into what most people overlook, and how you can avoid falling into these traps.
Myth: Bigger Is Always Better
It’s tempting to think that a larger screen automatically means a more immersive experience. However, oversizing your screen without considering your room’s size, throw distance, and viewer seating can cause distortions or force you to sit uncomfortably close. This often results in image blurriness or eye strain. Instead, focus on selecting a screen size that aligns with your room’s dimensions and optimal viewing distances. For detailed guidance, check out this projection screen size and material guide.
Myth: All High-Gain Screens Are Suitable for Bright Rooms
While high-gain screens are excellent for reflecting more light, they aren’t a one-size-fits-all solution. Many assume that cranking up gain will solve ambient light issues, but this often leads to glare, hotspots, and reduced contrast. The nuanced truth is that the optimal gain depends heavily on your specific room lighting and projector setup. For instance, if your room has controlled lighting, a moderate gain screen (around 1.3) might give you the best balance of brightness and image uniformity. Dive into this expert guide on ALR screens and gain to learn more.
Why Do Advanced Home Theater Setups Often Fail Despite Proper Screen Choice?
Even with the right material and size, many setups stumble because of overlooked details like ambient light control, projector calibration, or screen placement. For example, a common mistake is mounting the screen too high or too low, which can distort the image and reduce immersion. Additionally, ignoring the nuanced impact of screen gain and surface texture on contrast and color accuracy can undermine even the most expensive projectors. According to a study by Home Theater Review, fine-tuning these factors can improve perceived image quality significantly, sometimes more than upgrading the equipment itself. Always remember: a holistic approach leads to the best results.
Have you ever fallen into this trap? Let me know in the comments. The more we share, the better our home theaters become!
In conclusion, the key to avoiding costly mistakes when choosing your projection screen lies in understanding the nuances of size, gain, and room-specific factors. Don’t rely on generic advice or assumptions — instead, tailor your setup to your unique environment. This mindful approach will ensure you enjoy stunning, vibrant images every time you press play.
Once you’ve assembled an impressive home theater, keeping it in top shape requires the right tools and a bit of routine maintenance. Over time, dust, humidity, and regular usage can impact the performance of your projector, screen, and other equipment. In this guide, I’ll share the specific tools I rely on and routines I follow to ensure my setup remains pristine and operational for years to come.
Invest in a Good Laser Cleaner for Your Projector Lens
One of the most overlooked maintenance tasks is cleaning the projector lens. Dust or smudges can significantly diminish image clarity and contrast. I swear by a high-quality laser lens cleaner, which uses gentle light to remove stubborn grime without scratching the surface. This tool is especially useful if you notice a decline in brightness or sharpness over time. Regularly cleaning the lens—once every few months—keeps your image crisp and vibrant. Remember to turn off and unplug your projector before cleaning, and use a soft microfiber cloth for the best results.
Humidity and Dust Monitoring Tools Protect Your Investment
Extreme humidity or dust buildup can cause long-term damage to sensitive electronic components. I recommend a digital hygrometer to monitor humidity levels in your home theater room. Ideally, keep humidity between 40-50% to prevent mold, fogging, or static buildup. For dust, an air purifier with HEPA filters can dramatically reduce airborne particles. I use a compact air purifier that fits seamlessly into my setup, which helps maintain a clean environment and reduces the need for deep cleaning sessions.
Routine Checks and Firmware Updates Keep Things Running Smoothly
Beyond physical tools, staying on top of firmware updates for your projector and receiver is crucial. Manufacturers often release updates that improve compatibility, add features, or fix bugs. I set a recurring reminder to check for updates quarterly. Additionally, inspecting cables and connections regularly prevents issues caused by loose or damaged wires. Using a cable management system not only tidies up your space but also prolongs the lifespan of your cables by preventing wear and tear.
Long-Term Planning with Calibration Devices
If you’re serious about maintaining top picture quality, consider investing in a calibration device like the X-Rite i1Display Pro. This tool allows you to calibrate your display settings precisely, ensuring consistent color and contrast over time. I calibrate my projector bi-annually for optimal viewing. Proper calibration can extend the lifespan of your display’s perceived quality and reduce eye strain, making every viewing session more enjoyable.
Predicting Future Trends in Home Theater Maintenance
Looking ahead, I believe automation and smart home integrations will make maintenance even easier. Future systems might automatically alert you to dust buildup, firmware needs, or component failures via smartphone apps. This proactive approach will keep your setup performing at its best without constant manual checks. Until then, sticking to routine maintenance and investing in quality tools remains your best bet.
Ready to take your home theater’s longevity to the next level? Start by trying out a calibration device or setting up a regular cleaning routine with trusted tools. Your future self will thank you for the crystal-clear images and hassle-free setup!
The Hardest Lesson I Learned About Home Theater Screens
One of my biggest surprises was realizing how much the wrong screen material can ruin an otherwise perfect setup. I once bought a matte white screen without considering my room’s ambient light, only to find my images dull and washed out. That taught me to always match my screen material to my room’s lighting conditions, which dramatically improved my viewing experience.
3 Myths About Screen Size and Gain That Held Me Back
I used to think bigger was always better, but in reality, a screen that’s too large can cause distortions and eye strain. Also, I believed all high-gain screens work well in bright rooms, but many cause glare and hotspots if not chosen carefully. Learning the nuances of gain and size from trusted guides like this ALR screen options guide saved me from costly mistakes.
What Experts Won’t Tell You About Home Theater Screens
Many overlook the importance of proper screen placement and calibration. Even with the best material and size, poor positioning or calibration can ruin your image. I discovered that consistently fine-tuning my setup using calibration tools like the X-Rite i1Display Pro keeps my picture at its best, giving me that cinematic quality every time.
My Essential Toolkit for Home Theater Maintenance
To keep my setup in top shape, I rely on a high-quality laser lens cleaner, a digital hygrometer, and a reliable air purifier. Regular firmware updates and routine checks on cables also prevent many issues. Investing in these tools has extended the lifespan and quality of my home theater system, ensuring every movie feels fresh and vibrant.
Your Turn to Try
The key to a stunning home theater is understanding the details that matter. Take the time to research your room’s lighting, measure your space accurately, and choose the right screen material and size accordingly. Your future movie nights will thank you for it. Ready to fine-tune your setup and avoid common pitfalls? Share your experience or ask questions below — I love helping fellow enthusiasts elevate their home theaters!

Reading through this guide really hit home for me, especially about choosing the right screen size and material. I used to go for the biggest screen possible and didn’t consider ambient lighting, which led to dull images and eye strain during long movie nights. Once I switched to a matte screen better suited to my dimly lit room, the picture quality improved dramatically. It’s surprising how much that small change made a difference. I’ve also been thinking about trying a high-gain screen for my next upgrade, but I wonder, how do you recommend balancing gain with potential glare issues? Has anyone found a sweet spot where brightness is optimized without suffering hotspots? I’d love to hear more about how others have tailored their screens to specific room conditions. It’s all about making smart choices to get that cinema-quality experience at home, isn’t it?
This article really resonated with my own journey in optimizing my home theater setup. I initially underestimated how much the room’s ambient light could affect projected images, leading me to choose a larger screen without considering gain or room lighting. Switching to a high-gain material helped boost brightness, but I faced hotspots and glare in certain spots. After some trial and error, I found that balancing gain around 1.3 to 1.5 works well for my slightly brighter living room. I think the key is understanding your unique environment and not just chasing bigger screens or higher gain. I’d love to hear how others have managed to fine-tune their screen settings, especially in rooms with mixed lighting conditions. Do you think room darkening solutions like blackout curtains can significantly reduce the need for ultra-high gain screens? It seems like a holistic approach can save money and improve overall experience. Looking forward to hearing more tips and personal experiences on this—it’s such a nuanced but rewarding process.
Reading this comprehensive guide really made me reflect on my own home theater setup, especially the importance of matching the screen material and size to my room’s light conditions. I used to think that a larger, cheaper matte white screen would do the job, but I quickly learned that in a brighter living room, images can become dull or washed out without the right material. Switching to a high-gain screen with better ambient light management made a noticeable difference for me. I’ve been exploring adjustable gain screens to find the perfect balance between brightness and glare, but I wonder, has anyone here experimented with different gain levels in diverse lighting environments? How do you optimize your screen for the best contrast without causing hotspots or reflections? I’d love to hear some real-world experiences or recommendations on balancing gain and size effectively, especially in mixed lighting setups.