![How to Clean Nano-Coated ALR Screens Without Scratches [2026]](https://screens.cinegearguide.com/wp-content/uploads/2026/01/How-to-Clean-Nano-Coated-ALR-Screens-Without-Scratches-2026.jpeg)
How to Clean Nano-Coated ALR Screens Without Scratches [2026]
It was a frustrating moment I won’t forget—trying to wipe down my prized Nano-Coated ALR screen only to see tiny scratches emerge under my fingertips. I had spent thousands on a premium screen, and here I was, accidentally tarnishing its sleek surface with careless cleaning. That lightbulb moment made me realize how delicate and tricky these advanced screens can be, especially when it comes to maintenance.
Why Cleaning Nano-Coated ALR Screens Can Feel Like Walking a Tightrope
If you’ve ever gone to clean your ALR (Ambient Light Rejection) screen and ended up with unsightly scratches, you’re not alone. It’s a common frustration among home theater enthusiasts, and surprisingly, many don’t realize that the way they clean can either preserve or damage their investment. These screens boast a special nano-coating designed to enhance contrast and color accuracy, but that very coating can be sensitive to improper cleaning techniques. I’ve learned the hard way that the tiniest slip can lead to permanent marks, and mornings spent fussing over stubborn smudges can turn into nights of regret.
Fortunately, through a lot of trial, error, and advice from seasoned experts, I’ve uncovered some effective methods that keep my screen spotless without risking scratches. Today, I want to share those insights with you—so you don’t have to go through the same mishaps. Whether you’re setting up a new theater room or simply maintaining your current setup, mastering scratch-free cleaning is crucial to maintaining that pristine, cinematic experience at home.
Is It Really Possible to Clean Without Scratches?
Early on, I made the mistake of using abrasive cloths and chemical cleaners, thinking they would cut through dust and fingerprints faster. Turns out, those shortcuts cost me dearly. According to industry specialists, using the wrong cleaning tools or aggressive scrubbing can easily damage the nano-coatings—while gentle techniques can keep your screen looking brand new for years. This realization kickstarted my journey into researching safe practices, and I found a wealth of tips that have become invaluable in my maintenance routine.
If you’ve faced similar struggles or want to avoid the pitfalls that come with improper cleaning, don’t worry. We’re about to go through step-by-step strategies that are proven to work, backed by expert advice. Trust me, with a little care and the right techniques, your screen can stay flawless and scratch-free. Ready to learn how? Let’s dive into the how-to part—because a clean screen equals a better viewing experience.
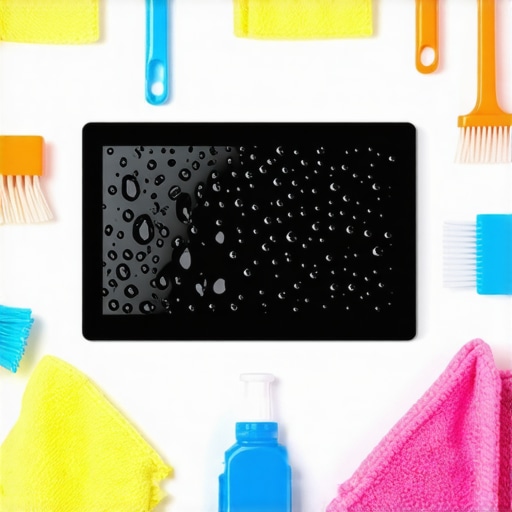
Equip Yourself with the Right Tools for the Job
Start by gathering a microfiber cloth specifically designed for delicate surfaces—avoid any abrasive or rough fabrics. I learned this the hard way when I used an old t-shirt, which left tiny scratches on my screen. Microfiber cloths trap dust and fingerprints gently without damaging the nano-coating.
Next, select a cleaning solution that’s pH-neutral and free of harsh chemicals. Distilled water can work for light dust, but for fingerprints or smudges, lightly dampen the cloth with a mixture of distilled water and a few drops of isopropyl alcohol (70% or less). Never spray directly onto the screen; always apply the cleaner onto your cloth to prevent excess moisture.
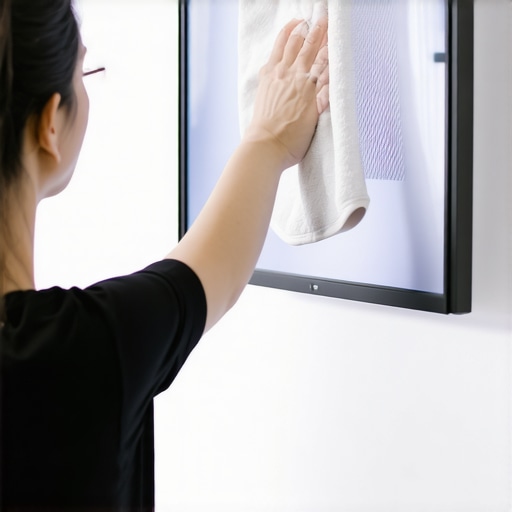
Approach Your Screen Gently — No Aggressive Scrubbing
Once you’re ready to clean, turn off your projector and unplug the screen to avoid static buildup. Gently wipe the surface with the damp microfiber in straight, light strokes—imagine you’re patting down a fine piece of glass rather than scrubbing away stubborn dirt. In my experience, using circular motions caused micro-abrasions, so I stuck with straight lines that evenly distribute pressure.
I once attempted to clean stubborn smudges by pressing too hard, which resulted in faint scratches. After that, I realized that patience and light pressure are key. If you encounter stubborn spots, let the cloth sit for a moment to loosen dirt, then continue gently.
Maintain Proper Pressure and Frequency
Apply only the slightest pressure—think of gliding your hand just above the surface without pressing down. Regular cleaning—once every few weeks—prevents buildup, making each session quick and safe. Over-cleaning or applying too much pressure increases the risk of damaging your nano-coating and creating scratches.
During one clean, I noticed that using a slightly damp cloth without pressing hard allowed me to remove dust effortlessly, leaving no streaks or marks. Consistency and gentleness are your best allies for long-term preservation.
Avoid Common Mistakes That Damage Your Screen
Avoid chemical cleaners with alcohol or ammonia, which can weaken the nano-coating over time. Also, resist the temptation to use rough cloths or paper towels, which are abrasive and scratch-prone. If your screen has stubborn grime, consider using soft, specialized cleaning wipes designed for electronics.
Never attempt to clean a screen with household window cleaners or household sprays—they can strip away coatings and ruin the display. Remember, gentle, minimally dampened microfiber is your safest bet.
Additional Tips for Healthier Screens
Position your screen away from direct sunlight or sources of dust to reduce cleaning frequency. When cleaning, ensure the environment is free of debris that can fall onto the surface during wiping. After cleaning, let the screen dry completely before powering on your projector again to prevent streaks or water spots.
On a personal note, adopting these techniques turned my experience around. My screen stayed pristine, and I avoided costly repairs or replacements. Staying consistent with gentle cleaning will keep your Nano-Coated ALR screen looking flawless for years to come.
When it comes to optimizing your home theater setup, many enthusiasts fall prey to misconceptions about screen gain, size, material, and the latest ALR technologies. Let’s dig deeper into some of these nuances and common pitfalls that can undermine your efforts.
One pervasive myth is that higher screen gain always equates to a better image. In reality, while a 1.4 to 1.6 gain is typically ideal for most rooms, pushing beyond that can cause glare and uneven brightness, especially in ambient light conditions. Experts recommend tailoring gain to your specific environment, rather than blindly chasing the highest numbers. For a comprehensive understanding, check out the “[Best ALR Screen Options and Gain Insights for 2024](https://screens.cinegearguide.com/best-alr-options-screen-material-gain-insights-for-2024)”.
Many assume that larger screens are always better. However, an oversized screen in a small room can lead to eye strain, and the projected image may lose sharpness if the projector’s lens isn’t matched properly. Optimal sizing depends on your room dimensions, viewing distance, and projector capabilities. For precise calculations, refer to “[Understanding Projection Screen Size and Gain for Optimal Home Theater Setup](https://screens.cinegearguide.com/understanding-projection-screen-size-gain-for-optimal-home-theater-setup-2)”.
Another common oversight involves screen material selection. Some buyers opt for low-cost PVC-based or woven fabrics, believing all materials are equivalent. Yet, as [spectacularly explained](https://screens.cinegearguide.com/stop-buying-pvc-5-woven-screen-materials-for-2026-atmos-setups), not all screen materials perform similarly—some may exhibit color shifting, glow, or degrade quickly. Choosing the right material isn’t just about gain; it involves spectrally-neutral, non-reflective surfaces designed for your room’s lighting conditions.
When it comes to ALR (Ambient Light Rejection) screens, many folks confuse optical coatings with physical layer structures. Not all ALR screens are created equal; the type of material, the layering technique, and the presence of a black backing layer can significantly influence contrast and brightness. An overly high gain ALR screen may enhance contrast in a dark room but can cause hot-spotting and uneven brightness in bright environments. Check out the “[Ultimate Guide to ALR Screen Options and Technologies](https://screens.cinegearguide.com/ultimate-guide-to-alr-screen-options-size-gain-and-material-insights)” for a detailed breakdown.
Finally, considering a projection screen isn’t just about choosing a model but understanding the complex interplay between gain, material, size, and room lighting. A misjudgment in any of these aspects leads to disappointing results. The false belief that opting for the brightest or the highest gain screen guarantees a superior image is widespread but misguided. As highlighted by experts, balancing all these factors based on your room’s specifics leads to true cinematic excellence.
Have you ever fallen into this trap? Let me know in the comments. Remember, being an informed enthusiast means digging into these subtleties that make or break your home theater experience.
Tools I Recommend for Long-Term Screen Maintenance
Maintaining your projection or ALR screen isn’t a one-time task but an ongoing process that benefits from the right equipment and methods. Over the years, I’ve refined my toolkit to ensure my screen stays pristine with minimal effort. The cornerstone of effective maintenance is choosing tools that are both gentle and effective. For instance, I always keep a high-quality microfiber cloth designed specifically for delicate surfaces—these trap dust and oils without risking scratches. Brands like MagicFiber have proven reliable for me due to their finely woven fibers and durability.
Beyond cleaning cloths, a compressed air duster is invaluable for removing dust from edges and corners that are hard to reach. I prefer compressed gas cartridges with a nozzle that allows precise control, preventing the accidental spray of dust particles onto the screen surface. This prevents buildup that can compromise image quality over time.
For a more thorough clean, I rely on a spray bottle filled with distilled water mixed with a few drops of isopropyl alcohol (70%). It’s essential to use distilled water to avoid mineral deposits, and I always apply the solution to the cloth—not directly onto the screen—to prevent excess moisture that could damage coatings. This method keeps my screen free from smudges and fingerprints without risking the nano-coating’s integrity.
Leverage Software and Calibration for Longevity
Regular calibration isn’t just about getting bright, vivid images; it also prolongs the lifespan of your equipment. I utilize software like CalMAN or LightSpace to perform color calibration and gamma adjustments, ensuring the projector or display operates within optimal parameters. Proper calibration reduces the need for physical cleaning or adjustments, as it minimizes artifacts and unwanted reflections that can attract dust or fingerprints.
Additionally, ambient light sensors integrated into some projectors automatically adjust brightness, reducing strain on the screen surface and electronics. Keeping firmware updated ensures your device benefits from the latest features that support longevity and performance.
Future Trends: Smart Maintenance Will Dominate
Looking ahead, I predict smart cleaning solutions will become standard in high-end home theater setups. Imagine robotic cleaners equipped with gentle microfiber brushes and sensors to identify dirty spots—saving time and ensuring consistent cleanliness. Additionally, AI-driven calibration tools will allow for real-time adjustments to maintain perfect image quality with minimal user intervention. Investing in these technologies now can future-proof your setup and keep your screen performing flawlessly for years to come.
How do I sustain my screen’s performance over time?
Consistent, gentle cleaning paired with routine calibration is key. Incorporate tools like microfiber cloths, compressed air, and proper cleaning solutions into your maintenance routine. Regularly update your projector firmware and utilize calibration software to fine-tune image parameters. This holistic approach ensures your investment remains vibrant and scratch-free long-term.
Don’t overlook the importance of environment—position your screen away from dust sources and direct sunlight, and use room filters when possible. For complex setups, consulting expert guides such as the Ultimate Guide to ALR Screen Technologies can provide tailored advice for your specific needs. I highly recommend trying my preferred method of using a microfiber cloth combined with a very light spray of distilled water and alcohol mixture—it’s safe, effective, and low-cost. Give it a shot during your next cleaning session and see the difference it makes.
Lessons I Never Expected to Learn About Screen Maintenance
- One of the toughest realizations was that even the softest microfiber cloth, if not chosen carefully, can cause micro-abrasions over time—so investing in high-quality, delicate cleaning tools is a game-changer.
- I discovered that patience truly pays off; rushing through cleaning leads to mistakes, while gentle, methodical strokes preserve the nano-coating’s integrity and extend the life of your screen.
- Reminding myself that every cleaning session is a chance to improve has kept me consistent—embracing a routine that prioritizes delicate care keeps my cinematic view crystal clear.
- I’ve learned that environment matters just as much as technique. Keeping dust and direct sunlight away reduces the need for frequent cleaning, maintaining the screen’s pristine condition with less effort.
My Toolkit for Preserving the Perfect Projection Experience
- Microfiber cloths from brands like MagicFiber—trusted for their ultra-soft fibers that prevent scratches—are my primary cleaning gear, ensuring gentle removal of fingerprints and dust.
- Compressed air cans with fine nozzles help me reach tricky corners without risking water or debris falling onto the screen—an essential for thorough maintenance.
- A spray bottle with distilled water mixed with a few drops of isopropyl alcohol (70%)—applied onto the cloth, not directly onto the screen—is a simple yet effective solution for light smudges.
- Additionally, calibration software such as CalMAN keeps my setup balanced, reducing artifacts that may attract dust or fingerprints and prolonging the clarity of my display.
Now It’s Your Turn to Elevate Your Screen Care
Taking small steps in delicate cleaning and routine calibration can make a significant difference in your home theater’s visual longevity. By adopting these insights and refining your maintenance habits, you ensure your investment remains flawless and immersive for years to come. Don’t shy away from experimenting with gentle techniques—your perfect cinematic experience starts with mindful care.
Have you ever struggled with selecting the right cleaning tools or techniques for your screen? Share your experiences below and let’s learn from each other’s journeys toward spotless, scratch-free displays.


Reading through this post really resonated with my own experience in maintaining my high-end ALR screen. I used to think that more frequent cleaning would keep it looking perfect but quickly learned that gentle, infrequent care with the right tools is much more effective. I recall a close call where I used a rough cloth and nearly scratched the surface, which made me realize the importance of microfibers and proper technique. It’s fascinating how the nano-coating is so delicate that even tiny micro-abrasions can set it back. One thing I’ve found helpful is always turning off the projector and unplugging before cleaning—static buildup can attract dust and make cleaning even trickier. Have others found that environmental factors, like room humidity or dust levels, impact how often they need to clean or the tools they choose? I’d love to hear tips on optimizing the environment for minimal maintenance, as it could save a lot of effort and keep the display pristine longer.
I totally relate to the frustration of accidentally scratching a delicate ALR screen—it’s a painful lesson in patience and the right cleaning techniques. I’ve found that a consistent routine using the proper tools, like high-quality microfiber cloths and gentle, alcohol-free cleaning solutions, really helps maintain the screen’s integrity over time. I also make sure to turn off the projector and unplug it before cleaning, as static can attract dust and make scratches more likely. Interestingly, I’ve noticed that the room’s humidity level affects how often I need to clean, as drier environments can increase static and dust attraction. Has anyone experimented with environmental controls—like humidifiers or air purifiers—to extend the cleanliness of their screens? I’d love to hear if these methods have helped others keep their screens spotless and scratch-free without added effort.