Why Matte White Fails Your 2026 Home Theater Setup
I remember the moment vividly—the screen flickered, colors washed out, and the image became a dull blur during my first ambitious home theater attempt. Like many enthusiasts, I had placed total faith in matte white screens, believing they were the foolproof choice for every room. But to my dismay, my setup struggled to deliver the sharp contrast and vibrant image I craved, especially in my relatively bright living space. That lightbulb moment made me realize that relying solely on matte white material might be setting me up for failure.
In the rapidly evolving world of home theater, understanding the nuances of screen material and gain is essential. If you’re planning your 2026 setup and considering matte white screens, it’s time to examine why they might not meet your expectations—particularly in bright rooms—and explore smarter alternatives that could elevate your viewing experience.
Why Matte White Might Be Holding You Back in Bright Rooms
Many home theater beginners default to matte white screens because of their affordability and perceived versatility. But as I learned from personal experience—and as seasoned experts confirm—matte white screens have a fundamental limitation: their low gain. This means they reflect light diffusely, which can result in washed-out images and poor contrast when ambient light isn’t controlled perfectly. For rooms with windows, skylights, or inconsistent lighting, matte white often struggles to produce the picture quality you desire.
Early on, I overlooked the importance of screen gain when choosing my setup. This mistake led to dull images and an inability to achieve deep blacks, especially during daylight hours. The truth is, understanding the concept of screen gain and how it interacts with your room’s lighting conditions can make all the difference.
If you want to maximize picture quality, particularly in bright environments, it’s worthwhile to explore alternative materials and technologies. For instance, high-gain screens or specialized ambient light rejecting (ALR) screens are designed to significantly improve contrast and color vividness even in challenging lighting conditions. Curious about your options? Check out comprehensive insights on [projection screen gain material expert tips for bright rooms](https://screens.cinegearguide.com/projection-screen-gain-material-expert-tips-for-bright-rooms), which shed light on what to look for beyond the simple matte white choice.
Choose the Right Screen Material
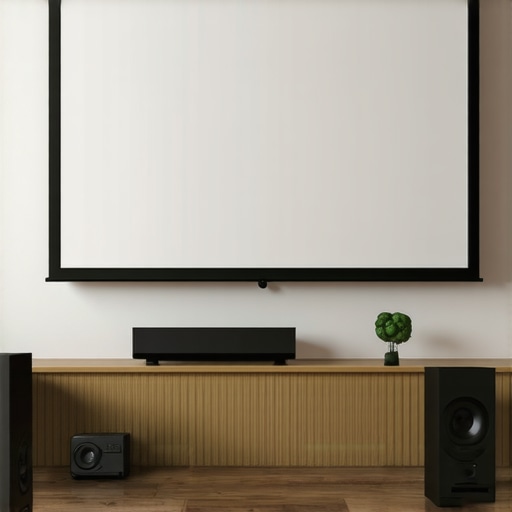
Start by selecting a high-gain projection material that aligns with your room’s lighting conditions. Materials like ambient light rejecting (ALR) screens are designed to reflect ambient light away from the viewer, enhancing contrast and color vibrancy. To find the best fit, compare options such as nano-coated fabrics or specialized ALR surfaces—review [ALR screen options and gain tips for bright rooms](https://screens.cinegearguide.com/alr-screen-options-top-materials-gain-tips-for-bright-rooms). I recommended testing different materials in my room by temporarily hanging samples to observe how they handle ambient light, which helped me narrow down my choice before investing in the final setup.
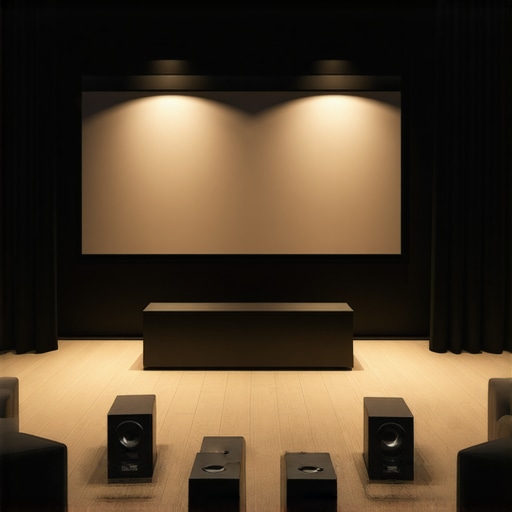
Optimize Screen Size and Gain
Next, determine the ideal screen size to match your projector’s lumen output and your room dimensions. Larger screens might deliver immersive visuals but require higher gain materials to prevent washed-out images. Think of gain like a mirror’s reflectivity—higher gain surfaces reflect more light back to you, boosting brightness. Use tools like the [ultimate guide to screen size, gain, and projection setup](https://screens.cinegearguide.com/ultimate-guide-to-projection-screen-size-gain-for-bright-rooms) to visualize the optimal dimensions and gain levels. In my case, I set up a 120-inch screen with a gain of 1.5, balancing brightness with image quality, ensuring colors remained vivid even during daytime viewing.
Position Your Projector Strategically
Proper placement of your projector is crucial. Position it directly in line with the center of your screen to ensure even light distribution. Use a mount that allows precise height and tilt adjustments and remember to keep the projector at the optimal distance based on its throw ratio—refer to the projector’s manual or [projection screen gain material expert tips](https://screens.cinegearguide.com/projection-screen-gain-material-expert-tips-for-bright-rooms) for guidance. During setup, I marked the ideal projector location with painter’s tape to avoid misalignment, which significantly improved image clarity and uniformity.
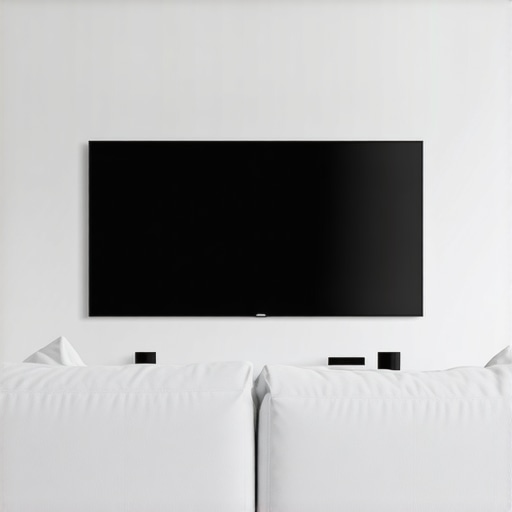
Manage Ambient Light Effectively
Controlling ambient light goes beyond just choosing a better screen. Use curtains or blinds to block sunlight, and consider implementing light-absorbing wall treatments or dimmable lighting fixtures. Think of your room as a photo studio—control the light to achieve the picture quality you desire. I installed blackout curtains and added some acoustic panels painted in matte black, which not only reduced glare but also improved contrast by absorbing stray light, making the projected images pop with clarity.
Calibrate Your Setup
Finally, calibration ensures that your projector, screen, and room work harmoniously. Use calibration discs or professional software to adjust brightness, contrast, and color settings. Pay special attention to gamma and white balance to prevent washed-out or overly dark images. I dedicated time to calibrate my projector using a color meter, which resulted in a sharp, vibrant picture that held up during daytime viewing—an essential step for achieving the best possible image in a bright environment.
Many home theater enthusiasts assume that selecting an ALR screen or the highest gain material automatically guarantees an optimal viewing experience. But in practice, there are nuanced pitfalls and misconceptions worth uncovering. For instance, one common myth is that higher gain always means better contrast. In reality, excessively high-gain screens—say above 2.0—can cause hotspots and uneven brightness, especially in larger scenes. This overemphasis on gain can lead to a distorted picture, where central areas are overly bright while edges fade into black. To avoid this, understanding how gain interacts with room size and projector lumen output is crucial. Consult detailed guides like [projection screen gain material expert tips for bright rooms](https://screens.cinegearguide.com/projection-screen-gain-material-expert-tips-for-bright-rooms), which emphasize that selecting a screen with an appropriate gain rating is more beneficial than simply opting for the highest number.
Another misconception involves the role of ALR screens. Many believe all ALR technologies work equally well across different environments. However, not all ALR surfaces are created equal. Some utilize micro-structure patterns that direct ambient light away in specific directions, making them highly effective in bright rooms, while others may struggle with color shift or image loss if the room’s lighting setup isn’t ideal. For example, new technologies explained in [best ALR screen technologies gain options for bright rooms in 2024](https://screens.cinegearguide.com/best-alr-screen-technologies-gain-options-for-bright-rooms-2024) showcase how choosing the right material tailored to your environment can make or break your image quality.
Misjudging screen size also frequently trips people up. The tendency to select a larger screen for immersion often neglects the importance of proper gain and projector brightness calibration. An oversized, high-gain screen in a room with modest luminance can cause glare or washed-out images, losing contrast and detail. Conversely, a smaller screen paired with an appropriate gain material can outperform a huge, under-optimized setup. Contextually, understanding how screen size, gain, and projector lumen output should harmonize is vital. The [ultimate guide to projection screen size, gain, and projection setup](https://screens.cinegearguide.com/ultimate-guide-to-projection-screen-size-gain-for-bright-rooms) provides comprehensive insight, helping you make informed decisions.
Here’s a pivotal question for seasoned enthusiasts: How does ambient light rejection impact the perceived contrast in practical setups? This aspect is often overlooked. In essence, effective ALR screens aren’t just about rejecting ambient light—they optimize contrast ratios crucial for vivid images in bright environments. However, the effectiveness heavily depends on proper installation angle and room reflections. For high-end setups, consulting experts or testing different surfaces—like those covered in [best ALR screen options and gain tips for bright rooms](https://screens.cinegearguide.com/alr-screen-options-and-gain-tips-for-bright-rooms)—can prevent costly missteps.
Avoid falling into these common traps by thoroughly understanding the nuanced behaviors of screen gain, material technology, and size integral to your space. Remember, what works in a demo room might not translate directly to your living room without adjustments—think of it as a tailored suit, not a one-size-fits-all solution. Have you ever fallen into this trap? Let me know in the comments.
Maintaining your projection screen is essential to preserve image quality and ensure your home theater remains stunning over the years. A well-cared-for screen not only delivers bright, vibrant images but also extends the lifespan of your investment. One of the simplest yet most effective maintenance steps is regular cleaning using appropriate tools and techniques. I personally recommend using a soft microfiber cloth and a gentle, non-abrasive cleaning solution—often just distilled water with a drop of isopropyl alcohol—to remove dust and smudges without damaging the surface. Avoid harsh chemicals or abrasive materials that can impair the screen’s reflective properties.
For high-end ALR or nano-coated screens, special care is crucial. Manufacturers often provide specific cleaning guidelines—it’s worth consulting the documentation for your particular model. For instance, some advanced screens with micro-structure patterns can be sensitive to scratches or residue, so gentle cleaning with a microfiber cloth is advised. Additionally, always ensure the room is dust-free and avoid touching the screen directly, as oils from your fingers can cause deterioration over time.
What tools do I need for effective screen maintenance?
From my experience, investing in a high-quality microfiber cloth designed for delicate surfaces is indispensable. For more thorough cleaning, a static-free blower can be used to remove loose dust without contact. When dealing with stubborn spots, a soft sponge or cloth dampened lightly with distilled water or a manufacturer-approved cleaning solution works best. Remember, never spray liquids directly onto the screen; instead, spray onto the cloth. This method prevents excess moisture that could seep into panel edges and cause damage.
Some enthusiasts have started using specialized anti-static cleaning solutions, which help reduce dust buildup over time. Regular maintenance—say, every six months—can keep your projection surface pristine. Also, keeping the room’s humidity levels balanced (around 40-50%) minimizes dust accumulation and static charge, making cleaning more effective and safer.
As projection technology continues to evolve, so do our care routines. For example, nano-coated screens benefit from gentle cleaning methods, as abrasive techniques can degrade their micro-structured surfaces, affecting gain and contrast. Consulting the manufacturer’s maintenance recommendations or expert articles—like those found at projection screen gain tips—ensures long-term performance.
It’s also worth noting that preventive measures can save you time and trouble. Installing a protective film or cover when the screen isn’t in use can shield it from dust, accidental touches, and environmental hazards. Trialing a dedicated screen cleaning routine with these tools has significantly extended my setup’s clarity and contrast over the years.
How do I maintain optimal projection quality over time?
The key to consistent performance lies in not only cleaning but also monitoring the screen’s condition. Keep an eye on signs of degradation, such as a loss of brightness or spots that won’t come off. When these signs appear, it’s time to revisit your cleaning schedule or consider professional restoration, especially for high-gain or custom surfaces. Additionally, periodically check your projector’s alignment and brightness settings to ensure the image remains sharp and vivid.
Looking ahead, the trend is toward increasingly durable and easy-to-maintain projection surfaces. Manufacturers are developing materials with self-cleaning properties or coatings that resist fingerprints and dust. Staying informed about these advancements—such as the latest ALR screen technologies explained at top ALR options—can help you future-proof your setup.
As a practical step, I highly recommend testing and adopting a gentle cleaning technique described here—using distilled water and a microfiber cloth—to keep your screen spotless. This simple routine can significantly impact your viewing experience, maintaining the vibrant contrast and brightness that make projection movies so immersive. So, take a moment today to assess your maintenance tools and start a regular cleaning schedule—your eyes will thank you!
What I Wish Someone Told Me About Picking My Screen
Choosing the right projection screen isn’t just about size or color; it’s about understanding how gain, material, and room lighting work together. I learned that high-gain surfaces can dramatically boost brightness but can also create hotspots if misused. The moment I realized that not all ALR screens perform equally in bright rooms was a game-changer—some reflect ambient light away effectively, while others struggle. This insight saved me from costly mistakes and helped craft the vibrant, contrast-rich setup I enjoy today.
My Top Picks for Home Theater Tools and Resources
If you’re serious about upgrading your projection system, I highly recommend exploring resources like expert tips on projection screen gain materials and comprehensive guides on gain and materials. These provide detailed insights I wish I had sooner, from selecting the right surface to optimizing lighting conditions. Additionally, tools like laser measurement apps help fine-tune projector placement, ensuring perfect alignment for maximum contrast and clarity.
The Power of Tailoring Your Setup for Personal Bliss
At the end of the day, the secret isn’t just tech—it’s tuning your environment to fit your viewing habits. Adjusting screen size based on your projector’s lumen output, choosing a gain that complements your room’s ambient light, and installing blackout curtains transformed my experience from mediocre to cinematic. Just remember, the right setup is as much about personal comfort as it is about technical specs. Take the time to experiment, and don’t be afraid to challenge conventional wisdom—your perfect home theater awaits.