Upside Down? The #1 ALR Screen Setup Mistake to Avoid in 2026
It was a moment of pure frustration. I had just spent hours calibrating my new ALR screen, only to realize I had mounted it upside down. The colors looked washed out, contrast suffering, and my 4K movies barely watched. That lightbulb moment hit hard: even the best screen can’t save you if it’s installed incorrectly.
Why Your ALR Screen Might Be Killing Your Image Quality in 2026
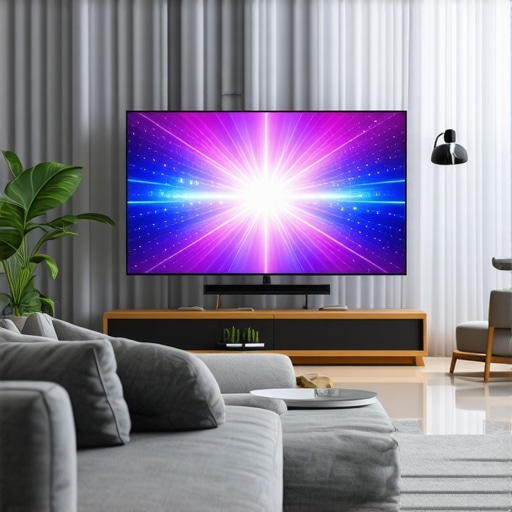
As home theater enthusiasts, we chase perfection—yet one simple mistake can wipe out our efforts. The setup approach we take can make or break the experience, especially with advanced Ambient Light Rejection screens gaining popularity. I’ve learned first-hand that the #1 setup mistake in 2026 is installing your ALR screen upside down. Why? Because the gain, texture, and materials are designed with specific orientation for optimal reflection and contrast. My early blunder left me questioning everything I knew about projection screens. Should I just get a white wall instead? Not quite. Instead, I discovered the importance of correct installation and how it can amplify or diminish your viewing pleasure. Trust me; once I flipped that screen, everything changed. Brightness improved, colors popped, and my room was transformed into a true home theater. Interested? Keep reading, and I’ll walk you through how to avoid this rookie mistake.
Is Your Screen Setup Really Worth the Hype? The Skeptic’s Dilemma
Early on, I fell into the trap of believing that any ALR screen would do. I watched reviews, bought the popular models, but ignored the crucial installation details. That led me down a rabbit hole of poor contrast and washed-out images. It wasn’t until I read a detailed guide—like the one explaining the importance of proper gain material placement—that I realized the impact of orientation. Just as [an expert](https://screens.cinegearguide.com/stop-washing-out-colors-3-alr-screen-gain-fixes-for-2026) highlights, even slight missteps in setup can ruin what could be an incredible picture. Are you sure you’re installing your ALR screen correctly? Or have you fallen into the common trap of ignoring this critical aspect? My advice: don’t buy into the hype blindly. Proper setup is the foundation of a stunning home theater experience. Next, I’ll shed light on exactly how to do it right, step by step.
Mount the Screen Correctly—The First Step to Clarity
When installing your ALR screen, ensure it is oriented according to manufacturer instructions. Think of it as flipping a pancake—place it shiny side up to reflect light properly and gain the optimal contrast. I once hurried through installation and faced washed-out images; reorienting my screen made a dramatic difference, restoring color richness and contrast.
Check the Surface Texture and Gain
The texture of your ALR screen influences light reflection. Matte textures are typically better for ambient light control, but the gain of the material determines brightness and contrast. For a room with some windows, aim for a gain around 0.8 to 1.2 to balance brightness without washing out details. I experimented by swapping different materials, using a high-gain screen in a bright room and observing how contrast diminished when improperly matched. You can learn more about selecting the best material at this guide.
Match Screen Size to Your Space and Projector
Picking the right size is crucial; too large overwhelms the room, too small underwhelms your display. Use the 8K view distance rule—roughly 1.5 times the diagonal size of your screen—for optimal clarity. My first attempt involved a 150-inch screen in a cramped room, resulting in a blurry picture. After consulting this calculator, I downsized to 120 inches, which improved clarity and immersion. Consider your projector’s lumen output and throw distance; for example, in bright rooms, a higher gain screen helps compensate for lower brightness.
Position the Screen for Maximum Impact
The placement of your screen relative to the projector and viewer influences image quality. Place the screen directly in front of the room’s main viewing position, at eye level, and avoid obstructions. Use a level to ensure the screen isn’t tilted and check reflections with a flashlight during setup. I initially misaligned my screen, causing glare and uneven reflections, but realigning it fixed the issues. To fine-tune positioning, refer to this comprehensive guide.
Test and Adjust Gain Settings
Once installed, assess your setup by projecting a uniform gray image in a dark room. If the picture is dull, consider increasing gain slightly; if washed out, lower it. Remember, higher gain isn’t always better, especially in ambient light. Consider your projector’s capabilities—many projectors in 2026 can deliver high contrast at 1.0 gain. For fine-tuning, visit this resource for expert advice on gain adjustments. During my initial tests, I found that minor tweaks in gain dramatically improved contrast and color vibrancy without additional equipment.Many enthusiasts assume that choosing a larger screen automatically guarantees a better viewing experience, but in reality, screen size is a nuanced decision that depends on your room and projector capabilities. Overestimating size can lead to a crowded, uncomfortable setup, especially if your projector can’t adequately fill the screen with sufficient brightness. Conversely, selecting too small a screen diminishes immersion and detail, making your investment feel underwhelming. A critical mistake is relying solely on popular sizes like 150 inches without considering room dimensions, throw distance, or the projector’s lumen output. For example, a 2026 study emphasizes matching screen dimensions to room size and projector specs, which avoids costly reconfigurations later. When it comes to screen material, many believe that any matte white surface will do, but materials engineered specifically for ambient light rejection—like those with textured, gain-optimized surfaces—offer a significant contrast advantage in bright rooms. Be cautious of low-gain screens (below 0.8), which can wash out colors and reduce contrast; instead, opt for optimized gain levels around 1.0 to 1.2, based on your ambient lighting conditions. A common myth is that higher gain always means brighter images; in truth, excessive gain (above 1.5) introduces hotspots and uneven reflections, which degrade image quality across the viewing area. For sophisticated setups, understanding how gain interacts with projector lumen output is vital; a popular misconception is that a 1.5 gain screen compensates for lower lumen projectors, yet expert sources clarify that the best results come from matching gain to your projector’s capabilities and room lighting, rather than simply increasing gain indiscriminately. Additionally, many overlook the importance of orientation and texture in ALR screens. Installing a screen upside down or with incorrect texture orientation can drastically impair contrast and color accuracy. Advanced enthusiasts scrutinize manufacturer instructions carefully, knowing that the gain and texture patterns are designed with specific directional properties. For example, textured surfaces aligned properly can diffuse ambient light while reflecting projector light accurately, providing a more balanced image. Always test your setup with uniform gray projections and adjust gain accordingly, avoiding the trap of relying solely on default settings. The key takeaway: understanding these technical nuances prevents common mistakes and elevates your home theater experience. Have you ever fallen into this trap? Let me know in the comments! For detailed guidance on choosing the right screen size and material, explore the comprehensive article on screen size and gain optimization.
Keeping Your Projection Screen in Top Shape
Maintaining your projection screen over time is crucial to preserving image quality and ensuring longevity. Regular cleaning with appropriate materials, like microfiber cloths and gentle cleaning solutions, prevents dust and smudges that can degrade picture clarity. Avoid abrasive cleaners or rough fabrics, as they can damage textured surfaces. I personally use a microfiber cloth dampened slightly with distilled water and a few drops of isopropyl alcohol for routine cleaning, which keeps the surface pristine without risking scratches or residue.
How do I maintain my screen over time?
Periodically inspect your screen for signs of wear, water damage, or misalignment. For ALR screens, especially those with nano-coatings, it’s essential to follow manufacturer cleaning guidelines to avoid impairing the reflective surface. Using compressed air can help remove dust from edges and subtle textures. Additionally, maintaining optimal room conditions—like humidity and temperature—helps prevent warping or deterioration. As projection technology advances, so do maintenance requirements; staying updated with the latest cleaning and care techniques ensures your screen remains vibrant and functional for years to come.
Selecting the Right Tools for Consistent Results
Investing in the right tools streamlines the maintenance process. A high-quality microfiber cloth is non-negotiable; it gently lifts dust without scratching delicate nano-coated surfaces. I recommend one like the MagicFiber Cloth because it’s super soft and highly absorbent. For cleaning solutions, a mix of distilled water with a dash of mild dish soap or isopropyl alcohol provides effective cleaning without leaving harmful residues. For more stubborn spots, grade-appropriate screen cleaning wipes that are alcohol-free are a safe choice. To prevent accidental damage, I keep a set of anti-static brushes for dusting and a small, soft brush for detailed cleaning around edges and corners.
Tools I rely on for ongoing maintenance include
– Microfiber cleaning cloths
– Compressed air cans
– Mild cleaning solutions formulated for nano-surfaces
– Soft-bristled brushes for delicate surfaces
– Laser levels for realigning when necessary
Regular check-ups and cleaning sessions can drastically extend your screen’s lifespan and keep images looking sharp. For example, some DIY enthusiasts use alcohol wipes carefully to remove fingerprints and smudges—just be sure to check manufacturer guidance to avoid voiding warranties. Staying proactive with maintenance helps prevent issues that could necessitate costly replacements or professional repairs.
Future Trends: Technology and DIY Solutions
As technology evolves, new coatings and materials are making screens even more resistant to environmental factors. In the future, we might see self-cleaning nano-surfaces or integrated sensors that notify you when cleaning or realignment is needed. Meanwhile, a growing DIY community shares innovative methods for maintaining high-gain and nano-coated screens, emphasizing ease and safety. An example of expert advice can be found in this comprehensive guide. For now, the best approach is to establish a routine using quality tools: regular cleaning, gentle handling, and proactive inspections. Try integrating a microfiber cloth and compressed air into your weekly maintenance—these simple adjustments can vastly improve response and clarity over time.
Lessons from My Biggest Setup Slip and How You Can Avoid Them
One of the most eye-opening moments in my home theater journey was realizing I had installed my ALR screen upside down—relying solely on visuals without double-checking orientation. That mistake cost me real contrast and color vibrancy, which I then recovered through proper setup. It taught me that even the smallest details make the biggest difference—like the importance of paying attention to gain orientation and texture alignment. Additionally, I learned that neglecting to match your screen size meticulously to your projector’s lumen output can lead to washed-out images, no matter how advanced your technology is. Lastly, I discovered the value of regular maintenance routines—cleaning and inspecting your screen—to preserve picture quality over years. These lightbulb moments have transformed how I approach my setup, and I hope they save you from similar frustrations. Paying attention to these nuanced details elevates your home theater from average to truly immersive and stunning.
Gear Up with My Trusted Home Theater Arsenal
When it comes to fine-tuning my projection setup, I rely on tools I trust deeply. A high-quality microfiber cloth like MagicFiber keeps my nano-coated ALR surfaces spotless without scratches. Compressed air cans help remove stubborn dust from delicate textures and corners, ensuring even the smallest particles don’t degrade image clarity. I also use a laser level to perfectly align my screen, which prevents uneven reflections or glare. For selecting the right screen material, expert advice from guides like this resource has been invaluable. When adjusting gain, I turn to uniform gray projections in a dark room—I fine-tune until color vibrancy and contrast are optimal. These tools and insights keep my home theater setup reliable and my viewing experience consistently breathtaking.
Elevate Your Vision Today and Embrace the Future of Home Cinema
Now is the perfect moment to revisit your projection setup and implement these insights. Mastering screen orientation, size, and maintenance ensures every movie or game is experienced with pristine clarity. The evolution of ALR screens and materials promises even more exciting innovations ahead—think self-cleaning surfaces and smart sensors—so staying engaged now prepares you for cutting-edge upgrades. Whether you’re just starting or refining an existing home theater, embracing these detailed tips makes your space not just functional but spectacular. Remember, the journey to perfect imagery is ongoing, but every small step brings your cinematic dreams to vivid reality. So, go ahead—recheck your projector setup, clean that screen, and enjoy a picture so captivating you’ll forget you’re watching at home.