Ultimate Guide to Projection Screen Material & Gain for Bright Rooms
Ever set up your home theater only to be disappointed by washed-out images or glare that makes watching a chore? I’ve been there. I remember the lightbulb moment when I realized my bright room was sabotaging my projector experience—no matter how high-end my equipment was. It’s frustrating to invest in a projector and screen, only to find out that the environment is working against you. But here’s the good news: understanding the right projection screen material and gain can turn that around. Today, I’ll share how to choose the best options for bright rooms, so your viewing experience is crystal clear, vibrant, and enjoyable, even with ambient light flooding in.
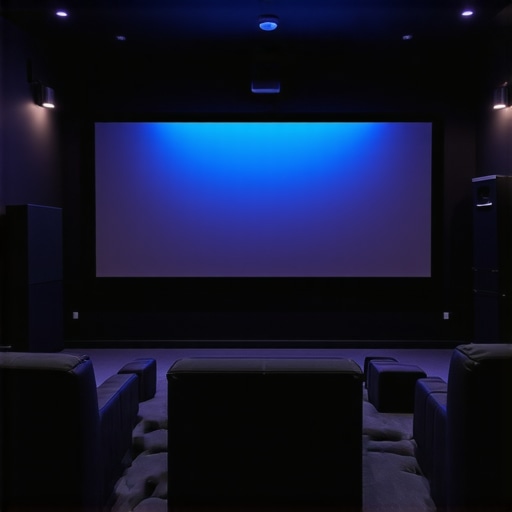
The Critical Role of Screen Material and Gain in Bright Rooms
When I first started exploring home theater setups, I thought all screens were created equal. Wrong. The key is in the material and the gain — a measure of how much light your screen reflects back. If you pick the wrong combination, you might end up with a dim, washed-out picture or glare that ruins the immersion. Bright rooms demand a different approach. You need a screen that can handle ambient light without sacrificing contrast or color accuracy. That’s where understanding projection screen gain and materials becomes essential. According to this resource, selecting the right gain can make or break your experience in well-lit spaces.
Is High Gain Worth It for Bright Rooms?
Many skeptics wonder if high-gain screens are just a gimmick. I admit, I was one of them. My early mistake was assuming that the higher the gain, the better—until I realized that too high a gain can cause hot spots and glare. The sweet spot is usually around 1.4 to 1.8 gain, which balances brightness and viewing angles. If you’re unsure, check out this guide for detailed insights. Personally, I’ve found that a well-chosen gain material makes all the difference, especially in rooms where windows and lights are unavoidable.
Have you faced this challenge with ambient light ruining your home theater? If so, you’re not alone. But don’t worry—by the end of this post, you’ll understand exactly how to select the right screen material and gain to enjoy a bright room without compromise. Ready to dive into the specifics? Let’s go!
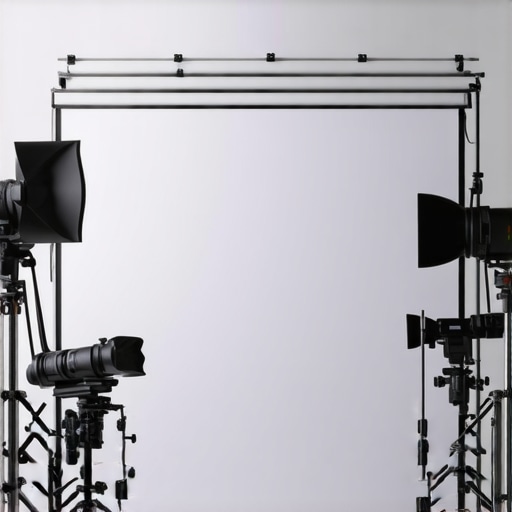
Choose Your Screen Material Wisely
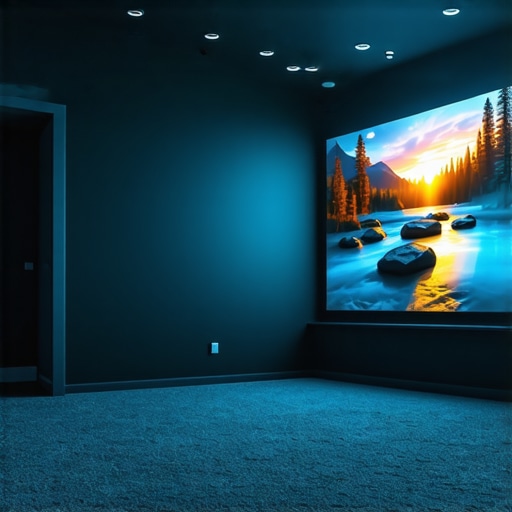
Start by selecting a screen material designed for high ambient light environments. Matte white screens are popular, but for brighter rooms, consider materials with higher gain, such as ambient light rejecting (ALR) screens. These are engineered to reflect more light toward the viewer, improving brightness and contrast. When I replaced my standard matte white screen with an ALR screen, the difference was immediate—colors became vibrant, and details popped even during daytime watching. For detailed comparisons, check out this resource to understand how different materials perform in bright settings.
Assess Your Room’s Ambient Light
Measure the amount of ambient light present during your typical viewing hours. Use a light meter app or simply observe how much natural and artificial light enters your space. If the room is very bright, aim for a high-gain ALR screen—around 1.6 to 2.2 gain. For moderately lit rooms, a gain between 1.4 and 1.8 might suffice. I once set up a projector in a room with large windows, and by choosing a 1.8 gain ALR screen, I achieved a much clearer picture without needing to block out all the light sources. Learn more about how gain impacts brightness in this guide.
Balance Gain and Viewing Angles
High-gain screens can cause hot spots and limit viewing angles, which was a surprise when I first experimented. To avoid this, select a screen with a gain around 1.4 to 1.8 for a good balance. When I tested a 2.0 gain screen, the center was bright, but the edges appeared dimmer. If your seating area is wide, opt for screens that maintain uniform brightness across wider angles. For more nuanced details, explore this expert guide to gain and size considerations.
Match Screen Size to Your Space
Choosing the right size amplifies the benefits of your high-gain screen. Too small, and you lose immersion; too large, and brightness diminishes. Use the formula: measure your room’s viewing distance, then select a screen size that fits comfortably within that space. I once tried a larger screen in a small room, which made the image appear washed out. After resizing to a more appropriate size, the picture was crisp and vibrant. For precise sizing tips, check out this detailed sizing guide.
Install and Calibrate for Optimal Brightness
Proper installation maximizes gain benefits. Mount the screen at eye level and ensure it’s tensioned flatly. Adjust your projector’s brightness and contrast settings to suit the new screen material and gain. I experimented with my projector’s settings after switching to a high-gain ALR screen, which took a few tweaks but resulted in a strikingly bright and detailed picture. Remember, calibration is key—use test patterns or calibration discs for best results. For technical tips, see this setup guide.
Experiment and Fine-Tune
Every room is unique, so don’t hesitate to try different materials and gain levels. I started with a 1.4 gain screen, then moved to 1.8 after testing in brighter conditions. The difference was night and day. Keep notes on your settings and results, and adjust as needed. Your perfect bright-room setup is within reach once you understand how gain and material influence your viewing experience. Remember, patience and experimentation lead to the best results—so test, tweak, and enjoy your improved home theater.
Many home theater enthusiasts are under the impression that choosing a high-gain ALR screen alone will guarantee bright, vibrant images in well-lit rooms. While it’s true that high-gain screens can significantly improve visibility under ambient light, there’s a common misconception that more gain always equals better performance. In reality, overestimating gain can lead to unintended issues such as hot spots, glare, and a narrow viewing angle, which may ruin your viewing experience. This is a critical nuance often overlooked by beginners who focus solely on gain numbers without considering room size, seating arrangement, or the type of material used.
Another trap is believing that all ALR screens are created equal. Many assume that any ambient light rejecting screen will work perfectly in their space. However, the effectiveness of ALR technology varies widely depending on the material’s design and the specific wavelength of ambient light. For instance, some ALR screens are optimized for specific light angles or wavelengths, meaning they perform superbly in some rooms but poorly in others. To truly optimize your setup, it’s essential to understand the underlying technology, which you can explore in this detailed guide.
Is More Gain Always Better for Bright Rooms?
Contrary to popular belief, higher gain isn’t always the answer. In fact, experts warn that gains above 1.8 can cause significant hot spots, where the center of the image appears overly bright while the edges look dull. This uneven brightness can be distracting and diminish the overall quality of the image. A balanced gain around 1.4 to 1.8 offers a good compromise, providing sufficient brightness without sacrificing uniformity or viewing angles. For a deeper understanding, check out this resource.
It’s also worth noting that the material’s surface texture plays a crucial role. Matte surfaces with textured finishes scatter light more evenly, reducing hot spots even at higher gains. Conversely, smooth, glossy surfaces tend to reflect light directly, causing glare and hotspots. Selecting the right material based on your room’s lighting conditions can prevent many common pitfalls. To compare different options, visit this guide.
Finally, remember that room size, seating distance, and projector brightness all influence your choice of gain and material. A high-gain screen in a small room might be too overwhelming, while in a large space, it can help compensate for distance. The key is to match your environment with the right specifications—something that often gets lost in the rush to pick the “best” gain number. If you want to explore how to tailor your setup precisely, see this expert guide.
Have you ever fallen into this trap of overestimating gain or choosing the wrong material? Let me know in the comments! Understanding these nuances helps you avoid costly mistakes and achieves the best possible viewing experience in your bright room setup.
Once you’ve optimized your projection screen and gain for bright environments, the next step is ensuring your setup continues to perform at its best over time. Proper maintenance and the right tools are crucial to preserving image quality, preventing deterioration, and making future upgrades easier. Whether you’re an enthusiast or a casual viewer, investing in specific equipment and adopting good habits can save you time and money in the long run.
How do I keep my projection environment in top shape
First, regularly clean your projection surface using a soft, lint-free microfiber cloth. Dust and fingerprints can diminish image clarity and lead to material degradation. For screens with textured surfaces, use gentle sweeping motions to avoid damaging the material. When cleaning, avoid harsh chemicals; instead, opt for a solution of distilled water with a few drops of mild dish soap or specialized screen cleaner. Consistent cleaning prevents dust buildup, which can cause hotspots or uneven brightness, especially in high-gain screens that reflect more ambient light.
Second, check your projector’s filters and air vents monthly. Dust accumulation in these components can cause overheating and reduce image brightness over time. Use compressed air or a soft brush to gently remove debris. Keep your projector in a cool, dust-free environment to extend its lifespan and maintain optimal brightness levels.
Tools I recommend for long-term performance
One of my personal essentials is a digital light meter, such as the Sekonic Light Meter. This device helps me monitor ambient light levels and verify that my room remains within the optimal range for my chosen gain material. By measuring ambient light periodically, I can decide whether I need to adjust curtains or add additional light-control solutions. Using a light meter ensures consistency, especially if you’re fine-tuning a high-gain screen setup for bright rooms.
Additionally, a calibration disc like the ISF Calibration Disc is invaluable. Regular calibration of your projector’s brightness, contrast, and color settings ensures your image stays sharp and vibrant. Over time, projector lamps dim, and color accuracy can drift. Routine calibration guarantees you’re getting the best image quality for your investment.
Another tool I swear by is a dedicated lens cleaning kit, which includes microfiber cloths, lens cleaning solution, and compressed air. Keeping your projector’s lens spotless maximizes brightness and contrast, especially when dealing with high-gain screens that reflect more ambient light.
Planning for future upgrades and scalability
As technology advances, so do the options for brighter, more efficient screens and projectors. To future-proof your setup, consider modular components that allow easy upgrades. For example, choosing a projector with HDMI 2.1 support or a screen material compatible with newer ambient light rejecting technologies can save you from costly replacements down the line.
In the coming years, I predict a shift toward smart, integrated ambient light management systems that automatically adjust room lighting based on content and ambient conditions. Staying informed about these trends allows you to plan upgrades proactively, ensuring your bright-room home theater remains stunning and functional.
To keep everything working smoothly, set a regular maintenance schedule—monthly cleaning, quarterly calibration, and annual component checks. With the right tools and habits, you’ll enjoy consistent, high-quality viewing for years to come. If you’re ready to fine-tune your environment further, I recommend trying a digital light meter to precisely monitor ambient lighting conditions—an often overlooked but game-changing step in maintaining your bright room setup.
Remember, a well-maintained setup not only preserves your investment but also guarantees an immersive experience every time you hit play. Keep experimenting, stay curious, and enjoy your enhanced home theater for years to come!
Choosing the perfect projection screen for a bright room can transform your home theater experience from mediocre to stunning. The secret lies in understanding how screen material and gain influence image brightness, contrast, and color fidelity in ambient light conditions. In this post, I’ll share personal insights and expert advice to help you select the best setup that makes daytime or well-lit environments work in your favor.
Lessons the Pros Don’t Usually Share About Bright Room Screens
- Gain isn’t a magic number: I used to think higher gain always meant better brightness, but I learned that gains above 1.8 can cause hotspots and glare, ruining uniformity. Striking a balance around 1.4 to 1.8 is generally ideal.
- Material texture matters: Smooth, glossy screens reflect too much ambient light, creating glare. Textured matte surfaces scatter light evenly, reducing hotspots especially at higher gain levels.
- Room layout influences success: I realized that measuring ambient light and seating angles before choosing a screen can prevent disappointment. High-gain screens work best when paired with controlled lighting and proper placement.
- Calibration makes all the difference: After switching to a high-gain ALR screen, fine-tuning my projector’s settings was essential for vibrant images without glare. Regular calibration preserves quality over time.
- Experimentation is key: I found that testing different gains and materials in my environment helped me discover what truly works, instead of relying solely on specs or reviews.
My Go-To Resources for Bright Room Projection Mastery
- This detailed guide helped me understand how gain and material interact, shaping my choices for ambient light conditions.
- Expert comparisons of ALR screens clarified which materials excel in bright environments and why.
- Size and gain considerations taught me how to select a screen that balances brightness and viewing angles based on my room dimensions.
- Projector calibration tips ensure my images stay sharp, colorful, and glare-free over time.
Your Next Step to a Bright Room Cinema
Now that you’re equipped with solid knowledge about screen material and gain, it’s time to apply these insights to your setup. Don’t be afraid to experiment with different materials and calibration settings—your ideal bright-room home theater is within reach. Remember, the key is balance: select a gain that enhances brightness without sacrificing uniformity or viewing comfort. With patience and a bit of testing, you’ll create a space that welcomes daylight and ambient light, all while delivering vibrant, crisp images that wow every viewer.
What has been your biggest challenge in setting up a home theater in a bright room? Share your experiences below—I’d love to hear your story!
Reading through this comprehensive guide really resonated with my own experience setting up a home theater in a bright living room. I initially thought that a high-gain screen would be the ultimate solution to combat ambient light, but I quickly realized that exceeding a gain of 1.8 caused noticeable hot spots and uneven brightness, which was quite distracting. The balance around 1.4 to 1.8 gained my attention because it maintained clarity without sacrificing uniformity. One thing I found particularly helpful was paying attention to the surface texture of the screen—opting for a textured matte surface made a significant difference in dispersing light evenly. Have others found that textured screens perform better in high ambient light environments than glossy ones? It seems like a simple tweak but made all the difference for my setup.
This article really hits home for anyone trying to optimize a home theater in bright rooms. I’ve personally experimented with high-gain ALR screens, and I agree that going over a gain of 1.8 can cause hotspots and uneven brightness, especially for seating areas positioned to the sides. What I’ve found helpful is combining a slightly lower gain with an ambient light control strategy, like blackout curtains or strategic lamp placement. It’s funny how sometimes reducing ambient light slightly can have such a big impact on image quality, even more than raising gain. Another thing I’ve noticed is that the surface texture of the screen makes a difference—textured matte screens tend to diffuse ambient reflections better than glossy surfaces, which can glare and cause distracting hotspots. Has anyone tried combining these approaches for an optimal setup? I’d love to hear your experiences or tips on balancing gain with ambient light reduction techniques for the best quality picture.