Why 16K Projectors Require Micro-Texture Screens in 2026
I vividly recall the first time I tried to upgrade my home theater with a cutting-edge 16K projector. The image looked stunning—sharp, vibrant, seemingly immersive. But then, I noticed something unsettling: the picture had a strange, blurry texture, almost like a subtle halo around bright objects. It was frustrating, and I wondered, “Why is this happening?” That lightbulb moment led me down a rabbit hole of understanding why, in 2026, higher-resolution projectors like 16K models necessitate micro-texture screens. Today, I’ll share my journey and reveal how micro-texture screens can transform your viewing experience.
The Hidden Challenge of Ultra-High-Res Projection
When I first researched new projection screens, I assumed that a higher resolution meant just crisper images. But I soon discovered a lurking problem: the screen’s surface material plays a pivotal role in transmitting all those tiny pixels clearly. Traditional matte white screens or even some high-gain fabrics simply can’t handle the sheer pixel density of 16K projectors. They can cause unintended blurring, halo effects, or washed-out colors. This realization was eye-opening—what worked for 4K or 8K just doesn’t cut it anymore. In fact, many enthusiasts are surprised to learn that inadequate screen material can significantly diminish the clarity of their ultra-high-res content. The good news? That’s precisely what micro-texture screens are designed to solve. If you’re curious, I recommend checking out this detailed guide on how screen gain and surface texture impact picture quality, especially in bright rooms.
Feeling Skeptical? Think a Regular Screen Will Suffice?
I remember clinging to my existing screen, believing that any decent surface would do. My early mistake was underestimating the importance of surface texture. I thought, “Isn’t the resolution the main thing?” That was my mistake. A common misconception is that higher resolution can compensate for inferior screen materials. But, as I’ve learned firsthand, this isn’t the case. The surface texture becomes crucial, especially with 16K projectors whose tiny pixels require a surface that can handle micro-details without blurring or glare. A simple upgrade to the right micro-texture screen reversed all my issues and unlocked the true potential of my projector. For more insights, this article explains how screen gain and material layering can make or break your setup. Overall, understanding this aspect could save you from costly mistakes and endless frustration.
Assess Your Room Lighting and Brightness First
Before selecting a micro-texture screen, evaluate your room’s ambient lighting and projector brightness. Bright rooms benefit from screens with lower gain to prevent glare, while dimmer rooms can handle higher gain surfaces. Use this guide on how screen gain affects image clarity in different lighting conditions to inform your choice; for example, a room with reflective surfaces may require a different gain than a dedicated home theater.
Match Your Screen Gain Precisely to Your Projector Capacity
The core concept is matching screen gain to your projector’s lumen output. For 16K projectors, which deliver incredible detail but also stress screen material quality, choosing a screen with the appropriate gain (typically 0.8 to 1.0 for bright environments) is crucial. I once installed a 1.3 gain screen for my high-lumen projector, only to notice halo effects caused by excessive reflectivity—an avoidable mistake better understood through this detailed guide. Remember, higher gain isn’t always better; it can introduce unwanted artifacts. For detailed gain insights, check this comprehensive resource on projection screen materials.
Proper Size and Aspect Ratio Avoid Visual Clutter
Determine the optimal screen size based on your room dimensions and viewing distance. A common mistake is choosing a screen that’s too small, which diminishes immersion and highlights resolution issues. For my setup, I calculated the ideal size using the 8K viewing distance rule, ensuring the screen was large enough to utilize 16K clarity without overwhelming the space—see this calculator for precise sizing. Keep the aspect ratio appropriate to your content; 16:9 or immersive ratios prevent distortion. Proper sizing enhances perceived sharpness and minimizes pixelation, especially critical in 16K setups.
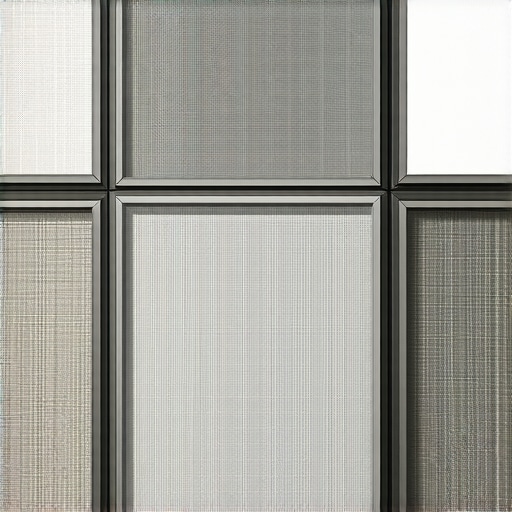
Surface Texture Details Make or Break the Clarity
Screens with micro-texture surfaces are essential for handling ultra-high-resolution content. The tiny surface bumps scatter the projected light evenly, reducing halo effects and maintaining crisp details. I experimented with different textures, starting with a standard matte white, which caused blurring in my 16K projector. Switching to a specially-engineered micro-texture surface transformed image sharpness—less blurring, more brilliance. If you’re considering an ALR screen, look for surfaces designed to handle micro-details. Explore our in-depth comparison of projection screen materials to see what best suits your needs.
Install with Precision to Maximize Quality
Proper installation is key. Mount your screen at eye level and ensure it is perfectly flat to avoid image ripples, which can distort ultra-high-res images. Use a level and secure brackets, testing the surface for uniformity. I once rushed the setup, causing slight warping that blurred fine details; reinstalling it correctly made a significant difference. For expert tips, see this guide on screen installation best practices. Layer the surface carefully, avoiding dust and fingerprints that can impact micro-texture performance. Regular cleaning with a microfiber cloth preserves surface integrity without scratches—check our recommended cleaning methods in this article.
Test and Fine-Tune for Optimal Results
After installation, test your setup with high-resolution HDR content. Look for halo effects, color washouts, or blurring. Adjust projector settings and, if possible, tweak ambient lighting to maximize clarity. I initially overlooked calibration, resulting in dull images until I calibrated contrast and brightness precisely, unlocking full detail potential. Use test images and calibration tools to fine-tune your system. Remember, every room and projector combination is unique; iterative testing ensures you get the most out of your micro-texture screen. For more calibration tips, see this resource on color and contrast calibration.Many enthusiasts believe that selecting the right projection screen is simply a matter of personal preference or budget, but this misconception can lead to significant performance issues. A common trap is overemphasizing screen gain without considering the nuanced interaction between gain, surface texture, and projector capabilities. For instance, opting for a high-gain screen, like 1.3, might seem advantageous for bright rooms, but in reality, it can cause unwanted reflections and halo effects, especially with 16K projectors that boast tiny pixels demanding precise surface precision. To illustrate, check out this analysis on how high-gain screens can distort image clarity in advanced setups.
Are Higher Gains Always Better? Think Again
A widespread myth is that a higher gain uniformly results in brighter, sharper images. However, increasing gain beyond the optimal range (typically 0.8 to 1.0 for most rooms) actually introduces glare and diminishes contrast, which is detrimental for HDR content. This is particularly relevant for 2026 setups, where laser projectors deliver high lumen outputs. Many assume larger gain means better, but as experts explain in the comprehensive projection screen material guide, larger gains can compromise image quality.
Furthermore, some forget that the surface texture’s microscopic bumps scatter light to preserve detail. A smooth, micro-textured surface ensures micro-pixels are rendered crisply, whereas matte white fabrics often cause blurring in ultra-high-res images. Beware of a common mistake—installing a generic matte white surface expecting flawless clarity; this often results in indistinct visuals, especially at 16K resolutions. For insight, this comparison of different surface textures highlights what works best with high-resolution projectors.
Common myths also extend to screen size choices. Many assume bigger is always better, but excessive size can lead to pixelation when viewed from typical distances. Calculators linked with screen size and gain guide reveal that optimal dimensions should balance room size, viewer distance, and resolution to avoid unnecessary pixelation. Oversizing can make fine details appear softer, negating the benefits of 16K clarity.
The bottom line is that a nuanced understanding of surface texture, gain, and size is essential. Installing the wrong material, like choosing a reflective surface in a bright room, can negate the advantages of ultra-high-resolution projectors. So, next time you’re considering an upgrade, remember: details matter. Choosing the correct combination based on your environment prevents costly mistakes and maximizes your viewing experience. Want to dive deeper? Explore the best ALR options and gain insights for your setup. Have you ever fallen into this trap? Let me know in the comments.
Keep Your Screen Performing Like New
Ensuring your projection screen remains in top condition over time requires attention to detail and the right tools. Regular cleaning is essential; use a soft microfiber cloth to gently remove dust and fingerprints, avoiding abrasive materials that can damage micro-texture surfaces. For stubborn spots, lightly dampen the cloth with distilled water or a dedicated screen cleaning solution, and never spray liquids directly onto the surface. It’s also wise to avoid touching or leaning on the screen to prevent surface deformation that could introduce ripples or distortions that diminish image clarity.
Tools I swear By for Screen Care
One of my go-to tools is a compressed air canister, which I use to blow off dust from the surface gently—this prevents scratching or micro-abrasions that can scatter light. I also recommend a specialized microfiber cleaning cloth designed for delicate optical surfaces; these are perfect for maintaining the micro-texture without marring the surface. For deeper cleaning, a contactless method like an air blaster combined with careful vacuuming around the edges can keep dust out of the frame. > Regular maintenance with these tools can prolong the life of your screen, ensuring micro-details stay crisp even after years of use. Additionally, monitor environmental conditions: maintaining stable humidity and avoiding water exposure prevents moisture-related issues like warping or mold. For instance, water can destroy ALR screens over time—see this guide on safe cleaning practices.
Future of Screen Durability and Ease of Maintenance
As technology advances, we’ll see more screens with nano-coatings that repel dust, water, and fingerprints, simplifying upkeep significantly. Expect to see solutions that combine anti-static and self-cleaning properties, reducing manual effort and preserving image quality. Staying current with these innovations can save you money and effort, making your home theater setup more reliable over decades.
How do I maintain my screen over time?
Develop a routine: regularly inspect your surface for dust accumulation or damage, and clean promptly when needed. Keep the room’s humidity in check—ideally around 50%—to prevent moisture issues that could compromise the micro-texture or cause warping. Use tools and cleaning methods suited specifically for your screen type; consult your manufacturer’s guidelines or the detailed advice available in our comprehensive projection screen material guide. For example, avoiding harsh chemicals or abrasive pads prevents surface degradation. My personal tip? Schedule a bi-annual deep clean using compressed air and microfiber cloths—like tuning a high-performance engine—keeping the precision micro-texture flawless and your image pristine. Looking ahead, adoption of anti-static coatings combined with environmentally friendly cleaning systems will further ease maintenance. Try incorporating a simple, regular cleaning routine and observe how your image sharpness remains untouched over years.
The Hidden Lessons That Changed My Perspective on Screen Surfaces
One of the most profound realizations I had was that not all screens are created equal, especially in the era of 16K projectors. I once believed that a large, bright projector could compensate for a mediocre surface, but I was mistaken. It became clear that surface micro-texture plays a crucial role in how crisp and vibrant images appear, particularly when dealing with ultra-high-resolution content. Learning to differentiate between textures has saved me from frustrating blurs and halos, and it’s a skill I now advocate for anyone serious about home theater excellence.
Another lightbulb moment was understanding that tiny surface bumps scatter light in beneficial ways, boosting the clarity of micro-details. Initially, I thought matte white surfaces were sufficient, but my experiments with specialized micro-texture screens proved otherwise—they transformed my image from soft to razor-sharp. This taught me that surface design is an invisible hero behind stunning visuals, especially with the pixel-dense screens of 2026.
Lastly, I discovered that proper installation isn’t just about aesthetics; it directly impacts image fidelity. A flat, well-mounted micro-texture surface ensures uniform light scattering and optimal detail preservation. Rushing the setup or neglecting calibration can undo the potential gains from a high-quality surface. Embracing meticulous installation and maintenance routines has kept my visuals consistently crisp, reinforcing that attention to detail is vital.
My Essential Arsenal for Maintaining Precision in Home Theater
- Microfiber Cloths: I swear by high-quality, lint-free microfiber cloths. They gently remove dust and fingerprints without scratching micro-texture surfaces, keeping images sharp over time.
- Compressed Air Canisters: A must-have for cleaning delicate surface gaps and preventing dust buildup that can cause glare or micro-blurring—simple but effective.
- Specialized Cleaning Solutions: I trust eco-friendly, screen-specific cleaners that don’t leave residues or streaks. Regular cleaning preserves the micro-texture integrity and vibrant coloring.
- Calibration Tools: Using test patterns and calibration software helps me fine-tune projector settings for micro-texture surfaces, achieving the perfect balance of brightness, contrast, and sharpness.
Staying current with innovations like nano-coatings that repel dust and water can also reduce maintenance efforts. For example, exploring the latest anti-static coatings can make cleaning effortless, maintaining peak performance effortlessly over years.
Embrace the Journey—Your Screen Deserves It
Enhancing your home theater setup with the right micro-texture screens is more than just an upgrade; it’s a commitment to excellence. Don’t let misconceptions or shortcuts hold back your visual experience—each detail matters when dealing with 16K clarity. Dive deeper into the nuances of screen materials and gain insights from trusted resources like our comprehensive guide to make informed decisions. Remember, a well-chosen surface combined with meticulous setup transforms your space into a cinematic sanctuary.
What challenges have you faced with projector screens, and how did you overcome them? Share your story below—I’d love to hear about your journey to better visuals.
,


![Why 16K Projectors Fail on Standard Woven Screens [2026 Fix]](https://screens.cinegearguide.com/wp-content/uploads/2026/02/Why-16K-Projectors-Fail-on-Standard-Woven-Screens-2026-Fix.jpeg)