
Projection Screen Material & Gain: Your Complete 2024 Buying Guide
I vividly remember the moment I realized I had been making a costly mistake with my home theater setup. I had spent hours choosing the perfect projector, hunting for the latest 4K model, only to be disappointed when the picture looked washed out and dull, even in my dimly lit room. The culprit? My screen material and its gain. That lightbulb moment changed everything for me—and it can do the same for you.
Why Your Screen Choice Can Make or Break Your Viewing Experience
Choosing the right projection screen isn’t just about size or price. It’s about understanding how different materials and gain levels influence picture quality, brightness, and color accuracy. When I first started researching, I underestimated how much the screen’s properties could impact my viewing. I thought, “As long as the projector is good, the screen doesn’t matter much.” Spoiler: I was wrong. A poor choice in screen material or gain can turn a bright, crisp image into a washed-out mess.
Today, I want to help you avoid the pitfalls I stumbled into. We’ll explore the ins and outs of projection screen gain, the best materials for different lighting conditions, and how to pick a screen that elevates your viewing from average to spectacular. Whether you’re setting up a dedicated home theater or a multi-purpose media room, understanding these factors ensures you get the best picture possible.
Is Screen Gain Really That Important? The Honest Truth
I used to think that higher gain was just a gimmick—more brightness, right? Not quite. Early on, I bought a high-gain screen expecting a sharper, brighter picture, only to find it caused glare and hot spots that ruined the experience. That mistake taught me that choosing the right gain isn’t about chasing the highest number, but about matching your room’s lighting and projector’s capabilities. For a sunny room, a high-gain screen can be a game-changer, but in a dark room, a low-gain matte surface often delivers better contrast and color fidelity. For a detailed breakdown, check out this comprehensive guide.
If you’ve ever felt frustrated with washed-out images or glare issues, you’re not alone. Many people make the mistake of ignoring screen gain or choosing a material that doesn’t suit their environment. The good news? Once I understood the fundamentals, I could select a screen that perfectly complemented my projector and room lighting, transforming my viewing experience.
In the next sections, we’ll get into the nitty-gritty of screen materials, gain levels, and how to pick the perfect size for your space. Ready to make your home theater shine? Let’s dive in!
Choose the Right Screen Material for Your Room
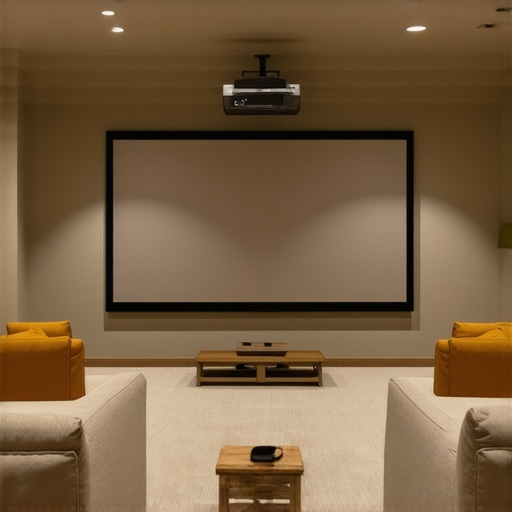
Start by selecting a screen material that matches your room’s lighting conditions. If your space is bright with lots of windows, consider high-gain ALR screens designed to reflect more light and combat ambient illumination. For darker rooms, matte surfaces with low gain provide better contrast and color accuracy. I once installed a high-gain screen in my basement home theater, expecting a vivid picture, but the glare created hot spots that distracted from the movie. After switching to a low-gain matte, the image became more uniform and natural. To make an informed choice, review this guide to gain and material options.
Match Gain to Room Lighting
Determine your room’s ambient light levels. Bright rooms need screens with gain levels above 1.3 to ensure images pop without washing out. Dark rooms benefit from lower gain (around 1.0 to 1.1) for richer contrast. I learned this the hard way when I used a high-gain screen in my living room, resulting in glare and uneven brightness. Once I switched to a lower gain, the picture improved significantly, especially in darker scenes. For detailed advice, check this resource.
Calculate the Perfect Screen Size for Your Space
Measure your viewing distance and decide on a comfortable size. A common rule is to multiply the distance in inches by 0.8 for the width of the screen. For example, if you sit 10 feet (120 inches) from the screen, aim for a width of approximately 96 inches. I once ordered a massive 150-inch screen without considering my room’s dimensions, only to find it overwhelmed the space. After resizing to a more appropriate 100-inch screen, my viewing experience became immersive yet comfortable. Use this guide for detailed sizing tips.
Determine the Optimal Screen Height and Aspect Ratio
Most home theaters use a 16:9 aspect ratio, but some prefer 2.35:1 for a cinematic feel. Position the top of the screen at eye level when seated, and ensure enough headroom above for speakers or cabinetry. I initially mounted my screen too high, causing neck strain during long viewing sessions. After adjusting the height to eye level, the comfort and immersion improved. For precise placement, consult this sizing guide.
Install the Screen Properly for Best Results
Use a sturdy mount or frame to keep the screen perfectly flat and aligned. Avoid sagging or wrinkles, which distort the image. When I first hung my DIY screen, it sagged slightly in the middle, causing a blurry spot. After tightening the frame and adding tensioners, the picture was perfectly sharp. Ensure the screen surface is free of dust and fingerprints. For installation tips, see this tutorial.
Test and Calibrate for the Best Picture
Finally, calibrate your projector to match the screen’s properties. Adjust brightness, contrast, and color settings for optimal picture quality. Use test patterns to check uniformity and focus. I spent hours tweaking my projector settings, but the difference became obvious once I aligned the calibration with my new screen. This step ensures you get the brightest, clearest, and most accurate image possible. For comprehensive calibration tips, visit this calibration guide.
Many enthusiasts dive into home theater setup with excitement, but there’s a hidden trap that even seasoned DIYers often fall into: oversimplifying or misunderstanding the nuances of projection screens, gain, and size. Let’s dig deeper into what most people get wrong and how to sidestep these pitfalls to truly elevate your viewing experience.
One widespread myth is that a higher gain always equals a better, brighter picture. In reality, many assume that boosting gain improves image quality, but this can lead to hotspots and glare, especially in larger rooms or with specific projector types. The misconception stems from seeing gain figures as a straightforward brightness measure, but gain actually affects the uniformity and viewing angles of the screen. For instance, screens with gain above 2.0 tend to create bright centers but dark edges, ruining the uniformity. To get it right, match your room’s ambient light and projector output carefully—overshooting gain can backfire. For advanced insight, check out this guide.
Another common mistake involves screen size selection. Many assume that bigger is always better, but without considering the room’s dimensions and viewing distance, a massive screen can cause discomfort or loss of image sharpness. The rule of thumb isn’t just about inches; it’s about proportion. Sitting too close to a large screen can strain your eyes and reduce perceived sharpness, while a too-small screen misses the immersive effect. Use the formula that multiplies your viewing distance by 0.8 to find the ideal width, but also consider aspect ratio and height for comfort. For detailed calculations, see this resource.
When it comes to screen material, many focus solely on gain and ignore other critical factors like reflectivity and texture. A matte surface isn’t always the dull, boring choice; it can provide richer contrast in dark rooms, while some high-gain materials are designed to optimize brightness in ambient light. The mistake is selecting a material based solely on one property—gain—without considering the room’s lighting conditions and projector type. Remember, a high-quality screen balances gain, texture, and reflectivity. For expert recommendations, review this detailed guide.
How Do You Balance Brightness and Contrast Without Sacrificing Image Fidelity?
Advanced enthusiasts often wonder how to achieve perfect contrast without losing brightness or introducing glare. The secret lies in understanding the interplay between gain, ambient light, and projector capabilities. High gain can boost brightness but at the expense of contrast and uniformity. Conversely, low gain offers better contrast but might struggle in brightly lit rooms. The key is to calibrate your projector settings precisely and choose a screen designed for your specific environment. Experts suggest testing different gain options and using ambient light rejection (ALR) screens for bright rooms—these are engineered to reflect projected light efficiently while minimizing room reflections. For the most comprehensive advice, see this article.
In conclusion, avoiding these common misconceptions and paying attention to the nuanced details of screen gain, size, and material can dramatically improve your home theater. Remember, every room and projector combination is unique—what works for your friend might not work for you. Do your research, test different setups if possible, and don’t be afraid to seek expert guidance. Have you ever fallen into this trap? Let me know in the comments.
Maintaining your projection screen and ensuring it stays in peak condition requires the right tools and a bit of know-how. Over time, dust, fingerprints, and even minor scratches can diminish image quality, especially on high-gain or specialized ALR screens. To keep your setup shining, I rely on a few specific tools and techniques that have proven effective in my experience.
Invest in a Microfiber Cloth for Daily Care
A high-quality microfiber cloth is indispensable for routine cleaning. I prefer using a lint-free microfiber cloth because it gently removes dust, fingerprints, and smudges without scratching the surface. When I first started neglecting screen maintenance, I noticed a significant decline in contrast and color vibrancy. Regular, light dusting with a microfiber cloth keeps the surface pristine and preserves the image quality over years.
Use Compressed Air for Hard-to-Reach Spots
Dust and debris can settle in the corners or along the edges of your screen frame. I use a can of compressed air, held at a safe distance, to blow away loose particles. This prevents buildup that could cause uneven reflections or hot spots, especially on larger screens. Be careful to avoid tilting the can too much, as moisture can be expelled, which isn’t ideal for delicate surfaces.
Apply a Gentle Screen Cleaner When Needed
If your screen develops stubborn smudges, I recommend a mild, alcohol-free screen cleaner. I personally use a solution specifically designed for delicate surfaces, applied lightly to a microfiber cloth—never directly on the screen. This approach prevents streaks or damage, maintaining the integrity of the material. Regular cleaning with the right cleaner extends the life of your screen and keeps colors vibrant.
Protect Your Investment with a Screen Cover
For long-term preservation, consider investing in a protective cover or frame that shields your screen from accidental impacts, dust, and UV exposure. I’ve found that a dedicated cover reduces wear and tear, especially if you need to move your setup or if children and pets are around. This extra layer of protection helps maintain consistent image quality and prevents costly repairs or replacements down the line.
Use Calibration Software for Long-Term Adjustments
To ensure your image remains sharp and accurate over time, I recommend periodic calibration using dedicated software like CalMAN or LightSpace. These tools help fine-tune projector settings to match your screen’s properties, compensating for any drift or aging of components. Regular calibration can be a game-changer, especially if you upgrade your projector or change ambient lighting conditions.
Looking ahead, advancements in auto-calibration and smart screen materials will make maintenance even easier. Imagine screens that self-clean or adjust their gain automatically based on room lighting—these innovations are on the horizon. Until then, sticking to proven tools and routine care is the best way to protect your investment.
How do I maintain my projection setup over time?
Establishing a regular maintenance routine is crucial. Schedule monthly dusting with a microfiber cloth, quarterly deep cleaning with a gentle cleaner, and annual calibration checks with professional software. Keep your projector’s filters clean and ensure your room’s lighting remains controlled. Consistent care not only prolongs your screen’s lifespan but also guarantees consistently stunning picture quality every time you watch.
Don’t forget—your projection screen is a vital part of your home theater’s success. Proper maintenance, combined with the right tools, ensures that every viewing experience is as immersive and vibrant as the first day you set it up. Try implementing these simple tips today, and enjoy crystal-clear images for years to come.
After countless hours tinkering with my home theater setup, I realized the biggest game-changer was not just the projector but the screen itself. Choosing the right material and gain level transformed my blurry, washed-out images into crisp, vibrant displays. This lightbulb moment taught me that understanding projection screen gain and material nuances can elevate your viewing experience from good to extraordinary.
Lessons From My Screen Setup Journey
- Higher gain isn’t always better: I once thought cranking up gain would boost brightness, but it caused glare and hot spots. Matching gain to room lighting is key. For bright rooms, opt for high-gain screens, but in dark rooms, lower gain surfaces deliver richer contrast.
- Room lighting shapes material choice: I learned that matte surfaces excel in darker spaces, while ambient light rejecting (ALR) screens shine in brighter rooms. Picking the right material based on your lighting conditions prevents washed-out images.
- Size isn’t just an aesthetic decision: Bigger isn’t always better if it overwhelms your space. Use the rule of multiplying your viewing distance by 0.8 to find your ideal screen width, ensuring comfort and immersion.
- Proper installation matters: I discovered that sagging or misaligned screens can ruin the picture. A sturdy mount and careful setup are worth the effort for a perfectly flat, aligned surface.
- Calibration is a lifelong friend: Regular projector calibration keeps your image sharp and true. Using calibration tools like CalMAN or LightSpace ensures your setup remains optimized over time.
Tools and Resources I Trust for Projection Perfection
- Top Tips for Picking the Best Projection Screen Material and Gain in 2024: An excellent resource to understand the latest in screen technology and how to choose the perfect surface for your room.
- Understanding ALR Screen Gain Material: Essential reading to grasp how ambient light rejection screens can improve brightness and contrast in challenging environments.
- Ultimate Guide to Projection Screen Size & Gain: A comprehensive guide on matching your screen size and gain to your room for the best immersive experience.
- Understanding Projection Screen Materials & Gain: Deep dive into different materials, their reflectivity, and ideal use cases.
Step Into a New Realm of Home Theater Brilliance
Elevating your projection setup isn’t just about buying the latest tech; it’s about understanding how each component — especially screen gain and material — interacts with your room and projector. With the right choices, you’ll enjoy stunning images, vibrant colors, and immersive sound every time you press play. So, are you ready to transform your home theater into a cinematic sanctuary? Dive deeper, experiment, and don’t be afraid to fine-tune your setup for perfection.
What has been your biggest challenge in choosing or setting up a projection screen? Let me know below — your story might inspire someone else to achieve their perfect home theater!

Reading this post really resonated with me, especially the part about choosing the right gain level for different room lighting conditions. I remember when I first set up my home theater, I rushed into buying a high-gain screen without thoroughly considering my room’s ambient light—which is quite bright during the day. The glare and hotspots were so distracting that I almost gave up on the setup! It was only after I switched to a low-gain matte screen that everything improved significantly. This experience taught me how crucial understanding gain is, not just from a technical standpoint but also how it affects our viewing comfort and overall experience. I’d love to hear from others—what have been your biggest challenges when matching your screen material and gain to your room’s lighting and projector? Have you found strategies that work particularly well for specific environments? Exploring these solutions can really help others avoid costly mistakes and enhance their home theater enjoyment.
This post hits home for me because I learned the hard way that choosing the wrong screen gain can really spoil the viewing experience. I initially went with a high-gain ALR screen, thinking it would make my projector look brighter, especially since my room has a lot of windows. But I didn’t realize how much glare and hot spots it would cause, which really detracted from the picture quality on darker scenes. After switching to a low-gain matte screen, the contrast and color accuracy improved dramatically, and I finally got that immersive cinema effect I was after. It’s fascinating how much room lighting and screen materials influence the final picture, which is often overlooked. I’m curious—has anyone experimented with semi-matte or textured surfaces that balance brightness and contrast? I’d love to hear what works in mixed lighting environments where you want vibrant images without glare.
I totally relate to the point about screen gain and its impact on your overall home theater experience. When I first set up my system, I underestimated how crucial choosing the right screen material and gain actually is. I went with a high-gain ALR screen for brightness without thinking about glare in my room, which has large windows. The hotspots and uneven brightness really detracted from the picture quality, especially during darker scenes. It took a bit of experimenting, but switching to a lower gain matte surface made a significant difference, giving me better contrast and natural colors.
What’s been interesting in my experience is how much surround light influences the visual quality. Even with a good projector, the right screen can make or break the viewing quality. Have others found that subtle lighting adjustments, like dimming or indirect lighting, can improve the contrast and overall picture? I’d love to hear what lighting setups others have found effective for balancing ambient light and maintaining vibrant images.