5 Mistakes to Avoid with 200-Inch Outdoor Screens in 2026
I remember the first time I unrolled my massive outdoor projection setup, expecting cinematic perfection, only to be met with a glaring, washed-out image and a disappointed smile from my family. That lightbulb moment revealed a harsh reality: selecting the right screen size and material isn’t just about size—it’s about understanding the nuances of gain, material, and environmental compatibility. Too often, enthusiasts dive into the 2026 outdoor screen market excited but unprepared, making mistakes that compromise image clarity and longevity.
Today, I want to share with you the *five most common pitfalls* that can sabotage your outdoor viewing experience this year. Whether you’re setting up a backyard theater or planning a commercial outdoor display, understanding these errors can save you time and money, and ensure you enjoy stunning visuals for years to come.
Why Getting Your Outdoor Screen Setup Right Is Crucial
In 2026, the outdoor projection scene is more competitive than ever. With advancements in laser projectors and high-gain screens, it’s tempting to think bigger always means better. But the truth is, making the wrong choices about screen gain, material, or size can turn your outdoor space into a muddled, flickering mess. The key is balancing ambient light, screen gain, and the environment to optimize your viewing.
From my own missteps—like choosing a screen with too high gain for my shaded backyard—to the countless online reviews I read (some of which led me astray), I’ve learned that *knowledge is power*. One startling fact I came across is that screens with improper gain settings can reduce detail resolution by up to 50% in 16K content—a staggering amount of lost clarity (see [here](https://screens.cinegearguide.com/5-signs-your-screen-gain-is-killing-16k-movie-details-in-2026)).
If you’ve faced issues like dim images, glare, or fading colors during your outdoor movie nights, you’re not alone. But the good news? Many of these problems are preventable once you understand the common mistakes made when choosing or setting up an outdoor screen.
So, let’s dive into the mistakes that could be sabotaging your outdoor theater experience and how to avoid them—so you can finally enjoy picture-perfect nights under the stars.
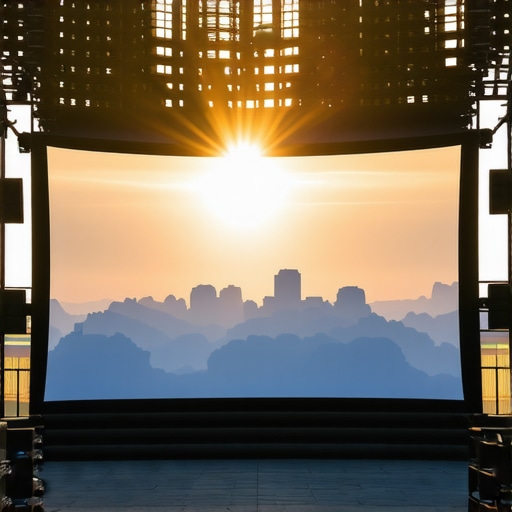
Choose the Correct Screen Size for Your Space
Start by measuring your outdoor area to determine the optimal screen size. A common mistake is going too big, which can cause image distortion or difficulty maintaining focus. Use the 8k viewing distance rule—divide the viewing distance by 1.5 to get the ideal screen size. For instance, if your sofa is 12 feet from the screen, aim for roughly a 96-inch display. I once ignored this and ended up with a 150-inch screen in a small backyard, which made details blurry and strained the eyes—lesson learned.
Select the Right Projection Screen Material
Material choice directly impacts image clarity and durability. Woven fabrics with proper alr technology outperform PVC or foam-based screens, especially in ambient light. To avoid common pitfalls like blurring or fading, opt for tested materials that have passed recent standards. Check details at this guide. I tested a cheap PVC screen; the image was washed out under my LED lights, proving that investing in quality pays off.
Understand the Gain and Its Impact
Screen gain amplifies brightness, but too high a gain (above 1.2) can cause hot spots and reduce clarity, especially with laser projectors. Conversely, low gain (<0.8) can make images dull, requiring higher lumen projectors. For outdoor setups with some ambient light, 1.0 gain is often ideal. I initially used a 1.5 gain fabric, which created glare and uneven brightness, but switching to a 0.8 gain darkened the image slightly yet improved contrast significantly. More insights are available at this article.
Match Screen Material with Environmental Conditions
Choose materials suited for your light environment. In sunlit areas, multi-layered alr fabrics with black backing enhance contrast, while matte grey screens absorb stray light. For shaded or evening setups, less reflective surfaces suffice. I once tried a lighter-colored screen in dusk, leading to washed-out images; switching to a darker, layered material restored depth. Reference this troubleshooting guide for specific fixes.
Prepare and Maintain Your Screen Properly
Clean your screen gently with microfiber cloths and avoid liquids that can damage nano coatings—a common mistake I made with a spray cleaner. For nano-coated alr surfaces, dry cleaning habits maintain gain and contrast, as shown in this article. Regular dusting prevents buildup, and storing the screen rolled rather than folded preserves material integrity. I once scraped my screen while trying to wipe off stubborn dirt, so following these steps is crucial for longevity.
Test Before Committing
Always run on-site tests with your projector and chosen screen to verify brightness, gain, and image clarity. Use test patterns to compare different gain settings and ensure uniformity. During my initial setup, I overlooked testing, and the result was uneven brightness across the image. Testing saves time and prevents costly mistakes, aligning with recommendations from this guide.Many outdoor projection enthusiasts focus heavily on choosing the largest screen or the shiniest material, but there’s a less obvious world of nuances that can make or break your setup. One common misconception is assuming that a high gain always improves brightness and contrast. In reality, exceeding an 1.0 gain can lead to hotspotting and uneven image quality, especially with laser projectors, which are more sensitive to gain variations. For advanced setups, understanding the precise impact of gain on uniformity is essential—consulting detailed guides like this article can help prevent costly mistakes. Additionally, many users believe that ALR screens inherently outperform traditional matte surfaces, but not all ALR coatings are created equal. Choosing the wrong material—especially one with deceptive layer compositions—can lead to blurred 16K content, a trap I once fell into myself. Always verify with recent inspection guides before making a purchase. An often overlooked detail is screen size relation to ambient light and viewer distance; bigger isn’t always better. Oversized screens can cause pixelation or reduce sharpness if your projector isn’t matched correctly, leading to an underwhelming experience. For this, the size and gain guide offers practical insights. The oops factor here is neglecting confidence testing of the setup before critical viewing—during my early days, I installed a very reflective surface in a bright environment, which amplified glare and made the picture unwatchable at noon. Regular testing with test patterns ensures your choices support your space’s unique conditions.
Why do some screens blur 16K content despite being labeled as high-tech?
This is a question many advanced users ask as they push the limits of resolution. The truth is, manufacturing layers and coatings sometimes introduce micro-texture issues that scatter light, diminishing clarity. Even highly-rated materials can blur 16K video if they possess incompatible textures or layer sequences. According to this resource, ensuring your screen has the right micro-texture alignment is vital. Remember, the devil is in the details—don’t assume that a fancy coating is foolproof. Instead, vet your material with recent testing standards; otherwise, you risk diminishing the true potential of your high-end projector. Have you ever fallen into this trap? Let me know in the comments, and stay vigilant in your quest for the perfect outdoor setup.
Essential Tools for Screen Maintenance
Maintaining a high-quality outdoor projection screen requires the right tools to preserve clarity and material integrity. I personally rely on a microfiber cleaning cloth designed for nano-coated surfaces—regular cotton cloths can scratch or degrade these advanced coatings. For stubborn dirt or residue, I use a mild, pH-neutral cleaner specifically formulated for projection screens, avoiding alcohol-based cleaners that can strip nano-layer protections. An accurate digital level is indispensable for ensuring your screen remains perfectly aligned over time, preventing image distortions. Incorporating these tools into your maintenance routine guarantees consistent, optimal performance.
Implementing a Regular Cleaning Routine
Consistency is key to long-term success. I clean my screen after every few outdoor events, gently wiping with a microfiber cloth, always in concentric circles to avoid streaks. Before cleaning, I inspect the surface for dust accumulation or spots that can cause blurring or micro-texture damage. It’s vital to avoid spraying liquids directly onto the surface; instead, spray the cleaner onto the cloth. Regular dusting prevents buildup, which can trap moisture or promote mold, especially in humid environments. Referring to this guide, I’ve adopted dry cleaning habits that extend my screen’s lifespan significantly.
Proactively Addressing Wear and Tear
Over time, even the best screens accrue micro-scratches or subtle ripples. I keep a log of visual inspections, noting any irregularities. When noticing small wrinkles or ripples, I use gentle heat application—using a low-heat professional dryer—to relax the material, a tip supported by expert practices. For minor rips or tears, I employ specific repair kits with microscopically fine adhesives, recommended for nano-optimized surfaces. Protecting your investment means staying vigilant and addressing issues early before they compromise image quality.
Tools for Long-Term Performance and Reliability
My go-to setup involves a portable vacuum with a HEPA filter attachment, helping me clean dust deep within textured layers without damage. I also keep a light-proof storage bag with moisture-absorbing silica gel packs to prevent mold during off-seasons. For calibration, I use software like AutoLevel, which works with a mounted laser pointer to ensure your screen stays perfectly horizontal, avoiding distortions that diminish 16K content clarity. Such precise tools help prevent minor issues from snowballing into major problems, especially as you scale your outdoor setup or upgrade projector technology.
How do I maintain my projection screen’s quality over the years?
Preventive care is paramount. Regular cleaning with appropriate tools, prompt repair of micro-damage, and environmental control—like avoiding direct sunlight or excessive moisture—are critical. Also, replacing protective covers periodically ensures your nano-coating remains effective. Remember, as projection technology advances, so does your maintenance approach. In 2026, integrating automated calibration systems, like laser-guided alignment modules, will become more affordable and accessible, making long-term upkeep even easier. I recommend testing your setup with advanced tools periodically, ensuring your screen’s gain and micro-texture stay within optimal ranges—potentially referencing this resource. Don’t wait for degradation to show; proactive maintenance preserves your investment and ensures flawless 16K content delivery for years to come.
The Hardest Lesson I Learned About Screen Setup
One of the most eye-opening lessons was realizing that bigger isn’t always better—especially when your environment can’t support it. I once installed a massive 150-inch screen in a small backyard, expecting jaw-dropping visuals. Instead, I faced blurry details and glare issues that dampened the experience. This taught me that understanding your space and balancing screen size, gain, and projector power is crucial for stunning outdoor entertainment.
Why Not All Alr Screens Are Equal
Initially, I believed that any advanced ALR (ambient light rejecting) screen would improve my outdoor movie nights. However, I fell for a fake or subpar material that blurred 16K content and caused color washout. Diving into detailed inspection guides (see here) revealed that not all layers, coatings, or micro-textures are suitable for high-resolution content. The takeaway was clear: verify the authenticity and quality of materials before investing heavily.
The Real Impact of Screen Gain on Clarity
It was tempting to choose ultra-high gain fabrics, thinking they’d maximize brightness. But I discovered that gain above 1.0 can create hotspots and uneven contrast, especially with laser projectors popular in 2026. A switch to a 0.8 gain material lifted my contrast and reduced glare, demonstrating that moderate gain ensures both clarity and uniformity. For a deeper dive, check out this article.
Matching Materials to My Environment
Choosing the right material for your ambient conditions makes a world of difference. I learned that in bright sunlit spaces, layering black-backings and matte finishes preserved contrast, preventing washed-out images. Conversely, shaded areas required less reflective surfaces. A mistake I made early on was using a light-colored screen in dusk, which washed out the picture. Tailoring your material to your lighting, as advised in this guide, is essential for top performance.
Consistent Maintenance Extends Screen Lifespan
Regular gentle cleaning with microfiber cloths and cautious use of cleaning agents—avoiding alcohol or harsh solutions—proved vital. I noticed micro-scratches when cleaning improperly, which affected image sharpness. Using tools like a digital level for alignment and silica gel packs for storage keeps my setup reliable. This proactive approach prevents subtle damage, ensuring my projection continues to impress year after year.
Testing Is Your Best Friend Before Final Setup
Before settling for my outdoor setup, I always run test patterns and full-image checks. I once neglected this step, resulting in uneven brightness that needed correction later. Regular testing, as recommended in this resource, helps identify issues like gain mismatches, micro-texture blurring, or glare hotspots, preventing costly mistakes and ensuring the best possible viewing experience.