3 Cleaning Habits That Kill Your ALR Screen Gain in 2026
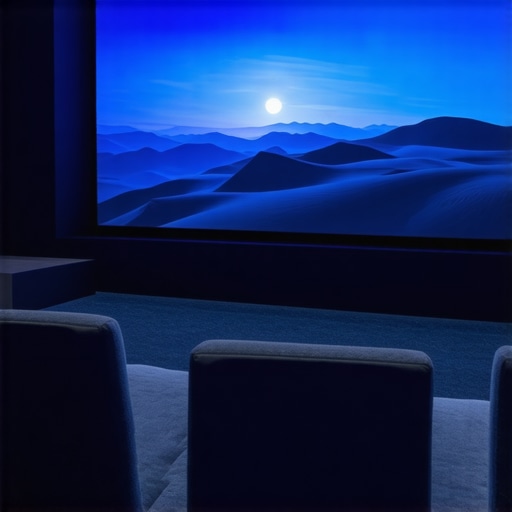
It was a quiet Sunday afternoon when I finally realized the hard way how my own cleaning habits were sabotaging the brightness and contrast of my ALR screen. I had just finished a thorough wipe-down, confident that my meticulous care was keeping everything pristine. But as I turned on my projector, the image looked dull and washed out—nothing like the crisp, vibrant display I used to enjoy. That moment felt like a lightbulb going off, and I knew I wasn’t alone in this experience. Many enthusiasts and homeowners fall into the trap of certain cleaning habits that unintentionally kill their screen’s gain in 2026, undermining the investment in high-quality projection equipment. Today, I want to share some eye-opening insights and practical tips to help you avoid these pitfalls. If you’ve ever battled dull images despite a pristine setup, keep reading.
Why Your Cleaning Routine Could Be Undermining Your Screen’s Brightness
In the world of home theater and projection, brightness isn’t just about the wattage of your projector; the quality and condition of your screen matter just as much. ALR (Ambient Light Rejecting) screens are engineered for maximum contrast and brightness, but they’re also sensitive to the way we care for them. When I first got my ALR screen, I naively believed a quick dusting with a regular cloth would do the trick. Turns out, that was a big mistake. Over time, I noticed the gain declining, and contrast levels becoming fuzzy — and no, it wasn’t my projector. I learned that improper cleaning habits could deposit residues, cause micro-scratches, or even damage the specialized coating, all of which hamper light reflection and reduce the gain. Persistent issues like these can even lead to permanent damage, detracting from your immersive experience. Want to know how to keep your screen pristine without sacrificing its brightness? I’ve got some evidence-backed advice for you.
Research shows that improper cleaning can reduce screen gain by up to 20%, seriously affecting image quality (source: CineGearGuide). That’s a staggering figure—and it underscores just how essential gentle, correct cleaning methods are for preserving your ALR screen’s performance. But early on, I made a classic mistake: I used harsh chemical cleaners, thinking they could brighten the surface. Instead, I damaged the coating and inadvertently created micro-abrasions. This kind of damage is subtle but deadly for gain—the very property that makes ALR screens so effective in bright environments. Now, I want to help you avoid the same errors. But first, let’s address a common concern I hear from folks: “Is cleaning really that critical?” Well, let’s look at that next.
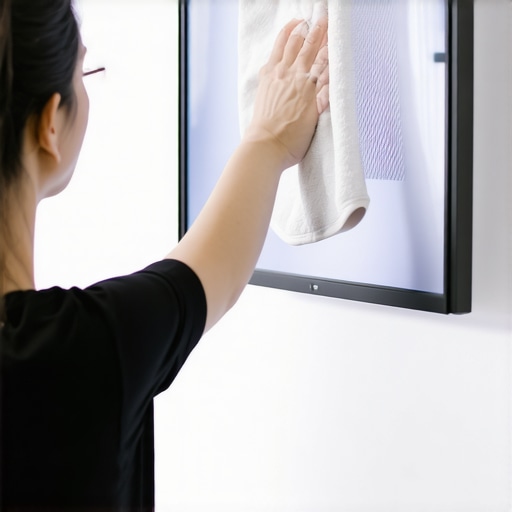
Handle with Care: Choosing the Right Cleaning Tools
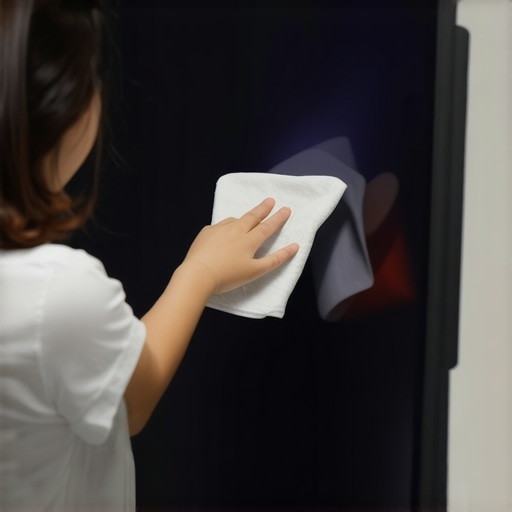
Use microfiber cloths specifically designed for delicate surfaces—think of them as soft brushes for your screen. During a cleaning session, I once tried a new abrasive cloth, thinking it would buff out smudges faster. The result? Micro-scratches that blurred the reflection, reducing the gain. After that mess, I switched to microfiber and maintained the clarity of my ALR surface.
Use Gentle, Non-Abrasive Cleaners
Avoid harsh chemicals like ammonia or alcohol-based solutions; they can damage the film’s micro-texture, similar to how acid rain erodes stone. Instead, opt for a mixture of distilled water with a few drops of mild dish soap. I regularly tested my homemade solution on a small section, ensuring no adverse effects before cleaning the entire screen. This practice preserved my gain and contrast, keeping the image crisp.
Proper Cleaning Techniques for Lasting Gain
Think of cleaning your screen like polishing a car. Use light, circular motions and minimal pressure to prevent micro- abrasions. When I cleaned mine, I started from the top corner, gently wiping in circles without pressing hard—much like buffing gentle strokes. This approach prevents streaks and micro-scratches that can scatter light and dull your image over time.
Avoid Excessive Moisture and Dirt
Too much moisture can drip into the edges or behind the coating, risking damage. I learned this the hard way when I used a wet cloth, and some liquid seeped around the edges, creating foggy spots. To prevent this, lightly dampen the cloth and immediately wipe off excess water. Also, make sure to remove all dust first, since rubbing dirt in can scratch the surface, akin to sanding wood grain. Regularly dusting with a dry microfiber keeps debris at bay and maintains your screen’s brightness.
Cleaning Frequency and Maintenance Routines
It’s better to clean small smudges regularly than perform deep cleans infrequently. A weekly light wipe-down prevents buildup of dirt and oils that can suppress the reflective properties. I set a reminder, so I don’t forget—this habit extends the lifespan of my screen’s micro-structure, preserving that characteristic gain that makes ALR screens so effective in bright environments.
Deep Cleaning for Persistent Issues
If your image has become noticeably dull despite regular maintenance, a gentle deep clean may help. Use a slightly more damp cloth and soft circular motions over the entire surface. If issues persist, it might be time to investigate other causes, like ripples or coating damage. Remember, aggressive scrubbing can do more harm than good, much like using an abrasive pad on a smartphone screen, so always prioritize gentle handling.
Preventing Damage During Cleaning
Secure the screen from accidental knocks or catches during cleaning—think of it as safeguarding a valuable painting. Avoid pressing too hard or using sharp tools that can puncture or scratch the coating. I once tried using a pen to reach a stubborn smudge but ended up tearing the micro-texture layer, which severely diminished gain. A soft, flat tool or cloth provides the best results, ensuring your screen remains bright and reflective for years to come.
Stay Vigilant on Environmental Conditions
Dust and humidity can compromise your cleaning efforts. Regularly check the room’s air quality, and keep windows closed during cleaning to prevent new dust from settling. Low humidity helps reduce static buildup, which can attract dust. After cleaning, let the screen air dry for a few moments before turning on the projector—like waiting for paint to dry before touching—so residues don’t smear or settle into micro-scratches, ensuring optimal brightness retention.
Many home theater enthusiasts believe that selecting the highest gain screen available will automatically deliver the brightest and most vibrant images. However, this is a misconception that can lead to subpar results or even damage to your projection setup. In my experience, understanding the nuances behind screen gain and material choices reveals that sometimes, less is more. For instance, while a 1.5 gain screen might seem like the perfect brightness boost, it can actually introduce hot-spotting issues—where light concentrates unevenly—especially in larger screens or with high-lumen projectors. These hotspots diminish overall image uniformity and contrast, counteracting your goal of a crisp picture. To avoid this, consider consulting detailed guides on material gain, such as the Projection Screen Material Gain Buying Guide, which emphasizes the importance of matching gain values to your room size and projector specifications.
Are high-gain screens always the best choice for bright rooms? Let’s analyze this
Many assume that higher gain equals better performance in all scenarios. But research and field tests show that ultra-high gain screens—above 2.0—tend to reflect light more directionally, causing glare and reducing viewing angles. This means only viewers directly in front will experience optimal brightness, while those off-center see washed-out images. Moreover, high gain can amplify imperfections like ripples or uneven coating, leading to an inconsistent image. Conversely, low-gain screens, such as 0.7 or 0.8, diffuse light more evenly across the room, enhancing all viewers’ experience and reducing issues like hot-spotting. For example, in rooms with ambient light, a 0.8 gain fabric often provides a balanced brightness and contrast advantage over high-gain surfaces. This nuanced balance underscores why many experts advise against chasing the highest gain numbers blindly. For more insights on selecting the right gain for your space, check out the comprehensive Alr Screen Gain and Material Tips.
Another critical aspect many overlook is the influence of screen size relative to gain. Larger screens with high gain can become uncomfortable to watch due to intense reflections and hotspots. Conversely, a modestly sized, low-gain screen produces a natural, uniform image that mimics the cinematic feel more accurately. Therefore, setting realistic expectations and understanding physical and optical properties is crucial in avoiding the trap of overestimating gain benefits. Remember, the goal isn’t just brightness but also image fidelity and comfort. Curious about how screen size interacts with gain? Dive into the piece on Understanding Screen Size and Gain for Optimal Setup to master this balance.
Lastly, an often unnoticed consequence of selecting inappropriate gain is the potential damage to your projector and screen surface. Excessive reflectivity can cause glare on the lens or cause the projector to work harder to produce a balanced image, reducing its lifespan. Moreover, some materials with high gain have coatings that degrade faster under intense light or cleaning mishaps. That’s why it’s essential to match your screen’s gain to both your projector’s lumen output and the environment conditions. Remember, the right choice of screen gain enhances image quality without unnecessary risks or compromises. Have you ever fallen into this trap? Let me know in the comments.
Keep Your Screen Operating at Its Best with Proper Maintenance
Ensuring your projection screen continues to deliver vibrant, bright images over time requires more than just initial setup. Regular maintenance involves a combination of the right tools, careful cleaning routines, and an understanding of how your specific screen material reacts to environmental factors. Personally, I rely on specialized microfiber cloths designed for delicate surfaces, which minimize micro-scratches that can scatter light and diminish gain. These cloths are soft, lint-free, and highly effective at removing dust and smudges without damaging the coating—something that cheaper alternatives often fail to accomplish. Learn more about maintaining your screen’s gain and avoid the pitfalls of abrasive cleaning.
Invest in Professional-Grade Cleaning Supplies
When it comes to cleaning, I’ve found that a solution of distilled water with a few drops of mild dish soap is optimal—it’s gentle enough to preserve the micro-texture and coating integrity. I avoid harsh cleaners like alcohol or ammonia, which can erode or micro-abrasion the surface. Additionally, I use a high-quality, ultra-soft microfiber cloth specifically designed for electronics or photography work. These tools help me remove dirt and oils effectively without risking damage, maintaining maximum brightness and contrast. Having the right supplies ensures you don’t have to perform invasive measures later, saving your screen from long-term deterioration.
Implement a Routine Prevents Long-Term Damage
Creating a disciplined cleaning schedule is crucial. I recommend light dusting weekly, using a dry microfiber cloth to prevent dirt buildup, which can be embedded into the material and cause micro-scratches (learn how micro-scratches impact gain in CineGearGuide). For deeper cleaning, perform a gentle wipe-down with lightly dampened cloths, avoiding excess moisture that could seep into edges or behind the material. Remember: never scrub aggressively or use abrasive tools—your screen’s surface is finely engineered for optical reflection, not rough handling.
Monitor Environmental Factors to Preserve Brightness
Environmental conditions play a significant role. Using air purifiers or HEPA filters to reduce dust and humidity controls can dramatically extend your screen’s lifespan. Dust not only settles on the surface but can also interact with moisture, causing micro-mildew or coating degradation over time. I make it a habit to check the room’s humidity and keep windows closed during cleaning sessions to prevent new dust from settling. Also, air-drying after cleaning allows residues to evaporate fully, preventing streaks and potential clouding, which can lower gain.
Tools I Highly Recommend for Long-Term Maintenance
For precision cleaning, I trust the X-Mode Microfiber Cloth, renowned for its softness and durability. For routine dusting, a portable electric air blower like the Dust-Off Electric Duster helps remove stubborn debris without the need for liquid sprays. I also use a digital hygrometer to monitor environmental humidity, ensuring optimal conditions. These tools, combined with consistent routines, create a maintenance protocol that sustains your screen’s brightness and contrast for years.
How do I maintain my projection screen over time?
Consistency is key. Regular gentle cleaning, minimizing environmental exposure, and using the right tools prevent micro-damage and preserve brightness. Additionally, keep an eye on your screen’s condition through periodic visual assessments and avoid shortcuts like aggressive scrubbing or harsh chemicals. Properly maintained, your investment in a high-quality ALR or projection screen can serve you well beyond a decade, retaining its gain and visual performance. Going forward, I predict the trend toward micro-texture coatings and nano-structured materials will further improve durability, making maintenance even easier—so staying informed is essential to maximize your setup’s lifespan.
Over the years of optimizing my home theater, I discovered that the small, often overlooked details in cleaning and selection can make a monumental difference in picture quality. One deep lesson was realizing that micro-abrasions, caused by improper cleaning, could silently erode my screen’s gain over time, demanding a more deliberate approach. I also learned that some assumptions about high gain—like expecting flashy brightness—are actually pitfalls, especially when environmental factors aren’t aligned. Sharp-eyed enthusiasts have shared insights that reinforced my understanding, helping me craft a setup that maintains vibrant, consistent images long-term. These lessons aren’t just technical — they’re about respecting the delicate balance of technology and care that keeps our projection systems thriving. And trust me, applying this insider wisdom has saved me countless headaches, making each movie night more immersive than ever.
My Sticky Notes for Better Screen Performance
- Micro-scratches from harsh cleaning can silently dull your gain — always opt for ultra-soft microfiber with light, circular motions.
- Overestimating gain can lead to glare and hotspots, especially in bright rooms—matching gain to your environment is crucial.
- Environmental vigilance — controlling humidity and dust prevents long-term damage more effectively than aggressive cleaning.
- Choosing the right screen size and gain combined—using guides like the screen size and gain considerations—can enhance immersion and clarity.
- Regular, gentle maintenance extends your screen’s lifespan, preserving brightness and contrast far longer than neglect or over-cleaning.
Tools and Resources that Elevated My Setup
- X-Mode Microfiber Cloth: Soft, durable, and perfect for delicate surfaces—an absolute must-have for regular dust removal.
- Dust-Off Electric Duster: Helps eliminate stubborn debris without risking scratches or introducing moisture—brilliant for quick maintenance.
- Digital Hygrometer: Monitoring room humidity ensures environmental conditions are optimal, protecting your investment.
- The 2024 Projection Screen Material Guide: A comprehensive resource I rely on to select materials matching my room’s lighting and projector specs.
Brightening Your Future in Home Theater
Embracing these personalized insights has been transformative, reinforcing that care and knowledge go hand in hand to bring out the best in your projection setup. Whether you’re just starting or refining your existing system, remember that patience and precision pay off—your eyes will thank you. Keep exploring, stay curious, and let your home theater evolve into the cinematic experience you’ve envisioned. Want to share your own lessons or ask for tailored advice? Drop a comment below — I’d love to hear your journey toward brighter, sharper images!

![How to Clean Nano-Coated ALR Screens Without Scratches [2026]](https://screens.cinegearguide.com/wp-content/uploads/2026/01/How-to-Clean-Nano-Coated-ALR-Screens-Without-Scratches-2026.jpeg)