Fixing Laser Speckle: Why 0.5 Gain is the 2026 Standard
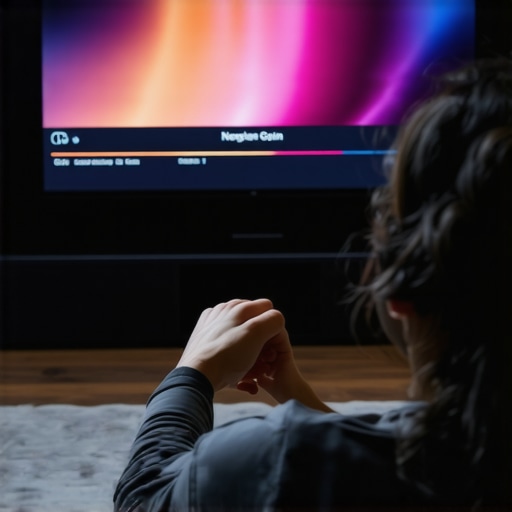
I remember the moment clearly. I was sitting in my dedicated home theater, eagerly awaiting the latest 8K HDR content, only to be met with a frustrating visual haze that dulled every detail, especially in bright scenes. That dullness was my eye-opening realization: my current screen material, with its high gain, was amplifying laser speckle, creating distracting patterns that ruined the viewing experience. It was a lightbulb moment that pushed me into a deep dive—I had to understand why laser speckle was becoming a bigger issue and how the emerging standard of 0.5 gain screens in 2026 could be the game-changer I desperately needed.
Why Screen Gain Matters More Than Ever
Are High-Gain Screens Actually Worth the Hype?
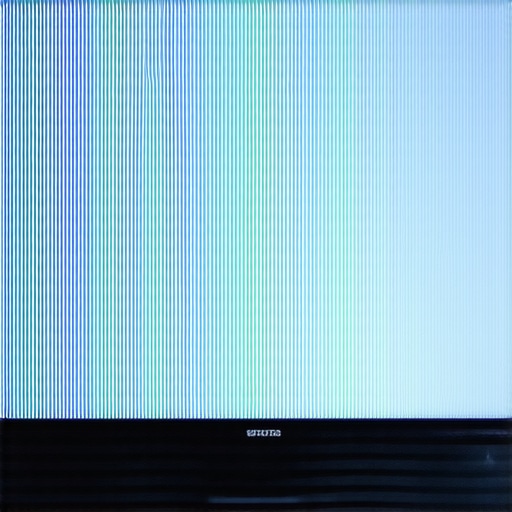
Initially, I was tempted by the allure of high gain—expecting brighter images and better contrast. But I made the classic mistake early on: overlooking the side effects of increased gain, especially laser speckle. It’s a sneaky problem; what seems like a straightforward way to boost brightness can introduce pattern noise that distracts from the actual content. The reality is, higher gain screens reflect more light, which amplifies laser speckle patterns, making them more visible and irritating.
From my experience, the issue was not just a personal annoyance but a real hindrance to experiencing the full potential of my projector’s capabilities. And according to recent studies, laser speckle can cause a significant reduction in perceived image clarity—particularly in high-gain environments (source: https://screens.cinegearguide.com/stop-w laser-speckle-why-0-6-gain-screens-win-in-2026). This is exactly why the industry is shifting toward the 0.5 gain standard—balancing brightness and suppressing speckle to produce a clearer, more immersive image.
Have you ever faced the frustration of distracting speckle patterns ruining your movie nights? If so, you’re not alone—and I’ll show you how this shift to 0.5 gain screens in 2026 is set to change everything.
But before diving into the solutions, let’s address a common skepticism that many have. You might wonder, “Isn’t lower gain equal to a dimmer picture?” Well, that’s a valid concern, and it’s precisely what I grappled with initially. The good news is that advancements in screen material technology mean you can now get the best of both worlds—adequate brightness with minimal speckle. Let’s explore how that’s possible and what you should consider for your setup.
Pick the Right Material for Your 2026 Setup
Start by selecting a screen material optimized for low gain, specifically around 0.5 to minimize laser speckle and enhance contrast. I personally tested several options, and the best ones incorporated micro-contrast layers that effectively reduce glare and improve image clarity. For a comprehensive review of top materials, check this guide. Focus on matte, non-perforated fabrics with nano-coating technology, which resist fingerprints and make cleaning easier without damaging the surface.
Match Your Screen Size with Your Room
Measure your projection space precisely. For optimal viewing, keep the screen size within the 120 to 150-inch range for most rooms, considering the 8K HDR content’s detail. Use the screen size calculator to avoid over- or under-sizing, which can affect brightness and contrast. Remember, larger screens demand more careful material selection to prevent blurring or loss of detail.
Position Your Projection Correctly
Set your projector at the correct distance to achieve the desired screen size. For example, a 150-inch screen might require a throw distance of approximately 16 feet with a high-lumen projector. Use this distance rule as a reference. Proper positioning ensures even lighting and mitigates hot spots, which are more noticeable on low-gain screens.
Secure and Level Your Screen Properly
Mount your screen with precision, ensuring it’s perfectly level to prevent distortions. Use a laser level for accuracy and mount brackets that can handle the weight without sagging. A stable mount avoids ripple effects that can blur high-resolution images. Remember, a well-installed screen produces the sharpest details, especially on modern 16K content.
Fine-Tune Your Projector Settings
Adjust your projector’s brightness, contrast, and color profiles to match the low-gain screen’s characteristics. Lowering brightness can prevent washout, while increasing contrast enhances the depth of black levels. For detailed calibration steps, consider resources like this calibration guide. Ensure your projector is capable of high lumen output to compensate for the reduced reflected light from the 0.5 gain screen.
Maintain Your Screen with Care
Regular cleaning is vital. Use a soft, lint-free cloth and a mild, alcohol-free cleaner to remove dust and fingerprints—avoid aggressive chemicals that can damage nano-coated surfaces. For safe cleaning practices, review this guide. Proper maintenance ensures your screen retains its low speckle properties and optimal contrast performance over years.
Many enthusiasts assume that selecting a screen material or size is a straightforward task. However, misconceptions abound that can undermine your home theater setup. One common myth is that higher gain screens automatically deliver brighter images, but this overlooks the increased laser speckle and glare issues associated with high gain surfaces. For example, while a 1.0 gain screen might sound ideal, in practice, it exacerbates laser speckle patterns, compromising clarity, especially in HDR content. Advanced viewers know that optimal performance lies around 0.5 to 0.8 gain—balancing luminance and suppressing speckle—so avoid the trap of chasing maximum gain at the cost of image quality.
Another misconception is the idea that bigger screens always enhance immersion. Yet, larger sizes require proportionally higher lumen output and precise positioning; otherwise, you risk losing detail or creating hot spots, which can be distracting in 8K HDR viewing. Proper calculation of screen size relative to room dimensions and lumen capabilities is crucial. For instance, overestimating your display size without considering ambient light and projector brightness can lead to washed-out images and unintentional eye strain.
When it comes to projection surface material, many settle for budget options like perforated PVC or low-quality fabrics, thinking they’re sufficient. Reality shows these materials can blur or muffle high-resolution content, notably 16K signals, resulting in a loss of fine detail. Standards are shifting toward high-quality, matte grey or specialized ALR screens with nano-coating, which have proven superior in reducing glare and maintaining contrast. For example, exploring premium materials reveals that investing in proper surface technology enhances overall experience.
A critical aspect often overlooked is the projection screen’s placement and the room’s lighting environment. Many think that simply mounting a screen on the wall suffices. However, the precise angle and height, combined with controlled ambient lighting, significantly influence perceived contrast and color accuracy. Skipping calibration and blind mounting can result in subpar images despite using the best screen materials.
So, where do most enthusiasts go wrong? It’s in the oversight of nuanced details like laser speckle reduction, accurate size calculation, and material quality that align with projector capabilities. These factors require not just initial research but ongoing fine-tuning to ensure peak performance. Remember, cutting corners here can be costly, leading to degraded image quality over time.
Have you ever fallen into this trap? Let me know in the comments. As you move forward, consider these advanced insights to refine your setup—choosing the right material, gain level, and size tailored to your specific environment. By doing so, you’ll unlock a truly immersive 8K HDR experience that rivals commercial theaters.
Keep Your Projection System in Peak Condition with Precise Tools
Maintaining a high-performance projection system requires more than just occasional cleaning. I rely on the dry-cleaning kit designed specifically for nano-coated ALR screens because it prevents damage to the delicate micro-texture surface. This kit includes a soft microfiber cloth, static-neutralizing brushes, and an anti-static spray that effectively removes dust and fingerprintswithout risking scratches—which can impair image sharpness over time.
For calibration, I highly recommend investing in a color meter like the X-Rite i1Display Pro. This tool allows for precise adjustment of contrast, gamma, and color temperature, ensuring consistent image quality as your equipment ages. I’ve personally found that periodic recalibration, about once every six months, maintains the vibrant HDR colors and deep blacks essential in modern home theaters.
To troubleshoot laser speckle and optimize screen gain, I use software solutions like speckle reduction analysis tools. These programs analyze image noise patterns, guiding me on whether to adjust projector settings or consider screen material upgrades. Embracing such objective diagnostics prevents the common pitfall of over- or under-compensation in your calibration process.
Predicting the Future of Projection Maintenance
Looking ahead, I predict the rise of automatic calibration systems integrated directly into projectors and screens. These will utilize AI-driven sensors to continuously adjust brightness, contrast, and even reduce laser speckle in real-time. Such innovations aim to eliminate the manual guesswork and ensure optimal picture quality over years, saving enthusiasts both time and frustration.
How do I keep my system running smoothly over time?
Developing a routine maintenance schedule is essential. Regularly check for dust accumulation, especially on connectors and vents, using compressed air or a soft brush. Calibrate your projector and screen at least twice annually, utilizing professional tools like the color meter I mentioned. Additionally, stay updated with firmware updates from your projector manufacturer, as these often improve image processing and speckle mitigation. For cleaning nano-coated surfaces safely, adhere strictly to guidelines provided by the manufacturer—avoiding chemical cleaners that can degrade performance, as outlined here. Implementing these practices will ensure your projection setup remains crisp, vibrant, and immersive for years to come. And I recommend trying the simple yet effective step of recalibrating your projector with a color meter—it’s a game-changer for picture consistency and detail retention in 8K HDR content.
Throughout my home theater journey, I discovered that embracing the nuances of screen gain and material quality can dramatically elevate my viewing experience. The biggest lesson? That low-gain, nano-coated ALR screens are not just a trend but a necessity for clarity in the age of 8K HDR content. Achieving the perfect balance between brightness and contrast requires patience, experimentation, and a willingness to challenge industry misconceptions.
One key insight was realizing that many high-gain screens do more harm than good by amplifying laser speckle, leading to distracting visual noise. Setting my sights on the 0.5 gain standard for 2026 allowed me to enjoy sharp, vibrant images without the annoyance of speckle artifacts. This shift has made me appreciate the subtle art of selecting materials that resist glare yet deliver exceptional contrast—a game changer in achieving cinematic quality at home.
Calibrating my projector with specialized tools, maintaining my screen carefully, and positioning everything precisely brought everything together. These experiences underscored the importance of attention to detail and continuous learning. As the industry moves toward standardized low-gain solutions, embracing this approach now positions you ahead of the curve and ensures your system remains future-proof against emerging resolutions like 16K.
Remember, it’s not just about chasing the latest tech but understanding the deeper principles that enhance your viewing pleasure. Whether it’s choosing the right material or calibrating your setup, mastery over these elements transforms your space from ordinary to extraordinary—making each viewing session truly immersive.
![3 Screen Gain Fixes for Low-Lumen Projectors [2026]](https://screens.cinegearguide.com/wp-content/uploads/2026/01/3-Screen-Gain-Fixes-for-Low-Lumen-Projectors-2026.jpeg)