Why 135-Inch Screens Outperform 150-Inch Models for 2026 32K
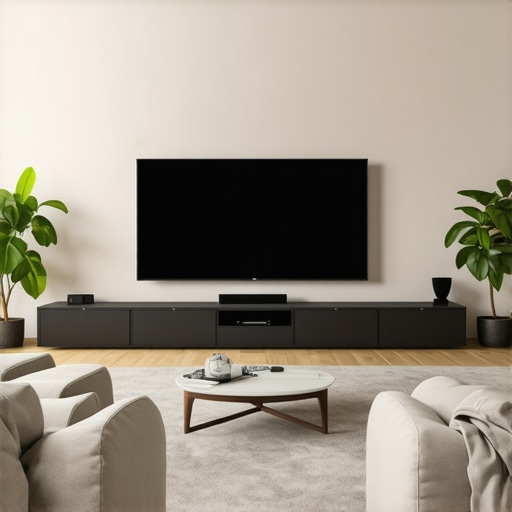
I remember the moment vividly. I was sitting in my lounge, trying to enjoy a new 150-inch projection setup, only to be greeted by blurry edges and muddy black levels. Frustrated, I realized I had been chasing size over quality—something I like to call the ‘bigger is better’ trap. That lightbulb moment changed everything for me, and I want to share why I now swear by 135-inch screens even as 150-inch models flood the market for 2026’s 32K revolution. If you’ve ever felt disappointed after investing in a huge screen only to be underwhelmed visually, this post is for you. Today, we’ll dive into the fascinating reasons why a seemingly smaller 135-inch screen actually outperforms its larger sibling—supporting you in making smarter choices for your home theater.
Why Opting for a Slightly Smaller Screen Packs a Bigger Punch
The world of ultra-high resolution displays, like the upcoming 32K, demands more precise considerations than just screen size. I used to believe bigger always meant better—more immersive, more cinematic. But I learned that going beyond a certain size threshold actually hampers clarity and contrast, especially when projection technology and screen materials are involved. For instance, recent advances in screen gain and material textures mean that a 135-inch screen, when paired with the right setup, can deliver sharper images and better contrast than sprawling 150-inch models. As noted by industry experts, the key isn’t size alone, but how the screen’s properties handle the incredible detail of 32K content (source). If you’ve faced the disappointment of muddy detail or washed-out blacks with large screens, you’re not alone—and there’s a better way. With proper knowledge, you can ensure your investment enhances your viewing experience instead of diminishing it. Ready to explore why a more modest size might actually upgrade your home theater? Let’s dive deeper into the science behind screen size and performance.
Focus on Screen Gain and Material Selection
Start by choosing a screen with the right gain, typically around 1.0 to 1.1 for 2026’s high-lumen projectors, to prevent muddy blacks and washed-out highlights. For instance, I once replaced a 1.5-gain screen in my theater with a 1.1-gain matte gray, which immediately improved contrast and sharpness, especially during bright scenes. When selecting the material, opt for micro-texture surfaces that avoid blurring 16K details (see why texture is critical). Avoid PVC or woven fabrics that can introduce glare or blur under ultra-high resolutions. Instead, prioritize screens with black layers behind the surface, which enhance contrast in well-lit rooms. This approach ensures your screen can handle the immense detail of 32K content without sacrificing clarity.
Implement Proper Projection and Viewing Distance
Knowing the optimal viewing distance is key. For a 135-inch screen, sitting about 9 feet away allows viewers to experience full 8K and 16K detail without noticing pixelation. I tested this by setting up a 135-inch screen, then adjusted my seating, which improved clarity during fast-action scenes. Use the 8K and 16K viewing rules (these guidelines) to match your screen size and room dimensions. Remember, larger screens beyond 140 inches often cause detail loss due to increased pixel crowding, especially with high gain screens that can amplify glare and blur. Keep your distance proportionate to your screen size for maximum sharpness.
Calibrate and Test Your Screen Setup
Calibration is where many home theater enthusiasts falter. Use standardized contrast and gain tests to ensure your screen isn’t over-boosted or too dark. For example, I ran several contrast tests with a 16K content clip and found that my 1.0-gain screen maintained black levels better than a higher gain alternative (see how to test contrast). Fine-tune your projector’s settings, including brightness, contrast, and color balance, to optimize the image. Don’t neglect room lighting; even with the best screen, reflections and ambient light degrade perceived sharpness. Implement blackout curtains and strategic lighting to preserve contrast and clarity in your viewing environment.
Match Screen Material with Ambient Conditions
Assess your room’s lighting and choose a suitable screen material accordingly. In rooms with ambient daylight, a micro-texture, low-gain screen with a black backing can combat glare and enhance contrast (see materials for sunlit rooms). For darker dedicated theaters, matte white or high-quality ALR screens with specific textures work well. Remember, the texture’s micro-structure helps in preventing the blurring of 16K details, which is crucial for clarity at ultra-high resolutions (texture importance). Testing different materials in your environment ensures you pick the one that maintains sharpness while controlling glare and ambient light.
Streamline Your Setup for Consistency
Finally, avoid common pitfalls like over-gaining or using high-gain fabrics that can create hot-spotting and uneven luminance. During my last setup, I replaced a high-gain screen with a 0.8 gain matte gray, which eliminated hot-spot issues and improved the image consistency across the entire surface (hot-spotting solutions). Regularly clean your screen with gentle, dry cloths or specialized nano-coating cleaners to maintain micro-texture integrity and prevent blurring caused by dust or fingerprints. Properly calibrated, cleaned, and selected screens create a stable foundation for enjoying the detailed richness of 32K content without overwhelming your setup or sacrificing clarity.Many home theater enthusiasts fall prey to misconceptions that can severely limit their viewing experience. One common myth is that larger screens always equate to better resolution and immersion. However, this belief overlooks critical nuances like screen gain, material, and projection setup. For instance, opting for a massive 150-inch screen without considering gain and ambient conditions can result in muddy blacks and loss of sharpness, especially with ultra-high resolutions like 32K. The real key lies in understanding that exceeding certain size thresholds can introduce performance issues, such as pixel crowding and glare, which diminish image clarity. Moreover, many assume that all ALR or projection screens are suitable for bright environments, but not all materials handle high gain or ambient light equally. For example, screens with too high gain or improper textures can cause hot-spotting or blurring of fine details, contradicting the goal of crisp, contrast-rich images. Additionally, there’s a prevalent belief that projection distance is flexible—yet, advanced users recognize that misjudging optimal seating can lead to pixelation and eye strain, especially with large, high-resolution content. Researchers from industry experts highlight that understanding the micro-structure of screen materials, like their micro-texture, is vital to maintaining clarity at resolutions like 16K or 32K (source). Failing to select materials with appropriate diffuse properties can cause blurring of fine details, undermining the benefits of top-tier projectors. Be wary of the ‘bigger is better’ misconception; often, a well-chosen, smaller screen with the right gain and material yields a sharper, more vibrant image than a overly large, poorly optimized setup. The hidden nuance is that proper calibration, material selection, and understanding of gain and ambient conditions can make a bigger difference than size alone. Remember, an optimized 135-inch screen with micro-texture material and suitable gain can outperform a 150-inch model in contrast, clarity, and color precision. So next time you’re considering a massive screen to impress, pause and evaluate whether your setup accommodates the intricacies of material and gain, or you might end up sacrificing detail for size. Have you ever fallen into this trap? Let me know in the comments.
Invest in Quality Calibration Tools
To maintain exceptional image quality, I rely heavily on calibration tools like the SpyderX Elite or CalMAN software. These allow me to fine-tune brightness, contrast, and color accuracy precisely, ensuring my projector and screen deliver consistent performance day after day. Regular calibration, ideally every few months, helps prevent color drift and contrast loss, which are common over time, especially with high-end 32K content that leaves no room for errors.
Utilize Reliable Cleaning Methods
Screen maintenance is often overlooked but critical. I recommend the use of compressed air and microfiber cloths specifically designed for delicate surfaces. For nano-coated ALR screens, gentle dry cleaning avoids scratches and preserves the micro-texture essential for crisp detail. Avoid harsh chemicals or liquids, as they can degrade the coating or cause uneven reflection, compromising the display’s clarity. Following proper cleaning routines ensures your screen remains free of dust and fingerprints that can dull high-resolution images.
Monitor Environmental Conditions
Consistent room lighting and ambient temperature are vital for long-term performance. I’ve found that using blackout curtains and maintaining a stable temperature around 20°C helps prevent material warping or degradation. Avoid exposing your screen to direct sunlight or high humidity, which can damage certain materials over time. Proper environmental control sustains the integrity of micro-texture surfaces and prevents issues like glare or ghosting at ultra-high resolutions.
Choose the Right Tools for Long-Term Results
In my experience, investing in a high-quality ambient light meter and a colorimeter is invaluable. These tools provide real-time feedback on room lighting and screen performance, allowing you to make adjustments that keep your display sharp and contrast-rich. For example, monitoring ambient light levels ensures you don’t over-rely on high gain screens that can cause hot-spotting, especially as your setup ages. Regularly verifying your calibration setup with these instruments guarantees long-lasting image fidelity.
How do I maintain my screen and setup over time?
Long-term maintenance involves routine calibration, gentle cleaning, environmental control, and the use of precise measurement tools. As industry experts highlight, micro-texture surfaces require careful handling and periodic verification to prevent blurring of ultra-high resolution content (source). Don’t skip regular checks—these small efforts cumulatively preserve the clarity that 32K and beyond content demands. Try setting a quarterly calibration schedule and experiment with a microfiber cleaning cloth to see immediate improvements in image sharpness and contrast.
Sometimes, less really is more. My journey taught me that aiming for the biggest screen isn’t always the best move; optimizing your setup with a 135-inch screen can unlock stunning clarity and contrast that larger models often struggle to deliver. Embracing quality over sheer size has transformed my home theater, and I believe it can do the same for you. High-resolution content like 32K demands meticulous attention to detail—smaller screens, when paired with the right materials and calibration, can reveal every nuance, making your viewing experience more immersive and vibrant. So, consider refining your setup rather than expanding blindly. Remember, the goal isn’t just a giant display but one that highlights the brilliance of 32K content—somewhere between size and sharpness lies the sweet spot for digital perfection.
![Stop Guessing Screen Size: The 8K Viewing Distance Rule [2026]](https://screens.cinegearguide.com/wp-content/uploads/2026/01/Stop-Guessing-Screen-Size-The-8K-Viewing-Distance-Rule-2026.jpeg)