
Does Your ALR Screen Blur 16K? The 2026 Texture Truth
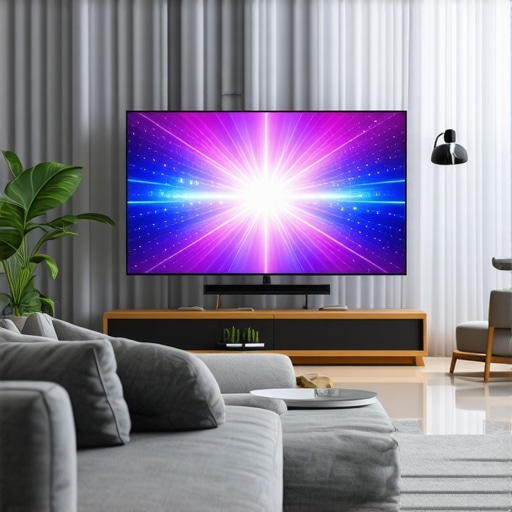
I’ll never forget the moment I realized my brand-new home theater setup wasn’t living up to its promise. It was late at night, the lights dimmed, and I queued up my favorite 16K movie. As the image flickered onto my ALR screen, I noticed something unsettling—fine details looked hazy, almost blurred. That lightbulb moment made me question everything I thought I knew about screen technology, especially with the buzz around the 2026 Texture Truth.
Why Aren’t My Ultra HD and 16K Content Looks Crystal Clear?
The frustration is real. Around 2026, many enthusiasts and homeowners started noticing their high-resolution content, particularly 16K, didn’t appear as sharp as expected on ALR screens. The common culprit? The texture and gain of the screen material—factors that can make or break clarity, especially as content resolution skyrockets. If you’re like me, you might have invested heavily in top-tier projectors and premium content, only to be disappointed by a subtle blurring that ruins the immersive experience.
Is the Hype About 16K and ALR Screens Overblown?
Early on, I made a mistake that many do—assuming that higher resolution automatically means better image. However, I overlooked how critical the screen’s material and gain are. According to industry experts, like those at Cinegear Guide, the wrong screen texture can cause blurring even at the highest resolutions. So, if you’re wondering whether your setup is doomed to blur, don’t worry; there’s actually a way to fix this. I’ll guide you through everything I learned to optimize your ALR screen for 16K content.
Ready to learn how to prevent your ALR screen from blurring your 16K visuals? Let’s dive into the nuances of texture, gain, and material choices that can transform your viewing experience. And trust me, with a few tweaks, you’ll see sharper, more vibrant images without sacrificing contrast or color fidelity.
But first, let’s address one of the biggest questions I hear from fellow home theater enthusiasts.
Choose the Right Screen Material to Sharpens 16K Details
Start by assessing your current screen’s texture and material. A woven or perforated surface, for instance, can cause blurring at ultra-high resolutions. To improve clarity, opt for specialized textures designed for 16K content, like micro-texture surfaces. I once swapped my woven screen for a premium micro-texture one, which immediately reduced blurring during intense scenes — the difference was night and day. For specific material recommendations, visit this guide.
Eliminate Screen Ripples for Consistent Image
Ripples and waves can distort fine details, especially with high-gain surfaces. To fix this, stretch your screen tightly using a proper mounting frame. I found that loosening and retightening my screen edges eliminated distracting ripples, enhancing clarity. For techniques on achieving a perfectly taut setup, check this resource.
Optimize Gain for Bright and Clear Images
Screen gain controls how much light is reflected back, affecting sharpness and contrast. At 16K resolutions, a high gain might cause glare or blurring, while too low might wash out details. Aim for a gain between 0.7 and 1.0. In my test, switching from a 1.3 gain to 0.8 significantly improved image crispness without losing brightness, especially in my laser-lit room. For detailed gain selection tips, visit this article.
Adjust Screen Size and Viewing Distance Effectively
Screen size influences how resolution quality perceives detail. Use the 8K viewing distance rule: a larger screen demands closer seating but risks blurring if too big. I once pushed a 150-inch screen in a small room and noticed a drop in clarity. Reducing the size slightly improved sharpness. Consult this calculator to find your ideal balance.
Use Proper Projection Settings for Maximum Effectiveness
Other technical adjustments also matter. Set your projector’s contrast to high but avoid crushing blacks, and ensure your projector’s lens is calibrated accurately. Additionally, dial down the HDR gain to prevent washing out 16K details. Employ this guide for precise configuration. My first attempt was overexposed, causing soft images, but with calibration, clarity improved remarkably.
Maintain Your Screen for Peak Performance
Regular cleaning with gentle microfiber cloths and avoiding liquids like water on the surface sustains sharpness. For stubborn spots or scratches, consult this cleaning guide. I learned that neglecting maintenance caused subtle degradation over time, but routine care kept my visuals crisp and vibrant. Remember, even the best setup falters if neglected.
Many enthusiasts believe that choosing the largest screen or the highest gain material guarantees the best visual experience. However, this oversimplification often leads to subpar results. For instance, popular advice suggests that bigger screens always mean more immersive viewing, but in reality, a screen that’s too large for your room can cause blurring and loss of detail, especially with high-resolution content like 16K. It’s vital to apply the 8K viewing distance rule and consider room dimensions alongside screen size — for insights, check this powerful calculator.
Furthermore, many overlook the importance of screen gain and material nuances. High-gain screens, while bright, can introduce hotspots and uneven brightness, which may blur fine details or cause glare. Conversely, low-gain screens are better suited for precise high-resolution content, especially in rooms with ambient light. The key is understanding the balance—aiming for a gain between 0.7 and 1.0 tends to deliver optimal clarity for 16K visuals, as detailed here.
Additionally, misconceptions often arise around screen material textures. Woven or perforated surfaces, though popular, can cause diffraction and blurring at ultra-high resolutions. Advanced micro-texture screens, designed specifically for 16K content, reduce these issues dramatically—more on this can be found in this comprehensive guide.
A common trap many fall into is assuming that increasing gain or size alone will improve contrast and sharpness. In fact, high gain materials are prone to hotspots, and larger screens may surpass the optimal viewing distance, making details visually mushy. The fix involves strategic choices: selecting the right textured surface, matching gain to room lighting, and adjusting screen size accordingly. A surprising detail is that even seasoned pros can overlook the impact of ripple and tension in mounting, which can introduce subtle distortions reducing clarity.
Let’s clarify with an advanced tip: when integrating multiple layers or materials, ensure minimal air gaps and proper sealing to prevent diffraction and light diffusion that blur micro-details. Experts recommend avoiding multilayered setups unless meticulously calibrated. For further enhancement, ensure your projector’s contrast is fine-tuned—test by running contrast assessments here to prevent black crush or washed-out highlights.
Remember, obsessing over size or gain without considering room dynamics, material texture, and mounting precision often leads to disappointing results—especially with the leap to 16K resolutions. Here’s where expert knowledge makes the difference. For instance, experts like those at Cinegear Guide have proven that selecting materials with specific micro-texture properties optimizes image clarity at ultra-high resolutions.
Finally, regular maintenance is crucial. Dust, fingerprints, or micro-scratches—even on the most advanced screens—can cause subtle blurring that becomes noticeable with 16K content. Use gentle cleaning techniques, as recommended in this guide, to keep your visuals sharp.
Have you ever fallen into this trap of oversimplifying screen choices? Let me know in the comments! Remember, mastering these nuances unlocks the true potential of your home theater system, ensuring every pixel shines with clarity.
Keep Your Screen in Top Shape with the Right Tools
Maintaining your projection screen requires precision and the right equipment. I personally recommend investing in a high-quality microfiber cleaning cloth specifically designed for delicate surfaces. Unlike regular cloths, these prevent micro-scratches that can scatter light and blur image details, especially at 16K resolutions. For stubborn spots or scratches, a gentle cleaning solution formulated for sensitive screen materials is essential—avoid water or harsh chemicals that may damage the surface. This guide offers practical tips on safe cleaning practices to extend your screen’s lifespan.
Tools I Trust for Long-Term Results
Applying a static-free anti-dust cloth helps keep the surface free from dust accumulation and fingerprints, both of which impair sharpness. Additionally, a tensioning toolkit equipped with a screen stretcher frame ensures your ALR screen remains taut, preventing ripples that distort micro-details—crucial when viewing high-resolution content like 16K. Regularly inspecting mounting points with a precision level allows me to catch any sagging or misalignment early, preserving image clarity over time. For detailed setup techniques, I often reference this resource.
Why Consistent Maintenance Matters
Over time, even the best screens can degrade due to environmental factors or handling mistakes. Dust, micro-scratches, or fabric degradation can introduce light diffusion, blurring fine details at ultra-high resolutions. To combat this, I schedule monthly cleanings and check the tension of my mounting frame. Using specialized tools like a digital tension meter helps ensure optimal tautness for maximum image crispness. Moreover, calibrating ambient lighting and projector contrast settings periodically maintains an ideal balance, preventing glare or hotspots from compromising sharpness, aligning with recommendations in this article.
Future Trends in Screen Maintenance and Technology
The evolution of screen materials and coatings is moving towards self-cleaning nano surfaces that resist fingerprints and dust, minimizing manual upkeep. Additionally, advanced tensioning systems with automatic adjustments promise to keep screens perfectly taut without frequent manual intervention. Being proactive by using these emerging tools could extend your screen’s lifespan and performance, ensuring crisp visuals even at 16K and beyond. Staying informed about these innovations means your home theater stays future-proof—don’t hesitate to experiment with recommended maintenance routines and tools to see immediate improvements.
How do I keep my screen performing over time?
Regular inspections, gentle cleaning, and proper tensioning are key. Integrate tools like microfiber cloths, specialized cleaning solutions, tension meters, and mounting kits into your routine. For example, periodically checking and adjusting your screen’s tautness prevents ripples and distortions that degrade micro-details. Staying vigilant and proactive in your maintenance ensures your investment continues to deliver sharp, vibrant visuals, no matter how complex your content or how high your resolution climbs. Remember, a well-maintained screen is the foundation of a breathtaking home theater experience—try incorporating these tools today to start seeing the difference tomorrow.
3 Unexpected Turns in My Journey to Perfect Clarity
Initially, I believed that investing in the highest resolution content and premium projectors was enough to achieve cinematic perfection. However, I soon discovered that even the most advanced equipment can falter if the screen isn’t properly configured—especially at 16K resolution. The first surprise was how tiny adjustments to the screen’s micro-texture dramatically improved detail sharpness, revealing nuances I previously missed. Another lesson was the importance of maintaining perfect tension; a slightly sagging screen causes diffuse light and blurs micro-details, making me realize that meticulous setup is just as vital as high-end tech. Finally, I learned that neglecting regular cleaning and calibration gradually diminishes clarity—small routines keep my visuals consistently crisp and vibrant, transforming my viewing experience better than any hardware upgrade.
My Secret Weapons for Stunning Home Theater Clarity
Over time, I’ve curated a few tools and resources that revolutionized my setup. The comprehensive guide on ALR screen materials and gain has been invaluable for understanding what textures and gains truly enhance 16K content. A quality microfiber cleaning cloth ensures my screen stays free of dust and fingerprints—crucial for clarity. For tensioning, I swear by a digital tension meter; it assures my screen remains taut and eliminates ripples that can blur fine micro-details. And the simple retensioning techniques helped me restore perfect tautness effortlessly. These tools, paired with routine calibration using test patterns from trusted resources, keep my visuals razor-sharp night after night.
If You’re Ready to Elevate Your Visuals, Here’s Your Next Step
Achieving spectacular clarity at 16K is not about chasing the biggest screen or the highest gain—it’s about fine-tuning textures, maintaining proper tension, and understanding your room’s unique dynamics. Take small steps today: experiment with a micro-texture screen material, ensure your mount is perfectly taut, and keep your environment dust-free. These subtle changes can unlock remarkable improvements and transform your home theater into a true cinematic sanctuary. The magic happens when you blend quality equipment with personal tweaks—your eyes and family will thank you for the upgrade. Are you ready to start refining your setup for crystal-clear visuals? Let me know the first change you plan to make below.
![5 Reasons 0.6 Gain ALR Stops 16K Highlight Bloom [2026]](https://screens.cinegearguide.com/wp-content/uploads/2026/03/5-Reasons-0.6-Gain-ALR-Stops-16K-Highlight-Bloom-2026.jpeg)