Ultimate Guide to Projection Screen Size & Gain for Perfect Setup
My Journey into the World of Projection Screens: Finding the Perfect Fit
It all started when I decided to upgrade my home theater system. I was overwhelmed by the sheer variety of projection screens, especially when it came to understanding their size and gain. As someone passionate about creating the ultimate viewing experience, I dove deep into research and personal experimentation. Today, I want to share my insights on projection screen size & gain, so you can achieve that perfect setup without the hassle.
Why Screen Size Matters: My Personal Experience
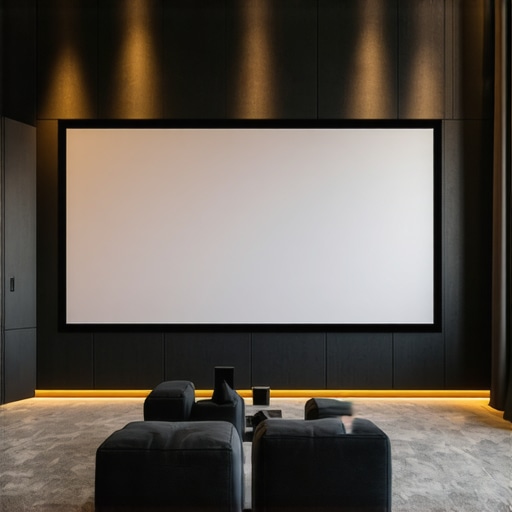
Choosing the right screen size isn’t just about fitting your wall; it’s about immersion and clarity. I remember initially selecting a screen that was too small, which made movies less impactful. After experimenting, I learned that a screen size roughly 1.5 to 2 times the diagonal of your viewing distance provides a cinematic feel. For my 10-foot viewing distance, I settled on a 120-inch screen, which truly transformed my movie nights.
Understanding Screen Gain: My Light Bulb Moment
Gain refers to how much light the screen reflects. I used to think a higher gain meant a better picture, but I soon realized it’s more nuanced. For a bright room, a gain of 1.3 to 1.5 offers excellent brightness without washing out details. I found that ALR screens with optimal gain made a massive difference in my setup, especially during daytime viewing.
What’s the Sweet Spot for Gain and Size?
Balancing size and gain was my biggest challenge. I wanted a large screen that didn’t require a dark room, so I opted for a 1.4 gain screen of about 120 inches. This combo maintained brightness and clarity, even in ambient light. I also learned that the right material and size are crucial for optimal image quality. My advice? Match your gain to your room’s lighting conditions and your desired screen size for a cinematic experience at home.
How Do I Know If I’ve Got It Right?
Honestly, the best way to tell is by watching content that you love. If the picture feels vibrant yet natural, and details are crisp, you’re on the right track. I also recommend measuring your setup’s ambient light and testing different gain screens if possible. Remember, the perfect setup is personal—trust your eyes and preferences.
Curious About the Technical Details Behind Gain?
Gain essentially measures the reflectivity of your screen surface. An authoritative source like CineGearGuide explains how different materials impact brightness and contrast, helping you make informed choices. Understanding these technicalities empowered me to select screens that suit my room’s unique lighting and viewing habits.
If you’re like me, eager to perfect your home theater, I invite you to share your experiences or ask questions in the comments below. Remember, finding the right projection screen size & gain is a journey—enjoy every step of it!
Can You Fine-Tune Your Projection Screen for the Perfect Home Theater Experience?
As an enthusiast who’s spent countless hours optimizing my home theater, I can attest that understanding the nuances of screen gain and size can elevate your viewing quality from good to cinematic perfection. It’s not just about choosing a big screen or a high-gain surface; it’s about tailoring these elements to your unique room conditions and viewing habits.
The Interplay Between Gain and Room Lighting: An Expert’s Perspective
Gain influences how much light your screen reflects, which directly impacts brightness and contrast. For rooms with ambient light, selecting a screen with a gain of 1.4 to 1.5 often strikes the right balance—bright enough for daytime viewing without sacrificing detail. Conversely, darker rooms may benefit from a lower gain surface, typically around 1.0 to 1.2, to prevent glare and maintain natural contrast. This delicate balance is vital, especially when considering different types of projection surfaces and their reflective properties, as detailed in expert guides on ALR screen options.
What Factors Should I Consider When Matching Screen Gain to My Room?
Beyond ambient light, think about the projector’s brightness (measured in lumens), your seating distance, and the desired image quality. For instance, if you have a high-lumen projector, a slightly higher gain screen can compensate for some loss in contrast, making images pop. Additionally, the size of your room and the layout influence your choice; larger spaces may require bigger screens with appropriate gain to ensure uniform brightness and clarity across the entire surface. For a detailed approach, I recommend exploring comprehensive guides on size and material selection.
Practical Tips to Optimize Your Screen Setup
Once you’ve selected a screen gain that matches your lighting conditions, focus on positioning and calibration. Proper screen placement ensures minimal distortion and optimal viewing angles. Calibration tools and test patterns can help fine-tune brightness, contrast, and color accuracy. Remember, the ideal setup minimizes reflections and glare, ensuring every scene appears vibrant yet natural. Regularly reviewing your setup after room modifications or projector upgrades helps maintain the best possible image quality.
Why Is It Vital to Understand Your Equipment and Environment?
Every projector, room, and viewer preference is different. An understanding of ALR screen technology and materials enhances your ability to select the best surface for your scenario. For example, a high-gain screen might be ideal for a bright, sunlit room, but it could wash out images in a darker environment. Conversely, low-gain screens excel in controlled lighting but may require a projector with higher lumens to achieve the desired brightness.
If you’re eager to deepen your knowledge, I encourage you to share your questions or experiences below. Remember, mastering these technical details is a journey—one that transforms your home theater into a true cinematic escape!
Delving into the Nuances of Screen Gain: A Personal Revelation
One of the more intricate aspects I uncovered on my journey was how the choice of screen gain affects not just brightness but also overall image contrast and color richness. I initially believed that higher gain surfaces would automatically enhance my viewing experience, but I soon realized that this oversimplification could lead to glare and hot spots, especially in larger screens. After experimenting with different materials and gain levels, I found that a gain around 1.4 offers a sweet spot—balancing brightness without sacrificing contrast or color fidelity. This insight was pivotal, particularly when I explored ALR screen options that optimize light reflection for various room conditions.
The Complexity of Matching Gain to Room Lighting
Understanding the relationship between gain and ambient light was a game-changer. I learned that a high-gain screen in a bright room can cause undesirable glare, washing out details, while a low-gain surface might struggle to provide enough brightness in a darker setting. My personal solution was to tailor my setup by considering my room’s lighting profile and projector lumens. For instance, in my space with substantial ambient light, a screen with a gain of 1.5 significantly improved the picture’s vibrancy, aligning with what experts recommend. This nuanced understanding allows me to fine-tune my setup for consistent quality, regardless of the time of day.
How Do I Navigate the Complexities of Screen Size and Gain Compatibility?
Combining size and gain isn’t simply about picking the biggest or brightest surface; it’s about harmony. I discovered that larger screens with higher gain can sometimes create hotspots or uneven brightness if not properly calibrated. My approach involved first selecting an optimal size based on my seating distance—about 1.5 to 2 times the viewing distance—and then choosing a gain that complements this size given my room’s lighting. I also found that materials matter considerably; for instance, the right surface material enhances uniformity and reduces glare. Experimenting with these variables taught me that the perfect setup balances size, gain, and material in a way that feels natural and immersive.
What Advanced Considerations Should I Keep in Mind for a Premium Setup?
Beyond basic matching, I’ve come to appreciate how projector lumen output and room acoustics influence gain choices. For high-lumen projectors, a moderate gain surface prevents excessive brightness that could tire the eyes, while in rooms with challenging acoustics, the reflective properties of certain materials can either amplify or dampen sound reflections, indirectly affecting perceived image quality. Consulting detailed guides like this resource helped me understand these subtleties. The goal is a cohesive environment where visual and audio elements harmonize, creating a truly cinematic experience.
Join the Conversation: Share Your Personal Experiences
If you’ve navigated these complexities yourself, I’d love to hear your insights or questions. Personal experimentation, combined with expert advice, truly transformed my home theater into a sanctuary of visual delight. Your journey might reveal unique challenges or solutions worth sharing—so don’t hesitate to comment below or explore related guides to deepen your understanding. Remember, mastering gain and size isn’t just technical; it’s about crafting an environment that invites you into your favorite stories every night.
Refining Your Visual Harmony: The Impact of Screen Material and Coating Technologies
Beyond size and gain, the choice of screen material and coating technology plays a pivotal role in achieving a pristine cinematic image. I discovered that materials like acrylic, glass bead, or micro-structured surfaces each influence light diffusion, contrast, and color accuracy differently. For instance, high-quality ALR screens employ specialized coatings that enhance ambient light rejection while maintaining color fidelity. As explained in CineGearGuide, selecting the right surface tailored to your room’s lighting environment can elevate your viewing experience significantly. Incorporating these advanced materials requires understanding your room’s specific lighting profile and how different coatings interact with projectors’ lumen outputs, enabling a more tailored and refined setup.
How Does Projection Angle and Screen Positioning Influence Image Quality?
Optimal positioning isn’t solely about size and gain; the projection angle and screen placement critically affect uniformity and viewer comfort. I learned that mounting the screen slightly below eye level and ensuring the projector’s lens aligns perpendicularly to the center of the screen prevents keystone distortion and hot spots. Additionally, adjusting the tilt and tension of tensioned screens can improve flatness, avoiding wrinkles that distort images. Proper alignment ensures consistent brightness and contrast across the entire surface, especially important for larger screens where even minor misalignments become noticeable. For detailed guidance, I recommend exploring this comprehensive guide.
What Are the Nuanced Effects of Ambient Light Rejection (ALR) and Gain Synergy?
In my experience, combining high-gain surfaces with advanced ALR technologies creates a synergy that markedly improves daytime viewing. The nuanced interplay involves the screen’s ability to reflect projected light while rejecting ambient room light, which is especially beneficial in rooms with large windows or light-colored walls. For example, a high-gain, matte-finished ALR screen can offer increased brightness without glare, as detailed in this authoritative source. The key is matching the gain and material properties to your specific lighting conditions—higher gain surfaces excel in bright environments but may introduce glare if not paired with proper room control. Experimenting with different combinations, I found that layering light control with the right screen surface yields the most immersive results, blurring the line between a home and commercial cinema experience.
Incorporating Advanced Calibration Techniques for Peak Image Fidelity
Once you’ve optimized size, gain, and positioning, fine-tuning your setup with advanced calibration tools elevates the visual quality further. I utilize colorimeters and professional calibration software to meticulously adjust contrast, gamma, and color balance. This process is vital for ensuring that the projected images reflect true-to-life colors and optimal contrast ratios, especially when using screens with high gain or specialized coatings. Regular calibration sessions help maintain consistency over time, compensating for projector luminance decay or environmental changes. For those seeking an even deeper understanding, I recommend exploring this expert resource that delves into calibration best practices and technical nuances.
Join the Discussion: Share Your Advanced Setup Strategies
If you’ve experimented with these advanced techniques or have insights into optimizing projection environments, I invite you to share your experiences. Whether it’s fine-tuning screen materials, positioning, or calibration methods, your journey can inspire others seeking that perfect cinematic escape. Engage in the conversation below or explore tailored guides to elevate your home theater to new heights—because mastering these sophisticated variables transforms your space into a true personal cinema.
Things I Wish I Knew Earlier (or You Might Find Surprising)
The Hidden Impact of Room Size
One surprising realization I had was how much my room dimensions influenced my screen choice. Initially, I went for a massive 150-inch screen without considering my seating distance, which made the picture overwhelming and uncomfortable. It’s essential to balance your room size with the screen size — a lesson I learned the hard way.
Gain Isn’t Just About Brightness
I used to think that higher gain always meant a brighter image, but I discovered that it also affects contrast and glare. A screen with too high gain in a bright room could cause hotspots and glare, diminishing overall picture quality. Finding that sweet spot around 1.4 gain made my viewing much more enjoyable.
Material Matters More Than You Think
Choosing the right projection material changed my entire experience. Matte surfaces reduce glare, while ALR screens can reject ambient light effectively. I wish I’d paid more attention to materials early on, as they significantly influence brightness and color fidelity.
Positioning Is Key
Proper screen placement and projector alignment are often overlooked. A slight tilt or misalignment can cause keystoning or uneven brightness, ruining an otherwise perfect setup. Investing time in calibration made a noticeable difference.
Lighting Conditions Are Critical
Ambient light can sabotage even the best screens. I learned to control my room’s lighting with curtains and strategic placement, enabling me to enjoy daytime movies without losing contrast or brightness.
Calibration Is Worth It
Even a good setup benefits from professional calibration or at least using test patterns and calibration tools. Fine-tuning contrast, color, and brightness ensures you get the most out of your screen size and gain choices.
Resources I’ve Come to Trust Over Time
- CineGearGuide — Their in-depth articles on ALR screen technology helped me understand material and gain options better and are a must-read for enthusiasts.
- Projector Central — This site offers excellent calculators for choosing the right screen size based on your room and projector specs, which I found invaluable.
- RTINGS.com — Their reviews on projection screens and projectors provided honest, detailed insights that guided my upgrades and calibration process.
- AVS Forum — Community discussions here share real-world experiences and troubleshooting tips that helped me refine my setup.
Parting Thoughts from My Perspective
Getting the right projection screen size and gain isn’t just about technical specs; it’s about creating an immersive, comfortable viewing environment that matches your room and habits. My journey taught me to pay attention to room size, material quality, and proper calibration. When these elements come together, your home theater transforms into a personal cinema that’s perfect for movie nights, sports, or gaming. If this resonated with you, I’d love to hear your thoughts or experiences. Feel free to share your journey in the comments and help others on theirs — because every home theater is uniquely special.