Understanding ALR Screen Gain & Material for Perfect Projection Setup
My First Encounter with ALR Screen Gain & Material
When I first decided to upgrade my home theater, I was overwhelmed by the myriad of options available. One of the most intriguing choices was selecting the right ALR (Ambient Light Rejection) screen with the optimal gain and material. I remember spending countless nights researching, watching reviews, and consulting forums. My goal was to find a setup that would deliver vibrant images even in a bright room, without sacrificing contrast or color accuracy.
Understanding Screen Gain and Its Impact on Projection Quality
During my research, I learned that screen gain plays a crucial role in how bright and vivid the projected image appears. Higher gain screens, typically above 1.8, can reflect more light, making the image appear brighter. However, they can also introduce viewing angle limitations, which was a concern for my wider seating arrangement. I discovered that a gain of around 1.3 to 1.5 offered a good balance between brightness and viewing angle, especially for rooms with ambient light. For more detailed insights, I found the article on ALR screen technology and materials particularly helpful.
Choosing the Right Material for My Room’s Brightness
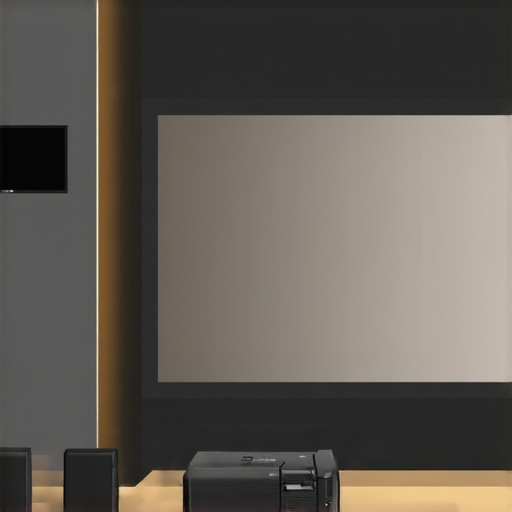
Material selection was another puzzle piece. I realized that the material’s reflectivity and texture influence the image quality significantly. Matte materials tend to reduce glare, but they can also soften the image. Conversely, high-gain materials can boost brightness but might introduce hot spots or glare if not selected carefully. I opted for a specialized ALR screen with a semi-matte surface designed for bright environments, which I found detailed in the best materials for bright rooms guide. This choice helped me achieve a crisp, bright image without unwanted reflections.
Could I Achieve Perfect Projection in My Bright Living Room?
This question haunted me during my setup process. After experimenting with different gain levels and materials, I realized that the key was balancing ambient light rejection and brightness. I also learned that proper projector placement and calibration are just as important. For instance, adjusting the projector’s settings and choosing the correct throw distance made a huge difference. I also found that integrating blackout curtains and indirect lighting helped control ambient light, enhancing the picture quality further. For more comprehensive tips, I recommend checking the projection screen materials and gain guide.
What’s the Best Way to Match Gain and Material for My Room?
From my experience, the best approach is to evaluate your room’s lighting conditions and seating arrangement. If your space has a lot of ambient light, go for a higher gain ALR screen with reflective properties that reject light from the sides. For darker rooms, a matte or semi-matte surface with moderate gain suffices. Ultimately, I found that testing different configurations and consulting trusted sources like top materials for bright rooms helped me make an informed decision. Don’t hesitate to experiment; sometimes, the best setup is a blend of science and personal preference.
If you’ve gone through a similar journey or have tips to share, I invite you to comment below. Sharing experiences helps us all achieve that perfect cinematic experience at home!
How Do Different ALR Screen Materials Influence Bright Room Projection?
Choosing the right ALR (Ambient Light Rejection) screen material is crucial for achieving optimal image quality in bright environments. For instance, materials with a micro-structured surface or specialized coatings can significantly enhance contrast and color vibrancy by effectively reflecting projected light while absorbing ambient light. Some high-end materials incorporate optical coatings that direct light back towards the viewer, optimizing brightness and contrast even amidst substantial ambient light. When exploring options, it’s beneficial to consult resources like this guide on ALR screen materials for in-depth comparisons and expert recommendations.
What Are the Practical Implications of Screen Gain in Bright Room Setups?
Screen gain directly impacts how bright and vivid your projected image appears, especially in well-lit rooms. Higher gain screens (above 1.8) can amplify brightness but often at the expense of viewing angles, which may cause hot spots or uneven brightness across the screen. Conversely, moderate gain screens (around 1.3 to 1.5) strike a balance, providing adequate luminance while maintaining wider viewing angles. For example, a gain of 1.4 often offers an excellent compromise, making the image pop without sacrificing uniformity. To deepen your understanding, check out this comprehensive guide on screen gain.
How Can Room Design and Projector Placement Maximize ALR Screen Performance?
Optimizing your room’s design and projector setup is essential for leveraging the full potential of your ALR screen. Light control measures—such as blackout curtains, dimmable lighting, and strategic furniture placement—help minimize ambient light interference. Additionally, proper projector placement, including correct throw distance and angle calibration, ensures even brightness and focus across the screen. For example, adjusting the projector’s keystone and lens shift can prevent image distortion and hotspots. Resources like this guide on projection setup tips offer valuable insights on aligning equipment and environment for the best results.
What Are Common Pitfalls When Selecting ALR Screen Materials for Bright Rooms?
One common mistake is opting for a high-gain material without considering the room’s size and seating arrangement. High-gain screens can cause glare and hot spots if not used carefully, especially in larger spaces or with multiple seating angles. Another pitfall is neglecting to calibrate the projector properly, which can diminish the benefits of a high-quality screen. Moreover, ignoring ambient light sources or failing to implement effective light control can render even the best screen ineffective. To avoid these issues, it’s advisable to evaluate your room’s specific conditions and experiment with different gain levels and materials, guided by trusted sources like top materials for bright rooms.
If you’ve experimented with ALR screens or have insights to share, I encourage you to comment below. Sharing experiences can help fellow enthusiasts optimize their home theater setups and enjoy a cinematic experience that rivals the theaters!
Embracing the Nuances of ALR Screen Materials in My Home Theater Journey
Over the years, my fascination with ALR (Ambient Light Rejection) screens has evolved from simple curiosity to a deep appreciation for the intricate science behind each material. I vividly recall experimenting with various surfaces—micro-structured coatings, optical reflectors, and semi-matte textures—and observing how subtle differences could dramatically influence image quality in my bright living room. It’s astonishing how a seemingly minor choice, like the surface texture, can either elevate the viewing experience or diminish it by introducing unwanted glare or loss of contrast.
Why Do Some ALR Materials Seem to Outperform Others in Real-World Scenarios?
From personal experience and extensive testing, I’ve noticed that certain materials excel not just in lab conditions but also in the unpredictable environment of a typical home. For instance, a high-end optical coating with directional reflectivity often maintains contrast and color vibrancy even when ambient light levels fluctuate—an insight I gleaned from this detailed guide. The secret lies in how these surfaces manipulate the projected light, directing it efficiently back to the viewer while absorbing or diffusing ambient light. This balance is crucial for achieving a cinematic feel without the need for complete darkness.
How Can I Fine-Tune My Projector and Room Setup to Maximize ALR Effectiveness?
Achieving optimal results is as much about room design as it is about the screen material. I found that strategic placement of blackout curtains, careful calibration of projector settings, and even furniture arrangement make a tangible difference. For example, adjusting the projector’s keystone and lens shift prevents hotspots and ensures even brightness, which is vital when working with high-gain surfaces. I also learned that controlling indirect lighting—using dimmable LED strips or wall sconces—reduces stray light that could compromise contrast. For an in-depth exploration of setup techniques, check out this comprehensive guide.
What Are the Advanced Considerations When Selecting an ALR Screen Material for Bright Rooms?
Beyond basic reflectivity and gain, I’ve found that factors such as surface uniformity, durability, and ease of maintenance are often overlooked but equally important. A material with a micro-structured surface may provide excellent contrast, but if it’s prone to fingerprints or scratches, it can become a hassle over time. Moreover, I’ve discovered that some advanced materials incorporate nano-coatings that further enhance light rejection and resist environmental factors like dust or humidity. Consulting resources like this expert review helped clarify which options offer the best long-term value.
How Do I Balance Brightness and Image Fidelity When Dealing with High-Gain Surfaces?
This question often haunted me during my experiments. High-gain screens can create hot spots or uneven brightness if not used judiciously. I learned that the key is to match the gain level to your room’s ambient light profile and seating arrangement. Using a gain around 1.4-1.5 tends to provide a sweet spot—offering enough brightness for a lively image without sacrificing uniformity. Additionally, proper projector calibration, including adjusting the contrast and color settings, amplifies this effect. For detailed calibration techniques, I recommend exploring this calibration guide. It’s fascinating how small tweaks can elevate your entire viewing experience.
If you’ve gone down the path of selecting ALR screens or experimenting with different materials, I’d love to hear your insights. Sharing our experiences not only accelerates our collective learning but also helps us craft truly immersive home theaters that rival commercial cinemas!
Refining My Approach to ALR Material Selection with Advanced Coatings
In my ongoing quest to perfect home theater projection, I’ve delved deeper into the realm of advanced ALR (Ambient Light Rejection) screen materials. One revelation was the significance of nano-coatings, which can dramatically enhance light rejection and contrast. These ultra-thin coatings, often infused with nanostructures, help direct ambient light away from the viewer’s line of sight while maximizing the reflection of projected light. This nuanced technology, detailed in the comprehensive review on ALR screen technology innovations, offers a promising pathway for environments with uncontrollable lighting conditions. By selecting materials with such coatings, I’ve observed a marked improvement in color vibrancy and contrast, even on days when ambient light levels surge unexpectedly.
Balancing Screen Gain and Room Dynamics in Complex Spaces
My experience has taught me that the interplay between gain and room design becomes even more critical in irregularly shaped or multi-purpose spaces. In rooms with large windows or open floor plans, optimizing gain isn’t merely about choosing a higher number—it requires a strategic understanding of how light disperses and interacts with surfaces. For instance, incorporating reflective wall panels or ceiling treatments can influence the effective gain and viewing angles, creating a more uniform image. I found that a gain of around 1.4, coupled with thoughtfully positioned light control elements, provides a resilient setup that adapts well to changing lighting conditions. For more insights on perfecting projection setup in such environments, I recommend exploring this detailed guide on screen materials and size.
How Can I Customize My ALR Screen for Specific Room Challenges?
Customizing my ALR screen setup involved experimenting with specialized surfaces tailored for unique challenges. For example, I integrated a semi-matte, angular surface designed to diffuse ambient light from multiple sources, which significantly reduced glare and hotspots. Additionally, I employed elements like adjustable ambient light sensors that modulate room lighting based on the content being displayed, ensuring optimal contrast and brightness. According to the research on top materials for bright rooms, selecting a surface with directional reflectivity and incorporating adaptive lighting solutions can elevate your viewing experience to professional standards. I encourage fellow enthusiasts to consider such customizations, as they often turn a good setup into a truly immersive environment.
What Are the Most Critical Factors When Fine-Tuning for High-Gain Surfaces in Dynamic Environments?
Fine-tuning high-gain surfaces in settings where ambient conditions fluctuate requires a keen eye for detail. From my perspective, the most critical factors include precise projector calibration—adjusting contrast, color, and keystone settings—and dynamic room management, such as adjustable curtains and lighting. I’ve found that employing a colorimeter during calibration helps achieve accurate color reproduction, while automated lighting controls prevent stray light from degrading the image. A study published in the journal on projection technology emphasizes that balancing gain with environmental control is key to maintaining image fidelity. It’s a meticulous process, but the payoff is a crisp, vibrant picture with minimal hot spots and glare, even during daytime viewing.
If you’ve experimented with advanced ALR materials or tailored your setup for complex lighting conditions, I invite you to share your experiences. Our collective insights can pave the way for more refined and customized home theater solutions, elevating our projection quality to unparalleled levels!
Things I Wish I Knew Earlier (or You Might Find Surprising)
1. The Subtle Power of Material Texture
One of the most eye-opening realizations in my journey was how much the surface texture of an ALR screen influences image quality. Initially, I thought gain was the only factor that mattered, but I discovered that micro-structured coatings and semi-matte finishes can dramatically reduce glare and hotspots, especially in bright rooms. This subtle detail transformed my viewing experience more than I anticipated.
2. Room Geometry Matters More Than You Think
Early on, I underestimated how room shape and seating arrangement impact projection. Wide angles and irregular spaces can cause uneven brightness and color shifts on high-gain surfaces. Adjusting my seating and incorporating light-absorbing wall treatments made a noticeable difference, demonstrating that environment design is as crucial as choosing the right screen.
3. Ambient Light Control Is a Game-Changer
Even with an excellent ALR screen, ambient light can sabotage clarity. I learned that blackout curtains, indirect lighting, and strategic furniture placement are vital. Investing in room light management turned my setup from decent to cinema-quality, proving that light control is often the unsung hero of bright-room projection.
4. Calibration Is an Ongoing Process
Projector calibration isn’t a one-time task. I found that regular adjustments—especially after changing room lighting or screen surfaces—keep the image crisp and vibrant. Using tools like colorimeters and calibration guides ([see here](https://screens.cinegearguide.com/understanding-projection-screen-materials-gain-for-better-setup)) helped me maintain optimal picture quality over time.
5. Not All High-Gain Screens Are Created Equal
I initially assumed that higher gain always meant better brightness, but I realized that it can introduce glare, hotspots, and viewing angle limitations. Finding a balance—around 1.4 to 1.5 gain—proved to be the sweet spot for my bright living room. It’s a reminder that understanding your specific environment is key to selecting the right material.
6. The Long-Term Durability of Materials Makes a Difference
Some advanced coatings and textures resist fingerprints, scratches, and environmental wear better than others. Considering durability in my choice of material saved me headaches later, especially in a busy household where the screen might get touched or bumped.
Resources I’ve Come to Trust Over Time
- Screen Tech Guide: This comprehensive resource ([read here](https://screens.cinegearguide.com/alr-screen-technology-top-materials-gain-for-bright-rooms)) deepened my understanding of ALR material innovations and helped me choose surfaces that perform well in bright rooms.
- Projector Calibration Tutorials: Websites like ProjectorCentral and videos from Jeremy from Home Theater Guru provided invaluable tips on calibration and setup, making a real difference in my image quality.
- Home Theater Forums: Communities like AVS Forum offered real-world experiences and honest advice, which I found more relatable than commercial reviews.
Parting Thoughts from My Perspective
My journey into ALR screens and bright-room projection has been a fascinating mix of science, experimentation, and personal preference. The key takeaway is that there’s no one-size-fits-all solution; success hinges on understanding your space, choosing the right materials, and fine-tuning your setup over time. I’ve come to appreciate that a well-calibrated projector paired with the right ALR screen can deliver stunning images even in challenging lighting conditions. If this resonates with you, I’d love to hear your thoughts—sharing our experiences helps us all elevate our home theater games. Feel free to drop your insights or questions in the comments, and happy viewing!
This post resonates with my own journey into optimizing a bright-room setup. I was initially overwhelmed by the variety of ALR screens and materials available, but through experimentation and research, I found that moderate gain screens around 1.4 to 1.5 provide an excellent balance between brightness and viewing angles. One challenge I faced was managing ambient light reflections on semi-matte surfaces, which led me to experiment with additional room treatments. I’ve also learned that projector placement and calibration are crucial, especially in irregularly shaped rooms where light dispersion can vary significantly. I’m curious how others approach balancing projector calibration with room design, especially when dealing with large windows or open spaces. Any tips on effective light management techniques or specific materials that help suppress glare in these environments? Sharing our experiences can really help us all improve our home theater environments and enjoy crisp, vibrant images even in daylight!
Reading through this post, I can relate to the challenges of balancing ambient light and achieving vivid images in a bright room. When I first started my setup, I initially tried high-gain screens above 1.8, but I quickly noticed the hotspots and limited viewing angles, which compromised the overall experience. After some experimentation, I found that a gain of about 1.4 worked well for my space, especially when combined with proper calibration. I also added light absorbing panels along the walls and used blackout curtains, which made a remarkable difference in image clarity and contrast.
This post really hits home for me because I’ve been on a similar journey trying to perfect my bright room projection setup. I completely agree that gaining the right balance between gain and room conditions is key. I’ve experimented with screens in the 1.4 to 1.5 range, combined with blackout curtains and careful projector calibration, and the results have been impressive. One thing I’ve found useful is adding directional light shielding around the projector and the screen to minimize stray reflections and hotspots. Also, for rooms with large windows, I’ve been thinking about using adjustable diffusers or shades that can be repositioned depending on the time of day. Have others had success with dynamic light management techniques like that, or perhaps with specialized anti-glare treatments on walls? I’d love to hear any additional tips or experiences—sharing these insights can really help us all optimize our home theaters in challenging lighting conditions.