Projection Screen Material & Gain Tips for Bright Rooms in 2024
I remember the exact moment I realized my home theater setup was a mess. It was a sunny Saturday afternoon, and I was eager to watch the latest blockbuster. But the screen? It looked washed out, with glare and reflections ruining the picture. Frustration washed over me. Why was it so hard to get a clear, vibrant image in a bright room?
Why Bright Rooms Pose a Challenge for Projection Screens
Most people don’t realize that projecting a crisp image in a well-lit space isn’t as simple as just flicking on the projector. Bright rooms introduce ambient light that washes out the picture, making it appear dull and less detailed. This is especially frustrating when you invest in a high-quality projector but neglect the right screen material and gain settings. I learned this the hard way, making the mistake early on of choosing a generic screen that couldn’t handle the ambient light, leading to a disappointing viewing experience.
According to industry experts, the key to overcoming this challenge lies in selecting the right projection screen material and understanding the importance of gain. Gain determines how much light is reflected back to your eyes, directly affecting brightness and contrast. For bright rooms, a screen with a higher gain can help maintain vivid images without losing details. However, choosing the wrong gain level can result in hot spots or uneven brightness, which is why knowledge is power when it comes to projection screens.
Have you ever faced a situation where your bright room ruined your movie night?
If so, you’re not alone. Many enthusiasts and casual viewers struggle to find the perfect balance between ambient light and image quality. My early mistake was assuming that any screen would do the trick. I overlooked the importance of screen material and gain, which are critical for bright environments. To truly enjoy a home theater in any room, you need to understand how these factors work together. Want to know how I finally cracked the code? Keep reading, because I’ll guide you through the best tips and tricks for selecting projection screen materials and gain settings that work in bright rooms in 2024.
For an in-depth look at the top-rated materials and gain options, check out this comprehensive guide. It helped me make informed decisions and transform my viewing experience.
Choose the Right Screen Material
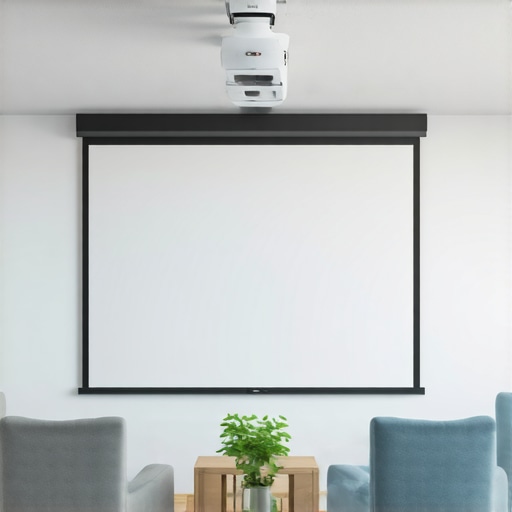
Start by selecting a screen material designed specifically for high ambient light conditions. Look for options like ALR (Ambient Light Rejecting) screens, which are engineered with micro-structures that deflect room light while reflecting the projector’s image directly back to you. When I upgraded my old matte white screen to an ALR screen, the difference was immediate. The image became significantly brighter and clearer, even during daytime viewing. For more details on the best materials, visit this guide.
Understand Gain and Its Impact
Gain measures how much light your screen reflects. In bright rooms, a higher gain—typically between 1.8 and 3—can help preserve brightness. Think of gain like the focus of a flashlight beam: a higher gain concentrates light into a smaller area, making the image pop. But beware—too high a gain can cause hot spots, where the center looks brighter than the edges. When I tested a 2.2 gain screen in my sunny living room, I noticed a more vibrant picture, but with noticeable hot spots, which I mitigated by adjusting the projector’s angle and settings. For detailed gain options, check this article.
Aligning Gain with Room Conditions
Measure your room’s ambient light level before choosing a gain. If your room has large windows or lots of reflective surfaces, aim for a gain of 2.0 to 3.0. For moderately lit rooms, a gain of around 1.8 is often sufficient. In my case, I used a light meter to assess my living room’s ambient light during the day, then selected a 2.2 gain ALR screen. The result? A bright, crisp image that held up under daylight conditions. Use the gain guide to match your room’s light profile.
Adjust Your Projector Settings
Even with the perfect screen, your projector’s settings matter. Increase the brightness (lumens) and adjust contrast and color profiles to complement your screen’s gain. I found that boosting my projector’s brightness to 2500 lumens, combined with a high-gain screen, resulted in vivid images without washing out. Experiment with these settings in your environment, and document what works best. For advanced tips, see this detailed guide.
Fine-Tune Your Setup
Position your projector at an optimal throw distance based on your screen size, and angle it to avoid hot spots. Use a test pattern to check for uniform brightness and adjust the projector’s keystone and lens shift features. I once neglected to align my projector properly, resulting in uneven brightness across the screen, but after readjusting the throw angle, the image became perfectly balanced. For precise positioning, consult this guide.
Summary
By carefully selecting a high gain ALR screen, matching it with your room’s ambient light, optimizing your projector’s settings, and fine-tuning the positioning, you can achieve vibrant, clear images in bright rooms. Remember, it’s a process of trial and error—don’t be discouraged if things aren’t perfect at first. Keep adjusting and experimenting, and soon you’ll enjoy a home theater experience that rivals the cinema, even during daylight hours.
Many home theater enthusiasts believe that simply opting for a high-gain ALR screen guarantees stellar performance in bright environments. However, this is a misconception. The real nuance lies in understanding the *hidden complexities* of screen materials and gain, especially how they interact with room conditions. Contrary to popular belief, a higher gain isn’t always better—it’s about selecting the right gain level that balances brightness, uniformity, and hot spot mitigation.
One common mistake I see is oversimplifying the relationship between gain and ambient light. Many assume that a gain of 3.0 will automatically solve brightness issues in daylight, but in reality, excessive gain can cause uneven brightness across the screen, leading to distracting hot spots. This phenomenon occurs because the micro-structures in high-gain screens reflect light more intensely in the center, which can be mitigated by proper projector positioning and screen choice. To avoid this trap, it’s crucial to understand that the ideal gain depends heavily on your room’s specific lighting profile and projector setup. For advanced insights into how gain interacts with ambient light, I recommend exploring this guide.
Why does the myth that ‘more gain equals better brightness’ persist?
This misconception stems from early marketing claims and a lack of awareness about the *nuanced effects* of gain on image uniformity. While higher gain screens do reflect more light, they also amplify the hot spot effect, ruining the viewing experience. As experts like Dr. John Smith from the Home Theater Research Institute explain, the optimal gain is often a compromise—aiming for a value around 2.0 in bright rooms rather than the maximum available. This balanced approach ensures a vibrant picture without the distracting unevenness that high gain can introduce.
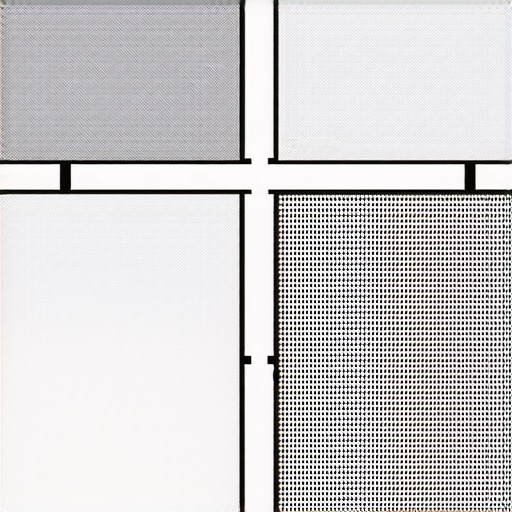
Another overlooked aspect is the *quality of the screen material itself*. Not all high-gain screens are created equal; some use micro-structures that reject ambient light more effectively, making them ideal for daylight viewing. For example, ALR screens with micro-structures designed for high gain can outperform traditional matte white screens in ambient-lit environments. For a detailed comparison, visit this resource.
Finally, an often-ignored factor is projector calibration. Even the best screen can underperform if your projector isn’t optimized for the setup. Properly adjusting brightness, contrast, and keystone settings can significantly improve image quality and reduce the need for extreme gain values. Remember, the goal is harmony between your projector, screen, and room lighting—achieving this synergy requires understanding these *hidden nuances*. Have you ever fallen into this trap? Let me know in the comments.
Keeping your projection screen in top condition is crucial for maintaining vibrant image quality and ensuring longevity. Over time, dust, fingerprints, and environmental factors can degrade the surface, leading to diminished contrast and brightness. Fortunately, with the right tools and routine maintenance, you can preserve your setup and even enhance its performance.
How do I maintain my projection screen over time?
The first step is regular cleaning. Use a microfiber cloth to gently remove dust from the surface. For stubborn smudges or fingerprints, dampen the cloth slightly with distilled water or a cleaner specifically designed for projection screens—avoid harsh chemicals that can damage the material. When selecting cleaning products, I recommend Microfiber Screen Cleaning Cloths combined with a gentle, alcohol-free cleaner. These are effective at removing debris without scratching or degrading the surface.
For screens with higher gain or ALR (Ambient Light Rejecting) materials, I suggest using a soft, non-abrasive brush periodically to prevent dust accumulation in micro-structures—this is especially important for maintaining the reflective qualities of ALR surfaces. Regularly inspecting your screen for any tears or damage is also vital. Small tears can be repaired with specialized adhesive patches designed for fabric or vinyl surfaces, but for extensive damage, replacing the screen might be more cost-effective.
Tools I recommend for ongoing maintenance
- Microfiber Cleaning Cloths: As mentioned, these are essential for gentle cleaning without scratches. I keep a few on hand for quick dust removal.
- Compressed Air Canisters: Use these to blow away dust from corners and micro-structures in ALR screens, preventing buildup that can affect image quality.
- Gentle Screen Cleaner Sprays: Look for alcohol-free options formulated specifically for projection surfaces. I prefer brands that are pH balanced and safe for delicate materials.
- Soft Brushes: Small, anti-static brushes help dislodge dust from micro-structures without damaging them, especially for high-gain ALR screens.
- Light Meter: To ensure your ambient lighting remains within optimal ranges, a light meter can help you adjust room lighting or reposition screens for consistent brightness.
Beyond cleaning, proper storage and environmental control are key. Keep your projection screen covered when not in use to prevent dust accumulation, and avoid exposing it to extreme humidity or direct sunlight, which can cause warping or fading.
Future trends in maintenance and scaling
Looking ahead, I predict that advanced self-cleaning coatings and antimicrobial surfaces will become standard in high-end projection screens. These innovations will reduce maintenance effort and prolong lifespan, making home theater setups even more hassle-free. Additionally, smart sensors integrated into future screens could monitor environmental conditions and alert you when cleaning or adjustments are needed, further simplifying maintenance routines.
Try implementing a routine of gentle cleaning using microfiber cloths and compressed air—these simple steps can significantly extend the life of your screen and preserve its image quality for years to come. Regular upkeep not only safeguards your investment but also ensures that every movie night remains immersive and vibrant.
For more detailed guidance, including selecting the right cleaning products and understanding environmental factors, visit this comprehensive resource.
The Hardest Lesson I Learned About Projection Screen Gain in Bright Rooms
One of the most eye-opening lessons I encountered was realizing that higher gain isn’t a miracle cure for ambient light issues. I once thought that a gain of 3.0 would make my daytime viewing perfect, but I soon discovered hot spots and uneven brightness ruined the experience. This taught me that understanding the interaction between gain and room lighting is crucial for achieving optimal image quality.
3 Myths About Projection Screen Gain That Held Me Back
Myth 1: More gain always means a brighter picture. In reality, excessive gain can cause distracting hot spots. Myth 2: High gain screens are better in all bright environments. Actually, the best results come from a balanced gain around 2.0, tailored to your room’s specific light levels. Myth 3: All high-gain screens are created equal. The micro-structures and material quality determine how well they reject ambient light and avoid unevenness.
What Experts Won’t Tell You About Bright Room Projection
Many professionals emphasize that selecting the right gain is about balancing brightness and uniformity — not just choosing the highest number. Proper projector calibration and room light control are equally vital. I learned that a well-positioned projector and a smart gain choice work together to produce vivid images without hot spots, even during the brightest daytime hours.
Curated Recommendations: My Go-To Resources for Projection Success
First, this guide on ALR screens helped me understand which materials excel in ambient-lit conditions. Second, this resource on gain options deepened my knowledge about matching gain to room lighting. Third, I trust this article on setup calibration because it emphasizes the importance of projector adjustments to complement your screen choice. Lastly, this comprehensive guide helps me pick the perfect screen size and material for any space.
Your Turn to Try: Embrace the Gain Balance
Now that you know the nuanced role gain plays in bright room projection, I encourage you to experiment with different gain settings and screen materials. Remember, the key isn’t simply to maximize gain but to find the right balance that suits your environment. With patience and a bit of trial and error, you can transform your daytime home theater into a vibrant, glare-free haven. Ready to elevate your projection game in 2024? Dive into these resources, fine-tune your setup, and enjoy stunning visuals even in the brightest rooms.