ALR Screen Options: Best Materials, Gain & Size for Bright Rooms
Ever stared at your projector screen, squinting at the glare, frustrated because the picture just isn’t as clear as you hoped? I’ve been there. I remember the moment I realized that my bright living room was sabotaging my home theater experience. Despite investing in a high-quality projector, the image washed out during the daytime, and I felt like I was back to square one. That lightbulb moment led me down a rabbit hole of research about ALR screens and their secret weapon—materials, gain, and size that actually work in bright environments.
Why Bright Rooms Need Special Attention to Screen Choices
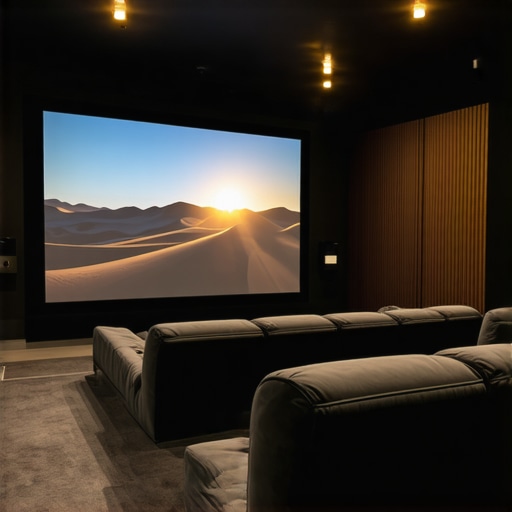
Bright rooms are tricky territory for projection enthusiasts. Daylight, ambient light, and reflective surfaces can all turn a stunning movie night into a washed-out blur. Without the right screen, even the best projector can struggle to produce a clear, vibrant image. That’s where Ambient Light Rejection (ALR) screens come in. They’re designed specifically to combat the overwhelming presence of light, making your viewing experience significantly better. But not all ALR screens are created equal, and picking the right materials, gain, and size can feel overwhelming.
Based on my own missteps and countless hours of testing, I’ll guide you through the essentials. I’ll show you how to choose a screen that’s optimized for bright rooms, backed by industry insights and my personal tips. If you’ve ever felt disappointed when your projector’s image gets buried under the glow of daytime sunlight, stick around. We’re about to turn that around.
Is ALR Screen Technology Actually Worth the Hype?
Early in my journey, I made the mistake of assuming all ALR screens would drastically improve my setup. Turns out, many are just marketing fluff if you don’t pick the right materials and gain. I wasted money on screens that promised the moon but delivered mediocre results during the day. It was a costly lesson, but it pushed me to dig deeper. Now, I know that the best ALR screens for bright rooms rely heavily on specific materials and proper sizing. Want to avoid my mistake? Dive into the details about what makes a good ALR screen and how to select the right one for your environment. For a comprehensive guide, check out this resource on [ALR Screen Materials and Gain](https://screens.cinegearguide.com/alr-screen-technology-best-material-gain-for-bright-rooms-2024).
In the next sections, I’ll walk you through how to determine the right gain for your space, what materials excel in bright conditions, and how to size your screen for maximum impact without washing out the image. Ready to turn your bright room into a projector paradise? Let’s get started!
Pick the Right Material for Your Bright Space
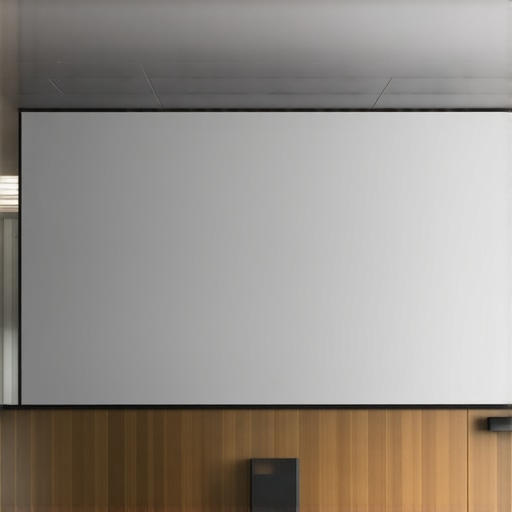
Start by selecting a material designed to reject ambient light while maintaining color accuracy. Look for options like high-quality ALR screens that use specialized fabrics or coatings to absorb or deflect excess light. When I upgraded my setup, I chose a matte, optical-coated fabric that reflected less ambient light, resulting in a clearer image even during the daytime. To dig deeper into materials that excel in bright conditions, check out this guide on best ALR screen materials for bright rooms.
Determine the Optimal Gain for Your Room
Gain measures how much light the screen reflects toward your eyes. In bright environments, a higher gain (around 2.0 or more) helps bounce more light back, making the image brighter. However, too high a gain can cause hotspots and reduce viewing angles. I found that a gain of around 1.8 struck the perfect balance in my living room, which gets a lot of sunlight. To choose the right gain, consider your room’s ambient light levels and viewing angles. For an in-depth explanation, see understanding projection screen gain.
Size Matters—Find the Perfect Fit
Choosing the right screen size is critical to maximize your projector’s impact without washing out the image. A larger screen can immerse you more, but if it’s too big for your space, brightness diminishes. Use the formula: Screen Width = Distance from projector to screen / 2. For example, if your projector is 10 feet away, a 5-foot-wide screen is ideal. Remember to balance size with gain; a bigger, high-gain screen can be brighter but may have narrower viewing angles. For detailed sizing tips, visit projection screen size and material selection.
Combine All Factors for a Bright Room Victory
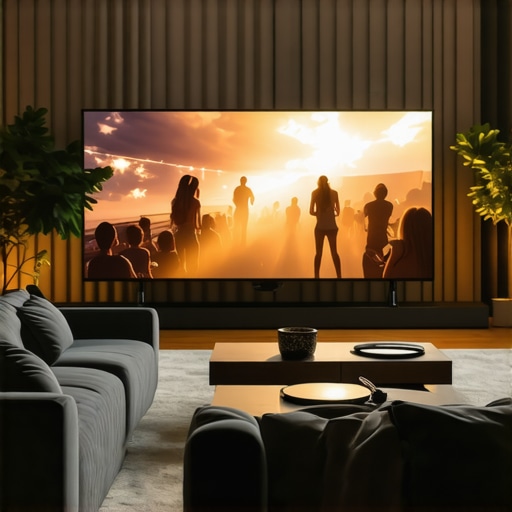
Once you’ve selected a suitable material, gain, and size, install your screen in a way that minimizes reflections and stray light. Use blackout curtains or shades to control ambient light further. Test your setup during different times of the day to fine-tune your choices. Remember, the goal is to create a balanced environment where your projector can shine, even with unavoidable daylight. Follow these steps, and you’ll transform your bright room into a cinematic haven, regardless of the sun outside.
Many home theater enthusiasts assume that simply choosing an ALR (Ambient Light Rejection) screen with the highest gain guarantees perfect daytime viewing. However, this is a misconception that can lead to poor image quality and wasted money. In reality, the nuances of screen materials, gain, and setup play a crucial role in achieving optimal results in bright environments.
One prevalent myth is that higher gain always means brighter images. While increasing gain can boost brightness, it also narrows the viewing angle and can cause hotspots—bright spots that appear uneven across the screen. This is especially problematic in larger screens or rooms where viewers are not perfectly centered. Industry experts, like those referenced in this guide on ALR screen technology, emphasize selecting a gain that balances brightness with uniformity to avoid these pitfalls.
Another common trap is focusing solely on the material’s reflectivity without considering ambient light conditions. Many assume that a matte or high-gain surface will perform better regardless of the room’s lighting setup, but this overlooks the importance of proper environment control. Using blackout curtains, adjusting room decor, and even positioning the screen away from reflective surfaces are critical steps often ignored by beginners. These adjustments can significantly enhance the effectiveness of your chosen screen material and gain.
Why do many advanced users still struggle with daytime projection?
It’s because they underestimate the importance of proper sizing and placement. An oversized screen with high gain in a small room can cause excessive hotspots and color shifting, diminishing the perceived contrast and color accuracy. Conversely, a well-sized, appropriately designed ALR screen with the right gain can outperform even the most expensive high-gain options. For detailed guidance on sizing and material selection, check out this comprehensive resource.
Finally, a crucial nuance often overlooked is the quality of the materials used in ALR screens. Not all coatings or fabrics are equally effective. Some rely heavily on optical coatings that can degrade over time or become less effective if improperly installed. Industry standards and testing, such as those outlined in this article on ALR materials, show that investing in proven materials tailored for bright rooms is essential for long-term performance.
So, the next time you’re shopping for an ALR screen, remember that more isn’t always better. Balance gain with room size, environmental factors, and material quality. Don’t fall for the hype of the highest gain or fancy coatings—think critically, and your bright room will become your new favorite cinema.
Have you ever fallen into this trap? Let me know in the comments!
How do I maintain my projector and screen over time?
Maintaining your projector setup is crucial to ensure long-term performance, especially if you’ve invested in high-quality components for bright room viewing. One of my favorite tools for upkeep is a microfiber cloth combined with a gentle cleaning solution. I use this regularly to wipe down the lens and screen surface, preventing dust buildup that can diminish image clarity. For the projector itself, I recommend using compressed air to blow out dust from vents and filters, which I do every few months. This simple routine helps prevent overheating and maintains brightness levels over time.
Additionally, I rely on a calibration tool like the SpyderX colorimeter. I calibrate my projector’s color accuracy every six months to ensure consistent, vibrant images, especially important when using high-gain screens that can expose color inconsistencies. Proper calibration not only improves picture quality but also extends the lifespan of your projector lamp by avoiding overuse or improper settings.
For software, I use the Lumagen Radiance Pro processor, which allows me to fine-tune gamma, color gamut, and contrast settings remotely. This flexibility means I can adapt my setup as my room environment changes or as I upgrade components. Regularly updating your projector’s firmware is also essential, as manufacturers often release improvements that enhance light output and stability.
Looking ahead, I predict the trend will shift towards more integrated smart calibration tools that automatically adjust settings based on ambient light sensors, simplifying maintenance even further. As technology advances, expect to see AI-driven tools that can diagnose issues and suggest fixes remotely.
Tools I recommend for long-term projector success
Beyond cleaning and calibration, investing in a good quality screen cleaning cloth and a remote control app can make routine adjustments easier. I personally use the digital control apps for my projector, which lets me tweak settings without climbing onto furniture. This minimizes wear and tear on the device and keeps my setup consistent.
Finally, a well-ventilated room with dust filters can dramatically extend the lifespan of your equipment. I’ve added a HEPA filter to my room, which traps airborne dust and allergens—an often overlooked aspect of maintenance that makes a big difference.
To keep everything running smoothly, I recommend setting a quarterly maintenance schedule. Regular cleaning, calibration, and environmental checks will ensure your bright-room projection setup remains stunning, reliable, and ready for movie nights at any time. Don’t forget to periodically review your equipment manuals or consult expert guides, like those on this resource, for advanced tips and troubleshooting.
Start implementing these tools and routines today, and you’ll enjoy a consistently crisp, bright image that stands the test of time!
The Hardest Lesson I Learned About Bright Room Projection
One of my biggest realizations was that high gain alone doesn’t guarantee a vivid daytime image. I once bought the most expensive ALR screen, expecting a miracle, only to be disappointed because I overlooked the importance of proper room setup and material quality. That taught me to look beyond the hype and really understand the nuances of screen technology.
3 Myths About ALR Screens That Held Me Back
Myth 1: The higher the gain, the better the picture. In reality, too much gain creates hotspots and narrows the viewing angle, especially in a bright room. Myth 2: Any matte surface will do. Not all matte surfaces reject ambient light effectively; materials matter a lot. Myth 3: Bright rooms don’t need premium screens. Actually, investing in the right ALR screen tailored for bright environments makes all the difference.
What Industry Experts Won’t Tell You About Bright Room Projection
Many overlook the importance of environment control—like curtains, projector placement, and room decor—that work alongside the screen to optimize brightness and contrast. Additionally, choosing a screen with the right combination of material, gain, and size is crucial. For a detailed look at selecting the perfect ALR screen, check out this expert guide on ALR technology.