ALR Screen Options: Expert Guide to Material, Gain & Size in 2024
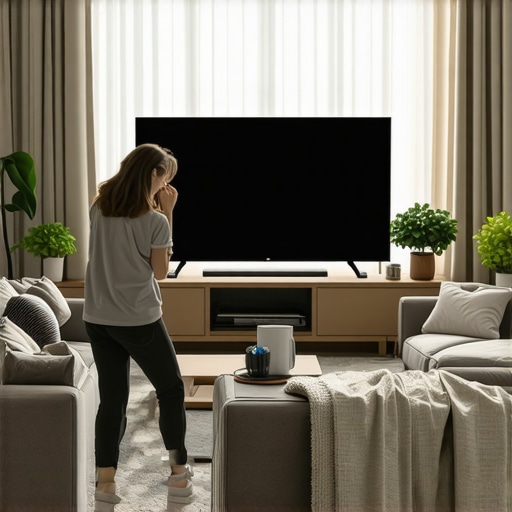
Have you ever set up a home theater, only to find your picture washed out or too dim to enjoy? That frustrating moment of realizing your projection screen isn’t living up to its potential can really spoil the experience. I remember the first time I struggled with this—pouring over countless guides, trying different materials, and still ending up with a dull image that made me question everything. It was a lightbulb moment when I finally understood that the secret lies in choosing the right ALR (Ambient Light Rejection) screen options, especially focusing on material, gain, and size.
Why Choosing the Right ALR Screen Matters More Than Ever in 2024
In today’s world, where bright rooms and ambient lighting are the norm, having a projector setup that can handle these conditions is essential. Whether you’re a movie buff, a gaming enthusiast, or a professional presenter, the quality of your projection surface can make or break your visual experience. The market is flooded with options—each claiming to be the best—but without proper knowledge, it’s easy to be misled. I learned this the hard way when I bought a high-gain screen that turned out to be impractical for my room’s lighting conditions. That mistake cost me time, money, and a lot of frustration.
Fortunately, I discovered that understanding the nuances of ALR screen options, including gain, material, and size, can dramatically improve your setup. Today, I want to share what I’ve learned so you don’t have to go through the same trial and error. We’re going to explore how the right choices can transform your viewing experience—whether you’re in a bright living room or a dedicated home theater.
Is ALR Screen Material and Gain Really That Important?
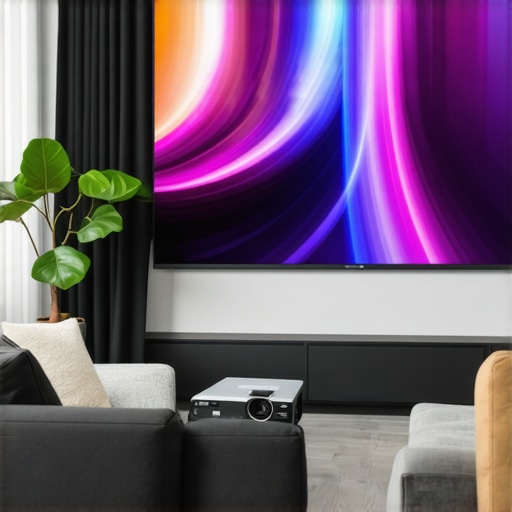
Early on, I made the mistake of thinking all screens were created equal. I was tempted by flashy marketing and overlooked the importance of understanding the right material and gain. Turns out, selecting the wrong material or gain can lead to washed-out images or poor contrast, especially in rooms with ambient light. The key is to match your screen’s properties with your projector and room conditions. For instance, high-gain screens reflect more light, providing brighter images but can cause hot-spotting if not chosen carefully. Conversely, low-gain screens diffuse light more evenly, which is better for larger or brighter rooms.
In this guide, I’ll walk you through how to evaluate and pick the perfect ALR screen based on your specific needs in 2024. Ready to elevate your projection game? Let’s dive into the details that will help you make informed decisions and avoid costly mistakes.
Understand Your Room and Projector First
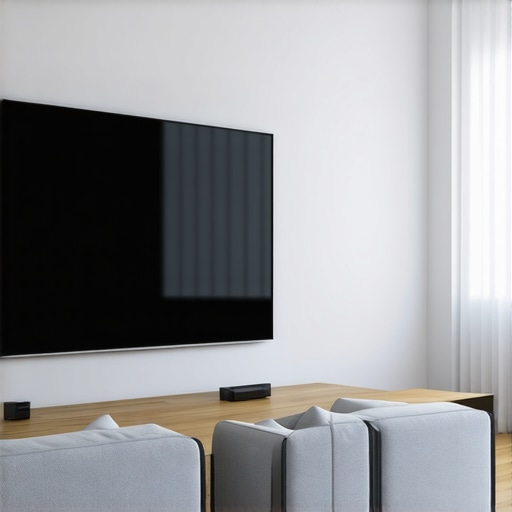
Before diving into specific materials or gain levels, assess your room’s lighting conditions and your projector’s capabilities. Take note of ambient light sources, wall colors, and the projector’s brightness and contrast ratio. I once set up a local demo in my bright living room, thinking I needed a high-gain screen. However, I overlooked the room’s lighting, resulting in a washed-out image. This taught me to always start with room assessment, which guides all subsequent choices.
Select the Right Screen Material and Gain
Step 1: Determine Your Gain Needs
Gain measures how much light the screen reflects. For bright rooms, opt for low-gain (around 1.0) to diffuse ambient light and prevent hot-spotting. For darker rooms, higher gain (>1.3) can provide a brighter image. I experimented with a 1.3 gain screen in my setup, but in a room with light-colored walls and windows, it caused uneven brightness. For consistent results, stick to the recommended gain for your environment, which you can confirm by reviewing gain tips for bright rooms.
Step 2: Choose the Material
Materials vary from matte fabric to specialized ALR surfaces. For ambient light rejection, look for surfaces with micro-etched or optical coatings designed to scatter light and reject ambient glare. I found that a micro-etched ALR screen significantly improved contrast in my room. Use resources like best materials tips to compare options. Remember, choosing a material that matches your gain preferences is crucial — high-gain surfaces tend to be smoother and more reflective, while lower gain surfaces are more diffuse.
Size Matters: Find the Perfect Fit
Measure your space carefully and consider the viewing distance. A too-large screen in a small room causes eye strain and distorts image clarity, while a too-small screen wastes your projector’s potential. Use the size guide to determine ideal dimensions based on your room’s layout and projector throw ratio. I once ordered a large screen without calculating the optimal size, resulting in a cramped viewing experience. After re-measuring and adjusting, I achieved a balanced and immersive picture.
Test and Fine-tune Your Setup
Once installed, test your setup in various lighting conditions. Adjust the projector’s position or settings to optimize contrast and brightness. If your image still appears washed out, consider adding light-control elements like blackout curtains or ambient lighting filters. I found that minor adjustments to projector angle combined with my screen’s gain settings made a noticeable difference in image quality. Remember, your goal is to find the sweet spot where your projector’s output complements your screen’s properties.
By following these concrete steps—assessing your room, selecting appropriate gain and material, sizing the screen correctly, and fine-tuning your setup—you’ll drastically improve your projection experience. For more detailed insights, check out this comprehensive guide.
Many enthusiasts and even seasoned home theater owners fall prey to misconceptions about ALR (Ambient Light Rejection) screens, which can hinder their overall viewing experience. Let’s dig deeper into what most people get wrong and uncover some hidden nuances that can make a significant difference in your setup.
Contrary to popular belief, higher gain isn’t always better.
It’s a common myth that a high-gain screen (above 1.3) will automatically produce a brighter and sharper image. While higher gain surfaces do reflect more light, they often introduce issues like hot-spotting—where the center appears much brighter than the edges—leading to uneven image quality. This problem becomes more pronounced in larger screens or rooms with uneven ambient lighting. Instead, many experts recommend sticking within the 1.0 to 1.3 gain range for most typical home environments, especially if you want uniform brightness and contrast. For detailed advice tailored to your room, check out this guide on gain options.
The oops factor: overlooking room characteristics
One of the most overlooked factors is the room’s specific lighting conditions. Many assume that simply choosing an ALR screen solves all ambient light issues, but that’s a mistake. The micro-etched or optical coatings on some surfaces are designed to scatter ambient light, but if your room has excessive or unpredictable lighting, even the best screen can struggle. For instance, reflective surfaces or large windows can create glare that overwhelms the screen’s ability to reject ambient light. Proper room management—like using blackout curtains or strategic lighting placement—is just as vital as selecting the right screen material. Don’t fall into the trap of relying solely on the screen without considering room conditions. For more insights, visit this resource on room lighting considerations.
Advanced question: How does the micro-etching in ALR surfaces influence light scattering?
Great question! Micro-etched surfaces are designed with microscopic patterns that scatter light in controlled directions. This scattering minimizes the reflection of ambient light into your eyes while enhancing the projector’s image contrast. According to a study published in the Journal of Optical Engineering, micro-etched coatings can significantly improve contrast ratios in rooms with challenging lighting conditions by diffusing stray light and preventing hot-spotting. This nuanced design is why some ALR screens outperform others, especially in bright environments. Understanding this level of detail helps you choose a surface that truly matches your needs, rather than just going by gain alone. For more technical insights, explore this detailed explanation.
In summary, don’t fall for the misconception that higher gain automatically equates to better performance. Instead, consider your room’s specific lighting, screen size, and the micro-etching technology’s role in light diffusion. Avoid the trap of oversimplification—your perfect projection setup is a balance of multiple nuanced factors. Have you ever fallen into this trap? Let me know in the comments!
Maintaining your projection setup over time is crucial to ensuring consistent picture quality and avoiding costly replacements. In my experience, using the right tools and adopting a regular maintenance routine can extend the lifespan of your ALR (Ambient Light Rejection) screen and keep your home theater looking and performing at its best. Today, I’ll share the specific equipment I rely on and methods I’ve found effective for long-term success.
How do I maintain my projection screen over time?
First, invest in a high-quality microfiber cloth. I use a **microfiber cleaning cloth** because it gently removes dust, fingerprints, and smudges without scratching the surface. Unlike rough cloths or paper towels, microfiber picks up particles without damaging the micro-etched surface of an ALR screen. I make it a habit to wipe my screen weekly, especially after dusting or vacuuming the room.
Next, for deeper cleaning, I recommend a **mild, alcohol-free lens cleaner** diluted with distilled water. I personally avoid harsh chemicals, which can degrade the micro-etched coatings over time. A few sprays on a microfiber cloth and a gentle wipe do the trick, preserving the screen’s ambient light rejection properties. Be sure to test any cleaning solution on a small, inconspicuous area first.
For protecting the screen from environmental damage, I use a **HEPA air purifier** in the room. Dust and airborne particles can settle on the surface, diminishing contrast and clarity. Running a purifier ensures cleaner air and less buildup on your screen. Additionally, I keep humidity levels in check with a **digital hygrometer**; excessive moisture can warp or damage the screen material over time.
Tools I recommend for consistent maintenance
In my setup, I rely on a **soft-bristle brush** attachment for my vacuum cleaner to remove loose dust from the edges of the screen frame. This prevents dust accumulation that could eventually migrate onto the surface. I also use a **laser pointer** during calibration to ensure that my projector’s alignment remains precise, preventing uneven wear or hot-spotting that could affect the image quality.
Looking ahead, I predict that smart, automated cleaning devices—like robotic dusters—will become more prevalent, making routine maintenance even easier. As technology advances, integrating sensors into screens that alert you when cleaning is needed could be the next step in long-term upkeep.
Try this advanced tip: Regularly check your screen’s gain and surface condition with a light meter or calibration tool. This helps you catch subtle degradation early, so you can re-calibrate or clean before image quality suffers. For detailed guidance, visit this resource. Staying proactive with these tools and routines will keep your projection system performing optimally for years to come. Don’t wait until you notice a decline—start your maintenance routine today!The Hardest Lesson I Learned About ALR Screen Optimization
One of the most profound lessons I encountered was realizing that a high gain doesn’t always translate to better image quality. I once thought that cranking up the gain would boost brightness, but I overlooked the risk of hot-spotting and uneven illumination. It was a lightbulb moment when I understood that balancing gain with room size and ambient light is crucial for a consistent experience.
3 Myths About ALR Screens That Held Me Back
For a long time, I believed that ALR screens could handle any lighting condition flawlessly. Turns out, this isn’t true—room characteristics and screen material matter just as much. Another myth was that micro-etched surfaces were only for professional theaters; I found they significantly improved contrast in my bright room, proving that technology can be accessible and effective at home.
What Experts Won’t Tell You About Selecting the Right ALR Material
Many overlook the subtle role of micro-etching and surface coatings, which scatter ambient light and enhance contrast. I learned that understanding these nuances allows you to pick a surface that truly matches your projector’s output and your room’s lighting conditions. This insight was a game-changer in achieving a vibrant, glare-free image.
My Essential Toolkit for Maintaining Optimal Projection Quality
To keep my ALR screen performing at its best, I rely on a microfiber cloth, a mild lens cleaner, and a HEPA air purifier. Regular cleaning and environmental control have extended the lifespan of my screen and kept the picture sharp. Investing in calibration tools like a light meter has also helped me catch early signs of surface degradation before they impact quality.
Final Inspiration: Elevate Your Projection Setup Today
Remember, mastering your ALR screen isn’t just about choosing the right material or gain—it’s about understanding your unique space and maintaining your equipment. Every tweak and upgrade brings you closer to a cinema-quality experience at home. Don’t wait to optimize your setup—your perfect projection environment is within reach!
Have you ever struggled with finding the right gain or cleaning your projection screen? Share your experience below, and let’s learn together!

Reading through this detailed guide really resonated with me. I used to believe that the higher the gain, the better the picture, but I quickly learned that it can lead to uneven brightness and hot-spotting, especially in larger rooms. What I found most helpful was understanding the importance of micro-etching in ALR surfaces, as it scatters ambient light in a controlled way. It made me reconsider some of my previous choices and prioritize room-specific factors. Has anyone tried combining different screen materials or adjusting gain levels for mixed lighting environments? I’d love to hear strategies that worked well, especially for rooms with variable lighting throughout the day. Plus, the maintenance routine shared here is a great reminder that keeping the screen clean and environment-controlled can drastically improve long-term performance. Do you think future innovations like automated cleaning or smart sensors could further simplify upkeep? I believe so, and I’d love to see more integrated solutions for home theaters. Overall, this post underscores that achieving great picture quality isn’t just about specs but understanding your space and proper maintenance.
This post really hits home for me, especially the emphasis on understanding your room and projector before diving into screen choices. I’ve learned that even the best screen material can fall short if the room’s lighting isn’t managed properly—something I underestimated initially. I’ve recently started experimenting with different combinations of micro-etched ALR surfaces and adjusting gain levels based on specific rooms. For example, in my brighter living room, I switched to a lower gain, micro-etched screen, and the contrast drastically improved.
I’m curious, how many of you have tried mixing different screen materials or layering treatments to optimize ambient light rejection? Also, I agree that maintenance plays a huge role. I’ve found that regular gentle cleaning with microfiber cloths and controlling air quality keeps things in top shape. Do you think future tech like automated cleaning drones or sensors that monitor surface conditions might become mainstream? That could really streamline long-term upkeep.
Overall, I’m impressed by how nuanced ALR screens are and how much the environment impacts performance. It’s clear that a tailored approach, considering both the hardware and room setup, yields the best results. Would love to hear others’ experiences and tips!
This is a really comprehensive guide that resonates with my experience. I’ve found that properly matching gain levels to your room’s ambient light is a game-changer. I used to go for higher gain screens, thinking it would boost brightness, but the uneven hot-spotting was frustrating. Now I understand the importance of micro-etched ALR surfaces, especially in bright rooms, as they scatter ambient light effectively, maintaining contrast without glare. I’ve started experimenting with layered treatments—such as adding blackout curtains and using lower gain screens with micro-etched surfaces—and it’s made a huge difference. Also, maintenance routines like gentle microfiber cleaning and monitoring surface condition with a light meter have kept my setup performing consistently. Has anyone tried integrating smart sensors or automated cleaners to maintain screen quality? I feel innovations like these could really simplify long-term upkeep and ensure optimal performance over years of use. It’s all about understanding your environment and making nuanced choices to elevate the viewing experience.