Projection Screen Size & Material Tips: Find Your Ideal Screen Today
My Journey to the Ideal Projection Screen Setup
As someone who recently transformed my living room into a cozy home theater, I can tell you that choosing the right projection screen size and material was a game-changer. I remember the excitement and a bit of confusion I felt initially, trying to balance screen size with room dimensions and image quality. After some trial and error, I discovered that understanding the nuances of screen materials and sizes can truly elevate your viewing experience.
Why Screen Size Matters More Than You Think
When I first started shopping for a projection screen, I underestimated how critical size is. I used to think bigger always meant better, but I soon realized that a screen too large for my space caused discomfort and loss of image clarity. On the other hand, a too-small screen didn’t do justice to my high-definition projector. I found that a good rule of thumb is to consider the viewing distance and room dimensions, which you can get guidance on from this projection screen size guide.
Choosing the Right Material for Bright or Dark Rooms
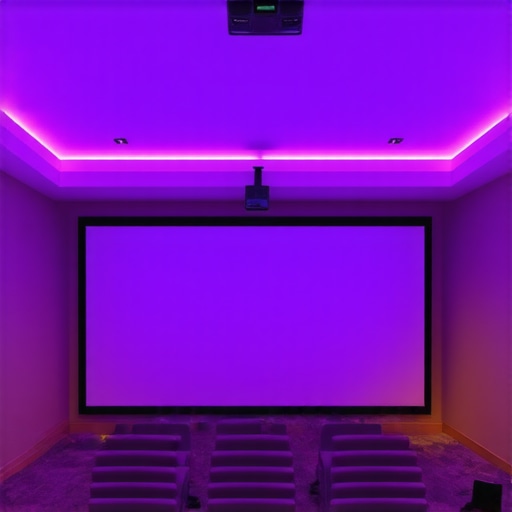
Next, I explored different screen materials. I learned that the material impacts brightness, contrast, and color accuracy. For my bright living room, I opted for a high-gain screen that reflects more light, ensuring a vivid image even with ambient light present. Conversely, if your room is dark, a matte or ambient light rejecting (ALR) screen like the ones explained in this article can provide rich blacks and sharp images. I found that the material choice directly affects how immersive your viewing experience can be.
What Are the Best Materials for Bright Rooms?
In my search, I discovered several top materials ideal for bright environments. These include high-gain screens and specialized ALR surfaces that minimize ambient light interference. I was particularly impressed by the advanced optical coatings that enhance contrast and color saturation without sacrificing brightness. For another perspective, I also checked out reviews on this resource. It helped me appreciate how technology continues to evolve, making high-quality projection possible even in less-than-ideal lighting conditions.
How Do I Know If My Screen Size Is Perfect?
Deciding if your screen size is right can be tricky. I recommend measuring your room carefully and considering the optimal viewing distance—generally, 1.5 to 2.5 times the diagonal size of the screen. A too-large screen might strain your eyes, while a too-small one won’t deliver the cinematic feel you want. For more detailed guidance, checking out this size and material guide was invaluable for me.
Are There Any Hidden Factors I Should Consider?
Absolutely! Beyond size and material, factors like room acoustics, projector brightness, and even wall color can affect your setup. I found that experimenting with different screen surfaces and coatings can make a significant difference, especially when trying to replicate a commercial cinema experience at home. Trust me, a little research into these elements can save you from costly mistakes and enhance your enjoyment.
If you’re on the fence about which screen size or material suits your space, I encourage you to share your experience or ask questions below. Connecting with fellow enthusiasts can offer new insights and reassurance.
How Can Advanced Screen Materials Elevate Your Viewing Experience?
When it comes to optimizing your home theater, selecting the right screen material is as crucial as choosing the perfect projector. Modern innovations like optical coatings and specialized surfaces can significantly enhance contrast, color accuracy, and ambient light rejection. For instance, high-gain screens reflect more light, making images brighter in well-lit rooms, while ambient light rejecting (ALR) screens help maintain picture quality without the need for complete darkness. Exploring these options, as detailed in this comprehensive resource, can empower you to craft a viewing environment tailored to your space and lighting conditions.
What Are the Practical Implications of Screen Size Choices?
Choosing the right screen size involves balancing room dimensions, seating arrangements, and desired immersion. An overly large screen in a small room can cause discomfort, while a too-small display may diminish cinematic impact. The rule of thumb—considering a viewing distance of approximately 1.5 to 2.5 times the diagonal size of the screen—serves as a helpful guideline. More detailed insights can be found in this detailed size guide. Remember, the goal is to achieve a harmonious balance that maximizes image clarity and viewer comfort.

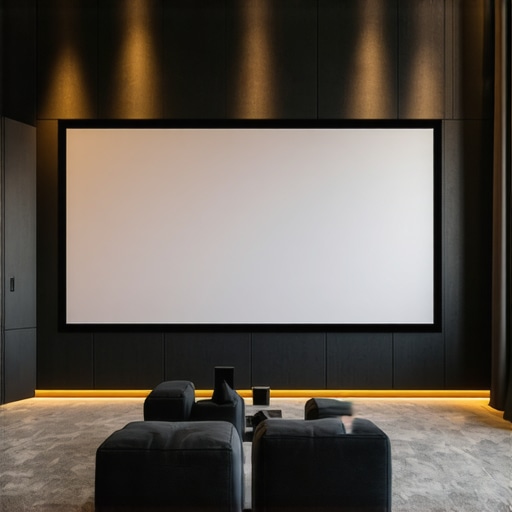
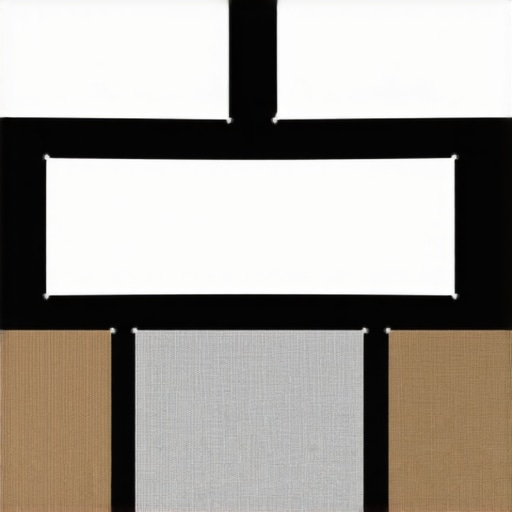
Visual aids can make a significant difference in understanding how different screen materials and sizes work together. Imagine a side-by-side comparison of high-gain versus matte screens in various lighting conditions—such visuals can clarify why certain choices excel in specific environments.
Are There Overlooked Factors That Can Make or Break Your Setup?
Beyond materials and size, other elements like wall color, room acoustics, and projector brightness play vital roles. Light-colored walls can reflect ambient light, diminishing contrast, while soundproofing enhances audio clarity. Additionally, projector lumens determine how well your image performs under different lighting scenarios. For those seeking a truly immersive experience, experimenting with different screen coatings or even wall paints designed for home theaters can be beneficial. For example, a neutral gray wall enhances contrast without darkening the room excessively. To dive deeper into these nuances, exploring resources like this expert guide offers valuable insights.
If you’re contemplating your next upgrade or need personalized advice, don’t hesitate to share your questions or experiences below. Engaging with a community of enthusiasts can reveal tips that transform your setup from good to truly cinematic.
Beyond the Basics: Embracing the Nuances of Screen Material Selection
When I first set out to perfect my home theater, I thought choosing a high-quality projector and a large screen was enough. However, I soon realized that the devil is in the details—specifically, the nuances of screen materials. For instance, I experimented with several surfaces before discovering that a specialized optical coating, like those used in high-gain screens, could dramatically affect contrast and color vibrancy, especially in rooms with ambient light. This insight came after reading detailed reviews in this comprehensive guide. Understanding these subtle differences allowed me to tailor my setup precisely to my room’s lighting conditions, ensuring a more immersive experience.
How Do Advanced Materials Transform Your Viewing Experience?
Advanced screen materials do more than just reflect light—they optimize it. For example, ambient light rejecting (ALR) screens utilize optical coatings that absorb or redirect stray light, maintaining contrast and color accuracy even with ambient room lighting. My own experience with an ALR screen was eye-opening; in a bright room, the image remained sharp and vibrant, unlike my previous matte screens that washed out easily. These technological innovations have democratized high-quality projection, making it feasible even in less-than-ideal lighting conditions. Exploring the latest materials, as explained in this article, opened my eyes to possibilities I hadn’t considered, pushing my setup from good to truly cinematic.
What’s the Hidden Complexity in Choosing the Perfect Screen Size?
Deciding on the right size isn’t as straightforward as it seems. I learned that room dimensions, seating arrangements, and viewing angles all interact in complex ways. For example, I initially aimed for a massive 120-inch screen, but after measuring my room and considering optimal viewing distance—typically 1.5 to 2.5 times the diagonal—I realized it would cause discomfort. Instead, I opted for a 100-inch screen, which struck a perfect balance between immersion and comfort. To deepen my understanding, I found the detailed guidance in this size and material guide invaluable. It helped me avoid common pitfalls and ensured that my setup maximized both image quality and viewer comfort.
Could Wall Color and Room Acoustics Be the Unsung Heroes of Screen Performance?
Absolutely. I discovered that wall color significantly impacts contrast and color accuracy. Light-colored or reflective walls can diminish the perceived contrast of my high-gain screen, making blacks seem washed out. Painting my walls a neutral gray enhanced the contrast without darkening the room excessively. Additionally, room acoustics play a pivotal role—soundproofing and acoustic treatments improve audio clarity and create a more immersive environment. I experimented with wall paints and acoustic panels, which, combined with the right screen material, elevated my viewing experience beyond just visual fidelity. For more insights, I highly recommend exploring this expert resource.
Share Your Journey—What Have You Discovered About Your Ideal Projection Setup?
If you’re like me, the journey to the perfect home theater involves continuous learning and experimentation. I encourage you to share your experiences, questions, and discoveries below. Whether it’s the choice of screen material, size, or room modifications, every detail counts. Connecting with fellow enthusiasts has not only expanded my knowledge but also made the process more enjoyable. Remember, achieving cinematic quality is an evolving pursuit—stay curious and keep exploring!
Refining Your Setup with Precision Calibration
After establishing the ideal screen size and material, I found that calibration became the next critical step. Fine-tuning aspects like color balance, contrast, and keystone correction can dramatically enhance image fidelity. I experimented with my projector’s settings, leveraging professional calibration tools such as colorimeters, to match my screen’s reflective properties precisely. This meticulous process, detailed in this expert guide, transformed my viewing experience from good to astonishing, especially when watching HDR content or high-contrast movies.
How Do High-End Optical Coatings Elevate Your Visual Immersion?
Advanced optical coatings on projection screens can significantly influence light management, offering benefits that go beyond basic gain. These coatings can be engineered to optimize light diffusion, reduce hotspots, and enhance contrast, especially in rooms with ambient light. My exploration into these technologies revealed that high-end coatings can be tailored for specific environments, ensuring vivid colors and deep blacks even in less-than-ideal lighting conditions. For example, I incorporated a specialized coating that improved my HDR viewing by increasing contrast without sacrificing brightness, a feature I discovered through case studies in this resource. These innovations demonstrate how material science continues to push the boundaries of home cinema quality.
What Are the Nuances of Aspect Ratio and Screen Curvature?
While selecting a flat screen and standard aspect ratio is common, I ventured into curved screens and ultra-wide formats for a more immersive experience. Curved screens can reduce distortion and improve viewing angles, especially in larger rooms. However, they require precise positioning and understanding of the optimal curvature radius. I delved into the technical discussions in this detailed guide to better comprehend how curvature impacts light reflection and viewer immersion. My experimentation with different configurations allowed me to customize my setup, achieving a near-cinematic depth that flat screens couldn’t match.
Can Wall Treatments and Room Geometry Influence Your Visual Fidelity?
Absolutely. I discovered that wall treatments, from acoustic panels to specialized wall paints, can subtly influence image perception. For instance, I applied a neutral gray matte finish to my walls to minimize reflections and enhance contrast, aligning with the recommendations in this guide. Additionally, understanding room geometry—such as ceiling height and seating arrangement—helps optimize sightlines and reduce distortion. I also explored the strategic placement of acoustic treatments to improve sound quality and synchronization with visual elements, creating a truly enveloping environment that rivals commercial cinemas. This holistic approach underscores that every detail, from materials to room design, is integral to achieving cinematic perfection.
Engage with My Journey—Share Your Advanced Customizations and Discoveries
If you’re committed to elevating your home theater with sophisticated adjustments, I invite you to share your experiences and insights below. Whether it’s experimenting with optical coatings, integrating curved screens, or fine-tuning calibration settings, each enhancement contributes to a richer viewing environment. Connecting with fellow enthusiasts and sharing technical breakthroughs not only deepens our collective knowledge but also inspires innovative solutions tailored to unique spaces. Remember, mastering projection technology is an ongoing journey—so stay curious, experiment boldly, and keep pushing the boundaries of your home cinema experience.
Things I Wish I Knew Earlier (or You Might Find Surprising)
The Hidden Impact of Wall Color
Initially, I overlooked how much wall color could influence my projection quality. Choosing a neutral gray wall instead of bright white transformed my contrast levels and made blacks appear much deeper, enhancing the cinematic feel. It’s a subtle detail that can make a significant difference, especially when paired with the right screen material.
The Power of Calibration
After setting up my projector and screen, I thought I was done. Then I realized that fine-tuning contrast, brightness, and color calibration could elevate my viewing experience from good to breathtaking. Investing in a calibration tool or professional help was a game-changer I hadn’t considered initially.
Size Matters More Than You Think
I used to believe bigger screens were always better. However, I learned that room size and viewing distance are crucial. An oversized screen in a small room caused discomfort, while a too-small screen lacked cinematic impact. Finding that sweet spot improved immersion without straining my eyes.
Room Lighting Is a Game Changer
Ambient light can wash out images, so I discovered that choosing a high-gain or ambient light rejecting (ALR) screen significantly improves picture quality in bright rooms. This insight saved me from having to darken my entire living space, making my setup more practical and enjoyable.
Advanced Screen Coatings Make a Difference
Modern optical coatings on projection screens can enhance contrast and color saturation. I experimented with different surfaces and found that premium coatings allowed my projector to deliver vibrant images, even in less-than-ideal lighting conditions. It’s incredible how much technology has evolved to improve home cinema experiences.
The Role of Room Acoustics
Sound quality is just as important as picture. I added acoustic panels and noticed a clearer, more immersive audio experience that perfectly complemented my visual setup. It’s a reminder that every detail, from sound to walls, contributes to the overall home theater magic.
Reading through this detailed journey really resonated with my own experience in setting up a home theater. I completely agree that choosing the right screen size was a game-changer for me; I once tried a massive 130-inch screen in my small room, which caused discomfort during long viewing sessions. Balancing size with room dimensions is so crucial. I’ve also found that the choice of screen material makes a big difference, especially when dealing with ambient light. For my bright living room, I use a high-gain screen, which has significantly improved image brightness without washing out colors. I’m curious, has anyone experimented with different wall colors or lighting setups to optimize contrast? I’ve read that even wall paint can impact picture quality, and I’d love to hear more about what’s worked for others.
I really enjoyed reading about your journey to the perfect home theater setup. Your point about balancing screen size with room dimensions resonated with me—I’ve made the mistake of installing a too-large screen in my small living space, which was uncomfortable during extended viewing. I’ve also experimented with different screen materials; for bright rooms, a high-gain screen really does help keep the picture vibrant, even with ambient light present. Regarding wall color, I’ve found that painting the walls a neutral gray rather than bright white made a noticeable difference in contrast and depth, especially paired with the right screen material. Have you played around with different wall colors or lighting setups? I wonder if combining wall treatments with adjustable ambient lighting could further enhance the viewing experience. It seems every element, from screen material to room lighting, contributes significantly to immersion. Would love to hear other tips on optimizing small spaces for the best picture quality!
Reading through your experience really made me reflect on my own home theater journey. I totally agree that the size of the projection screen is such a crucial factor that often gets overlooked at first. I made the mistake of choosing a 120-inch screen in my small living room, which caused more discomfort than immersion, especially during longer binge-watching sessions. Since then, I’ve learned that balancing screen size with room dimensions and seating layout makes a huge difference. I’ve also experimented with different screen materials based on room lighting. For bright spaces, a high-gain material has helped me keep the picture vibrant without losing color accuracy. I wonder, how do others decide on aspect ratio or curvature for their screens? Has anyone tried curved screens to enhance immersion without distorting the picture? It seems like exploring these aspects further can really elevate the cinematic feel, especially in versatile spaces.
Your detailed journey really resonates with me, especially your emphasis on balancing screen size with room dimensions. I recently faced a similar challenge when upgrading my setup. I used the guideline of 1.5 to 2.5 times the diagonal, but I also found that the seating arrangement impacts how large the screen should be for maximum comfort. It’s fascinating how conditions like wall color and ambient lighting can influence the perceived contrast and overall immersion. In my experience, painting walls a neutral gray combined with adjustable dimmable lighting made a noticeable difference in image quality. Have others experimented with wall color schemes or lighting controls to optimize their projection quality? I think these subtle adjustments can really elevate a home theater from good to breathtaking, especially in smaller spaces where every detail counts.
Reading this detailed post really got me thinking about my own setup and the importance of screen material choices. I initially went with a standard matte surface, but after experimenting, I found that switching to a high-gain surface in my bright room made a noticeable difference in brightness and color vibrancy. It’s fascinating how nuanced these decisions are—like you mentioned, ambient light plays a huge role. I’ve noticed that walls painted a neutral gray also helped improve the contrast without darkening the room excessively. Combining that with a high-quality ALR screen transformed my viewing experience. I wonder if anyone here has tried different wall colors along with specific screen materials for unique lighting conditions? And do you think adjustable lighting could further optimize the picture quality in small or multipurpose rooms? I’d love to hear your insights or suggestions based on your experiences.
Your detailed exploration of projection screen choices really struck a chord with me. I’ve gone through similar trials in my own home theater build, especially when it comes to balancing screen size with room dimensions. The rule of thumb you mentioned about viewing distances, around 1.5 to 2.5 times the diagonal, is a great starting point, but I’ve found that seating arrangements and furniture placement also play a crucial role in achieving that immersive feel without causing discomfort. Regarding screen materials, I experimented with different types, and I agree that choosing between high-gain and matte surfaces greatly influences how well the picture holds up under various lighting conditions. I’m curious, has anyone here tried multi-layered screen setups or layered coatings to optimize contrast and brightness further? I believe the nuances of these materials are continually evolving, and staying updated can really refine the overall viewing experience. What other tips do you all have for creatively managing ambient light and room layout to maximize projection quality? I’d love to hear some innovative ideas!