ALR Screen Options Explained: Best Material & Gain for Bright Rooms
Have you ever set up your home theater or presentation space only to find the picture washed out or too dim? I’ve been there—thinking I’d just buy a high-end projector and be done with it. But the moment I turned on my projector in a bright room, everything looked dull and uninspiring. It was frustrating. Like many, I overlooked the importance of choosing the right screen material and gain, and that mistake cost me a lot of time, money, and headaches. But here’s the good news: I finally cracked the code, and I want to share what I learned so you don’t have to go through the same trial and error.
In this post, we’re going to explore ALR screens, their materials, and how gain impacts your viewing experience—especially in bright environments. If you’re tired of flickering images or washed-out colors when sunlight sneaks in, stay with me. My goal is to help you understand exactly what makes a screen ideal for bright rooms and how to choose the best options for your setup. Because trust me, the right screen can transform your space from a dull viewing zone into a lively, vibrant home theater or presentation area.
But first, I want to address a common concern I hear all the time: “Is investing in a specialized ALR screen really worth it?” Believe me, I questioned that myself early on. I made the mistake of thinking that all screens are created equal, only to realize that in bright rooms, the wrong choice can ruin your entire viewing experience. The secret lies in understanding the nuances of screen gain and materials—that’s where many get confused or overwhelmed. Luckily, I found some reliable resources, like this guide on ALR screen options, which opened my eyes to the variety of materials designed specifically for high ambient light conditions.
So, if you’ve ever faced the frustration of a screen that just doesn’t cut it in your sunlit room, you’re not alone. Many people underestimate the importance of choosing the right screen material and gain, only to be disappointed later. The good news is, with the right knowledge, you can make informed decisions and enjoy bright, crisp images every time. Let’s dive into what makes a screen suitable for bright rooms and how to pick the best one for your space.
Pick the Right Screen Material for Bright Rooms
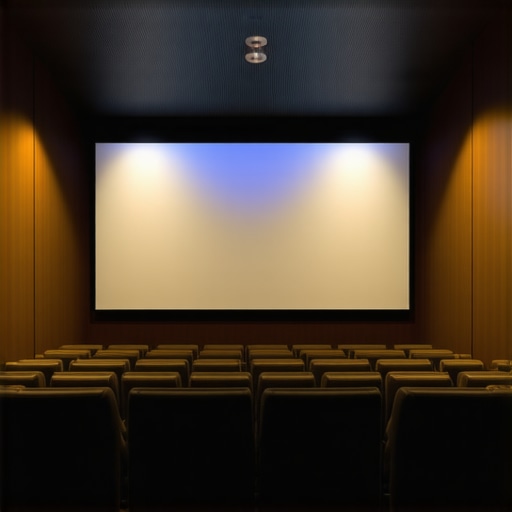
Start by assessing your ambient light levels and room layout. I remember testing several screens in my sunlit living room—each with different materials like matte white, ambient light rejecting (ALR), and high-gain surfaces. The key is to select a material that reflects enough light to produce a bright image while minimizing washout. For bright environments, ALR screens with specialized reflective layers are game-changers. They use optical coatings to direct ambient light away from the viewer, enhancing contrast and color richness. To dive deeper into the materials suitable for such settings, check out this guide on ALR screen options.
Many enthusiasts and even seasoned home theater builders fall into a common trap when choosing screens for bright rooms. The misconception is that increasing gain always results in a better, brighter image. In reality, this oversimplifies a nuanced technology. The truth is, while higher gain screens reflect more light, they also introduce a host of issues that can diminish overall picture quality. Let’s dig into what most people misunderstand about gain and how it can lead you astray.
One prevalent myth is that higher gain equals better brightness without drawbacks. Many assume that a 3.0 gain screen will automatically produce a brighter image, especially in ambient light. But this overlooks the fact that high-gain surfaces tend to create hotspots—areas where the image appears significantly brighter than the edges. This uneven brightness can ruin the immersion, making the viewing experience uncomfortable and visually unbalanced. In practice, screens with gains above 2.0 often require precise positioning and viewing angles to avoid these hotspots.
Moreover, high gain screens can cause contrast loss. When a screen reflects more ambient light, it also reduces the effective contrast ratio, leading to washed-out colors and less detail in shadow areas. This is especially problematic in rooms with uncontrolled lighting, where the goal is to maintain vibrant colors and deep blacks. Instead, a balanced approach with a gain around 1.8 or lower is often more effective, providing sufficient brightness while preserving contrast and uniformity. You can explore the details of gain impact in this comprehensive guide.
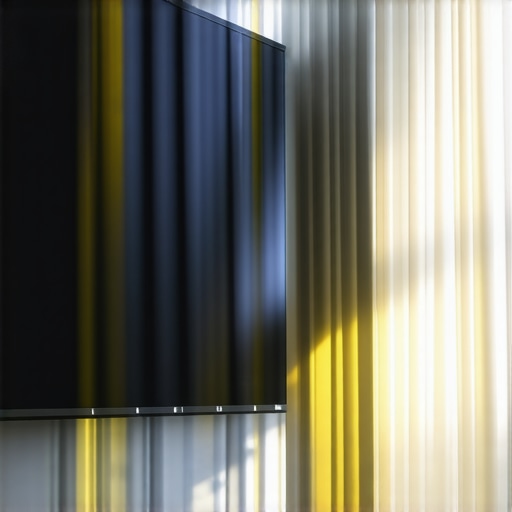
Another mistake is neglecting the viewing angle. High-gain screens tend to direct light in a narrow cone. If your seating is spread out or not directly aligned with the screen, you’ll notice a significant drop in brightness and color fidelity. This is why understanding the angle dependence of gain is crucial for optimal placement.
Why does gain matter more than you think for advanced users?
For those looking to optimize their setup, it’s vital to consider how gain interacts with screen size and ambient light conditions. Larger screens inherently reflect more light, so pairing them with a high-gain surface can exacerbate hotspot issues and contrast problems. Conversely, using a matte or ambient light rejecting (ALR) material with a moderate gain can provide a more consistent viewing experience across different seating areas and lighting scenarios. This balanced approach is often overlooked but can dramatically improve your viewing satisfaction in bright environments. Check out this guide on ALR screens for more insights.
Remember, the goal is to find a sweet spot where brightness, contrast, and uniformity coexist harmoniously. Don’t fall into the trap of thinking higher gain is always better. Instead, focus on the specific needs of your room, seating arrangement, and lighting conditions. Have you ever fallen into this trap? Let me know in the comments!
Maintaining your projection screen’s optimal performance over time is crucial, especially when dealing with specialized ALR surfaces used in bright environments. A well-maintained screen not only preserves image quality but also extends its lifespan, saving you money and effort in the long run. One of the most effective ways to keep your screen working flawlessly is by investing in the right cleaning tools and understanding proper maintenance routines.
Choosing the Right Cleaning Tools for Your Projection Screen
For delicate ALR or high-gain surfaces, I recommend using a microfiber cloth specifically designed for sensitive surfaces. These cloths prevent scratches and dust buildup that can compromise reflectivity. I personally avoid abrasive cleaners or rough cloths, which can damage the optical coatings. Instead, I use a slightly damp microfiber cloth with distilled water, ensuring no mineral deposits are left behind. For stubborn spots or smudges, a solution of 50% distilled water and 50% isopropyl alcohol works well, but always test a small area first to prevent any damage. Regular dusting with a soft cloth keeps the surface free of particles that could cause micro-abrasions over time.
Additionally, consider using an anti-static brush for cleaning the edges and corners. Dust and static buildup are common in home environments and can diminish image brightness. Proper tools like these help maintain the surface’s reflectivity and contrast, ensuring your bright room setup remains vibrant and sharp.
Implementing Routine Maintenance for Consistent Performance
Develop a maintenance schedule that includes gentle cleaning every few months, depending on your usage and environment. Keep the room free of excessive dust and humidity, which can accelerate deterioration. When not in use, cover your screen with a breathable fabric cover to protect it from dust and accidental scratches. If your room experiences high humidity, consider dehumidifiers or air purifiers to prevent mold or mildew growth on the surface.
Another tip is to avoid touching the screen surface directly with your hands, as oils and dirt can degrade the optical coating over time. If you need to adjust or reposition your screen, do so gently and with clean hands or gloves.
Tools I Recommend for Long-Term Maintenance
Based on my experience, I highly recommend the Microfiber Tech Microfiber Cloth for routine dusting. It’s soft, highly absorbent, and gentle enough for delicate surfaces. For removing stubborn spots, a spray bottle with distilled water and a small amount of isopropyl alcohol is ideal. I also use a static brush designed for electronics and screens, which helps eliminate dust from hard-to-reach areas.
Looking ahead, I believe that as screen technology advances, maintenance tools will become more specialized and easier to use, such as self-cleaning coatings or anti-static surfaces that reduce dust accumulation. Staying proactive with regular cleaning and using the right tools ensures your investment continues to shine in bright environments for years to come.
How do I maintain my projection screen over time?
The key is consistency and gentle handling. Regularly dust your screen with a microfiber cloth, avoid harsh chemicals, and keep environmental factors like humidity in check. This simple routine, combined with quality cleaning tools, will keep your bright room projection setup performing at its best, ensuring vivid images and long-term durability. Try incorporating a microfiber cloth into your maintenance routine today—it’s an easy step that makes a big difference!
The Hardest Lesson I Learned About Bright Room Screens
One of the biggest realizations I had was that not all screens are created equal, especially in bright environments. I used to think that a high-gain screen was the ultimate solution, but I quickly learned that this could lead to hotspots and contrast loss. It’s crucial to understand that balancing gain and material type makes all the difference in achieving vibrant images without sacrificing uniformity.
3 Myths About ALR Screens That Held Me Back
Many believe that higher gain always equals a brighter picture, but this isn’t true. I used to think that a gain of 3.0 would be perfect for my sunlit living room, only to find the image uneven and washed out. Also, I thought ALR screens only worked in dedicated dark rooms—turns out, the right materials can make a big difference in bright spaces. Lastly, I underestimated the importance of proper cleaning and maintenance, which can preserve the optical coatings and ensure consistent performance over time.
What Experts Won’t Tell You About Bright Room Projection
Most experts emphasize gain and material choice, but few highlight how ambient light rejection coating designs can dramatically improve contrast and color richness. It’s not just about reflecting light; it’s about directing ambient light away from your eyes. I found that investing in a quality ALR screen with an engineered optical coating provided a noticeable boost in image clarity and color vibrancy, even with sunlight streaming through the windows. For a deeper dive, check out this guide on ALR screen options.
My Essential Toolkit for Bright Room Projection
When maintaining my projection setup, I rely on a few trusted tools. A microfiber cloth designed for delicate surfaces is my go-to for regular cleaning, preventing scratches on the optical coating. For stubborn spots, a mixture of distilled water and isopropyl alcohol works wonders—always tested on a small area first. An anti-static brush helps keep dust off the edges, maintaining reflectivity and contrast. I trust these tools because they’ve proven effective in preserving my screen’s brightness and clarity over time.
Where to Go from Here
If you’re serious about improving your bright room projection experience, start by assessing your ambient light and seating arrangement. Choose a screen material with a balanced gain—around 1.8 to 2.0—that’s designed for ambient light rejection. Regular maintenance is key; dust and dirt can diminish reflectivity and contrast. Remember, the right screen isn’t just an accessory—it’s the foundation of a vibrant, immersive viewing experience in any well-lit space. For more insights, explore this comprehensive guide.

I completely relate to the frustrations shared in the post about dealing with washed-out images in bright rooms. When I first set up my home theater, I underestimated how much the screen’s material and gain could affect visibility in daylight. I ended up replacing my projector before realizing it was the screen’s reflective properties that needed attention. Since switching to an ALR screen with a moderate gain of around 1.8, the clarity and contrast have vastly improved, even during sunny afternoons. It’s fascinating how much of a difference the right optical coating makes in directing ambient light away. One thing I’ve learned is that high-gain screens, while brighter, often cause hotspots, which can be distracting or uncomfortable over long viewing sessions. To other enthusiasts out there, what have your experiences been with different screen gains and materials? Do you prefer certain brands or types when it comes to balancing brightness and image quality? I’d love to hear about the setups that work well for different lighting conditions.
Reading through this post really resonated with my own experience. I used to think that simply increasing the gain would improve my picture in a bright room, but I soon realized that it introduced hotspots and washed out detail, especially in the corners. What finally made a difference was switching to an ALR screen with a balanced gain of about 1.8. Not only did it improve contrast, but it also maintained a uniform image across different viewing angles. One thing I’ve noticed is that room lighting influences how effective these screens are—so sometimes, controlling ambient light with curtains or blinds can be just as crucial.
I’m curious, have others experimented with different screening materials or coatings that specifically address glare from sunlight? Personally, I’ve had good results with matte finishes that disperse light evenly, but I’d love to explore more options. For those who are just starting, what factors did you prioritize when choosing your screen for a bright room?
Balancing gain and material type has truly transformed my viewing experience—making it much more vibrant and comfortable. It’s fascinating how subtle nuances in technology can significantly change the whole setup.