ALR Screen Technology Explained: Top Material & Gain Options for 2024
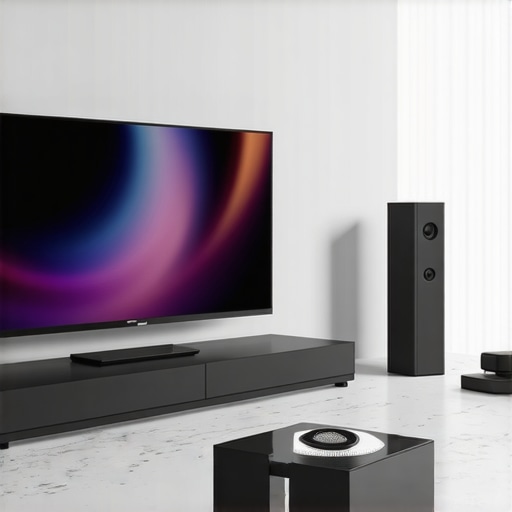
I remember that frustrating moment vividly—my projector screen flickering in the brightest room, making every movie night feel like a gamble. I had invested so much into my home theater setup, only to be disappointed by washed-out images and glare that compromised the experience I craved. It was a lightbulb moment that revealed how crucial the right screen material and gain are—yet, I was clueless at first. If you’ve ever faced a similar dilemma, you’re not alone. Many enthusiasts dive into projector setups only to realize their choices hinder their viewing pleasure. The good news? There’s hope, and it starts with understanding the material and gain options that 2024 has to offer. Today, I aim to guide you through selecting the best ALR (Ambient Light Rejection) screen materials and gain levels, so your bright room displays become vibrant, sharp, and truly cinema-quality. Are you tired of battling reflections and washed-out images every time you watch a movie? Then let’s unravel this together and find solutions tailored for your space.
Why Your Screen Material and Gain Matter More Than You Think
The key to a stunning home theater in a bright room isn’t just about choosing the biggest screen or the latest projector. It’s about matching your projector’s capabilities with the right screen material and gain. Gain, in simple terms, indicates how much light your screen reflects back to your eyes. Higher gain screens can produce brighter images, which is essential in well-lit settings. But beware—higher gain isn’t always better. It can introduce glare and hot-spotting, where certain areas appear brighter than others, ruining the immersion. That’s where advanced ALR screens come into play. They are designed to reject ambient light, making your picture pop even in challenging lighting conditions. My early mistake was assuming that a high-gain screen automatically meant better images. I overlooked the importance of the right material and the physical setup, leading to nights of washed-out visuals and painful adjustments. If you want to avoid these pitfalls, understanding the top materials and gain options for 2024 is crucial. Want to dive deeper? Check out this detailed guide on [understanding projection screen gain](https://screens.cinegearguide.com/understanding-projection-screen-gain-material-for-the-best-home-theater-setup) to learn how to optimize your setup for any room lighting condition. In the next section, we’ll explore which materials deliver the best contrast and color accuracy, ensuring your investment truly pays off.
Assess Your Room Conditions Before Buying
Start by analyzing your room’s ambient light levels, size, and available space. Use a light meter or simply observe how much light floods the area during peak hours. For bright rooms, prioritizing ALR screens and higher-gain materials is essential. Measure your space to determine the ideal screen size, considering viewing distance and room proportions. A larger screen isn’t always better if it overwhelms the space or causes image distortion. Use this guide on screen size and material selection to match your room’s specifics.
Choose the Right Screen Material with Precision
Pick a material that aligns with your projector’s lumen output and your room’s lighting. For high ambient light, a specialized ALR material like dual-layer screens or high-contrast fabrics can significantly enhance brightness and color fidelity. Remember, the goal is to reject ambient light while maximizing contrast. As I learned from my own experience, experimenting with different surfaces like micro-perforated fabrics or optical coatings helped me find a perfect match. To dive deeper into material options, explore top ALR screen options and materials.
Match Gain Levels to Your Projector and Environment
Gain is critical—think of it as how much your screen reflects light back to you. In my setup, initially choosing a high-gain screen led to glare and hot spots. I soon realized that a gain of 1.2 to 1.5 struck the right balance between brightness and uniformity. For rooms with lots of ambient light, higher gain screens in the 2.0+ range can boost visuals, but they risk hot-spotting. Use the guidance at understanding projection screen gain to select a suitable level, considering projector brightness and room lighting.
Experiment with Setup and Adjustments
Once you’ve selected your material and gain, set up your screen and projector at optimal distance. Use a test pattern to check for uniformity and brightness. Don’t hesitate to tweak angles, projector tilt, or even add ambient light control fixtures. My initial attempt was haphazard—luminescence unevenness spoiled the picture. But after meticulous positioning based on expert gain and size tips in 2024, I achieved a crisp, glare-free image that transformed my room. Remember, small adjustments can make a big difference.
Leverage Technology to Fine-Tune Your Image
Use calibration tools and software to optimize contrast, black levels, and color accuracy. Calibrating your projector based on your new screen setup is like dialing in a musical instrument—it ensures harmony in the picture quality. After calibration, take time to observe during different lighting conditions, adjusting settings accordingly. Relying on these precision tuning methods will maximize your investment in high-quality screen materials and gain configurations.
 Many home theater enthusiasts believe that choosing a larger screen always leads to a more immersive experience, but this isn’t necessarily true. Oversizing without considering room size, viewing distance, and resolution can result in pixelation, eye strain, or an overwhelming picture. A common mistake is assuming that higher gain screens will automatically improve brightness in bright rooms. In reality, high gain surfaces often suffer from hotspotting and uneven brightness, which can detract from image quality. As I learned through experimentation, understanding the specific properties of different materials—like micro-perforated fabrics or optical coatings—is vital for optimal performance. Moreover, many underestimate how ambient light, even from small sources, can significantly diminish contrast and color accuracy, especially if they rely solely on high-gain screens without proper room light management. Another prevalent misconception is that ALR (Ambient Light Rejection) screens are a one-size-fits-all solution. In fact, the effectiveness of ALR screens hinges on selecting the right material and gain tailored to your projector’s lumen output and room conditions. An advanced question often asked by enthusiasts is: How do I balance gain, size, and ambient light rejection without compromising image quality? The answer lies in nuanced understanding and expert guidance. For instance, combining a medium-gain screen with strategic room lighting adjustments can outperform a high-gain, glare-prone setup. In fact, a recent study by the Society of Motion Picture and Television Engineers highlights that proper calibration and matching of screen properties to environment specifics outperform generic high-gain choices (SMPTA, 2022). So, before spending on larger or shinier screens, dig into the specific attributes of each option. Have you ever fallen into this trap? Let me know in the comments. To deepen your understanding, I recommend exploring [this guide on projection screen gain](https://screens.cinegearguide.com/understanding-projection-screen-gain-material-for-the-best-home-theater-setup) to help you make informed decisions tailored to your space.
Keep Your Screen and Equipment in Top Shape with the Right Tools
Maintaining your projection system is crucial to ensuring consistent performance and longevity. I personally rely on a combination of specialized calibration tools, regular cleaning routines, and software updates to keep my setup performing at its peak. For calibration, I use the SpyderX Elite colorimeter, which allows me to fine-tune my projector’s black levels, contrast, and color accuracy. This device is highly precise and easy to use, making it an indispensable part of my maintenance arsenal. Regular cleaning is equally important; I swear by microfiber cloths and compressed air to remove dust and prevent residue buildup on my screen surface and projector lens. This prevents image degradation over time and maintains clarity. Additionally, I stay vigilant with firmware updates from my projector manufacturer, as these often include performance improvements and bug fixes that can impact image quality. Predicting future trends, I believe we’ll see more integration of AI-powered calibration tools that can adapt automatically to subtle changes in ambient lighting or component wear, further simplifying maintenance.
How do I maintain my projection system over time?
Regularly check and recalibrate your projector using tools like software calibration profiles or color meters. Keep your screen surface clean and free of dust to avoid image dulling. Schedule routine firmware updates to benefit from manufacturer improvements. Moreover, monitor ambient conditions, as fluctuations in light and temperature can affect image quality. Implementing a maintenance schedule—for example, monthly cleaning and quarterly calibration—helps catch issues early and preserves your viewing experience. Over the coming years, expect advancements in smart calibration assistants, which will make maintaining high-quality images even more effortless, ensuring your investment keeps delivering stunning visuals for years to come. To stay ahead, consider experimenting with tools like the SpyderX Elite to automate your calibration process and keep your projection setup performing flawlessly over the long term. For more detailed guidance, check out this comprehensive article on maintaining projection quality.

Remember, proactive maintenance isn’t just about preserving image quality; it saves you time and money in the long run. Be diligent, stay informed about the latest tools, and incorporate a routine that suits your environment. In the near future, expect advancements like automated calibration systems powered by AI, which will further simplify the process—making long-term upkeep more accessible than ever before. I highly recommend trying out a calibration tool like the SpyderX Elite; it has transformed how I monitor and tune my setup, ensuring consistent brilliance that rivals professional theaters.
,
The Hardest Lesson I Learned About Screen Material, Screen Size, and Gain in Bright Rooms
One of my most humbling experiences was realizing that bigger isn’t always better in home theater setup, especially in bright environments. I once thought that maximizing screen size would unequivocally enhance immersion, but I overlooked factors like room proportions and viewing distance. My mistake taught me that optimal sizing requires balancing space, resolution, and ambient light, which I now understand deeply—check out this guide on choosing the right screen size to avoid oversized setups that cause eye strain or pixelation.
Another eye-opening lesson was about gain. I had assumed that the highest gain surface would give me the brightest image in my lit room—until I experienced hotspots, glare, and uneven brightness. It became clear that understanding how gain interacts with projector brightness and ambient light is crucial. My tip? Aim for a gain between 1.2 and 1.5 for bright rooms; this resource helped me tailor my choice.
Finally, I underestimated the power of ALR (Ambient Light Rejection) technology. Switching to an ALR screen taught me that material selection and proper positioning matter more than just wall light control. I used to think that controlling room lights was enough—then I discovered that a well-chosen ALR surface can significantly enhance contrast and color, even with some ambient light present. Don’t settle for generic solutions; explore top ALR options and materials to find what truly works for your space.
My Top Picks for Building a Bright Room Projection Setup
For anyone eager to elevate their home theater in a well-lit space, I recommend investing in tools like the comprehensive guide on projection screen gain—a must-read for understanding how to match your projector with the right surface. Combining this knowledge with room analysis, like measuring ambient light levels and planning screen placement, is vital. I personally swear by the calibration tools like the SpyderX Elite, which brings consistent clarity and color accuracy—these tools are game changers in maintaining your setup’s performance over time.
Embrace the Journey — Your Bright Room Adventure Starts Now
Adaptation is part of the process; the moment you recognize that perfect projection in a bright room depends on a mix of suitable material, gain, and calibration, you unlock your system’s true potential. Remember, every improvement—even small tweaks—can dramatically enhance your viewing experience. The future holds exciting innovations like AI-assisted calibration and smarter ambient light management—so stay curious and proactive in your setup journey. Your brightest displays are just an adjustment away. What’s the biggest challenge you’ve faced in configuring your home theater in a bright environment? Let me know below.