Best ALR Screen Options for Bright Rooms: Materials, Gain & Size
I remember the exact moment I realized my home theater setup just wasn’t cutting it during the daytime. Despite investing in a high-quality projector, the vibrant sunlight streaming through the windows washed out the picture so badly that I felt like I was watching a faded memory. Frustration set in, and I wondered—am I missing something obvious? That lightbulb moment led me down a rabbit hole of researching the best ALR (Ambient Light Rejection) screens, and let me tell you, the right choice can make all the difference. If you’ve ever faced similar struggles with visibility and picture quality in bright rooms, you’re not alone. The good news is, selecting the proper materials, gain, and size for your specific environment transforms your viewing experience completely.
Why Bright Rooms Need Special Screen Solutions
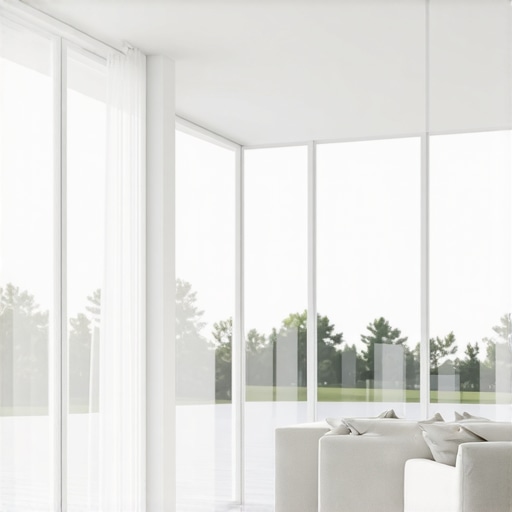
In my early days of home theater setup, I underestimated how much ambient light affects picture quality. A dark room is ideal, but not always practical. Bright rooms with lots of natural sunlight pose a unique challenge—your projector’s brightness needs an upgrade, and your screen must be designed to combat glare and washout. This is where ALR screens shine, as they are specifically engineered to reject ambient light and preserve contrast. But with so many options out there, how do you know which material or gain level will serve your needs best? That’s exactly what I sought to figure out, and I want to share my journey along with practical tips so you can avoid the common pitfalls and select an ALR screen that truly works in your bright environment.
Is All ALR Screens Just a Marketing Gimmick
Early on, I made the mistake of thinking that all ALR screens are created equal. Spoiler: They are not. Some market themselves as the ultimate solution, but their performance in bright rooms can vary dramatically. I learned this the hard way when a cheaper ALR screen looked impressive in a showroom but failed to deliver contrast when I set it up at home. That’s why I always recommend digging into the specific materials and gain levels—trust me, this makes or breaks your setup. For a comprehensive overview, check out this detailed guide on [best ALR screens in 2024](https://screens.cinegearguide.com/best-alr-screens-2024-gain-material-size-tips-for-bright-rooms), which explains how different materials and gains perform in high-light environments.
Select the Ideal Screen Material and Gain
Start by researching the best ALR screen materials suited for bright environments. The goal is to choose a material with high gain, typically around 1.8 to 2.2, which amplifies the projected light and compensates for ambient light. I once ordered a screen claiming to have high gain but realized it underperformed because I didn’t verify its material compatibility with my projector. To dive deeper, visit this comprehensive guide on ALR screen materials and gain levels.
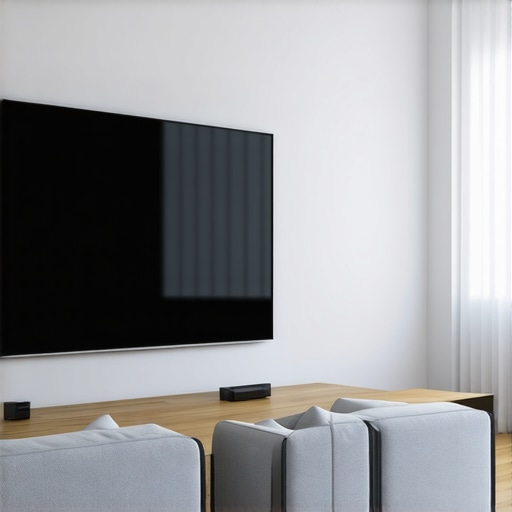
Match Screen Size to Your Room and Projector Brightness
Determining the right screen size is crucial. Think of it like choosing the right window size; too big and sunlight overwhelms it, too small and you miss immersive impact. Use the guideline from this resource to calculate optimal dimensions based on your projector’s lumens and room size. I once tried a 120-inch screen in a small living room; not only did it overwhelm the space but also diminished image clarity. Adjusting the size improved visibility without sacrificing immersion.
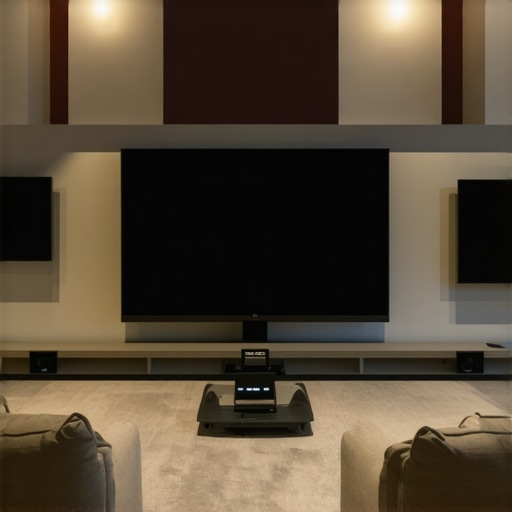
Optimize Screen Placement and Environment Control
Position your screen perpendicular to windows and source of ambient light. Use window coverings like blackout curtains, and consider mounting the projector closer to the screen to reduce light falloff. I found that angling the screen slightly away from direct light sources decreased glare significantly. Additionally, installing a dedicated light barrier or using wall paint with matte finish helps diminish reflections, enhancing contrast. Remember, controlling your environment can sometimes be as vital as choosing the right material.
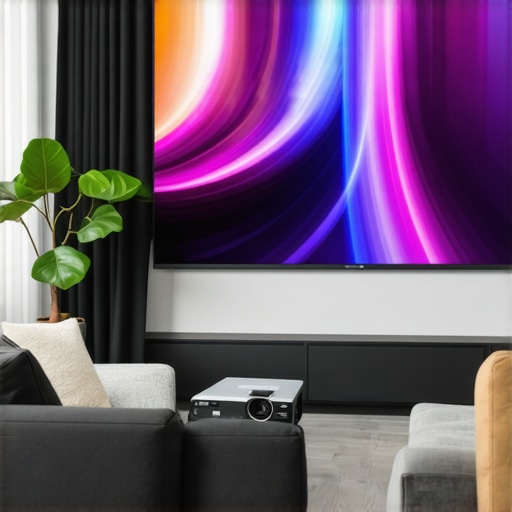
Fine-Tune Your Projector Settings for Bright Conditions
Increase your projector’s brightness, but do so judiciously—too high can wash out the picture. Adjust contrast and color settings to boost perceived contrast and vibrancy. This step is essential because even the best screen material can’t compensate for poor projection calibration. Experiment with the projector’s eco, bright, and mode settings, ensuring it matches your ambient lighting conditions. I once overlooked this and only after fine-tuning did my picture become remarkably clearer and more vibrant.
Test and Refine for Consistent Quality
After setup, test your home theater during different times of the day. Sunlight varies, and your settings might need adjustments. Use a high-contrast scene to evaluate image clarity and contrast. Make incremental changes to gain and calibration, documenting what works best. I learned this the hard way when my daytime viewing was washed out until I started detailed testing and tweaking. Remember, small adjustments can yield significant improvements in visibility and image fidelity.
Implement these steps methodically, combining high-quality materials with precise placement and calibration. Treat your setup like a puzzle—every piece matters, especially in bright rooms where ambient light challenges your display. For more in-depth insights into ALR options and maximizing gain for bright environments, explore this latest guide.
Many enthusiasts believe that selecting the largest screen or the highest gain material guarantees a perfect home theater experience, but this is a misconception that can lead to costly mistakes. One common myth is that bigger always means better; however, an oversized screen in a small room can cause image distortion and reduced clarity, especially if the projector’s brightness isn’t matched correctly. Instead, focus on calculating the optimal screen size considering room dimensions and projector lumens, as detailed in this comprehensive guide. Additionally, many overlook how screen gain affects image quality. While high-gain screens (around 2.0 or more) can amplify brightness, they often introduce hotspots and viewing angle issues, especially if the material isn’t suited for wide-angle viewing. Trust me, understanding the specific gain behavior, as explained in this deep dive, helps prevent these pitfalls. The misconception that all ALR screens are merely marketing gimmicks is also widespread. In reality, the performance of an ALR screen depends heavily on its material composition and how well it complements your projector’s light output. Some materials are better at rejecting ambient light in certain environments; choosing wrongly can result in washed-out images despite impressive specs. For an expert opinion, check out this article. Another nuanced point is the importance of understanding how projection angles and ambient light interact with screen properties. A common mistake is not considering the viewing angle, which can drastically diminish contrast on high-gain screens if viewers are off-center. This can be mitigated by selecting a screen with appropriate gain and viewing angle specifications, explained thoroughly in this guide. Ultimately, the key to an optimal setup lies in appreciating these subtleties—matching your room size, ambient light, projector brightness, and screen material precisely. Don’t fall into the trap of oversimplification. Instead, analyze each component’s interplay to achieve cinematic quality for years to come. Have you ever fallen into this trap? Let me know in the comments.
How do I maintain my projection screen and keep it performing optimally over time?
Ensuring your high-quality projection screen stays in top shape requires intentional maintenance and the right tools. First, regularly dust the surface with a microfiber cloth to prevent dirt buildup that can affect image quality. For deeper cleaning, use a soft, damp cloth with a gentle, non-abrasive cleaner, avoiding harsh chemicals that can damage the material. When selecting cleaning agents, consult the manufacturer’s guidelines or visit this resource for recommended products tailored for different screen surfaces.
To prevent scratches and surface deterioration, avoid using abrasive materials or rough cloths. Additionally, protect your screen from direct sunlight and excessive humidity, as environmental changes can warp or fade the material over time. Installing a cover or protective casing can help shield the screen when not in use. Periodic inspections for loose mounting hardware or warping ensure the screen stays secure and maintains optimal alignment. Remember, a well-maintained screen enhances contrast and clarity, especially in bright room setups.
Essential tools that I personally rely on include a microfiber cleaning cloth, a gentle screen-safe cleaner, and a laser level for precise mounting.
Using a microfiber cloth minimizes potential scratches, and a specialized cleaner designed for projection screens ensures effective cleaning without damage. A laser level aids in perfect alignment, preventing keystone distortions that could degrade image quality. For long-term results, keep a maintenance log noting cleaning schedules and any repairs or adjustments made. Staying consistent with these routines preserves your investment, ensuring consistent performance over the years.
Looking ahead, advancements in screen materials and environmental resistance will continue to evolve. Innovations like anti-static coatings or self-healing surfaces aim to reduce maintenance needs while extending lifespan. As the market grows, expect tools that automate cleaning or provide real-time health diagnostics—easing long-term upkeep and ensuring sustained clarity.
What can I do to scale or adapt my screen setup as my needs change?
Investing in adjustable mounts or modular screens allows flexible scaling, supporting different room sizes or seating arrangements. Consider screens with optional built-in ambient light rejection features that can be enhanced with supplemental accessories, ensuring your setup adapts seamlessly to changing environments. Incorporate software calibration tools like [CalMAN](https://screens.cinegearguide.com/alr-options-explained-best-screen-material-gain-for-bright-rooms) for precise color and contrast adjustments after screen upgrades or modifications. As your setup grows, also think about the future integration of 4K or HDR-capable projectors that demand even more accurate and consistent display surfaces—maintaining this level of quality requires diligent upkeep and precise calibration.
Embrace these maintenance routines and leverage reliable tools now to guarantee not only longevity but also continued excellence in your home theater experience. Remember, a well-maintained screen paired with the right accessories can deliver stunning visuals for years to come—so don’t skip on regular care and upgrades. For more detailed insights into tools and materials, visit this comprehensive guide and elevate your setup today.
What I Wish I Knew About Picking the Right ALR Screen in Bright Rooms
Sometimes, the biggest revelations in home theater aren’t about the latest tech but understanding the nuanced relationship between screen materials, gain, and environmental control. Early on, I underestimated how crucial it was to match my projector’s lumen output with a high-quality ALR screen — my initial choice left me frustrated with washed-out images and limited contrast. The lightbulb moment? Realizing that the right combination of gain and material can turn a problematic bright room into a cinematic haven. Personal experience taught me that focusing solely on specs without considering room specifics often leads to disappointment; instead, a thoughtful, environment-aware approach yields astonishing results.
My Essential Arsenal for Bright Room Projection Success
Over time, I curated a set of tools that consistently improve my setup. First, a high-quality **laser level** ensures perfect alignment, preventing distortion and hotspotting. Next, a **microfiber cloth** along with a gentle, screen-safe cleaner keeps my screen spotless, maintaining image clarity. Lastly, I rely on **calibration software** like [CalMAN](https://screens.cinegearguide.com/alr-options-explained-best-screen-material-gain-for-bright-rooms) to fine-tune my projector’s output, balancing luminance and contrast. These tools, combined with reputable sources like this guide, streamline my maintenance routine and ensure consistent excellence in my bright environment.
Seize the Moment: Elevate Your Home Theater Today
Empowered with insights into selecting the optimal ALR screen and environment management, you’re now equipped to transform your bright room into a cinematic oasis. Remember, the journey doesn’t end here; continuous testing, calibration, and updating your setup will keep your visual experience at its peak. The future of projection technology promises even smarter, more adaptable solutions—so stay curious and proactive. Your perfect home theater is within reach, waiting for you to take the next step.
Have you ever struggled with calibrating your projector for bright conditions or choosing the right gain? Share your experiences or questions below—let’s learn together and achieve that stunning, glare-free picture you deserve.
,

Reading through the post really brought back my early struggles with bright room setups. I remember investing in a high-gain ALR screen with the hope of eliminating glare issues, only to realize that hotspotting became a new problem. It highlighted how crucial it is to understand the specific gain and material properties of a screen before making a purchase. What I learned from experience is that a high gain isn’t always the answer—sometimes, it can cause uneven brightness and viewing angle problems, especially in larger rooms. I’ve found that smaller, more controlled environments benefit from a bit lower gain for wider viewing angles.
The detailed focus on environment control and calibration really resonates with me. Does anyone have tips for balancing projector brightness to match high-gain screens without washing out the picture? I’d love to hear about different setups or tricks that have worked for others trying to optimize picture quality during daytime viewing without costly upgrades.
This post really hits home for me, especially the emphasis on balancing gain with room conditions. I recall a similar experience where I upgraded to a high-gain ALR screen, expecting a dramatic improvement in daylight visibility. However, I soon faced hotspots and uneven brightness, which was frustrating. It made me realize that higher gain isn’t always a silver bullet; the material quality and viewing angles play a critical role. I’ve found that in a mid-sized living room, a gain around 1.8 works best to maintain image uniformity without sacrificing contrast or detail. Additionally, I started experimenting with projector placement—mounting it closer to the screen reduced the amount of ambient light impacting the image, and helped with glare issues.
To those struggling with washout during the day, have you considered combining environmental controls like blackout curtains with calibrated projector settings? Sometimes, simply reducing ambient light and fine-tuning contrast can make a significant difference before investing in more expensive screens or equipment. Would love to hear more tips on managing projector brightness alongside high-gain screens without losing picture quality. How do others manage this delicate balance in brighter rooms?