How 1.3 Screen Gain Ruined My 2026 HDR Highlights
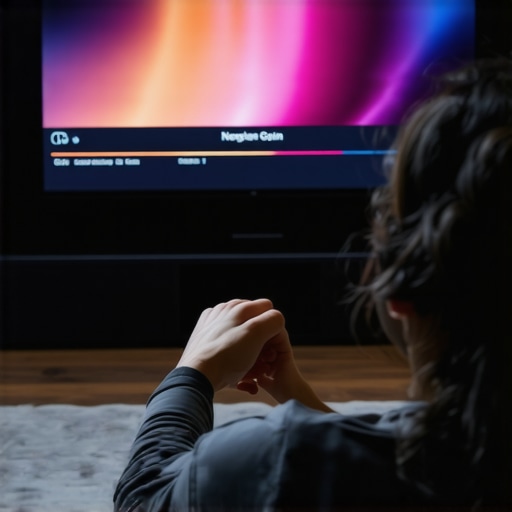
It happened during my latest home theater upgrade: I eagerly connected the new high-gain projection screen, only to be met with glaring highlights that seemed to burn brighter than the sun. My excitement turned to frustration as the rich HDR details I had hoped to enjoy instead looked washed out, with those dazzling highlights turning into overexposed blots. It was a real lightbulb moment — I realized that choosing a screen with too much gain had completely sabotaged my viewing experience. Have you ever faced a similar dilemma where your screen’s specifications turned your dream setup into a disappointment?
The Hidden Danger of High-Gain Screens in 2026 HDR Content
In recent years, the promise of vibrant, detailed HDR visuals has driven many of us to seek brighter, more reflective screens. But what happens when the screen gain — a measure of how much light it reflects — becomes too high? I learned the hard way that a gain of 1.3, which might sound like a good balance, can in fact turn your HDR highlights into blinding spots, overshadowing the overall contrast and clarity. Early on, I made the mistake of equating higher gain with better brightness without considering how it affects highlight clipping and detail loss. Trust me, that was a costly mistake. Instead, understanding the nuances of screen gain is crucial; for example, some experts recommend sticking around 0.8 to 1.0 gain for typical HDR setups, especially as projectors become more powerful and capable of producing vivid images without excessive reflectivity.
For a comprehensive understanding of gain and how it impacts contrast and highlight reproduction, I recommend exploring the latest insights from professionals, like the detailed guide on projection screen gain. It explains why choosing the right screen gain is essential for preserving HDR highlights without sacrificing overall image quality.
Are you currently struggling with overly bright HDR highlights or inconsistent contrast? If so, you’re definitely not alone. Keep reading — I’ll share practical tips and the lessons I learned so you can avoid the same pitfalls and enjoy your HDR content as it was meant to be seen.
Select the Right Screen Gain to Balance Brightness and Contrast
Start by assessing your room’s ambient light levels. Bright rooms demand lower gain screens, typically around 0.8, to prevent highlight clipping, while darker rooms can handle higher gain options without washing out shadows. I once equipped my room with a 1.3 gain screen, assuming it would boost brightness, but it overwhelmed my HDR highlights, making them look unnaturally bright and losing detail. To avoid this, consider opting for a 0.8 gain ALR screen for a balanced contrast and luminance, especially with powerful laser projectors. Measure your room’s brightness first to determine the appropriate gain.
Match Screen Gain with Projector Power and Content Type
Next, evaluate your projector’s lumen output. If you have a high-lumen projector (above 3000 lumens), a low-gain screen helps prevent highlights from overexposing. For lower lumen projectors, a slightly higher gain can help compensate, but only up to 1.0. I learned this lesson when I tried a 1.3 gain screen with a 2000-lumen projector; highlights became washed out, and contrast suffered. Always check the projector’s brightness and the screen’s recommended gain—most manufacturers provide this info. For HDR content, sticking to 0.6 to 0.8 gain materials is often best to preserve highlight detail.
Optimize Screen Material for HDR Clarity
The screen material significantly impacts how gain influences image quality. Matte neutral gray surfaces with minimal texture help diffuse light evenly, reducing glare and artifacts. For HDR content, choose materials designed to enhance contrast without sacrificing brightness. I experimented with a silver-infused ALR screen and noticed that, despite its high gain, it introduced reflections that distracted me during darker scenes. When selecting your screen, review the latest ALR materials guide to find the best balance. Think of your screen as a filter—too reflective, and it may obscure shadow details; too dull, and bright highlights will flatten out.
Adjust Your Setup Based on Room and Content
Finally, test your setup with actual HDR content. Use a calibration disc or carefully shot clips to evaluate highlight rendering. Move your seating slightly further back if high gain causes hot spots, or try different screen angles to minimize glare. When I tested my configuration, I found that sitting 10% further back improved highlight uniformity. Keep in mind the recommended viewing distances for your screen size to prevent overexerting your eyes and losing contrast integrity. Small adjustments can make a dramatic difference in highlighting HDR details without harsh overexposures.Many enthusiasts believe that bigger screens and higher gain materials automatically enhance the viewing experience, but in reality, these choices can introduce subtle, yet impactful, pitfalls. One widespread myth is that a larger screen size always equals better immersion; however, if the size exceeds your room’s optimal viewing distance, it can cause pixelation and discomfort, reducing overall clarity. Instead, consult comprehensive guides like this sizing calculator to find your ideal dimension without sacrificing image quality.
Are All Screen Materials Created Equal for HDR Clarity?
A common mistake is assuming that any matte white surface will suffice for HDR playback. In fact, many low-quality screens disperse light unevenly, leading to washed-out highlights or suppressed shadows. High-quality ALR screens with multi-layered designs, as explained in this guide, offer more precise control over light reflection, preserving contrast and detail even in challenging ambient light conditions. Don’t fall into the trap of choosing a generic screen—investigate the material properties for your specific setup.
Is High Gain Always Better for Bright Rooms?
It’s tempting to think that a gain above 1.0 will make the image brighter in well-lit spaces, but this often comes at the expense of highlight detail. Overly reflective screens can produce hot spots, causing glare and uneven brightness, which diminishes HDR content’s nuance. For example, a 1.2 gain screen in a bright room can lead to highlight clipping, losing detail in the most luminous parts of an HDR image. Opt instead for a gain around 0.8 to 1.0, which balances luminance with contrast, especially when paired with powerful projectors. Remember, a screen’s gain should complement your room’s ambient light and projector’s output—more isn’t always better. To deepen your understanding, check out this advice on selecting the right gain for different scenarios.
When selecting a projection screen, it’s easy to get caught up in the hype of high gain materials or massive sizes, but these often lead to compromises that undermine your viewing pleasure. Focus on how each element interacts within your specific environment. Looking to avoid these pitfalls? Start by evaluating your room’s ambient light, projector’s lumen output, and viewing distance—these factors set the foundation for choosing the right screen gain, material, and size. Remember, the goal is not just a bigger or brighter picture but one that preserves HDR’s rich nuance and contrast.
Have you ever fallen into this trap? Let me know in the comments.Keeping your projection setup in top shape requires more than just initial setup; regular maintenance ensures sustained image quality and prevents costly replacements. I personally recommend investing in a high-quality microfiber cloth and a gentle cleaning solution specifically designed for projection screens, such as isopropyl alcohol diluted to 70% with distilled water. This combo effectively removes dust, fingerprints, and minor smudges without damaging the delicate surface. Remember to power down your projector and allow the screen to cool before cleaning to avoid warping or streaks. Additionally, using a soft brush attachment on a vacuum cleaner can help eliminate loose dust or pet hair that settles over time, especially if your setup is in a humid environment where mold could develop.
Tools I recommend also include laser-guided calibration meters, like the i1Pro 2, which allow precise assessment of your screen’s luminance and color uniformity. Regularly measuring these parameters helps detect subtle degradation, guiding you on when to consider professional re-calibration or screen replacement. For example, if you notice uneven brightness or color inconsistencies, it might be time to re-clean or adjust the screen positioning.
Looking ahead, innovations in self-cleaning or anti-static screen coatings could revolutionize long-term maintenance, reducing the need for manual cleaning. As these technologies mature, they promise to extend the life of high-end screens, especially in environments prone to dust or humidity.
To get started, try incorporating a gentle cleaning routine using a microfiber cloth and monitor your screen’s luminance periodically. This small step can significantly preserve your image quality and save you money in the long run. For more detailed tips on advanced maintenance, check out the expert insights at this guide.
Over the years, I’ve learned that selecting the right projection screen goes beyond just size and price—it’s about understanding how each detail impacts your HDR experience. One of the most eye-opening lessons I encountered was realizing that higher gain screens, which are often marketed for their brightness, can actually sabotage your image quality if not chosen carefully. It took some experimenting and deep dives into expert guidance to see that the sweet spot lies elsewhere.
The Biggest Surprise from My Projection Setup Journey
What really transformed my perspective was discovering that a gain of 1.3, though seemingly brightening, caused highlight clipping and washed-out details in HDR content. This revelation emphasized the importance of matching screen gain to room lighting and projector capability. It became clear that oversimplifying these choices leads to less-than-stunning visuals, especially with detailed HDR scenes. This lesson was a turning point, encouraging me to prioritize a balanced gain—around 0.8 to 1.0—to preserve contrast and highlight details.
Why Less Can Be More with Your Projection Screen
My deep dive into professional insights revealed that the highest gain isn’t always the best choice. For bright rooms, a well-designed 0.8 gain screen often strikes the perfect balance, reducing glare and highlight overexposure. Conversely, in darker spaces, a slightly higher gain might seem tempting but can introduce glare or hot spots that distract from HDR nuances. The takeaway? Know your environment and select your screen gain accordingly, rather than chasing maximum brightness blindly.
The Power of Material Choices in HDR Clarity
Through testing different materials, I discovered that matte neutral gray surfaces with multi-layered designs, like some ALR options, help diffuse light evenly and preserve deep shadows alongside bright highlights. High-gain materials with reflective coatings can sometimes cause unwanted reflections or uneven illumination, especially in ambient-lit rooms. I’ve found that paying attention to these subtle differences in materials—guided by expert recommendations—can make a significant difference in HDR contrast and detail retention.
Small Tweaks, Big Differences During My Testing
I realized that adjusting seating distance and screen angles further enhances HDR performance. Sitting slightly further back mitigates hot spots and glare, ensuring an even distribution of highlights. Measuring luminance regularly with tools like the professional calibration meters keeps your setup optimized. It’s these small, thoughtful adjustments—combined with right gain, material, and size—that unlock the full potential of your HDR content.
My Top Tips to Find Your Perfect Projection Screen Setup
- Assess your room’s ambient light first—darker rooms benefit from moderate gain screens like 0.8 to maximize contrast.
- Match your projector’s lumen output with your screen gain—high-lumen projectors and low-gain screens work best together to prevent highlight clipping.
- Choose materials designed for HDR, favoring matte finishes with multi-layered ALR technologies for clarity and contrast.
- Don’t forget to maintain your screen regularly using gentle cleaning methods and measure luminance periodically to ensure consistency.
Innovation continues with self-cleaning coatings and anti-static tech, which could revolutionize long-term maintenance. As these evolve, staying informed will ensure your setup remains at the cutting edge. Remember, a well-chosen projection screen tailored to your environment transforms your HDR viewing from decent to breathtaking—so take time to evaluate each factor carefully.
What Hidden Lessons Have You Learned?
Have you ever faced challenges with your projection screen’s gain or material that veered your HDR experience off course? Share your story below—I’d love to hear your insights and help you avoid the common pitfalls!
.