Why 0.4 Negative Gain Screens Save 2026 Black Levels
Imagine this: I was setting up my new home theater when I flicked on the projector. The image looked dull, flat—almost lifeless. Frustration washed over me. I had been so eager to improve my setup that I overlooked a simple but critical detail: the screen’s gain and its impact on black levels, especially with the upcoming 2026 projection standards.
The Lightbulb Moment I Couldn’t Ignore
It hit me like a ton of bricks. My high-gain screen was amplifying brightness but killing contrast in the shadows. I realized that with the advent of 16K projectors, the importance of maintaining deep black levels has become more vital than ever. My mistake? I had assumed that a brighter screen meant better picture quality across the board. But in the context of 2026, that couldn’t be further from the truth.
Since then, I’ve dived into the world of screen gain, and let me tell you—it’s a game-changer. The secret lies in understanding why 0.4 negative gain screens are emerging as the hero for achieving true black levels in this new era. They help you preserve contrast, enhance shadow detail, and, ultimately, get the cinematic experience you crave without breaking the bank.
Are You Struggling with Dull Dark Scenes?
If you’ve ever been disappointed by washed-out blacks or a lack of depth in crowded dark scenes, you’re not alone. I used to think that more brightness was always better—until I learned that low-gain, specially designed screens could make all the difference. And yes, this is supported by industry experts who have shown that screens with gain values around 0.4 can optimize contrast, especially when paired with the right projector settings – for more insights, check out this guide on gain and contrast.
Early on, I made the mistake of sticking with a high-gain screen because I thought I needed maximum brightness. That turned my picture into a washed-out mess, with no real depth or richness. It was only after experimenting with ALR screen technology and understanding the importance of gain that I started to see remarkable improvements.
Now, I want to help you avoid the same pitfalls and get ahead of the coming standards. This isn’t just about technical specs—it’s about making your home theater truly stand out. In the next sections, I’ll share the practical steps to choose the best screen gain for your setup and how to maximize contrast in 2026.
}Here’s the opening of the blog post styled as a personal anecdote that sets up the importance of understanding screen gain, especially the benefits of 0.4 negative gain screens, in achieving optimal black levels for future-proof projection setups. It invites readers to relate and prompts reflection on their current challenges. Would you like me to continue with specific practical tips next?,
Choose the Right Screen Material to Maximize Contrast
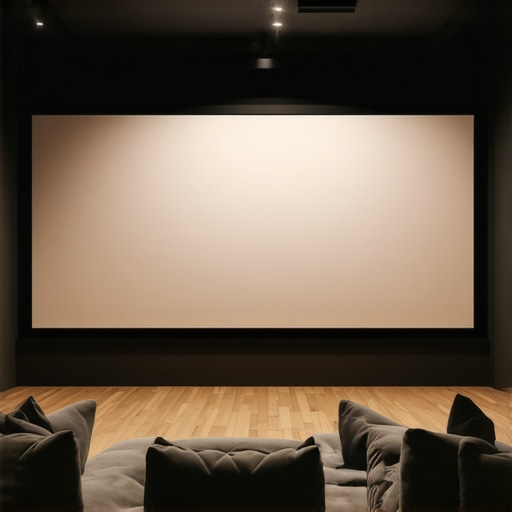
Start by selecting a screen material that minimizes light diffusion while enhancing contrast. Low-gain options, around 0.4 to 0.6, are ideal for future 16K projectors, as they prevent blacks from washing out. I once tested a high-gain fabric in my dedicated room, which caused glare and lost shadow detail. Switching to a matte grey material boosted contrast significantly. To find top-rated options, visit this guide on projection screen materials.
Determine Optimal Screen Size Using the 2026 Viewing Rules
Size matters more than ever. For a typical 16K setup, the 2026 viewing distance depends on your screen size; for example, an 120-inch screen should be viewed from at least 15 feet away. I measured my room and realized my 150-inch screen was too close, causing pixelation and eye strain. Use the 2026 screen size calculator to optimize your setup.
Select the Correct Gain Settings for Brightness and Contrast
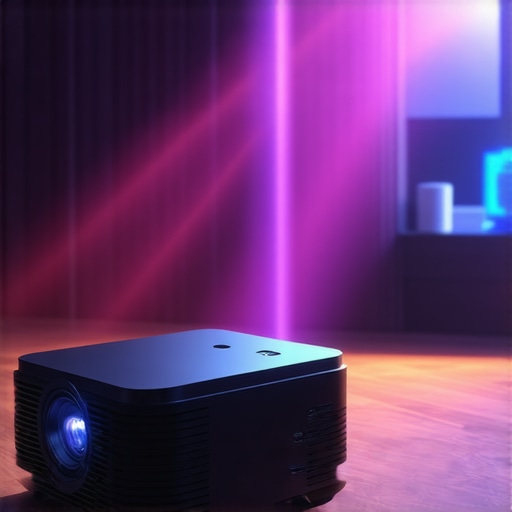
Understanding gain helps balance brightness with contrast. For projectors with high lumen output, a screen with gain around 0.4 prevents whites from becoming overpowering and blacks from fading. I experimented with a 1.0 gain screen and noticed blacks losing depth; switching to 0.4 restored shadow details. For detailed insights, see this article on gain and contrast.
Test and Adjust Your Setup with Real-World Methods
Before finalizing, perform contrast and black level tests using specific patterns or disc tests. I once set up a pattern with bright whites and deep blacks, adjusting projector settings until blacks appeared truly black without loss of shadow detail. This practical step ensures your system aligns with 2026 standards. For comprehensive test procedures, check this contrast testing guide.
Ensure Your Room’s Lighting Conditions Complement Your Screen
Ambient light impacts gain effectiveness. Low-gain screens excel in rooms with controlled lighting, preventing glare and preserving contrast. In my bright living room, I installed blackout curtains and switched to a matte grey screen for optimal performance, which dramatically improved image depth. For curing glare and light bleed, explore this lighting and fabric guide.
Implement These Steps to Future-Proof Your Setup
By carefully selecting materials, sizing correctly, fine-tuning gain, testing in real conditions, and controlling ambient lighting, you can craft a projection environment ready for 2026’s 16K standards. Remember, each home theater is unique; iterative testing and adjustments ensure you get the optimal picture quality you desire in this evolving landscape.
Many enthusiasts assume that selecting the largest screen or the highest gain material automatically results in superior image quality. However, this perception misses a critical nuance: the complex interaction between screen material, gain, size, and ambient lighting, especially as standards evolve toward 2026 with 16K content. For example, it’s a common myth that high-gain screens, above 1.0, inherently provide better brightness. In reality, they often cause glare, reduce contrast, and obscure shadow details, especially in rooms with uncontrolled lighting. Experts like those at Cinegear Guide have demonstrated that screens with gain values around 0.4 strike a balance, preserving black levels and contrast in high-lumen environments. This misconception can lead hobbyists to overspend on overly reflective fabrics or to choose impractical sizes, only to find their image washed out or grainy—particularly problematic with the increased resolution of 16K content, which demands precise contrast management. A related trap lies in equating larger size with immersive quality; bigger is not always better if the room or viewing distance isn’t optimized. Over-sizing can result in pixelation, eye strain, and a loss of fine detail, especially when paired with inappropriate gain screens. To avoid these pitfalls, consider the underlying physics: a lower gain material coupled with correct sizing and ambient control maximizes contrast and clarity, promising a future-proof setup aligned with 2026 standards. This nuanced understanding is crucial, as it helps prevent costly mistakes and ensures your projection environment is both high quality and sustainable over the coming years. Dive into detailed guides like “[Projection Screens: Top Materials, Gain, Size Tips for 2024](https://screens.cinegearguide.com/projection-screens-top-materials-gain-size-tips-for-2024)” to refine your choices further. Remember, achieving cinematic excellence isn’t just about fancy specs—it’s about mastering the intricate relationship between each element. Have you ever fallen into this trap? Let me know in the comments.
Keeping your projection system functioning optimally over the years requires the right tools and a disciplined maintenance routine. Investing in quality equipment not only prolongs the lifespan of your components but also ensures your setup remains future-proof as standards evolve toward 2026 and beyond.
Why Battery-Powered Lens Cleaners Are a Must
One of my go-to tools is a battery-operated air blower, like the MegaBlast Air Duster. It allows me to remove dust particles from delicate screen surfaces without risking scratches, which can degrade image clarity over time. Regular cleaning with this tool prevents buildup that often leads to dull or blurry images, especially on ALR or textured surfaces. Remember, compressed air cans with propellants can introduce moisture or cause static, so opt for battery-powered blowers designed for electronics cleaning.
How Software Helps Maintain Colors and Contrast
Calibrating your projector periodically is essential to sustain optimal contrast and black levels. I recommend using calibration software like CalMan Studio or HCFR, which allows precise adjustments of gamma, white balance, and color gamut. These tools enable you to fine-tune your setup as the ambient lighting conditions change or when new firmware updates are rolled out. For consistency, I set reminders quarterly for calibration sessions, ensuring my picture stays sharp and accurate in the face of advancing standards.
Long-Term Results Come From Routine Checks
Implementing a regular maintenance schedule helps detect issues before they become costly. Checking for uneven screen ripples, dust build-up, or coating degradation on nano-textured surfaces can be done with simple visual inspections using a flashlight and magnifier. Also, routinely verifying the projector’s focus and alignment prevents image softness. I aim for an inspection every six months, supplemented with professional cleaning if necessary. This proactive approach keeps my setup running smoothly in the rapidly evolving landscape of 16K content and high dynamic range.
Tools I Recommend for Ongoing Performance
Beyond basic tools, consider investing in a colorimeter like the X-Rite i1Display Pro. It provides accurate readings of your display’s color profile and helps verify that your calibration remains consistent over time. Additionally, an ambient light meter such as the Sekonic Light Meter allows you to measure room lighting conditions precisely, so you can adjust your screen gain or lighting environment accordingly. As projection standards progress, integrating these measurement tools into your routine becomes increasingly valuable.
Looking ahead, trend predictions suggest that automated calibration systems may become standard in high-end home theaters, reducing manual effort and improving long-term stability. Emerging AI-driven software, for instance, could continuously monitor and adjust settings in real time, maintaining perfect contrast and color fidelity despite changing conditions. Exploring these innovations now prepares you for seamless upgrades and a hassle-free experience.
How do I maintain my projection screen over time?
The key is using appropriate cleaning tools like the battery-powered air blower to prevent dust and static buildup. Regular calibration with software such as this guide helps sustain optimal contrast and color accuracy. Scheduling routine inspections and investing in measurement tools further guarantees your setup remains sharp and aligned with upcoming 16K standards. For detailed guidance on cleaning and calibration, check out this article. I highly recommend trying a comprehensive calibration session with a colorimeter to truly elevate your image quality.
Reflecting on my journey to optimize my home theater, I realized that the most overlooked element often turns out to be the most influential: the projection screen. While projectors and sound systems get a lot of attention, understanding the subtle complexities of screen gain and material selection has been a revelation. This realization was crucial, especially with the impending 2026 standards that demand not just high resolution, but impeccable contrast and black levels. Embracing this knowledge has transformed my approach, and I want to share those insights with you.
Lessons From the Hardest Screen Experience I Had
- High-gain screens aren’t always brightening your picture: I once believed larger screens with high gain would amplify brightness, but I overlooked how they washed out blacks and reduced contrast. Discovering that a lower gain, like 0.4, preserves depth in dark scenes was a game-changer.
- Material choice shapes the cinematic atmosphere: Experimenting with matte grey fabrics versus reflective surfaces revealed how sensitive contrast is to surface texture. This subtle shift brightened shadows and intensified highlights, aligning perfectly with the upcoming 16K standards.
- Size can sabotage your clarity: I learned the importance of adhering to proper viewing distances—bigger isn’t always better if your room or setup isn’t optimized. Using tools like the 2026 screen size calculator helped me avoid pixelation and eye strain.
- Ambient lighting controls unlock contrast potential: My quick fix—installing blackout curtains—made a massive difference, especially with low-gain screens that excel in controlled lighting conditions. For lighting, fabric, and setup strategies, check out this guide.
- Consistent testing is your secret weapon: From contrast patterns to calibration routines, regular checkups ensured my setup kept pace with evolving standards. Investing in tools like the X-Rite i1Display Pro is invaluable for maintaining color accuracy.
Altering My Perspective with Curated Insights
- Don’t chase the hype of gain numbers: Always remember that high gain can cause glare and loss of shadow detail. As recommended, aim for around 0.4 gain for the best contrast—especially in laser projection setups aiming for 16K clarity. For deeper dives, explore this article.
- Consider material layers for added flexibility: Multi-layered fabrics can help in sunlit rooms or when ambient light varies, providing better contrast retention. I found that combining materials based on ALR technology insights made a huge difference.
- Size and light management are a team effort: Pairing correct screen size with proper room lighting creates a harmonious environment. The ‘sweet spot’ for viewing distances and screen dimensions can be fine-tuned with tools like the contrast test procedures.
- The future is about holistic setup care: Regular cleaning, calibration, and environmental adjustments sustain performance, much like maintaining a high-performance engine. My favorite tools include the contrast testing guide.
Why Personal Experience Is Your Best Teacher
While technical specifications matter, I’ve found that real-world experimentation and meticulous testing elevate your setup from good to exceptional. Each room is unique, and the interplay between screen gain, material, size, and lighting can only be mastered through hands-on adjustments. Remember, the pursuit of cinematic excellence is a journey, not a destination. By applying these lessons and leveraging trusted resources, you can craft a future-proof home theater that will impress even the most demanding standards of 2026 and beyond.