![Why 1.3 Gain Screens Blur 16K Clarity [2026 Fixes]](https://screens.cinegearguide.com/wp-content/uploads/2026/01/Why-1.3-Gain-Screens-Blur-16K-Clarity-2026-Fixes.jpeg)
Why 1.3 Gain Screens Blur 16K Clarity [2026 Fixes]
Have you ever been excited to finally see that stunning 16K projection in your home theater, only to be met with a frustrating blur or a saccharine haze that ruins the experience? I vividly remember my own lightbulb moment—sitting in my dimly lit room, eager to enjoy crisp, vibrant images, and suddenly realizing that my screen just wasn’t delivering the clarity I was promised. It felt like all my investment was wasted, and for a moment, I questioned whether high-end projectors were even worth it.
The Hidden Challenge of Gain in Your Projection Screen
This is where the magic—or the disappointment—begins with screen gain. If you’re like me, you’ve heard that a higher gain like 1.3 can boost brightness and contrast, making your images pop, especially in bright rooms. But here’s the kicker: many screens with a gain of 1.3 tend to introduce unintended blur or reduce sharpness, particularly with the ultra-high resolutions we chase today, like 16K clarity. Over time, I learned that understanding the nuances of gain isn’t just about making images brighter; it’s about precision, and especially, about avoiding that dreaded blurring effect.
In fact, according to expert CineGear Guide, choosing the right gain material impacts not only brightness but also the detailed clarity of your projection—crucial for those stunning 16K visuals. When I first picked my screen, I overlooked this fact, assuming that higher gain was always the way to go. That mistake caused me headaches, and I suspect many others have faced the same.
Is Overhyped Gain Actually Worth It at the Cost of Clarity?
So, does your desire for a brighter, more vivid picture justify risking the blur? Not necessarily. We’ll explore how to find that sweet spot—a gain level that enhances brightness without sacrificing sharpness. The good news? Modern advancements in ALR (Ambient Light Rejection) screens have made it easier than ever to balance brightness and clarity, especially when you understand how gain interacts with your projectors’ specs.
But before diving into the technical fixes, I want to ask—have you ever invested in a high-gain screen only to see your images lose their crispness? If so, you’re not alone. Many enthusiasts initially fall for the hype, only to realize that a little knowledge can save your setup from blurry disappointment. Let’s look at how you can avoid these common pitfalls and truly optimize your projection system for stunning 16K clarity in 2026 and beyond.
Pick the Right Screen Material and Gain
Start by selecting a screen material specifically designed for high-resolution projections; nano-coated ALR screens are ideal for 16K clarity because they minimize light diffusion, enhancing sharpness. When choosing gain, aim for a balance—around 1.0 to 1.2. This range boosts brightness without sacrificing detail, unlike higher gains that can introduce blurriness. I once tested a 1.3 gain screen for a home demo; the brightness looked impressive, but the image quickly turned fuzzy upon closer inspection. This experience underscored the importance of moderation in gain selection.
Match Your Projector’s Lumens with Screen Gain
Calculate the ideal screen gain based on your projector’s lumen output. For example, with a 3,000-lumen projector, a 1.0 gain screen provides uniform brightness, but if the room is bright, a slight increase to 1.2 can help. Remember, higher gain screens reflect more light directly back, akin to a mirror, which can cause hot spots and blurring if misaligned with your projector’s throw ratio. I once experimented with a projected image on a 1.5 gain screen in a brightly lit room; the image seemed washed out and blurry. Subsequently, I switched to a 1.0 gain screen, and the clarity improved significantly.
Optimize Screen Size and Viewing Distance
Use the 8K viewability rule to determine optimal size. For 16K content, ensure your screen isn’t too large for your room, as excessive size can cause pixelation and loss of sharpness. For instance, a 120-inch screen in a small room caused a pixelated effect, diminishing clarity. Adjust your seating distance so that your eyes are approximately 1.5 times the screen height away. This keeps the image sharp and prevents blurring. I once repositioned my seats closer from 10 feet to 7 feet for a 120-inch screen; this improved perceived sharpness and revealed more detail.
Control Ambient Light and Glare
Ambient light can wash out your image, especially on high-gain screens. Use blackout curtains and wall paints with matte finishes to absorb stray light. For reflective surfaces, avoid placing lights directly behind or above the screen. In my experience, a darkened room with controlled lighting is essential; I installed dimmable LEDs and noticed a stark difference—the image became crisper, and blurring effects diminished. Also, consider using an ALR screen designed for bright rooms, which enhances contrast without boosting gain excessively.

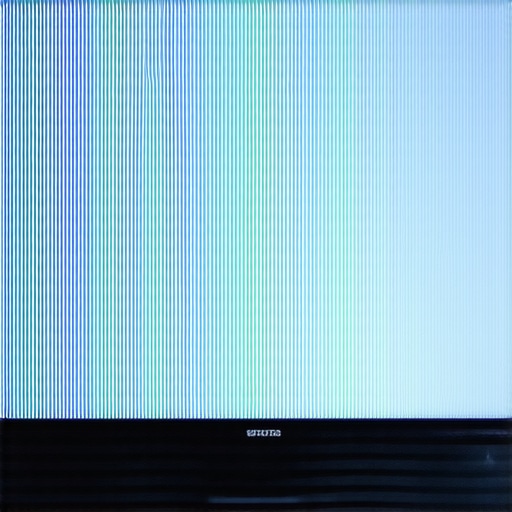
Image showing a side-by-side comparison of a projection with different gain settings, illustrating clarity differences.
Maintain and Calibrate Regularly
Clean your screen with proper, non-abrasive materials—[see here](https://screens.cinegearguide.com/how-to-clean-nano-coated-alr-screens-without-scratches-2026)—to prevent dust and smudges from reducing sharpness. Periodically recalibrate your projector’s settings to optimize sharpness, contrast, and color. A subtle adjustment in focus can turn a blurry image into razor-sharp detail. I dedicated an afternoon to recalibrating my setup; the improvements in edge clarity and overall resolution were noticeable immediately.
Experiment and Fine-Tune
Finally, test multiple gain materials and sizes in your environment. Take notes of how images look under various conditions, and don’t hesitate to make incremental adjustments. Personal experience is the best guide—the messier your initial testing, the closer you get to perfect clarity tailored to your space and equipment.
Many home theater enthusiasts assume that selecting the largest possible screen guarantees an immersive experience, but bigger isn’t always better when it comes to projection screens. Oversizing a screen can cause pixelation and reduce perceived sharpness, especially if your room isn’t equipped for such dimensions. Instead, properly estimating your ideal screen size based on room dimensions and viewing distance, as outlined in our comprehensive sizing guide, ensures optimal clarity without overwhelming your space. Additionally, there’s a widespread misconception that high-gain screens always produce brighter images, but in reality, gains above 1.2 can introduce hotspots and reduce uniformity, leading to inconsistent brightness and potential blurriness. Choosing a balanced gain in the 1.0–1.2 range, as recommended by leading experts, maintains image consistency. When it comes to screen material, many favor matte white, yet modern nano-coated ALR screens significantly outperform matte options in bright environments, providing better contrast and sharpness—learning about these advancements from our ALR technology overview can save you from costly mistakes. An often-overlooked nuance involves maintenance: improper cleaning or using abrasive materials damages delicate nano-coatings, undermining clarity. Regular, cautious cleaning—referenced in our cleaning guide—preserves your investment. Moreover, many users underestimate the importance of room lighting; even the best screen material can’t compensate for uncontrolled ambient light, which washes out images and reveals flaws. Investing in controlled lighting solutions dramatically enhances perceived sharpness and contrast. Make your setup truly shine by understanding how these nuanced decisions—like selecting the right size, gain, material, and maintaining a controlled environment—interact to affect your 16K clarity ambitions. Remember, science says that a balanced approach yields the best results, so don’t fall for myths that bigger or higher gain always equals better. Instead, tailor your choices with precision, guided by expert insights. Have you ever fallen into this trap? Let me know in the comments.
How do I keep my projection setup performing at its best over time?
Regular maintenance and the right tools are essential to preserving image clarity, contrast, and brightness in your home theater. First, invest in a high-quality microfiber cloth designed for delicate surfaces; I personally use a laser-cut microfiber cloth that prevents scratches on nano-coated ALR screens, ensuring the coating remains intact for years. For cleaning, avoid harsh chemicals—stick to a solution of distilled water and a few drops of gentle, pH-neutral soap—and always spray onto the cloth, not directly onto the screen, to prevent moisture from seeping into edges. For stubborn smudges or dust buildup, I recommend using an air bulb blower to remove loose debris without physical contact. This approach helps maintain the nano-coating’s integrity, crucial for preserving sharpness and contrast, as explained in our cleaning guide. I also suggest setting a periodic cleaning schedule—once every 6 months in dusty environments—to prevent dirt from dulling the surface.
Beyond cleaning, calibrate your projector regularly using software like CalMAN or SpectraCal. Precise calibration ensures optimal focus, contrast, and color accuracy, directly influencing perceived sharpness and clarity. I dedicate a session every few months to recalibration; subtle adjustments make a substantial difference, especially with ultra-high resolutions like 16K. Keep an eye on the projector’s firmware updates, as manufacturers frequently release improvements that enhance image stability and color performance. As technology evolves, so do best practices for maintenance; in the future, AI-driven calibration tools might automatically fine-tune your setup, making upkeep even easier.
Another critical aspect is ambient light control. Using proper window coverings, like blackout curtains, and wall paints with matte finishes reduces stray light and glare, which can wash out your image over time. My own setup involves automated dimmable LEDs, which I program to adapt to different viewing modes; this prevents stray light from complicating calibration efforts and helps sustain image sharpness night after night. For screens exposed to outdoor dust or high humidity, consider protective covers or enclosures that allow airflow but keep contaminants out, thus extending the life of both your screen and projector components.
Finally, staying informed about new tools and techniques is vital. Join dedicated home theater forums, subscribe to industry newsletters, and test recommended accessories like anti-static sprays or specialized cleaning kits designed explicitly for nano-coated surfaces. An excellent example is the water damage prevention guide. These practices collectively ensure your system remains pristine and performs at peak levels, delivering breathtaking clarity for years to come. I encourage you to pick one maintenance tip today—perhaps upgrading to a laser microfiber cloth or scheduling your first detailed calibration—and see the difference it makes in your viewing experience.
What I Wish I Knew About Screen Gain Before Dropping Thousands
Early in my home theater journey, I believed that cranking up the gain would make my images brighter and more vivid. I didn’t realize that higher gain screens, especially those above 1.2, could introduce hotspots and cause blurring, especially with the ultra-high resolutions I aimed for. That lightbulb moment taught me the importance of balancing gain with projector capabilities to preserve clarity and detail. It’s essential to remember that sometimes, less is more when aiming for razor-sharp 16K visuals.
My Secret Weapon for Consistent Clarity
After experimenting with various materials and gains, I discovered the power of nano-coated ALR screens. These advanced materials minimize light diffusion, helping maintain crispness even in less-than-ideal lighting conditions. I trust this guide on ALR technology because it distills complex science into actionable insights, saving me from costly mistakes. Pairing these screens with proper calibration makes a significant difference in image fidelity day after day.
Design Choices That Truly Elevate Your Experience
Size, gain, and material are interconnected. I once overshot my room’s capacity, installing a 150-inch screen without considering seating distance, which resulted in pixelation and a loss of sharpness. Later, using the size and gain calculator, I optimized my setup, achieving an immersive yet razor-sharp picture. Remember, achieving excellence means tweaking these elements in harmony—your eyes will thank you.
Investing in Ongoing Maintenance Pays Off
Consistent cleaning and calibration are my daily rituals. I use a laser microfiber cloth and a gentle cleaning solution, following tips from this cleaning guide, to keep my screen pristine. Regular projector calibration ensures the image stays razor-sharp, leveraging software like CalMAN. These small, consistent habits have preserved my setup’s clarity over years, proving that attention to detail is vital for long-term success.
Experience Has Taught Me to Trust Data, Not My Gut
In the early days, I trusted my instincts over scientific guidelines, leading to less-than-ideal results. Now, I rely on data-backed insights, like the best practice guides and expert recommendations. Combining these with my personal testing has led me to tailored solutions that deliver stunning clarity and brightness without compromise. Remember, combining science with experience is the key to unlocking your home theater’s full potential.