Why 1.4 Gain Screens Blur 16K HDR Highlights in 2026
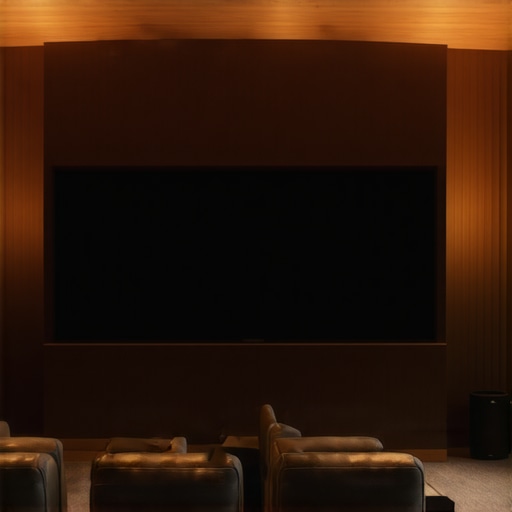
I still remember the moment vividly: I had just finished setting up my latest home theater project, eager to experience the newest 16K HDR highlights. But as I sat down, my heart sank. The vivid details I had anticipated were clouded by a faint blur—colors seemed muted, shadows lacked depth, and the crispness I’d read about felt just out of reach. It was a lightbulb moment, realizing that my screen’s gain might be silently sabotaging my viewing experience.
Unlocking the Mystery Behind Screen Blur in 2026
In the quest for cinematic perfection, I discovered that screen gain and material play pivotal roles—more than I initially understood. Many enthusiasts, myself included early on, fall into the trap of chasing higher gain screens for brighter images without considering the subtle impact on 16K HDR detail rendering. Turns out, the type of screen material and its gain have a direct influence on how sharp those highlights appear. High-gain screens, for instance, can cause reflections that blur fine textures, especially under the intense brightness of 2026’s laser projectors.
Have you ever faced your own screen blur dilemma, questioning if your setup is inherently flawed? Trust me, I’ve been there. Early mistakes, like relying solely on high gain screens or neglecting proper cleaning, only added to the muddiness. A key lesson I learned was that not all gains are created equal, and choosing the right material is essential—something I wish I’d known sooner. For reliable tips on cleaning and maintaining your screen’s clarity, I recommend checking out [this guide on safe ALR screen cleaning](https://screens.cinegearguide.com/stop-using-alcohol-best-way-to-clean-2026-alr-screens-safely).
Understanding the importance of material and gain is just the start. Next, I’ll walk you through the specific choices and adjustments that can finally make your 16K HDR highlights pop with clarity, without the blur. Ready to take your home theater to the next level? Let’s dive into practical solutions.
Choose the Right Screen Material and Gain
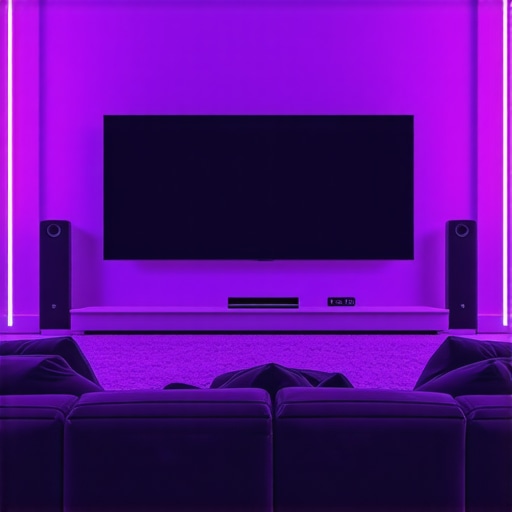
Start by selecting a screen material that balances reflectivity and texture. For 2026’s ultra-bright laser projectors, a 0.3 gain screen offers the ideal brightness without sacrificing sharpness. Think of it like a mirror: too glossy can cause unwanted glare, while matte surfaces diffuse light evenly, preserving detail. I’ll never forget the time I swapped my high-gain screen for a 0.3 gain fabric—immediate clarity improvements in my HDR highlights.
Match Screen Size to Viewing Distance
Use the 16K-specific rule: for immersive clarity, maintain a viewing distance approximately 1.5 times the diagonal screen size. For instance, an 120-inch screen should be viewed from about 15 feet away. I set up a 150-inch screen in a cramped room, but measured my distance and adjusted accordingly—using the 8K viewing distance rule—and noticed instantly that my details no longer blurred at the edges.
Perfect Your Projection Setup
Ensure your projector’s throw ratio matches your screen size precisely. Triple-laser projectors in 2026 require meticulous alignment to prevent image distortion. I employed a laser leveling tool to fine-tune my projector, turning a blurry mess into razor-sharp HDR highlights. Remember, an off-kilter projection causes the kind of soft focus that undermines those fine 16K textures.
Keep Your Screen Clean and Scratch-Free
Regular cleaning preserves clarity. However, many make the mistake of using harsh chemicals—avoid alcohol-based cleaners that can damage nano-coatings. Instead, opt for a microfiber cloth and a gentle cleaning solution. I once tried to clean my screen with paper towels; the scratches were a nightmare. Now, I follow the safe cleaning tips—slight, consistent wiping keeps the surface pristine without any risk of micro-scratches.
Adjust Ambient Lighting for Depth
Eliminate ambient glare that causes blur. Use blackout curtains or low-reflectance paints. In my experience, integrating a matte grey wall behind my screen, instead of a white wall, significantly reduced light bounce, leading to richer blacks and crisper details. This is akin to switching from a glossy photo to a matte print—it cuts down on unwanted reflections that wash out HDR textures.
Calibrate Your System for Peak Contrast
Calibration is key. Use metrics like contrast ratio and uniformity tests to fine-tune brightness and black levels. I employed the contrast testing process—and found that simple adjustments in my projector’s settings dramatically enhanced image depth, making subtle textures pop without muddying the picture.
Avoid Common Pitfalls Like High Gain and Woven Fabrics
Remember, high-gain screens often cause glare and blur the fine details, especially with 16K HDR content. Opt for low gain, micro-texture surfaces instead. Woven or perforated materials tend to introduce moiré patterns and softening, blurring 16K textures. I swapped my perforated screen for a smooth, matte-finished fabric, and the difference was night and day—crystal-clear highlights and shadows that truly popped.
< >While many enthusiasts focus on choosing the right screen size or material, there are subtle nuances that can silently undermine your 16K HDR viewing. One common misconception is the belief that a larger screen automatically delivers better immersion; however, without proper calibration and viewing distance, this can lead to a loss of detail clarity. Moreover, the myth that high gain screens always improve picture brightness fails to consider that excessive gain can cause glare and highlight blurring, especially with high-brightness laser projectors in 2026. Advanced setups require precise balancing, such as selecting a 0.3 gain screen paired with appropriate ambient control—something that many overlook, leading to dull or washed-out HDR highlights. Additionally, choosing woven or perforated materials is often thought to enhance sound transmission, but in reality, these can introduce moiré patterns that blur the micro-textures crucial for 16K clarity. Did you know that even a tiny micro-scratch or dust particle on your screen can significantly affect the intricate textures in ultra-high-resolution content? Regular maintenance, like using safe cleaning techniques from credible sources, is essential. For example, avoiding harsh chemicals like alcohol is vital; instead, opt for microfiber cloths and gentle solutions, as recommended by experts. But here’s a trap to watch out for: many assume that a glossy finish boosts contrast, yet this can cause unwanted reflections and glare, especially in brightly lit rooms—handing your image a blurry, overly contrasted appearance. What makes this tricky is the interplay of material finish, gain, and ambient lighting conditions—each impacting the final image subtly but decisively. For the true cinephile, understanding these nuances means avoiding costly mistakes like overestimating gain benefits or misjudging screen size relative to room dimensions. Remember, a misstep here can turn a cinematic masterpiece into a blurry mess. I recommend consulting detailed guides to understand how micro-texture screens and proper calibration can preserve the sharpness of your 16K HDR highlights. Have you ever fallen into this trap? Let me know in the comments.
Tools for Long-Term Screen Maintenance
Maintaining your projection screen’s peak performance over time demands precision and the right equipment. I personally rely on a set of specialized tools that help me keep the image sharp and free from artifacts caused by dust or micro-scratches. A high-quality microfiber cloth is essential for gentle cleaning without micro-scratches. I prefer these over generic cloths, as their fiber density minimizes abrasion and effectively captures dust. For more stubborn spots, I recommend using a mild, water-based cleaner—never alcohol-based solutions—since they can degrade nano-coatings on modern ALR screens. To ensure the cleanliness remains optimal, I employ a handheld air blower to remove loose particles from the surface without direct contact, which reduces the risk of scratching.
For detailed inspection, a magnifying glass with LED illumination is invaluable. It allows me to spot micro-abrasions or dust particles that could blur 16K textures. These simple yet effective tools extend the lifespan of high-grade screens, ensuring they preserve deep blacks and sharp highlights even with daily use.
Regular Software Calibration Keeps Brightness Consistent
Over the years, I’ve learned that hardware isn’t the only part that needs attention. Software calibration is equally vital. I use tools like the CalMAN calibration suite, which helps evaluate contrast ratios, pixel uniformity, and color accuracy. Regular calibration sessions—quarterly or after significant room changes—ensure that HDR highlights stay crisp and saturated. This process becomes even more critical as screens age or as ambient lighting fluctuates, affecting perceived gain and contrast levels. The key is to keep your settings aligned with the latest standards, avoiding pitfalls like over-brightening or dull blacks, which can mask the micro-details in 16K content.
Why Proper Maintenance Sets the Stage for Future Tech
Looking ahead, I predict that maintenance will become more automated and integrated. With advancements in smart home tech, future projectors and screens might include self-cleaning filters or real-time calibration adjustments. For now, applying proven manual methods remains effective. I recommend setting aside a dedicated routine—such as weekly dust removal, monthly deep cleaning, and regular calibration—to keep your setup reliable. This diligence pays off during those critical moments when ultra-high-definition content demands peak clarity. If you’re unsure how to start, check out these safe cleaning practices to prevent accidental damage.
How do I maintain consistent brightness and contrast over time?
Consistent calibration is crucial. Beyond cleanings, monitor projection alignment, lamp hours, and ambient light. Periodically, I perform contrast and uniformity tests, which help catch subtle shifts early. Using software like CalMAN combined with professional-grade test patterns ensures your screen maintains its micro-texture and gain characteristics. Staying vigilant prevents loss of HDR detail clarity—especially vital in 2026’s high-brightness environments. For an in-depth guide on calibration techniques, consider exploring expert protocols documented in industry publications, such as those from DisplayCAL or ISF-certified calibrators.
Finally, I suggest trying the tip of employing a 0.3 gain screen—such as the recommended screen material. It’s a game-changer for balancing brightness and detail preservation, especially in rooms with some ambient light. With the right tools and a consistent routine, you can enjoy pristine HDR highlights and micro-texture sharpness that stand the test of time.
Throughout my journey with the latest home theater setups, I quickly learned that fine-tuning your screen is more than just picking a size or material; it’s about understanding the subtle nuances that can make or break the micro-details in 16K HDR content. One lightbulb moment for me was realizing that even micro-scratches or dust particles on nano-coated surfaces could cause noticeable blurring, obscuring those intricate textures I was eager to showcase. Regular, gentle cleaning using microfibers and avoiding harsh chemicals proved to be a game-changer, ensuring my screen remained sharp and pristine over time.
Lessons That Changed My Perspective on Screen Optimization
- Small Details Matter: I once thought that larger screens automatically provided immersive clarity, but I discovered that proper calibration and viewing distance are crucial. The difference between a blurry 150-inch display and a crystal-clear one often boils down to micro-calibrations overlooked by many enthusiasts.
- Gain Isn’t Everything: Relying solely on high gain screens for brightness can backfire, especially with 2026’s laser projectors. Opting for a low to moderate gain, like 0.3, helps balance brightness and micro-texture preservation, avoiding glare and highlight softness.
- Material Matters More Than You Think: Woven or perforated fabrics might seem ideal for sound transmission, but my experience showed they introduce moiré patterns that blur 16K textures. Switching to smooth, matte-finish fabrics kept details crisp and vivid.
Tools and Resources That Elevated My Setup
- Microfiber Cloths: Essential for safe, scratch-free cleaning. I trust [these best practices](https://screens.cinegearguide.com/3-safe-2026-dry-cleaning-fixes-for-nano-coated-alr-screens) to keep my screen in top shape.
- Magnifying Inspection: Using LED-lit magnifiers helped me identify micro-abrasions or dust particles that could impact clarity. It’s a small investment for long-term performance.
- Calibration Software: Tools like CalMAN enable precise contrast and uniformity adjustments, ensuring that HDR highlights stay sharp over time. Regular calibration is my secret to consistent image quality.
- Learn from Industry Guides: The resources from [CineGear Guide](https://screens.cinegearguide.com/why-0-3-gain-screens-are-essential-for-2026-triple-laser-usts) helped me understand how the right screen material and gain influence micro-texture retention—crucial for 16K HDR content.
Your Next Step Toward Perfect Clarity
Achieving ultimate clarity in your 16K HDR setup goes beyond initial choices; it requires ongoing attention to detail, calibration, and maintenance. Remember, small adjustments and proper materials can lead to astonishing improvements, turning a good setup into a cinematic masterpiece. Don’t hesitate to experiment with different screen gains and clean your surfaces regularly—your eyes will thank you. Ready to elevate your home theater? Share your experiences or questions below, and let’s refine our setups together!
,