Understanding Projection Screen Size & Gain for Optimal Home Theater Setup
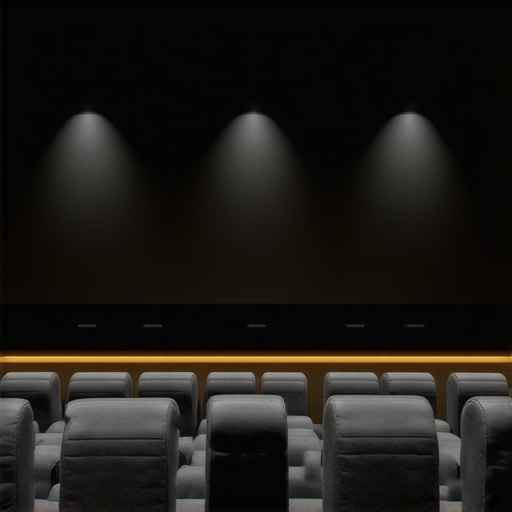
Ever spent hours setting up your home theater only to realize the image just doesn’t look right? Maybe it’s too dim, too washed out, or just plain uncomfortable to watch. I’ve been there—struggling with the frustration of not knowing why my screen didn’t deliver that cinematic feel I craved. The lightbulb moment came when I finally understood the crucial role of projection screen size and gain. Once I cracked that code, everything changed.
Why Getting Your Screen Size and Gain Right Matters
Choosing the right projection screen isn’t just about picking the biggest or the fanciest model. It’s about understanding how the size of your screen interacts with your room’s lighting, projector brightness, and even your seating distance. If your screen is too big or too small, or if the gain isn’t suited to your environment, the picture can become dull, distorted, or overly reflective. It’s like trying to watch a movie through fog—disappointing and frustrating.
From my experience, the secret lies in balancing these elements to create a vibrant, clear image that fills your field of vision without causing eye strain. An improperly chosen screen can ruin even the best projector, which is why I want to walk you through the essentials today. We’ll cover how to pick a screen that matches your space and gain that boosts brightness without washing out colors.
Is High Gain Always Better for Bright Rooms?
Many people think that a high-gain screen is the ultimate fix for bright rooms, but that’s not always true. Early on, I made the mistake of assuming bigger and glossier was better. Turns out, high gain can sometimes cause hot spots—bright patches that ruin the viewing experience. If you’ve faced similar doubts, you’re not alone. Let me guide you through these misconceptions and point you toward the most reliable solutions. Want to see what options are available? Check out this expert guide to ALR screen options.
Understanding the nuances of screen gain and size is the key to transforming your setup from mediocre to movie theater quality. So, are you ready to get it right? Keep reading, and I’ll help you navigate the ins and outs of creating that perfect projection environment—one that’s tailored to your space and needs.
Choose Your Screen Size with Precision
Start by measuring your room. I once set up a 120-inch screen in a small den, only to realize it dominated the space and made seating uncomfortable. Instead, I used a tape measure and a simple calculation: the optimal viewing distance should be about 1.5 to 2.5 times the diagonal size of your screen. Check out this guide on projection screen size to help determine your ideal dimensions.
Calculate Your Viewing Distance
For example, if you have a 100-inch screen, your ideal seating should be between 12.5 to 20.8 feet away. This ensures the image fills your field of vision without causing eye strain. Use a tape measure or a laser distance finder during setup to mark these spots accurately.
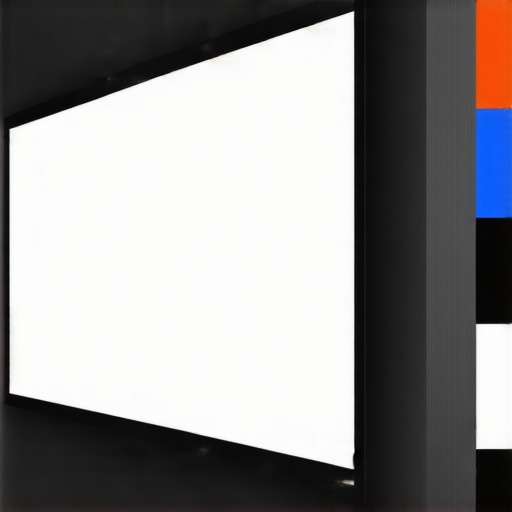
Match Your Gain to Room Brightness
Gain refers to how much light your screen reflects. A higher gain (above 1.0) makes images brighter but can introduce hot spots and glare. I once experimented with a 2.0 gain screen in a bright living room. The picture was dazzling centrally but faded at the edges, ruining the experience. That’s when I learned to balance gain and room lighting. For bright rooms, consider a screen with a gain around 1.1 to 1.3, which enhances brightness without sacrificing uniformity.
Select the Right Gain Material
Use this guide on gain materials to pick the best surface for your environment. For rooms with lots of ambient light, a matte or low-gain screen minimizes reflections. For darker rooms, higher gain screens can boost brightness without issues. Keep in mind, some high-gain surfaces can cause “hot spots”—bright patches that distract from the picture. To avoid this, I opted for a high-quality ALR screen with a carefully engineered gain profile, which I detailed in this expert guide.
Test and Fine-Tune Your Setup
Once you’ve chosen the size and gain, set up your projector and sit at your calculated optimal distance. Adjust the projector’s brightness and contrast settings first, then observe how the image looks across the entire screen. If you notice hot spots or dull areas, consider switching to a different gain material or adjusting the room lighting. I recommend experimenting with different surfaces and lighting conditions, as this hands-on approach gave me the best results.
Use Visual Aids for Better Judgment
During my setup, I used a whiteboard to simulate different gain levels and a tape measure for precise distances. This practical step helped me visualize how each change impacted the picture quality. Remember, small adjustments can make a significant difference. For more tips on material and gain choices, see this ultimate guide.
Many enthusiasts believe that opting for the highest gain screens or the largest sizes will automatically enhance their viewing experience. However, this isn’t always the case. In fact, such assumptions can lead to suboptimal setups and disappointing results. Let’s dig deeper into the nuances that most people overlook when selecting projection screens, especially concerning gain and size.
Why Bigger Isn’t Always Better and Higher Gain Can Backfire
It’s a widespread myth that bigger screens always deliver a more immersive experience. While a larger screen can be impressive, it must be proportionate to your room size and viewing distance. An oversized screen in a small room can cause eye strain and make the image appear less sharp. Conversely, a screen that’s too small may not fully utilize your projector’s capabilities. For expert guidance, check out this projection screen size guide.
Regarding gain, many assume that a higher gain surface (above 1.0) always results in brighter images. But, in practice, high-gain screens often produce hot spots—areas of uneven brightness—that can distract viewers. This is especially problematic in larger screens or when the projector isn’t extremely bright. The key is balancing gain with ambient lighting and room size. For bright rooms, a gain around 1.1 to 1.3 is often ideal, minimizing hot spots while boosting brightness. For more detailed material options, see this gain material guide.
Advanced Mistake: Overlooking the Impact of Room Lighting and Material
A common oversight is neglecting room lighting conditions when choosing gain and material. Some assume that a high-gain screen can compensate for ambient light, but this often leads to washed-out images if the material isn’t suitable. Matte or low-gain surfaces are better for brightly lit environments, as they diffuse light evenly and prevent glare. Conversely, high-gain surfaces excel in controlled lighting conditions, amplifying brightness without sacrificing uniformity. For a thorough comparison, visit this ALR screen materials guide.
Finally, many overlook the importance of properly testing and fine-tuning their setup after installation. Small adjustments in projector positioning, gain material, or room lighting can significantly improve image quality. I recommend experimenting with different surfaces and lighting setups, as this hands-on approach often yields the best results. For detailed tips on fine-tuning, see this ultimate guide.
Have you ever fallen into this trap? Let me know in the comments. Remember, mastering projection setup isn’t just about choosing the biggest or brightest options—it’s about understanding how they interact with your space. With a nuanced approach, you can truly elevate your home theater experience.
Once you’ve invested time and money into selecting the perfect projection screen and setup, the next crucial step is maintaining your equipment to ensure it continues delivering stunning visuals for years to come. Proper maintenance not only preserves image quality but also extends the lifespan of your investment, saving you money and hassle in the long run.
Why Regular Maintenance Is Essential
Projection screens and their associated hardware are subject to dust, dirt, and environmental wear. Over time, these factors can dull the surface, cause uneven reflections, or even damage the material. Regular upkeep helps maintain the screen’s gain properties and prevents issues like hot spots or discoloration. Additionally, keeping your projector’s lens and filters clean ensures optimal brightness and color accuracy, which directly impacts your viewing experience.
Tools I Recommend for Maintenance
In my experience, having the right tools makes all the difference. I always keep a microfiber cleaning cloth specifically designed for delicate surfaces, which I use to gently wipe dust off my screen without scratching it. For stubborn spots or smudges, I prefer a solution made of distilled water and a few drops of isopropyl alcohol—never harsh chemicals that could damage the surface. A soft brush or compressed air can help remove dust from projector vents and filters, preventing overheating and maintaining brightness. For screens with specialized gain materials, I use a dedicated screen cleaning kit recommended by manufacturers to avoid voiding warranties.
Establishing a Routine for Long-Term Results
To keep your setup in top shape, I follow a simple routine: I dust the screen weekly, check for any signs of discoloration or warping monthly, and clean the projector lens after every 50 hours of use. This proactive approach prevents buildup and ensures consistent image quality. It’s also wise to calibrate your projector settings periodically, especially after cleaning or moving the device. Many modern projectors come with calibration tools or software that can help you fine-tune brightness, contrast, and color settings for optimum performance.
Planning for Future Upgrades and Scaling
As technology evolves, so do the options for enhancing your home theater. Keep an eye on advancements like ambient light-rejecting screens or ultra-short throw projectors, which may require different maintenance practices. When upgrading equipment, always refer to the manufacturer’s guidelines and consider investing in protective covers or enclosures to shield your gear from dust and environmental hazards. This foresight helps you avoid unnecessary repairs and keeps your system performing at its best.
How do I maintain my projection setup over time?
Consistent cleaning, calibration, and routine inspections are your best allies for long-term success. Schedule monthly checks and keep spare cleaning supplies handy. Also, stay informed about new maintenance techniques and tools by following expert guides and manufacturer recommendations, like those found in this comprehensive guide. Implementing these practices will ensure your projection system remains vibrant and reliable for years ahead. Lastly, consider setting up a maintenance log—tracking cleaning dates and any adjustments made—to identify patterns and optimize your routine further.
Remember, keeping your projection setup in tip-top shape isn’t just about aesthetics; it’s about preserving the quality and longevity of your entertainment investment. So, take a little time each month to care for your gear — the results will speak for themselves on movie night.
The Hardest Lesson I Learned About Projection Screens
- One of the biggest mistakes I made was assuming bigger was always better. It took me trial and error to realize that a screen too large for my room caused eye strain and a loss of picture clarity.
- I learned that gain isn’t just about brightness — it’s about how evenly your screen reflects light. High gain surfaces can create distracting hot spots if not chosen carefully.
- Room lighting conditions dramatically affect what gain material works best. I used to think a high-gain screen could handle any ambient light, but in reality, matte surfaces often outperform glossy ones in bright rooms.
- Proper testing after setup is crucial. Small adjustments in projector position, gain material, or room lighting can significantly improve your viewing experience — don’t skip this step.
- Understanding these nuances transformed my home theater from a frustrating setup into a cinematic escape that I enjoy every night.
My Essential Toolkit for Projection Mastery
- Projection Screen Materials Guide: A comprehensive resource that helps me choose the right surface and gain for my room conditions. Check out this guide on materials and gain.
- Room Size and Distance Calculator: An invaluable tool that ensures my seating is optimal relative to the screen size. Find your perfect fit with this size and distance guide.
- Calibration Software: Helps me fine-tune my projector settings for the best picture quality, ensuring consistent brightness and color accuracy over time. Look into options compatible with your projector.
- Cleaning and Maintenance Kit: Protects my investment by keeping the screen and projector lens dust-free. Regular care prevents dullness and hot spots.
- Expert Resources: Following industry guides like this ultimate guide keeps me informed about new advancements and best practices.
Your Turn to Try
Improving your home theater is about more than just buying the biggest screen or the brightest projector. It’s about understanding how size and gain interact with your space to create that perfect cinematic experience. With the right knowledge and tools, you can transform your setup and enjoy movies like never before. So, what’s the first adjustment you’re planning to make today? Share your thoughts below!