ALR Screen Options: Best Materials & Gain for Bright Rooms 2024
Ever set up a home theater only to be disappointed every time the sunlight sneaks in and ruins the picture quality? I’ve been there. It’s frustrating to invest in a high-end projector and screen, only to find the picture washed out during the day. That lightbulb moment hit me hard when I realized I was choosing the wrong screen material and gain settings for my bright room. If you’ve ever faced similar struggles, you’re not alone. The good news? There’s a way to beat the glare and enjoy stunning images even in well-lit spaces, and I’m here to help you navigate that.
Why Bright Rooms Demand Different Screen Choices
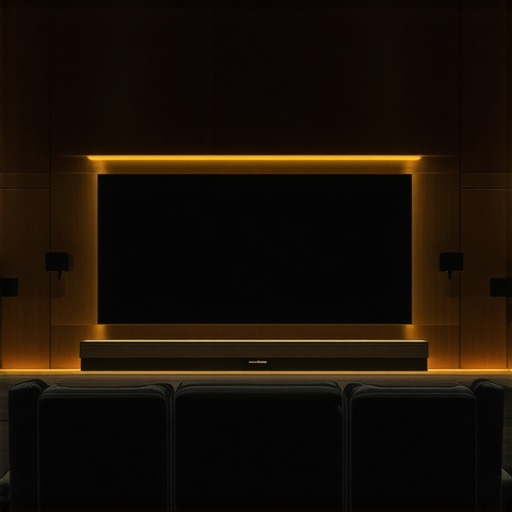
Bright rooms are a challenge for most projection setups. Standard screens often fall flat under ambient light, losing contrast and color vibrancy. That’s where Ambient Light Rejection (ALR) screens come into play. They’re designed specifically to handle light pollution by reflecting projected light directly back to the viewer while absorbing or dispersing ambient light. But not all ALR screens are created equal, and choosing the right material and gain is crucial. I learned this the hard way early in my setup journey, making mistakes like opting for a high-gain screen without considering my room’s lighting conditions. It was a costly lesson, but it led me to discover the best ALR screen options for bright environments. Curious to learn more? I’ll guide you through the most effective materials and gain settings to transform your viewing experience. For a detailed overview, check out my comprehensive guide on ALR screen options and gain tips in 2024.
Is All ALR Screens Worth the Hype?
That was a question I faced myself. I once bought a supposedly “best” ALR screen based purely on hype, only to find it underwhelming in my bright living room. I failed to consider the specific gain and material properties that suit my environment. This mistake made me realize the importance of understanding how different materials reflect light and how gain influences brightness and contrast. To truly optimize your setup, you need to focus on the right combination of material and gain tailored for bright rooms. It’s a bit more nuanced than just buying the most expensive screen on the market. Want to avoid my rookie mistake? Dive into my recommended picks and tips on best ALR screen materials and gain tips.
So, are you ready to make your bright room projections look incredible? Let’s explore what materials and gain levels will give you the best results, and how to select the perfect ALR screen for your space. The key is understanding the science behind these options, which I’ll break down step-by-step in the following sections.
,
Select the Right Material for Your Bright Room
Start by researching top ALR screen materials that excel in ambient light rejection. I recommend checking out this guide to understand the properties of different fabrics. When I chose my first ALR screen, I initially went for a high-gain material thinking more brightness was better. That mistake caused glare and washed-out images. Instead, I learned to pick a material with a gain around 1.2 to 1.4, which balances brightness and contrast. To find the best fit, consider the room’s lighting and view angles. For detailed comparisons, see this resource.
Test Different Gain Levels
Gain controls how much light your screen reflects. A higher gain (above 1.4) boosts brightness but can cause hot spots and reduce viewing angles. A lower gain (around 1.0) provides wider angles and better contrast but might not be bright enough in a lit room. I tested several screens with varying gains in my own setup, starting with one at 1.3, which gave me a good balance. Use a lux meter or simply observe under your typical lighting conditions to see what works best. Remember, a gain of 1.2 to 1.4 is ideal for most bright environments. For more on selecting the right gain, check this guide.
Configure Your Projector Settings
Adjust your projector’s brightness and contrast to complement your screen’s gain. For high-gain screens, lower the projector’s brightness to prevent glare and hot spots. I found that reducing brightness by 20-30% and increasing contrast improved image clarity. Also, tweak the color settings to enhance vibrancy without over-saturating the image. Use test patterns or calibration discs to fine-tune these settings. This step is crucial because even the best screen won’t perform optimally if your projector settings are off. For detailed calibration tips, see this calibration guide.
Position Your Screen and Projector Correctly
Proper placement maximizes ambient light rejection. Mount your screen at eye level and ensure it’s perpendicular to your projector. Keep windows and light sources behind the viewer or cover them with curtains. I experimented with different mounting heights and angles, and found that a slight tilt of the projector helped minimize glare. Distance matters too; a larger screen size can spread out the light, reducing hotspots. Use the size calculator to choose an optimal screen dimension based on your room size and projector throw ratio.
Test and Fine-Tune Your Setup
Once everything is in place, test your setup during different lighting conditions. Walk around, sit at your viewing spot, and observe the picture. Adjust projector settings or reposition your screen if you notice glare or washed-out areas. Small tweaks can dramatically improve image quality. I spent a weekend making incremental adjustments, and the difference was night and day. Keep notes of what works best in your space. For comprehensive testing techniques, consult this detailed guide.
Maintain Your Screen for Long-Term Performance
Regular cleaning with a soft, lint-free cloth keeps your ALR screen free of dust and smudges. Avoid harsh chemicals that can damage the material. Also, monitor the ambient lighting and consider blackout curtains or strategic lighting to reduce glare further. Proper maintenance ensures your investment continues delivering stunning images for years. For more maintenance tips, see this resource.
Many enthusiasts assume that choosing a high-gain ALR screen is always the best solution for bright rooms. However, this is a misconception that can lead to glare issues and uneven brightness. The truth is, most people overlook the importance of balancing gain with room size and projector capabilities. High gains above 1.4 tend to reflect too much light in a small area, creating hotspots and diminishing image quality. To truly optimize your setup, focus on selecting a material with a gain around 1.2 to 1.4, which offers a better compromise between brightness and uniformity. For detailed guidance, check out this comprehensive guide.
Another common trap is overestimating ambient light rejection capabilities without considering the specific viewing environment. Many assume that an ALR screen will automatically solve all glare problems, but in reality, the effectiveness depends heavily on the angle of ambient light sources and room layout. For instance, side windows or overhead lighting can still cause reflections if not properly managed. The critical nuance lies in matching the screen’s optical properties to your actual lighting conditions, not just relying on generic specifications. To avoid this mistake, I recommend testing different materials and gain levels in your own space, and leveraging expert advice from this resource.
Are higher gain screens always better for bright rooms?
Contrary to popular belief, higher gain screens aren’t necessarily the answer. While they do increase perceived brightness, they also narrow the viewing angle and can cause hot spots, which means the picture looks uneven unless you are perfectly aligned with the center. Studies, such as those summarized in a report by the Society of Motion Picture and Television Engineers (SMPTE), suggest that gains above 1.4 often introduce more drawbacks than benefits in typical home theater environments. Instead, focusing on a moderate gain coupled with proper projector calibration yields superior results. For more insights, explore this detailed explanation.
Finally, many forget that regular maintenance and environmental control are crucial. Dust, smudges, and fluctuating ambient lighting can all undermine your setup’s performance. Regular cleaning and strategic lighting adjustments are simple yet effective ways to preserve image quality over time. Have you ever fallen into this trap? Let me know in the comments. Remember, optimizing your projection setup is about understanding the nuances, not just the specs.
Maintaining a high-quality projection setup over time requires the right tools and regular care. I’ve found that investing in specific equipment and adopting a routine maintenance schedule not only extends the lifespan of your components but also ensures consistently stunning picture quality. Whether you’re using an ALR screen in a bright room or fine-tuning projector settings, these tips will help you keep everything running smoothly.
Tools I Recommend for Longevity and Precision
First, a reliable calibration disc like the Murideo Seven Generator or the Spears & Munsil HD Benchmark disc is invaluable. I personally use the Spears & Munsil disc because it provides comprehensive test patterns that help me adjust color, contrast, and sharpness with precision. Regular calibration ensures your projector and screen are working in harmony, especially after changes in room lighting or bulb replacements.
Next, a quality lux meter such as the Dr.Meter LX1330B is essential for measuring ambient light and verifying the effectiveness of your ALR screen. I use mine weekly to check that ambient light levels stay within optimal ranges, preventing glare issues. Monitoring light levels helps me decide when to close curtains or adjust room lighting to maintain image quality.
For cleaning, I rely on a soft microfiber cloth and a gentle screen cleaner designed specifically for projection screens. I avoid harsh chemicals, which can damage delicate fabrics. Regular cleaning keeps dust and fingerprints at bay, preserving brightness and contrast.
How do I maintain my projection system over time?
Implementing a routine inspection schedule is key. Check your projector’s filters monthly—most models have filters that trap dust and require cleaning or replacement. A clogged filter can cause overheating and reduce brightness. Also, periodically inspect your screen for dust or smudges that can distort image quality. Using a microfiber cloth and avoiding abrasive cleaners will keep your ALR surface pristine.
Bulb longevity is another crucial aspect. I keep a spare bulb on hand since projector lamps tend to degrade over time, usually after 2,000-4,000 hours of use. Tracking your usage with a timer or app helps ensure you replace bulbs before brightness drops significantly. When replacing, always handle bulbs with gloves to prevent oils from shortening their lifespan.
Looking ahead, I predict that automation tools will become more prevalent, allowing for remote calibration and system monitoring. Smart sensors could automatically detect ambient light fluctuations and adjust projector settings accordingly, making maintenance even easier.
Don’t underestimate the value of regular calibration with professional tools or software. For example, advanced users sometimes use SpyderX or CalMAN calibration software to fine-tune color accuracy. These tools, paired with calibration discs, offer a level of precision that significantly enhances your viewing experience.
Try this advanced tip
If you haven’t already, consider setting up a dedicated maintenance checklist. Include checking filters, cleaning your screen regularly, calibrating your projector, and measuring ambient light. Incorporate a reminder system—like a calendar alert—to ensure these tasks aren’t overlooked. Consistent upkeep will keep your projection setup performing at its best for years to come.
By equipping yourself with the right tools and establishing a routine, you can enjoy a consistently impressive viewing experience without the need for costly repairs or replacements. Ready to elevate your setup? Start with a calibration disc and a lux meter—these simple investments will pay off in picture quality and system longevity.
Over the years, I’ve learned that the key to stunning projection in bright rooms isn’t just about spending more on a projector — it’s about choosing the right screen material and understanding the nuances of gain and ambient light rejection. My biggest breakthrough came when I realized that a moderate gain ALR screen, combined with careful projector calibration, can outperform high-gain screens that cause hotspots and glare. This insight transformed my setup and could do the same for you. Remember, the science behind these choices is subtle but impactful, and it’s worth investing time in testing different options to find what truly works in your space.
Insider Wisdom That Changed My Approach to Bright Room Projection
- High gain isn’t always better: I used to think more brightness meant better. Turns out, gains above 1.4 tend to reflect too much light, creating hotspots and reducing image uniformity. A gain of 1.2 to 1.4 often hits the sweet spot.
- Ambient light management is crucial: Even with the best ALR screen, side windows or overhead lights can spoil the picture. Strategic placement and controlling ambient light sources are just as important as screen choice.
- Calibration makes a difference: Regularly calibrating my projector with a test disc and lux meter kept my image sharp and vibrant, especially when adjusting for room lighting changes.
- Room layout impacts performance: Positioning the screen at eye level and angling the projector correctly minimizes glare and hotspots, making a noticeable difference in picture quality.
Tools That Keep My Projection Sharp and Reliable
- Spears & Munsil HD Benchmark Disc: My go-to for precise calibration of color, contrast, and sharpness. It’s essential for any serious home theater enthusiast.
- Dr.Meter LX1330B Lux Meter: Monitoring ambient light levels helps me verify that my room stays within ideal ranges, preventing glare issues and ensuring consistent quality.
- Microfiber Cloth and Gentle Screen Cleaner: Regular cleaning keeps dust and fingerprints off my ALR screen, maintaining brightness and contrast over time.
- Projection Screen Size Calculator: Choosing the right size based on room dimensions and throw ratio ensures optimal viewing angles and image impact. Check out this guide for more.
Step Into Your Bright Room Projection Potential
Don’t let ambient light hold back your home theater dreams. With the right ALR screen material, gain setting, and calibration routine, you can enjoy clear, vibrant images even during the day. Remember, the key is in the details — testing different setups, managing room lighting, and maintaining your equipment. Your perfect bright-room projection setup is within reach, and I encourage you to experiment, learn, and enjoy the process.