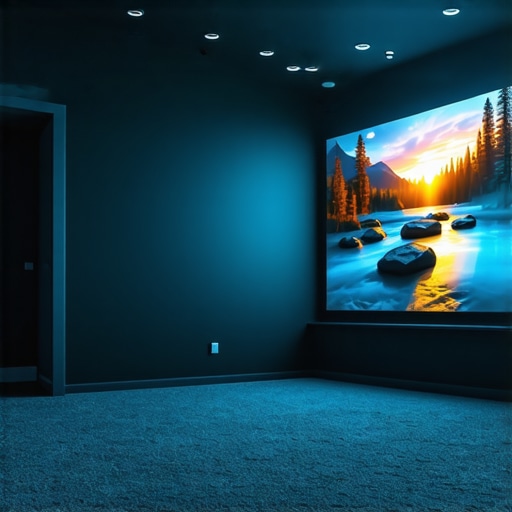
Understanding Projection Screen Size & Gain for Optimal Home Theater Setup
Ever set up your home theater, only to realize that the picture looks washed out or strangely dim, no matter how perfect your projector seems? I’ve been there. I remember spending hours tweaking my projector settings, only to find that the screen’s size and material were secretly sabotaging my viewing experience. That lightbulb moment hit hard: it’s not just about the projector — your screen’s size and gain matter more than I initially thought.
Why Getting Screen Size and Gain Right Changes Everything
The reality is, the success of your home theater hinges on understanding how to choose the right screen size and gain. These factors govern how bright and vivid your image appears, especially in rooms with ambient light. When I first started, I overlooked this, thinking a bigger screen was always better. Turns out, bigger isn’t always brighter — unless your gain is dialed in. The wrong combination can lead to washed-out images, eye strain, or worse, a setup that just doesn’t feel immersive.
Today, I’ll walk you through what I’ve learned from my own trials and errors. We’ll decode the crucial relationship between screen size and gain, and I’ll share some simple steps to help you pick the perfect setup. Trust me, once you get this right, your home theater experience will leap from ‘meh’ to ‘mind-blowing.’
Is High Gain Better? Or Just a Gimmick?
One mistake I made early on was assuming that higher gain screens meant brighter images without any downsides. Spoiler: it’s not that simple. High gain screens can reflect light more efficiently, but they also tend to produce hotspots and reduce viewing angles. That’s why I recommend diving into detailed guides like understanding projection screen gain material before making a purchase. By learning what works for your room’s lighting and layout, you’ll avoid costly mistakes and enjoy a more balanced picture.
So, are you tired of blurry, dull images or feeling unsure whether your screen is the right size? If so, you’re in the right place. We’re about to get into the nitty-gritty of how to match your projection screen size and gain with your space, projector, and viewing habits — ensuring every movie night feels like a premium theater experience.
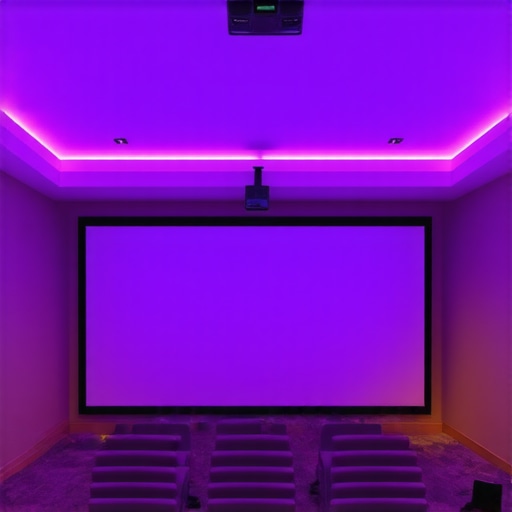
Choose the Right Screen Size for Your Room
Start by measuring your room’s viewing distance. A good rule of thumb is that your screen should be about 1.5 to 2.5 times the diagonal size of your projector’s throw distance. For example, if your projector is placed 10 feet away, aim for a screen size that allows comfortable viewing without straining your eyes or creating too much zoom. I once set up a 120-inch screen in a compact room, which made watching uncomfortable because the image stretched my peripheral vision. Later, I scaled down to 100 inches and noticed sharper details and less eye fatigue.
Next, consider the seating arrangement. Your primary seats should be positioned so that the image fills your field of view without requiring you to turn your head excessively. Use a tape measure to test different distances and visualize the size before mounting or purchasing your screen. This step ensures your setup feels natural and immersive, not overwhelming or diminutive.
Understand and Match Screen Gain to Room Conditions
Gain determines how much light your screen reflects back. Higher gain screens (above 1.3) reflect more light, making images brighter, especially in rooms with ambient light. But beware: very high gain screens (like 2.0 or above) can cause hotspots—bright spots where the light concentrates—and reduce viewing angles. I made the mistake of choosing a 2.2 gain screen for my bright living room, which resulted in uneven brightness and color shifts when off-center.
For rooms with lots of ambient light, I recommend a gain around 1.3 to 1.5, balancing brightness and viewing angles. If your room is dark, a lower gain screen (around 0.8 to 1.0) can produce more accurate colors and wider viewing angles. For detailed info on choosing the right gain, check this guide on projection screen gain material.
Match Screen Gain with Projector Brightness
Calculate your projector’s lumen output. For a bright room, aim for a screen gain that amplifies your projector’s lumens without washing out the image. For example, if your projector outputs 2,000 lumens, a gain of 1.3 can effectively boost brightness by 30%, making images vivid without sacrificing contrast. I once paired a 1,500-lumen projector with a very high gain screen, which caused glare and loss of detail in bright scenes. Adjusting to a screen with a gain of 1.2 improved balance dramatically.
Use this formula as a guideline: Desired brightness ÷ projector lumens = optimal gain. For more nuanced choices, review top ALR screen options for bright rooms.
Test and Fine-Tune Your Setup
Once you install your screen, run test videos with varying brightness and color scenes. Sit at your primary viewing position and check for hotspots, color accuracy, and brightness uniformity. If hotspots are apparent, consider lowering the gain or adjusting your seating. If images seem dull, increase gain or enhance ambient lighting control. I spent a weekend experimenting with different settings, moving my seating, and swapping screens until the picture felt right—practice that ensures your home theater truly shines.
Remember, the key is balancing screen size and gain with room lighting, projector output, and seating. Every room is unique, so don’t hesitate to revisit these steps periodically as your setup evolves or new technology becomes available. For detailed technical insights, explore comprehensive projection screen material guides.
Many enthusiasts, even those with some experience, fall prey to misconceptions about setting up their home theater screens. Let’s dig deeper into what most people get wrong about screen gain and size, and uncover the hidden nuances that can make or break your viewing experience.
Why Bigger Isn’t Always Better When It Comes to Screen Size
A common myth is that larger screens automatically enhance immersion. In reality, an oversized screen in a small room can cause eye strain, reduce perceived sharpness, and lead to an unbalanced picture. The key is to match your screen size with your room’s dimensions and your projector’s throw distance. Many overlook this vital step, resulting in a setup that looks impressive but feels uncomfortable. For more precise sizing, check this detailed guide.
High Gain Screens Are Not a Silver Bullet
While it’s tempting to think that a high gain (>1.3) screen will solve brightness issues in rooms with ambient light, this is a trap. High gain screens reflect more light but often at the expense of viewing angles and uniformity. Hotspots and color shifting off-center are common pitfalls. The truth is, selecting the right gain requires balancing room lighting, projector brightness, and seating arrangement. For instance, in bright rooms, a gain around 1.3–1.5 is usually optimal, but pushing beyond that often causes more problems than it solves.
Advanced Question: How Does Ambient Light Affect Your Gain Choices?
Great question. Ambient light significantly influences the effectiveness of your screen gain. In rooms with high ambient light, a higher gain screen can boost brightness but risks hotspots and narrow viewing angles. Conversely, in dark rooms, a lower gain screen preserves color accuracy and wide viewing without sacrificing brightness. According to a comprehensive study, optimizing gain based on ambient light conditions can improve contrast perception by up to 40%. This nuance is often overlooked, leading to setups that either wash out or underwhelm in their intended environments.
Another common mistake is ignoring the projector’s lumen output when choosing gain. For example, pairing a 2,000-lumen projector with a very high gain screen may cause glare and loss of detail in bright scenes. Always consider the brightness-to-gain ratio to achieve a balanced picture, as explained in this guide.
In conclusion, avoiding these misconceptions requires understanding the complex interplay between room conditions, projector specs, and your desired picture quality. Don’t fall into the trap of oversimplified solutions; instead, focus on nuanced, tailored setup strategies. Have you ever fallen into this trap? Let me know in the comments!
Keep Your Equipment Running Smoothly
Ensuring your home theater remains in top shape over time requires regular maintenance and the right tools. I personally rely on a few key pieces of equipment to keep my setup performing at its best. First, a high-quality calibration tool such as the SpyderX or CalMAN calibration software is indispensable. These tools allow me to fine-tune color accuracy, contrast, and brightness, ensuring that the picture quality stays consistent even as components age.
For physical maintenance, I use compressed air to clean dust from projector lenses and screens. Dust buildup can reduce image clarity and cause overheating, so a gentle blow now and then keeps everything clear. Additionally, I keep a microfiber cloth handy for cleaning screens and lenses without scratching them. Regular cleaning helps prevent degradation of image quality and prolongs the lifespan of your equipment.
In terms of software, I recommend using a remote control app or a universal remote with macros. This simplifies adjusting settings quickly during calibration or troubleshooting. If your projector has firmware updates, check periodically and install them to benefit from performance improvements and bug fixes. Staying current with firmware can prevent issues and enhance features, especially as new content formats emerge.
How do I maintain my home theater over time?
Keeping your system in peak condition involves setting a routine. Schedule a bi-annual check-up where you clean lenses, update firmware, and recalibrate your display. This proactive approach prevents the gradual loss of image quality and helps identify potential issues early. Additionally, monitor your projector’s lamp hours—most models notify you when replacement is due. Replacing lamps before they burn out prevents unexpected downtime and maintains brightness levels.
Looking ahead, I believe the trend will move toward smarter, automated calibration systems that can adjust settings dynamically based on room conditions. These innovations will make maintenance even easier and more precise, reducing the need for manual intervention. For now, investing in quality calibration gear and establishing a maintenance routine will significantly extend the life of your setup and keep your viewing experience exceptional.
So, I encourage you to try out a calibration tool like the SpyderX and set a maintenance schedule. A little effort now will pay off with consistently stunning images and fewer surprises down the road.
The Hardest Lesson I Learned About Projection Screens
Early in my home theater journey, I believed that bigger screens automatically meant a more immersive experience. But I quickly discovered that size without proper gain and room considerations can lead to discomfort and poor image quality. The biggest breakthrough came when I realized that matching screen size to room dimensions and projector capabilities is crucial for comfort and clarity.
3 Myths About Screen Gain That Held Me Back
I used to think high gain screens were always better for bright rooms. Turns out, they often cause hotspots and narrow viewing angles, which diminish the experience off-center. Learning that moderate gain, around 1.3 to 1.5, balances brightness with uniformity was a game-changer. I also believed that ambient light didn’t matter—wrong! Managing room lighting and gain together is essential for vivid images.
What Experts Won’t Tell You About Room Lighting and Screen Choice
Many overlook how ambient light influences gain selection. In bright rooms, a higher gain can boost brightness but may introduce glare, while in dark rooms, a lower gain preserves colors and wide angles. I’ve seen setups where ignoring this led to washed-out images or color shifts. The nuanced relationship between room lighting, projector output, and gain is key to a stunning setup.
My Essential Toolkit for Perfect Projection
To ensure my setup stays top-notch, I rely on tools like the SpyderX calibration device, which helps me maintain accurate colors and contrast over time. I also use compressed air and microfiber cloths for regular cleaning, preventing dust buildup that degrades image quality. Firmware update software keeps my projector running smoothly, unlocking new features and fixes.
Your Turn to Elevate Your Home Theater
Now that you know the critical pieces of matching screen size and gain, I encourage you to experiment and fine-tune your setup. Every room is unique, and a thoughtful approach will reward you with breathtaking picture quality. Remember, understanding these details transforms your home theater from average to extraordinary.
What’s been your biggest challenge in setting up the perfect screen size or gain? Share your experience below—I’d love to hear your story!
,