ALR Options and Screen Material Guide for Bright Room Home Theaters
Ever spent hours tweaking your home theater setup, only to be disappointed by washed-out visuals during the daytime? That was me a few months ago. I had the perfect projector, a cozy room, and a screen that looked fine in dim lighting—until the sun came up. Suddenly, everything looked dull, and I felt like I was back to square one. It was frustrating, and honestly, I almost gave up on achieving that crisp, vibrant picture I’d seen in reviews. But then, I discovered something that changed everything: understanding ALR options and the right screen materials for bright environments.
Why Bright Rooms Demand Special Screen Solutions
Bright rooms are a whole different challenge for home theater enthusiasts. You might think, “Why not just darken the room?” Well, that’s not always practical—especially if you want to enjoy your setup during the day or have windows that can’t be covered. The key lies in choosing the right projection screen material and gain. Gain, in simple terms, is how much light the screen reflects back to your eyes. Higher gain screens reflect more light, making images pop even in well-lit conditions.
But here’s the thing: not all screens with high gain are created equal. Some can produce a shiny, mirror-like reflection, which might give you bright images but can also cause glare and hot spots. That’s why it’s essential to pick a material tailored for bright environments, often called ALR (Ambient Light Rejection) screens. These screens are designed to minimize ambient light’s washout effect, ensuring you get a clear, vibrant picture no matter the lighting situation.
Early on, I made the mistake of choosing a cheap, high-gain screen without considering the material quality or the specific needs of my room. The result? Glare and washed-out images that made me regret my purchase. It wasn’t until I read some expert insights—like those found in this comprehensive guide to ALR screen options—that I realized how critical the right material and gain are for a bright room setup.
Is The Hype Around ALR Screens Justified?
Many skeptics wonder if ALR screens really live up to the hype or if they’re just another marketing gimmick. Well, I was one of those skeptics. My biggest fear was investing in a screen that might look great in theory but would fall short in real-world lighting. To my surprise, when I finally chose a quality ALR screen with the right gain, the difference was night and day. Bright, contrast-rich images appeared almost as if I had darkened the room. It was a revelation.
If you’ve faced similar frustrations, don’t worry. The secret isn’t just about buying the most expensive screen but understanding your room’s lighting conditions and matching them with the right material. For an in-depth look at how to choose the best projection screen material and gain, check out this ultimate guide. It helped me make smarter choices, and I bet it will do the same for you.
Ready to stop fighting glare and washed-out images? Let’s dive into the practical steps of selecting the perfect ALR screen and material for your bright room home theater.
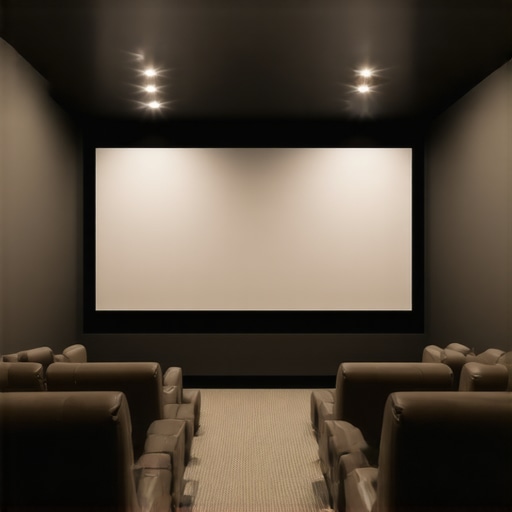
Selecting the Optimal Screen Size and Material
When I first tried to upgrade my home theater for bright environments, I underestimated how crucial screen size and material quality are. I measured my room, checked available space, and then visited a local AV store. There, I was overwhelmed by options, but I focused on two key factors: size and material. To get it right, I followed this size and gain guide. I learned that a larger screen boosts immersion but can reduce brightness if not paired with the correct gain material.
Measure Your Space Accurately
Use a tape measure to determine your available wall or projection surface area. Remember, larger screens require more space, but bigger isn’t always better if your projector can’t handle high brightness levels. I made the mistake of choosing a 120-inch screen without considering my projector’s lumen output, which led to dull images in daylight. To avoid this, check your projector’s lumen rating and compare it to the screen gain you plan to use. This link offers a detailed explanation of how to choose the right size: size selection guide.
Focus on Material and Gain
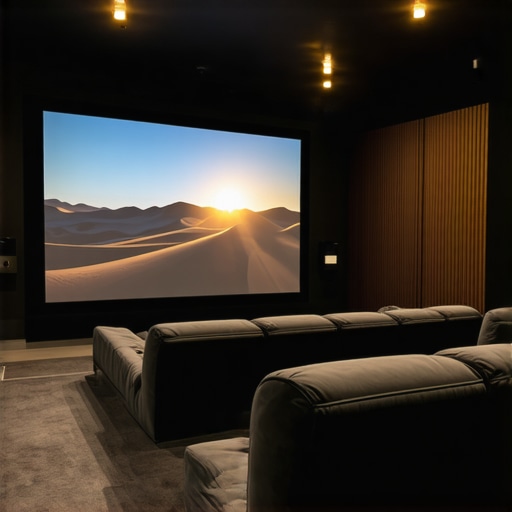
Next, I examined different screen materials. For bright rooms, I prioritized ALR (Ambient Light Rejection) options. These materials are designed to reflect ambient light away from your eyes, enhancing contrast and color vibrancy. I discovered that high-gain materials can produce hot spots or glare if not chosen carefully. I settled on a matte, ALR screen with a gain around 1.8—this balanced brightness and viewing angle. For an in-depth understanding, I reviewed this ALR material guide.
Test Before You Commit
Once I narrowed down options, I visited a local demo room to see different screens in action. I brought my own projector and sat at my usual viewing distance. Seeing the screens under similar lighting conditions helped me decide. I avoided shiny surfaces that caused glare and opted for a matte finish. This step saved me from costly mistakes and gave me confidence in my choice. If you can’t see samples in person, check online reviews and user photos to gauge real-world performance.
Fine-Tuning Your Setup
After installing my chosen screen, I calibrated my projector settings for optimal brightness and contrast. Adjusting the color temperature and gamma made a noticeable difference. Remember, even the best screen won’t perform perfectly if the projector isn’t properly calibrated. Use your projector’s calibration tools or a calibration disc to fine-tune the picture. This ensures you get the most out of your investment and enjoy vibrant, crisp images during daytime viewing.

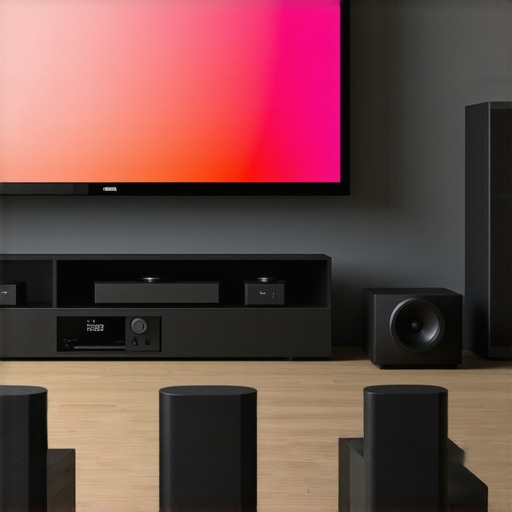
Prompt: Image of a home theater setup showing different projection screens and room lighting conditions, with a focus on size and material differences.
Many home theater enthusiasts fall into the trap of oversimplifying what it takes to get a stunning picture in bright rooms. While choosing a high-gain, ambient light rejecting (ALR) screen is crucial, there are nuanced pitfalls that even seasoned DIYers often overlook. Let’s dig deeper into the most common misconceptions and advanced mistakes that can sabotage your setup.
Why Bigger Isn’t Always Better for Bright Rooms
One prevalent myth is that larger screens automatically mean a more immersive experience. However, in bright environments, a larger screen can actually diminish picture quality if your projector’s lumen output isn’t sufficient. Higher gain screens reflect more light, but they also concentrate brightness in specific viewing angles, which can cause hotspots or glare if not carefully matched with your projector and room layout. It’s essential to balance size and gain; a too-large screen with high gain can result in uneven brightness and compromised contrast. For precise sizing, check out this size and gain guide.
Myth of the One-Size-Fits-All Screen Material
Many assume that any ALR screen material will perform well in bright rooms. The truth is, not all materials are created equal. Some claim to reject ambient light but do so at the expense of color accuracy or contrast. For example, cheap high-gain matte surfaces may produce glare or hot spots, reducing overall image fidelity. The best approach is to select a screen material that balances ambient light rejection with color vibrancy and viewing angles. I recommend reviewing this top ALR materials guide for expert insights.
Advanced Mistake: Ignoring Projector Calibration in Bright Settings
Even the best screen can underperform if your projector isn’t calibrated properly. Many overlook the importance of adjusting brightness, contrast, gamma, and color temperature to match the ambient light levels. In bright rooms, a projector’s default settings are often too dim or too warm, leading to washed-out images. Fine-tuning these parameters ensures your projector delivers maximum contrast and color accuracy, making the most of your high-gain or ALR screen. A comprehensive calibration can significantly elevate daytime viewing quality. For detailed calibration tips, see this calibration guide.
How Do You Know When Your Screen Is Right?
The ultimate test is to view your content under typical lighting conditions, not just in a dark room. If you notice glare, hot spots, or washed-out colors, it’s time to reassess your material choice, gain level, or calibration settings. Remember, the goal is to maximize contrast and color reproduction without sacrificing brightness or causing distracting reflections. Don’t be swayed by marketing hype—evaluate real-world performance and reviews. For comprehensive advice on choosing the perfect setup, explore this ultimate guide.
Keeping your bright room projection system performing at its peak requires more than just initial setup; it demands regular maintenance and the right tools. Over time, dust, humidity, and even the slightest misalignments can degrade image quality, making your investment less satisfying. Fortunately, with specific equipment and disciplined routines, you can ensure your home theater remains vibrant and crisp for years to come.
Why Regular Calibration Matters and How to Achieve It
Regular calibration of your projector and screen setup is essential to maintain optimal brightness, contrast, and color accuracy. I personally rely on the Datacolor SpyderX Pro color calibration tool because of its precise color matching capabilities and user-friendly interface. It allows me to quickly adjust my projector’s settings—such as gamma, white balance, and color temperature—to compensate for any drift over time. This ensures that my bright room setup consistently delivers the vibrant images I crave, regardless of ambient light fluctuations.
Calibration isn’t a one-and-done task. I recommend revisiting these settings every 6 to 12 months, especially if you notice color shifts or duller images. The process involves connecting the calibration device, running the software, and following guided steps to fine-tune your projector’s output. Over time, this routine becomes second nature, and the payoff in picture quality is worth the effort.
Tools I Recommend for Long-Term Maintenance
Beyond calibration devices, I swear by a few other tools that make maintenance easier. A microfiber cloth and compressed air are indispensable for keeping your projector lens and screen free of dust and fingerprints, which can scatter light and diminish brightness. For instance, I use the LensPen Cleaners for delicate cleaning of the lens without scratching the surface. Additionally, a remote control with programmable macros helps quickly switch between calibration modes and viewing settings, saving time and ensuring consistency.
In the future, I see automated calibration systems becoming more prevalent. Imagine a device that periodically scans your room’s lighting conditions and adjusts your projector settings automatically—making maintenance effortless and always ensuring optimal picture quality. Until then, routine manual calibration combined with these tools remains the best approach.
How do I maintain my projection system over time?
Establishing a consistent maintenance routine is key. Schedule a biannual check of your projector’s alignment and cleanliness, and perform calibration as needed. Keep your lenses and screens free of dust with microfiber cloths, and store your equipment in a dry, dust-free environment when not in use. These small steps prevent many issues before they arise and extend the lifespan of your setup.
If you haven’t tried regular calibration with a professional-grade tool like the SpyderX Pro, I highly recommend giving it a go. It’s a game-changer for maintaining vibrant, sharp visuals in bright rooms. Embrace these practices, and your home theater will continue to impress for years to come!
The Hardest Lesson I Learned About Bright Room Projection
One of my biggest realizations was that matching the right screen material with your projector’s lumen output isn’t just a detail—it’s the core of a successful setup. I once chose a massive screen without considering how much light my projector could handle, which led to dull, washed-out images during daytime. Now, I know that size and gain must go hand-in-hand, and that understanding this relationship saved me countless hours and money. For precise sizing advice, check out this size and gain guide.

Reading through this guide really resonated with my own experience trying to optimize my bright room home theater. I initially thought bigger screens would always be better for immersion, but I quickly noticed hotspots and glare whenever I went above 100 inches, especially with my high-gain screen. It’s pretty clear that balancing size, gain, and projector lumen output is crucial—and I appreciated the detailed links to sizing guides. One thing I’ve found helpful is testing different screen materials in my own setup before committing—something I saw mentioned here. Have others found that online reviews or user photos have been reliable when deciding on a screen material, especially given how much variance there can be in real-world performance? It seems like patience and proper testing can save a lot of frustration in the long run.
This post really hit home for me. I used to think that bigger always meant better, but I learned that in bright rooms, size and gain need to be carefully balanced. I had a 110-inch high-gain screen, and although the visuals were bright, I kept running into hot spots and glare, especially when sitting at sharper angles. Since then, I’ve realized that a moderate size with a matte, high-quality ALR screen provides a much more consistent experience. Calibration plays such a vital role—I’ve been using a basic colorimeter to regularly update my settings and can see the difference it makes. I’m curious, how do you all approach calibration in terms of frequency? Do you find that optical meters like the SpyderX are worth the investment for everyday home theater use, or are there simpler tools that work just as well? I’d love to hear other tips for maintaining consistent picture quality over time.
This article really resonated with my own experience trying to optimize a bright room home theater. The emphasis on matching screen material and gain with projector capacity is so crucial; I once made the mistake of going for a massive high-gain screen without considering my projector’s lumen output. The result was dull images, especially during daylight hours. Since then, I’ve learned to be more mindful of size and gain balance, and calibrating my projector regularly has made a noticeable difference in image quality. I’m curious how others here approach maintaining calibration over time. Do you find that investing in a professional-grade tool like the SpyderX is justified, or can more affordable options achieve similar results for most home setups? Also, has anyone tried automatic calibration systems that could simplify ongoing maintenance? It seems like routine calibration is key to consistent performance, but I’d love to hear some practical tips from experienced DIY enthusiasts.
I’ve found that the key to a great bright room setup really is choosing the right combination of screen gain and material. When I first attempted to upgrade, I went for a high-gain screen without considering how my projector’s lumen output aligned with the gain level, which resulted in that dreaded glare and some hot spots. After reading about ALR screens here, I decided to experiment with different materials and gain levels, and the difference was clear. Interestingly, I settled on a matte, 1.8 gain screen, which balanced brightness and viewing angles well in my environment. Since then, I’ve been more diligent about calibrating my projector regularly using my SpyderX device, which has helped maintain image consistency through varying ambient conditions. For those who hesitate about calibration tools, do you think even simple, less expensive colorimeters can be effective enough for regular maintenance, or is a high-end device worth the investment for consistent quality?