Understanding Projection Screen Gain & Material for Optimal Home Theater Setup
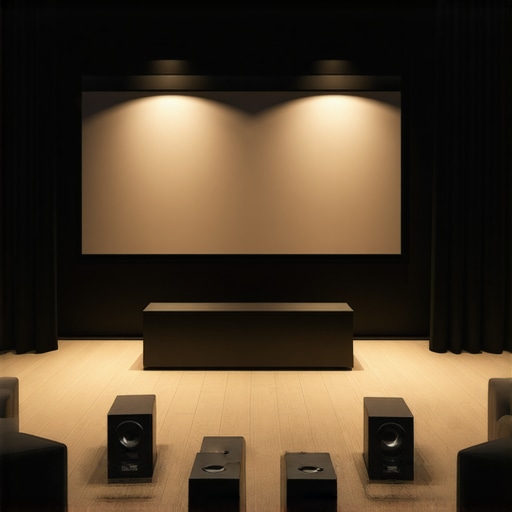
I remember the exact moment when I realized my home theater wasn’t living up to its true potential. I had invested in a decent projector, a comfy sofa, and a surround sound system. Yet, something just felt off. The image was often too dim, and colors lacked vibrancy, especially during those bright daytime scenes. Frustration crept in as I kept adjusting the lights and tweaking the settings, but nothing seemed to fix the core issue. That was until I started diving into the world of projection screen gain and materials, and suddenly, everything clicked.
Why Getting Your Screen Right Makes or Breaks Your Home Theater Experience
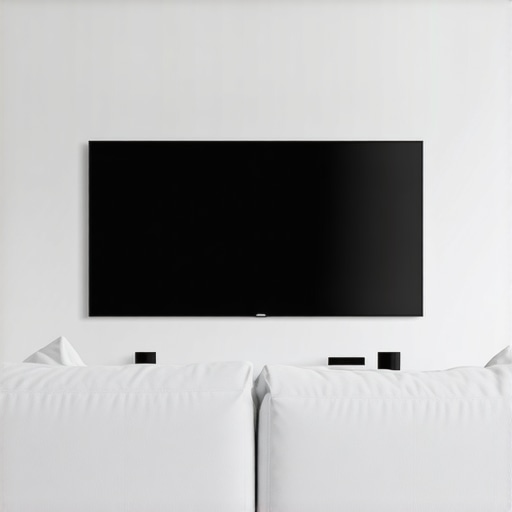
The truth is, many home theater enthusiasts overlook the importance of the screen material and its gain, assuming that a projector’s brightness or the room’s lighting conditions are the only factors worth considering. But the reality is, your choice of projection screen can dramatically influence your viewing quality. I learned this the hard way, by trying to make do with a generic white screen that came with my projector, only to find out that it was a major bottleneck in achieving crisp, vibrant images, especially in a room with ambient light.
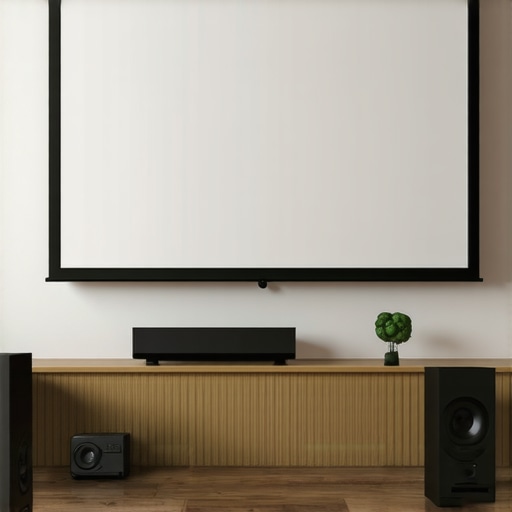
When I finally upgraded to an ALR (Ambient Light Rejecting) screen optimized for high gain, everything changed. Colors popped, contrast improved, and daytime viewing became feasible without dimming the lights. If you’re currently battling dull images or a washed-out picture, I promise you; understanding the role of screen gain and material is a game changer.
For those of you who are skeptical or worried about investing in the wrong equipment, I get it. I made the mistake early on of choosing a screen based solely on its price, without considering whether its gain matched my room’s lighting conditions. It was a costly lesson, but I want to help you avoid the same pitfalls. Trust me, selecting the right screen material isn’t just a small detail—it’s the foundation of a truly immersive experience.
To guide you, I’ll share practical insights on how to choose the best projection screen gain and material for your specific setup, so you can sit back, relax, and enjoy every frame with clarity and color accuracy.
But first, let’s address the biggest concern many have: “Is investing in high-gain screens actually worth it?”
Is Screen Gain Just a Fad or Really Worth the Hype?
Many early in the game worry that higher gain screens might produce overly shiny or uneven images, making them seem like a gimmick. I had the same fear. My mistake was believing that a high-gain screen would make the image unnaturally bright or cause glare issues. Actually, with the right materials and proper placement, high gain can enhance brightness and contrast without those drawbacks—if you know what to look for. A good rule of thumb is to select a screen gain tailored to your room’s ambient light levels. For more about this, check out [this comprehensive guide on gain and size](https://screens.cinegearguide.com/alr-screen-options-expert-guide-to-material-gain-size-in-2024).
In my case, ignoring this crucial aspect limited my viewing experience severely. Now, I won’t make that mistake again. Once I understood which materials and gain levels work best for my environment, I transformed my setup into a vivid, daytime-friendly home theater.
Prepare yourself, because in the upcoming sections, we’ll explore the types of materials, gain levels, and room considerations that will help you pick the perfect projection screen and truly elevate your movie nights.
Measure Your Room for the Perfect Screen Size
Before purchasing a projection screen, you must first determine the ideal size for your space. Use the guidelines from this comprehensive sizing guide to calculate the optimal screen dimensions based on your room’s distance and viewing angles. I once overlooked this step, resulting in a screen that was either too big, causing image distortion, or too small, losing immersive impact. By measuring precisely, you’ll avoid these pitfalls and ensure your display fits perfectly.
Calculate the Ideal Gain Level for Bright Rooms
Next, identify your room’s ambient light level. Bright rooms benefit from high-gain screens, which reflect more light and boost contrast. For rooms with lots of windows or lighting, target a gain of 1.8 to 2.2, as suggested in this expert guide. I once tried a standard 1.0 gain screen in my sunny living room, leading to washed-out images. Upgrading to a 2.0 gain screen made daytime viewing crisp and vibrant, proving the importance of matching gain to room conditions.
Select the Right Material for Your Viewing Environment
Choosing the appropriate material is crucial. For bright environments, opt for a specialized ALR (Ambient Light Rejecting) material designed to combat ambient light and enhance contrast. Review this selection of top ALR options that offer excellent light rejection. I experimented with different materials—starting with a matte white, then switching to a high-gain ALR—and the difference was night and day, especially during daytime movies. Use similar testing to find the best material for your setup.
Analyze Your Room’s Lighting and Positioning
Position your seating and projector thoughtfully. Even with a high-gain screen, bad placement can cause glare or hot spots. Think of your screen as a mirror; it reflects light similarly. Place furniture to avoid direct light hitting the screen and angle the projector to distribute light evenly. I once had a perfect screen but placed my furniture too close, causing reflections that hampered image clarity. Adjusting seating distance, guided by this setup guide, made a noticeable difference in my viewing comfort and picture quality.
Fine-Tune Your Projector Settings to Match Your Screen
Matching your projector’s output with your screen’s gain and material ensures maximum quality. Increase contrast and brightness settings to complement a high-gain screen, but be careful not to overdo it—aim for natural, vibrant images. During my first attempt, I kept the projector brightness high, which caused glare. When I recalibrated, considering my screen’s properties from this calibration guide, the picture became balanced and lifelike. Regularly adjust these settings as your room evolves to maintain optimal viewing conditions.
Many home theater enthusiasts believe that choosing a projection screen is as simple as picking a size, selecting a gain level, and settling for a material that looks good locally. However, this oversimplification often leads to subpar viewing experiences. As an expert, I’ve seen countless misconceptions that can actually hinder your setup’s performance. Let’s dig deeper into what most people get wrong about screen materials, gain, and size, and why understanding these nuances can elevate your home theater.
One common myth is that a high-gain screen will automatically make your image brighter and more vibrant. In reality, higher gain often introduces hotspots and uneven brightness if not paired correctly with room conditions or projector placement. Many assume that more gain is always better, but experts like those in the industry warn that overshooting the gain compromises image uniformity. For example, selecting a gain of 2.0 in a room with ambient light might seem beneficial, but without proper calibration and positioning, it can cause glare or hot spots. A thorough understanding can be found in this expert guide to gain and size.
Another pitfall involves the assumption that all screen materials are created equal. Matte white surfaces are often recommended for their versatility, yet many overlook that the underlying texture and reflectivity level significantly influence picture quality in different lighting conditions. Overestimating the effectiveness of a cheap or generic material leads to washed-out, dull images, especially in rooms with ambient light. Advanced materials like specialized ALR (Ambient Light Rejecting) screens can reject excess light and improve contrast, but only if selected with the room’s brightness profile in mind. Explore top ALR options tailored for bright rooms.
Misjudging the ideal screen size is also a frequent mistake. Many settle for a size based solely on aesthetics or room dimensions, forgetting the importance of viewing angles and resolution scaling. A screen that’s too large can cause pixelation or eye fatigue, while too small diminishes immersion. The key is to tailor size to both room dimensions and projector capabilities, considering factors like throw ratio and seating distance. For detailed calculations, this size guide is invaluable.
Having a grasp on these advanced aspects isn’t just for perfectionists. It’s about achieving a balanced system where every element complements the others. My own experience taught me that a well-matched gain, material, and size can make a dramatic difference—transforming a mediocre setup into an immersive experience. It’s all about the finer details that aren’t obvious at first glance.
Here’s an important question for advanced readers:
How does ambient light in a room influence the choice of screen gain and material, and what are the best practices to optimize contrast and brightness based on room lighting?
In short, ambient light can wash out your picture if your screen isn’t suited properly. Higher gain screens and light-rejecting materials can help improve contrast, but they must be used judiciously to avoid glare. Proper room lighting control, combined with selecting the right material according to your ambient conditions—as discussed in this detailed guide—is essential for a balanced, crisp image.
Remember, the devil is in the details. By understanding these hidden nuances, you can avoid common traps and truly optimize your home theater experience. Have you ever fallen into this trap? Let me know in the comments, and let’s discuss how you can start refining your setup today.Maintaining a high-performance home theater screen requires more than just initial setup; it involves using the right tools and adopting consistent maintenance routines to ensure long-term visual excellence. One of the most effective tools I rely on is a high-quality microfiber cloth paired with distilled water or a specialized screen cleaning solution. Unlike household cleaners, these prevent streaks and residue, preserving the material’s reflective properties and contrast. I personally use a product like the Zeiss Pre-Moistened Screen Cleaning Wipes, which are gentle yet effective. Regular cleaning—at least once a month—removes dust, fingerprints, and oils that can dull the image over time. Remember, avoiding abrasive materials or harsh chemicals is crucial to prevent damaging delicate ALR or matte surfaces.
For routine calibration, a light meter is indispensable. I recommend the Sekonic C-700 or similar models because they provide precise readings of ambient light and screen reflectivity. Use it to verify that your projected brightness aligns with your screen gain and room lighting conditions, ensuring consistent contrast and color fidelity. Regular calibration with software tools like CalMAN or DisplayCal can also fine-tune projector settings, especially as bulbs age and room lighting varies.
Long-term results depend on controlling environmental factors. Installing blackout curtains or shades minimizes ambient light fluctuations, maintaining consistent contrast ratios. Visualizing how your room’s lighting affects your screen can be challenging, but I find that a simple light meter helps me customize my room environment effectively. In noisy or dusty environments, occasionally checking for airflow or dust buildup around the projector and vents can prevent heat and dust from degrading image quality.
Looking ahead, automation is likely to revolutionize home theater maintenance. With smart sensors integrated into screens or projectors, future setups could automatically detect dust accumulation or brightness drift and prompt maintenance actions or even initiate cleaning cycles. Companies are exploring IoT-enabled devices that monitor environmental conditions, offering peace of mind and optimized performance over time.
For anyone serious about preserving their investment in a premium projection setup, I highly recommend investing in a quality microfiber cleaning cloth and a light meter for ongoing calibration. These tools empower you to maintain pristine image quality and extend the lifespan of your equipment.
How do I maintain my projection screen over time?
Developing a regular cleaning schedule with the right tools, like microfiber cloths and specialized cleaning solutions, prevents build-up and keeps the surface reflective and vibrant. Periodic calibration using a light meter and software ensures consistent image quality despite changes in room lighting or projector bulb brightness. Also, controlling ambient light fluctuations with curtains or shades maintains contrast and prevents deterioration of picture quality. In the future, automation driven by smart sensors could make ongoing maintenance even more effortless, automatically alerting you to clean your screen or calibrate your projector. Try setting a monthly cleaning routine with a microfiber cloth and a light meter—small steps that make a significant difference in your home theater experience.
What I Wish I Knew When Choosing My Projection Screen
One of the most eye-opening lessons I learned was that not all screens are created equal, and my instinct to pick the biggest or cheapest option almost sabotaged my viewing experience. I realized the hard way that understanding the nuances of screen gain and material could make or break the vividness and contrast I craved. This insight transformed my approach, and I wish I had known earlier about the importance of matching gain levels with room lighting conditions to avoid glare and hotspots.
Another unexpected revelation was that even in bright rooms, high-gain screens aren’t a one-size-fits-all solution. Overestimating gain sometimes led to overexposure and uneven brightness, detracting from picture quality. After experimenting with different materials and gain options, I found that a tailored approach—using [expert guides](https://screens.cinegearguide.com/alr-screen-options-expert-guide-to-material-gain-size-in-2024)—can help you select the ideal setup for your unique space.
Finally, I discovered that screen size matters just as much as gain and material. A too-large screen can cause pixelation, while a too-small one may not deliver the immersive experience you desire. Carefully measuring your room using guides like [this sizing tutorial](https://screens.cinegearguide.com/ultimate-guide-to-projection-screen-size-gain-for-perfect-setup) is crucial, so your investment complements your room’s dimensions and your projector’s capabilities.
Gear Up for Long-Term Viewing Clarity
Maintaining your projection setup over time is about more than initial choices. I found that regular cleaning with gentle microfiber cloths—paired with specific screens cleaning solutions—preserves surface reflectivity, keeping images sharp and vibrant. Using a quality light meter, like the Sekonic C-700, helped me calibrate contrast and brightness consistently, ensuring my setup stayed optimal as equipment aged or ambient light conditions shifted. A routine of dust control, environmental management, and calibration has become my secret weapon for sustained picture perfection.
Looking ahead, I’m excited about emerging smart technologies—imagine sensors that automatically detect dust buildup or calibration drift to maintain perfect visuals effortlessly. While these innovations are on the horizon, mastering simple yet effective tips now, such as regular cleaning and calibration, allows you to enjoy enduring high-quality viewing today.
Leave No Detail Unoptimized
I’ve learned that every element, from screen gain to material choice, impacts your theater’s magic. The real breakthrough was realizing that a well-matched system—tailored to my room’s lighting, size, and my projector’s specs—delivers the immersive experience I always wanted. Don’t fall into the trap of ignoring these details; instead, embrace this nuanced knowledge to unlock your home theater’s full potential.
What Surprised Me About Screen Materials and Gain
- I underestimated the effect of ambient light and how a high-gain screen can combat glare without sacrificing image quality, if selected wisely. The key is matching gain to your environment, and [this expert guide](https://screens.cinegearguide.com/alr-screen-options-expert-guide-to-material-gain-size-in-2024) offers invaluable insights.
- Choosing the wrong material can diminish color vibrancy and contrast, especially in rooms with unpredictable lighting. Upgrading to specialized ALR screens transformed my daytime viewing—check out [top ALR options](https://screens.cinegearguide.com/best-alr-screen-gain-tips-for-bright-rooms-in-2024) for ideas.
- Screen size isn’t just about aesthetic preference. Accurate measurements, guided by [this sizing tutorial](https://screens.cinegearguide.com/ultimate-guide-to-projection-screen-size-gain-for-perfect-setup), ensure your screen enhances immersion without causing eye strain or resolution issues.
Recommended Gear to Keep Your Setup Sharp
- Microfiber cleaning cloths like those from Zeiss ensure delicate surfaces stay dust-free without scratches.
- A light meter such as Sekonic C-700 empowers you to maintain consistent contrast and brightness—everything else depends on proper calibration.
- Room environment controls—like blackout curtains and ambient lighting strategies—are crucial for preserving image quality, especially in bright spaces.
- Calibration software like CalMAN or DisplayCal helps fine-tune your projector settings to match your screen and room specifics—think of it as maintaining the harmony of your visual orchestra.
Your Next Step Toward Cinema-Quality Viewing
Every home theater enthusiast deserves vivid, lifelike images that make every movie night special. Embrace the detailed understanding of screen gain, material, size, and maintenance—these are your tools to elevate your experience beyond the basics. With patience and precision, you can craft a setup that honors your space and your passion for quality visuals.
What was the most surprising thing you’ve learned about projection screens? Share your story below, and let’s help each other create the ultimate home theater experience!
**Would you consider adjusting your screen setup based on what you’ve learned here? Let me know below!**