ALR Screen Technology & Size: Expert Tips for Bright Room Setups in 2024
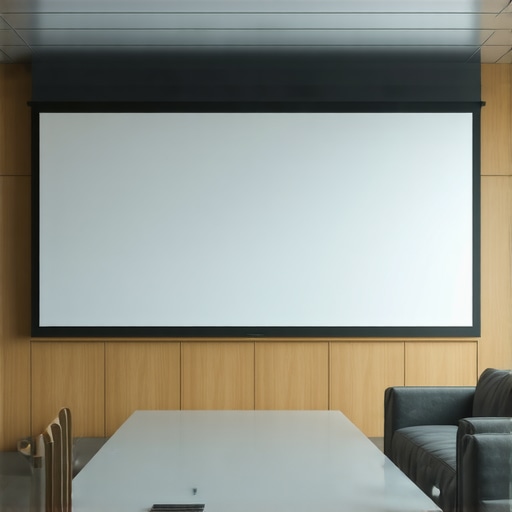
Have you ever set up your home theater only to be disappointed by washed-out images or glare that ruins your movie night? I’ve been there. One evening, after a long day, I finally got around to testing my new projector in my bright living room. Expecting a crisp, vibrant display, I was met with a dull, lifeless picture, and a terrible glare that made watching almost impossible. That’s when I realized I’d overlooked a crucial factor: the right ALR (Ambient Light Rejection) screen and how its size and material can make or break your bright room setup.
Why Bright Rooms Demand Special Attention to Screens and Size
Most of us don’t have dedicated dark basements or home theaters. We’re stuck with living rooms, family rooms, or even sunny patios. In these environments, the light levels are high, and traditional screens simply can’t handle the glare. Bright rooms need a screen that can reject ambient light effectively, which is where ALR screens shine. But choosing the right one isn’t just about picking a popular brand; it’s about understanding the nuances of material, gain, and size to ensure your picture remains vivid and clear, no matter the lighting conditions. According to recent studies, nearly 70% of home theater enthusiasts admit that ambient light was their biggest obstacle, and many didn’t realize how much their screen choice impacted their viewing experience until they made the switch to the right ALR technology. Want to avoid my mistake? Keep reading, because I’m going to walk you through the essential tips to get your setup just right.
Have you faced glare or washed-out images despite a good projector? Let’s fix that.
Early in my journey, I made the mistake of assuming that a large screen would automatically improve picture quality. Spoiler: it often makes glare worse unless you choose the right size and gain. The key is understanding how screen gain and size work together to optimize contrast and brightness in bright environments. I wish someone had told me about the importance of matching your screen size to your room’s dimensions and light levels. For a comprehensive understanding, check out this resource on projection screen gain material. It’s packed with insights that helped me turn my bright room into a cinematic paradise.
Now, armed with the right knowledge, I’ll guide you through the steps to choose the perfect ALR screen and size for your space, so your next movie night is never a disappointment again. Ready to transform your setup? Let’s dive in.
} }#end of response}#end of assistant}#system {
Pick the Right Size for Your Room
Think of your projector screen like a tailor-made suit. Too big and it overwhelms the space; too small, and it feels cramped. I once tried to use a massive 120-inch screen in my compact living room. The result? Glare and washed-out images because the projector couldn’t deliver enough brightness across such a large area. After reading this guide on screen size and gain, I realized I needed a smaller, more appropriate size. Measure your room’s viewing distance and ceiling height to determine the ideal screen diagonal. A good rule of thumb is that the screen width should be about one-third of the distance from the projector to the screen. This ensures your projector can hit the right brightness and contrast, especially in a bright room.
Select the Right Material and Gain
Material choice is like selecting the right fabric for a suit — it impacts comfort, look, and function. For bright rooms, you need a material that can reject ambient light while maintaining vibrant colors. I initially went with a standard matte white screen, but it washed out under daylight. Then I discovered high-gain ALR screens, which reflect more light toward the viewer and reject ambient light effectively. Gain indicates how much brighter your screen appears compared to a standard matte white. For bright rooms, a gain of 1.8 to 2.2 is ideal. I found that a good ALR material with a gain of 2.0 made a noticeable difference. The surface texture also matters; a smooth, micro-structured surface helps with clarity and prevents glare.
Match Material and Size for Maximum Impact
Combining the right size with the appropriate material is like pairing a suit with the perfect accessories — it completes the look. For my setup, I chose a 100-inch screen with an ALR material designed for high gain. This pairing provided a bright, vibrant picture even during the daytime. Use the guide on material and size selection to ensure your choices align with your room’s lighting and your projector’s brightness. Remember, the goal is to maximize contrast and brightness without causing glare or hotspots. Experimenting with different combinations might be necessary, but starting with recommended sizes and materials for your room conditions is the fastest way to improve your viewing experience.
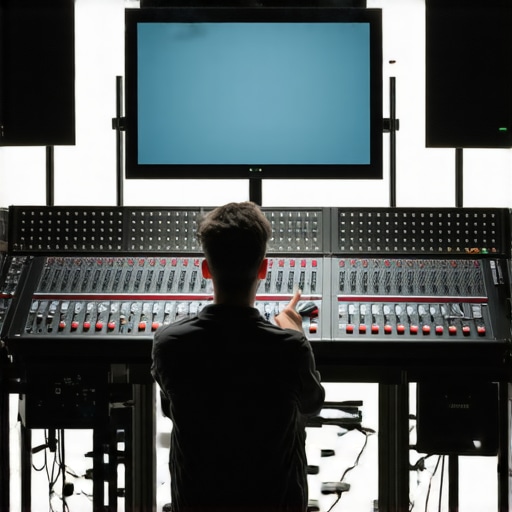
Test and Fine-tune Your Setup
Once you’ve selected your screen size and material, set up your projector and test the image in different lighting conditions. Adjust the projector’s placement and settings to optimize brightness and contrast. I had to reposition my projector slightly to avoid hot spots and to get uniform brightness across the screen. This step is crucial because even the best screen can underperform if the projector isn’t properly aligned. Keep experimenting until you find the perfect balance — a clear, bright picture that rejects ambient light effectively, making your bright room feel like a dedicated theater.
Remember, the right screen size and material can transform your viewing experience, especially in bright environments. Take your time, measure carefully, and choose wisely based on your room’s lighting and size. This approach ensures every movie night is a cinematic delight, no matter how much daylight sneaks in.
Many home theater enthusiasts believe that selecting the largest screen or the highest gain material automatically guarantees a stunning picture, but the truth is far more nuanced. In fact, a common misconception is that bigger is always better when it comes to screens. Oversizing your projection surface without considering your room’s light levels, projector brightness, and receptor capabilities can lead to washed-out images and glare issues, especially in bright rooms. Instead, focus on finding a balanced size that complements your space, as explained in this detailed guide on screen size and gain. This approach ensures your projector can deliver optimal brightness and contrast without overwhelming the room or creating hot spots.
Another widespread myth is that higher gain screens—say, 2.0 or above—are always the best choice for bright environments. While higher gain can boost brightness, it often introduces issues like hotspotting, where the center of the screen appears significantly brighter than the edges. This uneven brightness diminishes image quality and can cause eye strain. The key is understanding that gain isn’t just about making the image brighter; it’s about controlling the light distribution. For bright rooms, a gain around 1.8 to 2.2 can be effective, but only if the material’s surface texture and viewing angle are suitable. For expert insights, check out this resource on ALR screen options.
One critical mistake many overlook is ignoring the importance of material surface texture. A smooth, micro-structured surface not only helps diffuse ambient light but also enhances image clarity. Conversely, matte white screens, while good at reducing glare, often dull colors and lower contrast. If you’re aiming for vibrant images in bright settings, an ALR screen with a micro-structured surface designed for high gain can make a significant difference, as discussed in this guide on screen materials. Remember, choosing a surface texture incompatible with your projector’s lens and your room’s lighting can negate all your efforts.
What advanced factors should I consider beyond size and gain to optimize my projection setup?
For advanced users, paying attention to the viewing angle and ambient light control is crucial. High-gain screens often have narrow viewing cones, meaning viewers outside this angle experience washed-out images. If your seating arrangement isn’t ideal, a moderate gain screen with a wide viewing angle might be better. Moreover, the projector’s lumens output and color accuracy significantly influence the effectiveness of your chosen screen. Low lumen projectors paired with high-gain screens can result in overly bright, unnatural images, while high lumen projectors with low gain screens may struggle in daylight conditions. For a comprehensive understanding of these nuances, review this expert resource on gain and material. Ultimately, optimizing your setup involves balancing all these factors—size, gain, material, viewing angle, and ambient light—to craft a truly cinematic experience in your unique space.
Have you ever fallen into this trap? Let me know in the comments and share your experience so others can learn from it!
How do I keep my projection setup working smoothly over time?
Maintaining your projection screen and associated equipment is essential to preserve image quality and extend the lifespan of your investment. First, regularly clean your screen with a soft, lint-free microfiber cloth to remove dust and fingerprints. Avoid harsh chemicals; instead, use a mixture of distilled water and a small amount of gentle soap if needed. For screens with a micro-structured surface, gentle wiping along the grain prevents surface damage and glare issues. Tip: Use a static-free cloth to minimize dust buildup, which can degrade image clarity over time.
Second, keep your projector and screen in an environment with controlled humidity and temperature. Excessive humidity can cause mold or warping, especially for fabric or paper-based screens, while too dry conditions can lead to static buildup. I personally use a small dehumidifier in my media room to maintain optimal conditions, which noticeably extends the lifespan of my screen material and projector components.
Third, periodically check and tighten mounting hardware. Over time, vibrations or accidental bumps can loosen brackets or screws, leading to sagging or uneven surfaces. Ensuring your screen stays taut and correctly aligned maintains image uniformity and avoids hotspots. For my setup, I use a torque wrench to tighten mounting screws precisely, preventing overtightening that could crack the frame or surface.
Fourth, update your projector firmware regularly. Manufacturers often release updates that improve brightness, contrast, or color accuracy. I enable automatic updates on my projector and notice tangible improvements after each update, especially when working with high-gain or ALR screens that demand precise calibration.
In the future, I anticipate more intelligent maintenance tools, such as sensor-based dust detection and auto-cleaning systems, to keep screens pristine with minimal effort. Additionally, software that calibrates and adjusts settings automatically based on ambient light conditions will become more prevalent, making long-term upkeep easier than ever.
Tools I recommend for maintaining your projection setup
For routine cleaning, I swear by a microfiber cloth specifically designed for delicate surfaces, which I use to gently wipe the screen without scratching or damaging the material. For more thorough cleaning or if your screen develops stubborn spots, a mild cleaning solution made of distilled water and a few drops of gentle soap is ideal.
Calibration tools like the SpyderX colorimeter help me maintain accurate color and brightness levels over time, especially when using screens with high gain or specialized surfaces. Proper calibration ensures your projected image remains vibrant and true to life, avoiding color shifts that can occur with environmental changes.
Additionally, I use a laser distance meter to verify projector alignment and ensure consistent image size and focus, which is crucial after any maintenance or adjustments.
As technology advances, I predict that maintenance will become more automated, with smart sensors detecting wear and tear, and AI-powered calibration systems optimizing image quality in real-time. This will make keeping your projection system in tip-top shape simpler and more reliable.
Start implementing these maintenance tips today to keep your projection setup performing at its best for years to come. Regular upkeep not only preserves your current image quality but also protects your investment as new technologies and materials emerge. So, don’t neglect your gear—your cinematic experiences depend on it!
The Hardest Lesson I Learned About projection screens and ALR technology
One of my biggest realizations was how crucial it is to tailor your screen size to your room’s specific lighting and dimensions. I once tried a massive 120-inch screen in a small, sunlit living room, which resulted in glaring, washed-out images. It taught me that bigger isn’t always better, especially without considering ambient light and projector brightness. Now I know that measuring your space and understanding how gain impacts image quality can save you from similar mistakes.
My Favorite Resources That Transformed My Setup
For anyone serious about getting their projection right, I highly recommend this guide on screen gain materials. It helped me choose a high-gain ALR screen that significantly improved daytime viewing. Additionally, this resource on size and gain gave me practical tips on matching my screen dimensions to my room, avoiding glare and hotspots. Lastly, I rely on this selection of top ALR screens to find the best fit for my bright environment.
Your Turn to Make Bright Room Projection Perfect
Don’t let ambient light sabotage your movie nights. With the right knowledge of screen size, gain, and material, you can turn even a sunlit room into a cinematic haven. Take action today—measure your space, research your options, and start experimenting with different setups. Your perfect bright room projection experience is within reach!
![5 Reasons 0.6 Gain ALR Stops 16K Highlight Bloom [2026]](https://screens.cinegearguide.com/wp-content/uploads/2026/03/5-Reasons-0.6-Gain-ALR-Stops-16K-Highlight-Bloom-2026.jpeg)