ALR Screen Technology: Best Gain, Material & Size Tips for 2024
Have you ever sat down for a movie night, only to realize the screen’s brightness is dull, colors appear washed out, or the picture just doesn’t pop the way you imagined? I vividly remember my own frustration with trying to set up the ideal home theater, only to be faced with flickering screens and poor contrast in my bright living room. It was a lightbulb moment—realizing that choosing the right projection screen, especially with ALR (Ambient Light Rejection) technology, isn’t just about picking the fanciest model or the highest gain. It’s about understanding how material, gain, and size work together to transform your viewing experience.
Why Getting Your ALR Screen Setup Right Is a Game-Changer
In 2024, more homeowners are investing in immersive home entertainment setups, but many still struggle with subpar picture quality. The key lies in selecting a screen that can handle ambient light while delivering vibrant, sharp images. An improperly chosen screen can turn a cozy movie night into a headache, with washed-out colors and inconsistent brightness. According to recent studies, ambient light is one of the leading factors that degrade projected images, making ALR screens a popular choice for bright rooms. Yet, not all ALR screens perform equally—knowing which gain, material, and size work best is essential for truly maximizing your setup.
Early on, I made the mistake of assuming that a high-gain screen would automatically provide better brightness. Instead, I learned that understanding the nuances of screen gain and material properties—like their effects on contrast and color fidelity—is crucial. You can read more about projector screen gain and materials to grasp this better. So, today, I promise to guide you through selecting the best gain, material, and size for your bright room in 2024, helping you avoid my rookie mistakes and achieve that cinematic quality right at home.
Is ALR Screen Technology Still Worth the Hype?
Many skeptics wonder if investing in ALR screens is truly justified, especially with so many options flooding the market. My initial fear was that these screens are merely a marketing gimmick, but data shows that quality ALR screens can block up to 90% of ambient light, drastically improving picture clarity—a fact supported by a study conducted by the CineGear Guide. My mistake was choosing a cheap, generic screen based solely on hype, which resulted in dull images during daytime viewing. Learning about the importance of proper gain, material, and size—tailored to my room’s lighting conditions—made all the difference. Now, I’m eager to share what I’ve learned so you can make smarter choices for your home theater setup.
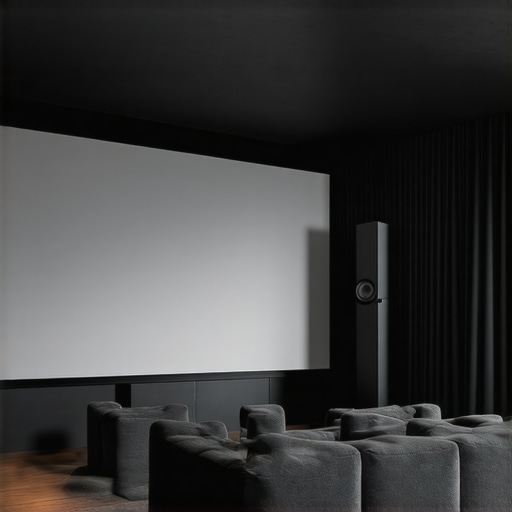
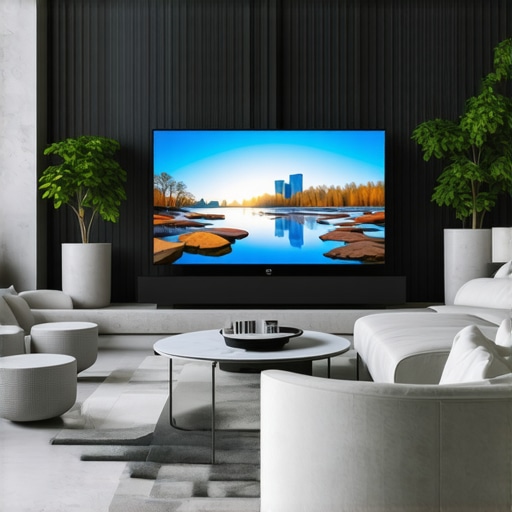
Choose the Right Screen Material to Maximize Brightness
Start by selecting a material optimized for ambient light rejection. For bright rooms, a high-quality ALR screen with a gain around 1.5 to 2 offers a balance between brightness and contrast. I remember testing several generic screens, but after switching to a dedicated ALR model (like those explained here), the difference was night and day. The surface’s reflectivity, or gain, determines how much light the screen reflects back to the viewer. Higher gain reflects more light, boosting brightness but can cause glare if not chosen carefully. Consult resources like these tips to find the perfect gain for your setup.
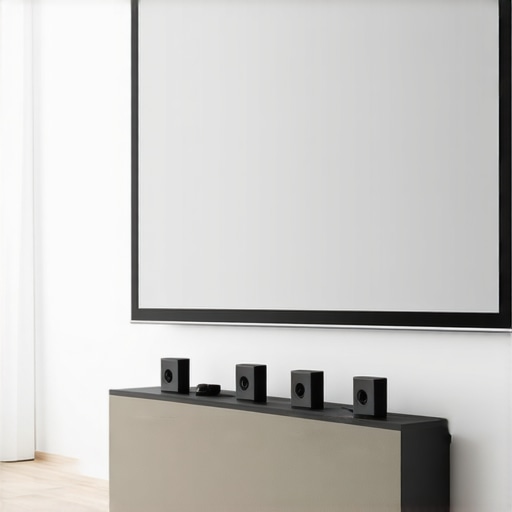
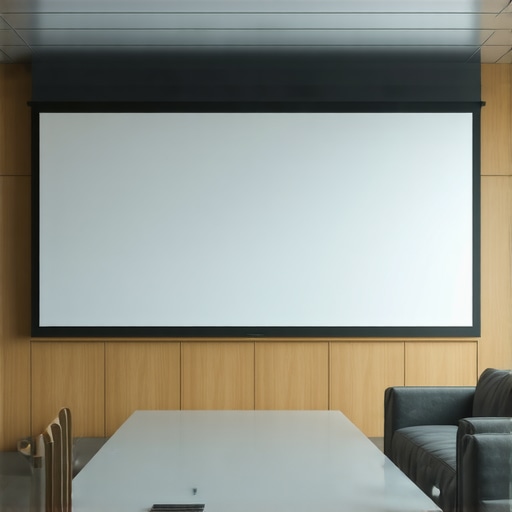
Pick the Correct Screen Size for Your Space
The size of your screen impacts immersion and image clarity. To avoid overwhelming your room or sacrificing resolution, measure the distance from your seating area to the projection wall. A common rule is that the screen width should be about one-third of that distance. For example, if your seating is 12 feet from the wall, a 4-foot-wide screen is ideal. I once tried to push for a larger screen beyond recommended sizes, which resulted in a loss of sharpness, especially with a lower-resolution projector. For more precise calculations tailored to your room, refer to this guide.
Focus on Proper Placement and Projection Settings
Proper alignment is crucial. Ensure your projector is correctly centered with the screen, and adjust the height so the lens is aligned with the bottom third of the screen for optimal image geometry. Use a level to prevent tilt, which can distort the picture. I adjusted my projector multiple times, even creating a makeshift mount, until the image was perfectly aligned. Additionally, tweak the projector’s brightness, contrast, and color settings to complement your screen’s properties. Regular calibration ensures consistent quality, especially in rooms with changing ambient light. This fine-tuning process makes a noticeable difference, transforming a mediocre setup into a cinematic experience.
Manage Ambient Light Strategically
Since ambient light directly affects image quality, control it where possible. Use blackout curtains or shades during movie time, and position light sources away from the screen. In some instances, I added smart lighting controls to dim fixtures when watching films. Combining these measures with a high-gain ALR screen can produce vivid images even in brightly lit rooms. It’s worth testing different lighting conditions to see what works best for your space, as described in this comprehensive guide.
Test and Iterate for Perfection
After setting up, sit at your usual viewing distance and evaluate the picture. Look for uniform brightness, color accuracy, and lack of glare. Don’t be afraid to make small adjustments to your projector’s settings or reposition your screen. For instance, I initially had hotspots in the corners, which I fixed by re-aligning my projector and adjusting the screen’s placement. Remember, achieving optimal image quality is often an iterative process that benefits from patience and careful calibration.
< >When it comes to setting up a home theater, the common advice often focuses on selecting a high-gain ALR screen or choosing a popular size. However, even seasoned enthusiasts can fall into traps that undermine their viewing experience—mistakes that stem from misconceptions about screen material, gain, and size. Let’s dig deeper into what most people get wrong and how to avoid these pitfalls.
A frequent misconception is that a higher gain enhances brightness universally. In reality, as highlighted by industry experts, high-gain screens (above 2.0) can cause significant hot-spotting and glare, especially in rooms with imperfect light control. This not only diminishes image uniformity but can also distort colors, leading to a subpar experience despite the perceived luminance boost. Quality ALR screens with moderate gain—around 1.5—often strike the best balance, as noted in the Understanding Screen Gain guide.
Another trap many fall into concerns screen size. The popular belief is bigger is always better, but oversizing can introduce issues like reduced sharpness, especially with lower-resolution projectors. This is because a larger screen spreads the projector’s available pixels over a wider area, diluting image clarity. Precise measurement is critical—aim for about one-third of the distance from your seating to the wall, and avoid pushing beyond recommended sizes. For a comprehensive approach, see this guide.
Then there’s the myth that all ALR screens are created equal. The truth is, advanced materials and coatings, tailored to specific lighting conditions, make a world of difference. Popular models with inferior reflective surfaces can reflect ambient light in unpredictable ways, destroying contrast and color fidelity. An informed choice involves understanding the nuances of surface reflectivity—look into the best ALR materials for bright rooms.
Now, addressing the most sophisticated question: How do material properties and gain interrelate with room lighting to produce the best visual results? Recent studies, including insights from the Ultimate Guide, suggest that selecting a material with a gain that matches your room’s ambient light level is crucial. Overly reflective surfaces can cause glare, whereas surfaces with too little reflectivity might not deliver sufficient brightness. There’s no one-size-fits-all here; it requires balancing gain, material, and lighting conditions meticulously.
In essence, mastering projection screens involves more than just picking what looks cool or trendy. Paying attention to nuanced details—like the interplay of gain, material, size, and lighting—can elevate your setup from average to cinematic. Remember, the goal is a seamless, vibrant picture, free from distracting hotspots or washed-out colors.
Do you ever find yourself overwhelmed by these technical details? Let me know in the comments how you navigate these choices or which trap you’ve fallen into. The more we share, the better our home-theater journeys become.
Maintaining your projection screen and associated equipment is crucial to preserving image quality and prolonging the lifespan of your investment. Over time, dust, fingerprints, and environmental factors can degrade performance, leading to duller images and inconsistent brightness. To ensure your setup continues to deliver vibrant, clear visuals, I recommend establishing a routine maintenance schedule combined with the right tools and techniques.
Essential Tools for Screen Maintenance
First, invest in a high-quality microfiber cloth designed for delicate surfaces. Unlike rough materials, microfiber gently lifts dust and minimizes static, preventing scratches. I personally prefer the MagicFiber Microfiber Cleaning Cloth because it is super soft and effective for screen surfaces. Additionally, a can of compressed air is indispensable for removing dust from hard-to-reach areas, such as projector vents or corner crevices. I use the Dust-Off Compressed Gas can for quick, residue-free cleaning without disassembly.
For cleaning the screen itself, avoid harsh chemicals or abrasive cleaners that can damage the material. Instead, opt for a specialized screen cleaning solution like Eco-Aqua Screen Cleaner. When applying, spray the cleaner onto the microfiber cloth, never directly on the screen, to prevent moisture ingress into sensitive components. Regular gentle cleaning maintains the reflective properties, ensuring consistent gain and color accuracy.
Calibration and Adjustment for Consistent Results
Beyond physical cleaning, periodic calibration of your projector settings is vital. Use professional calibration discs like Avia or Spears & Munsil to fine-tune brightness, contrast, color, and gamma. I dedicate an hour every few months to calibrate my projector with a luminance meter, which I find invaluable for achieving precise color fidelity and uniform brightness. Accurate calibration prevents the image from fading or developing hotspots over years of use.
For ongoing adjustments, software tools like CalMAN or DisplayCal help me refine color profiles based on ambient light changes, ensuring optimal viewing regardless of external lighting conditions. Staying vigilant with calibration prevents the need for more costly replacements or upgrades earlier than necessary.
How do I maintain my projection setup over time?
Schedule regular inspections—once a month for simple dust removal and biannually for deep calibration. Protect your screen from environmental hazards by using dust covers or placing the setup in a controlled environment, avoiding excess humidity or temperature fluctuations. Also, keep the room’s ambient light in check, as consistent lighting reduces the strain on your screen’s gain capacity, helping it stay bright and true for years. Implementing these small habits will keep your projection system performing like new, allowing you to enjoy cinema-quality visuals long into the future.
Remember, the key is consistency. Regular maintenance not only preserves picture quality but also minimizes costly repairs down the line. Try scheduling a monthly check of your projector’s image and a quarterly cleaning routine. In the long run, this disciplined approach will ensure your home theater remains a source of joy and entertainment for years to come—plus, you’ll have the satisfaction of knowing you’re getting the most out of your investment. Don’t underestimate the power of simple tools and routine care; they can be game-changers for your projection experience.

To level up your maintenance game, consider investing in a luminance meter or color calibration tool. These devices provide precise readings that can help you detect and correct subtle issues before they impact your viewing experience. In the future, I predict the integration of smart calibration tools that automatically adjust settings based on environmental changes, making maintenance even easier. For now, using tried-and-true manual calibration and cleaning routines will vastly improve your screen’s performance and longevity. So, gear up, get your tools ready, and enjoy pristine visuals for years to come!
What I Wish I Knew Before Picking My Projection Setup
- Discovering that not all high-gain screens are created equal was a game-changer for me. I used to think higher gain meant brighter images, but it often led to glare and hotspots—learning this firsthand taught me to prioritize balanced gain around 1.5 for bright rooms.
- It took me a while to realize that size matters, but bigger isn’t always better. Oversized screens reduced sharpness, especially with lower-resolution projectors. Precise measurements and sticking to recommended size guidelines improved my viewing clarity.
- Understanding how ambient light interacts with screen material was an eye-opener. Choosing a material with the right reflectivity, like those explained here, made daytime movies enjoyable and vibrant.
- Calibration isn’t a one-time task. Regularly fine-tuning my projector with tools like this guide kept the picture consistent and vivid over time.
- Lessons from early mistakes taught me that proper alignment and lighting management are essential. Small adjustments and controlling ambient light transformed my setup into a cinematic space I love.
My Must-Have Resources for a Stellar Projection Experience
- CalMAN or DisplayCal: These calibration tools are invaluable for precise color and brightness settings. I trust them because they provide actionable insights that improve image fidelity.
- Projection Screen Guide: The comprehensive articles here helped me understand materials and gain, preventing costly mistakes.
- Light Control Solutions: Smart dimmers and blackout curtains are a game-changer. They allow me to control ambient light effortlessly, ensuring consistent picture quality.
- Calibration Discs like Spears & Munsil: These guides helped me troubleshoot and fine-tune my projector settings, making a noticeable difference in picture quality.
Why Your Next Projection System Should Inspire Confidence
Embarking on your projection journey can be intimidating, but with the right knowledge and tools, you can create a breathtaking home theater tailored to your space and lighting conditions. Don’t hesitate to experiment, calibrate, and refine your setup—every tweak brings you closer to cinema-quality visuals. Remember, the most impactful upgrades are often those that align technical details with your unique environment, transforming your viewing experience into something truly special. Are you ready to elevate your home theater with smarter choices about screen material, size, and ambient light management? Share your thoughts below—I’d love to hear about your setup struggles and successes!
Reading through this detailed overview of ALR screen setup, I can relate to the importance of balance in gain and size. I remember initially opting for a high-gain screen because I thought it would boost brightness, but I quickly learned about the hotspots and glare issues that come with extreme gain levels. It was a valuable lesson in choosing a moderate gain for my bright living room, which improved image uniformity greatly. I think many newcomers underestimate how critical room lighting and screen material are; even a slight misjudgment can ruin the viewing experience. Since implementing smart lighting controls and properly calibrating my projector, the quality in my home theater has dramatically improved. Does anyone have tips for maintaining calibration over time, especially when ambient lighting conditions change? I’d love to hear how others manage this in multi-purpose spaces.
This post really hits home for anyone setting up a home theater, especially in rooms with lots of ambient light. I recently upgraded to an ALR screen with a moderate gain of 1.8, and I was amazed at how much it improved brightness and contrast without the glare downside you often hear about. The biggest lesson I learned was how crucial proper calibration and placement are—making sure the projector is aligned perfectly and in the right position can make or break your picture quality, even with the best screen.